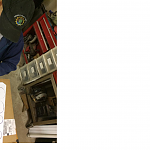
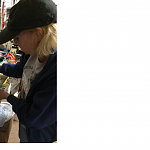
Today Karen and I decided to spend some quality time in the shop making our own custom dash cluster. Since we had the ability and the shop there was no reason to fork over $800 to $1000 for a custom set up.


Remove the old cluster and make a pattern of the inner section of your old cluster.
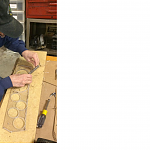
Mark out on the pattern where you want your gauges.

Cut the pattern out and then transfer to cardboard. Use a hole saw and carefully cut out for the gauges. Harbor Freight has for $16. Got mine on sale for $6.00
Find you a piece of 1/4" thick plexiglass. I happened to already have a couple of pieces.
Transfer the pattern over to the plexiglass. You want your plexiglass a little larger then your pattern so it will be rigid enough to withstand the drilling process.

Drill a 1/4" center hole in the center of each gauge location.
Place the plexiglass onto the top of wood or board. Use this as a backer to help stiffen for drilling. I actually drilled small holes for the light and wiper switch and placed a screw in them to hold it in place. We used a drill press but you could carefully used a handheld drill.
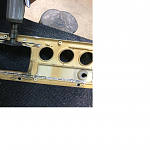
Set your hole saw up with the desired size. Slowly drill out the holes. Moving the hole saw up and down clears the teeth and lets the saw cut better. TAKE YOUR TIME.
After you get the holes drilled you can now finish drilling out for your switches and also add holes for blinker and hi-beam indicators. I bought some led lights on ebay. Push in from front and tighten nut on back.
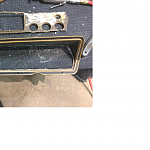
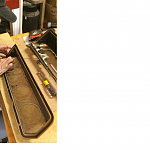
The test fitting is a slow process and patience is required. We used a black sharpie and marked areas to remove. I then used a disc grinder with a 30 grit disc to slowly remove material. Grind, fit, grind fit. I do suggest keeping about a 45 degree undercut angle on the edges since the dash edge is tapered on the sides and bottom.

Once you get it all trimmed and fitting the way you like make sure to check the gauges and switches making sure of no conflict with the outer cluster casing. In example I had to turn my light switch 90 degrees to clear the edge. I also used a small square file to cut the key hole for the switch to set in. Look at the old one for size.

Now depending on the condition of your old cluster and what look you are going for its now up to you.

For me I will rough up and prime the cluster and plexiglass. Then I will Paint the cluster parts separately.


Next I will use a special chrome paint pen to outline the outer cluster frame like original.
Now you can epoxy the gauge into the old cluster frame and wait until tomorrow for it to dry.
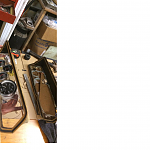
Install your gauges and wire them up.
Note: Something I will be doing is to cut the cluster plug out and use it to attach my wires to. I will solder each on into the proper location leaving a little extra wire on each one. This makes things a lot easier when installing or removing the new cluster.
I also suggest extending the length of the wires on the AMP gauge if installing one. They are a pain to get the nuts off of with the limited length of wires used.
Last but not least an after market speedometer cable will need to be used to make the connection. I like the screw on type better anyway.
I hope I covered everything and if you have any questions we will try and help.
Will I do one for you? Maybe. Just depends on where I am and what I am doing at the time.
All together we may have $200 in gauges and parts. I must say it is much better than $800 to $1000 for basically the same thing. Labor was free!
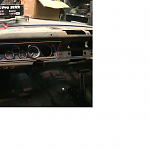
Take your time and you too can have a CUSTOM Dash Cluster.
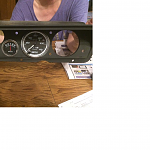
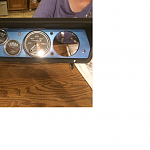
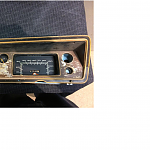
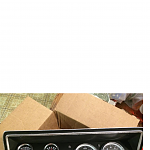
Here are some pictures of what we did. Please let us know what you think. Also check out our Dodge73dart page and see our progress.
Thanks
Remove the old cluster and make a pattern of the inner section of your old cluster.
Mark out on the pattern where you want your gauges.
Cut the pattern out and then transfer to cardboard. Use a hole saw and carefully cut out for the gauges. Harbor Freight has for $16. Got mine on sale for $6.00
Find you a piece of 1/4" thick plexiglass. I happened to already have a couple of pieces.
Transfer the pattern over to the plexiglass. You want your plexiglass a little larger then your pattern so it will be rigid enough to withstand the drilling process.
Drill a 1/4" center hole in the center of each gauge location.
Place the plexiglass onto the top of wood or board. Use this as a backer to help stiffen for drilling. I actually drilled small holes for the light and wiper switch and placed a screw in them to hold it in place. We used a drill press but you could carefully used a handheld drill.
Set your hole saw up with the desired size. Slowly drill out the holes. Moving the hole saw up and down clears the teeth and lets the saw cut better. TAKE YOUR TIME.
After you get the holes drilled you can now finish drilling out for your switches and also add holes for blinker and hi-beam indicators. I bought some led lights on ebay. Push in from front and tighten nut on back.
The test fitting is a slow process and patience is required. We used a black sharpie and marked areas to remove. I then used a disc grinder with a 30 grit disc to slowly remove material. Grind, fit, grind fit. I do suggest keeping about a 45 degree undercut angle on the edges since the dash edge is tapered on the sides and bottom.
Once you get it all trimmed and fitting the way you like make sure to check the gauges and switches making sure of no conflict with the outer cluster casing. In example I had to turn my light switch 90 degrees to clear the edge. I also used a small square file to cut the key hole for the switch to set in. Look at the old one for size.
Now depending on the condition of your old cluster and what look you are going for its now up to you.
For me I will rough up and prime the cluster and plexiglass. Then I will Paint the cluster parts separately.
Next I will use a special chrome paint pen to outline the outer cluster frame like original.
Now you can epoxy the gauge into the old cluster frame and wait until tomorrow for it to dry.
Install your gauges and wire them up.
Note: Something I will be doing is to cut the cluster plug out and use it to attach my wires to. I will solder each on into the proper location leaving a little extra wire on each one. This makes things a lot easier when installing or removing the new cluster.
I also suggest extending the length of the wires on the AMP gauge if installing one. They are a pain to get the nuts off of with the limited length of wires used.
Last but not least an after market speedometer cable will need to be used to make the connection. I like the screw on type better anyway.
I hope I covered everything and if you have any questions we will try and help.
Will I do one for you? Maybe. Just depends on where I am and what I am doing at the time.
All together we may have $200 in gauges and parts. I must say it is much better than $800 to $1000 for basically the same thing. Labor was free!
Take your time and you too can have a CUSTOM Dash Cluster.
Here are some pictures of what we did. Please let us know what you think. Also check out our Dodge73dart page and see our progress.
Thanks