The Brick, 1972 Dodge Dart Custom
Okay, so 2011 is starting off pretty good. Got the LCA bushings swapped out, and the front end is back together. Alignment is done, and it drives smooth and straight as an arrow.
So for Christmas my wife got me a nice Grant steering wheel with install kit and Mopar horn button.
This post is going to be a walk through with pictures for removing and installing a Grant wheel.
Step 1 - removing the factory wheel. Make sure the wheels are straight ahead.
On my 1972 Dart, the center section just pops off with a little prying action from a flat blade screw driver.
Underneath, the main wheel cover and horn buttons are affixed to with 3 phillips screws.
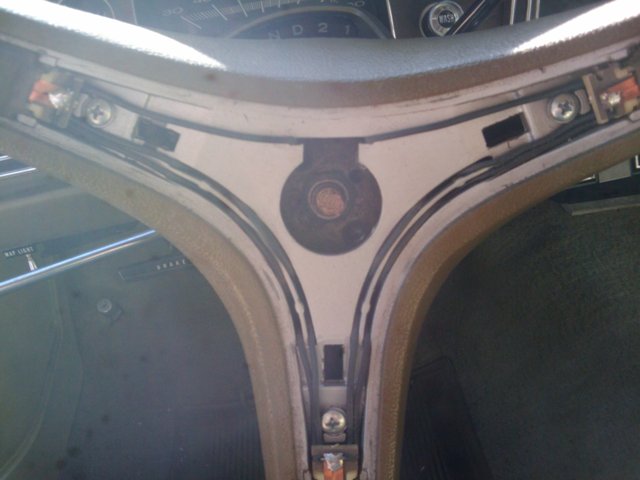
Remove those three screws and the connections for the horn (power and ground) are visible. Unscrew the ground and unplug the power wire.
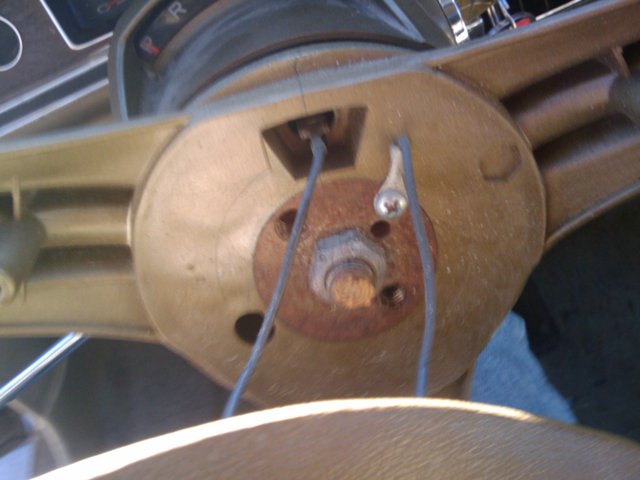
Loosen the center bolt (3/4 socket) Mark the center shaft marking the straight up position. I used the letters on the shift selection indicator.
Using a steering wheel puller (I use a combo steering wheel/vibration damper puller). It pops right off.
Underneath, you will see the turn signal cam. If you need to replace it, now is a good time.
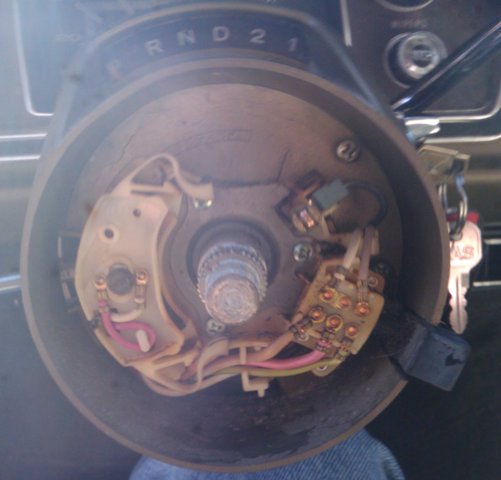
Following the supplied instructions in the Grant install kit, push the metal sleev all the way onto the shaft. Place the wheel mount onto the shaft. Use the marking on the adapter and place it in line with mark on the shaft. The adapter has a conductor ring that will pass power to the horn. Take the black supplied column cover and line it up on the adapter. Draw the adapter onto the shaft with the original nut and the supplied washer. For the classic style wheels, now is when you would bolt the new wheel up and follow the directions for the horn.
I installed a Grant GT wheel, so using the supplied mount, I bolted this onto the center shaft, and bolted the three mounting bolts up.
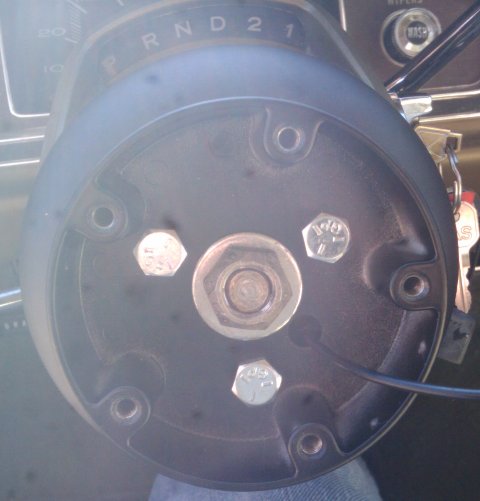
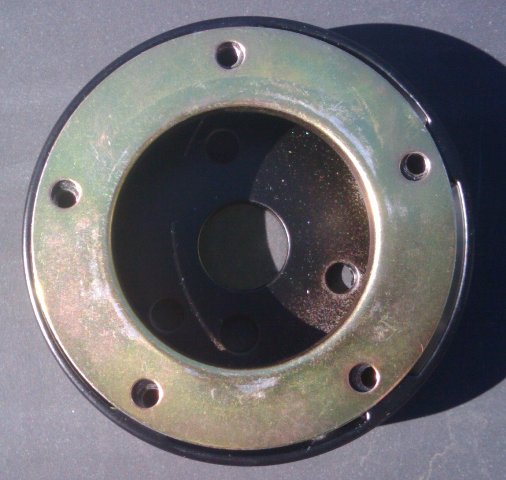
For GT wheels, you can install a center horn button with a Mopar "M" button. It comes with a mounting ring that must mount between the GT adapter and the wheel. When mocking it up, I found that the mounting holes did not match up completely.
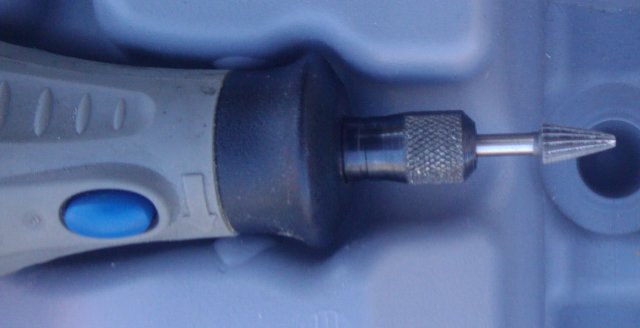
I busted out my handy Dremel tool with a cutting bit and used this to elongated the holes just a bit.
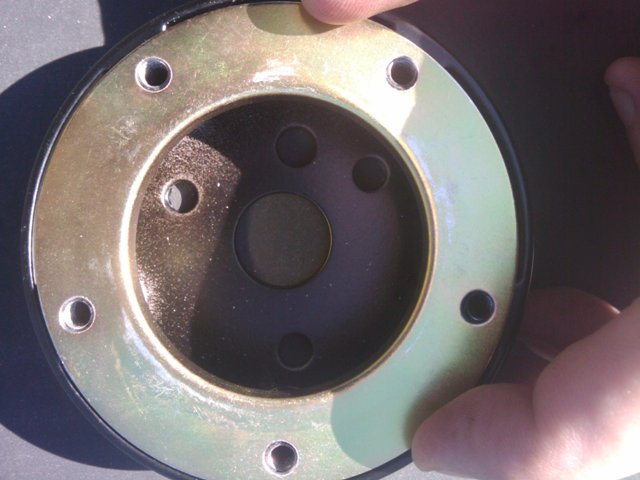
Now bolt up the wheel and connect the power wire to the horn button and push into place.
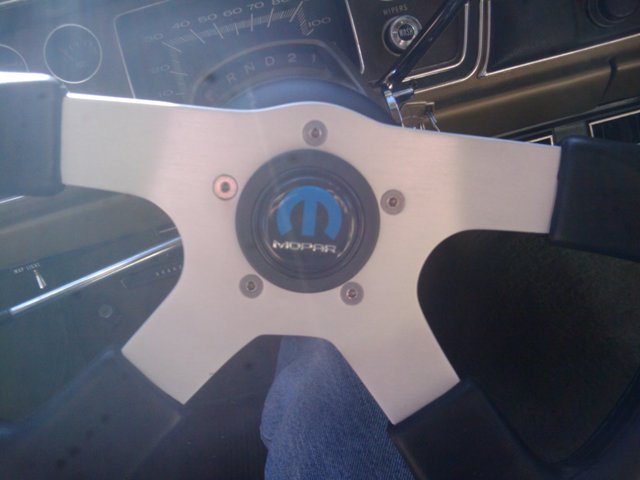
And the finished product:
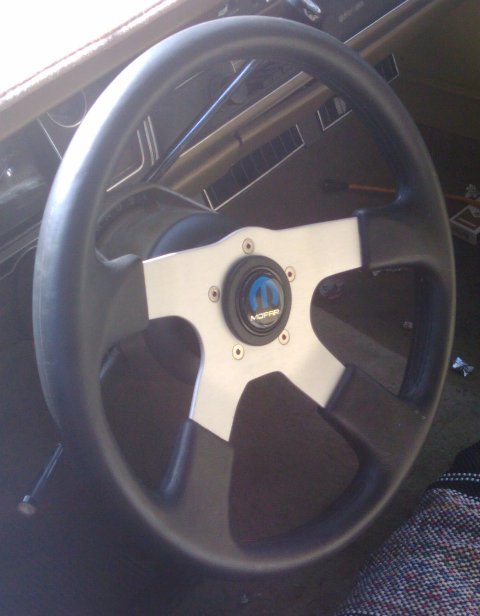
It is worth noting that if you are installing a Grant GT style wheel, make sure to set the adapter to have one of the mounting holes at the 12 o'clock position. The GT wheel adapter has a wheel bolt hole lined up with one of the adapter mounting bolt holes, so it makes it easy to ensure you are getting your wheel lined up.
All in all, took me an hour to install. Took my time and it went together really easy.
Okay, so 2011 is starting off pretty good. Got the LCA bushings swapped out, and the front end is back together. Alignment is done, and it drives smooth and straight as an arrow.
So for Christmas my wife got me a nice Grant steering wheel with install kit and Mopar horn button.
This post is going to be a walk through with pictures for removing and installing a Grant wheel.
Step 1 - removing the factory wheel. Make sure the wheels are straight ahead.
On my 1972 Dart, the center section just pops off with a little prying action from a flat blade screw driver.
Underneath, the main wheel cover and horn buttons are affixed to with 3 phillips screws.

Remove those three screws and the connections for the horn (power and ground) are visible. Unscrew the ground and unplug the power wire.

Loosen the center bolt (3/4 socket) Mark the center shaft marking the straight up position. I used the letters on the shift selection indicator.
Using a steering wheel puller (I use a combo steering wheel/vibration damper puller). It pops right off.
Underneath, you will see the turn signal cam. If you need to replace it, now is a good time.

Following the supplied instructions in the Grant install kit, push the metal sleev all the way onto the shaft. Place the wheel mount onto the shaft. Use the marking on the adapter and place it in line with mark on the shaft. The adapter has a conductor ring that will pass power to the horn. Take the black supplied column cover and line it up on the adapter. Draw the adapter onto the shaft with the original nut and the supplied washer. For the classic style wheels, now is when you would bolt the new wheel up and follow the directions for the horn.
I installed a Grant GT wheel, so using the supplied mount, I bolted this onto the center shaft, and bolted the three mounting bolts up.

For GT wheels, you can install a center horn button with a Mopar "M" button. It comes with a mounting ring that must mount between the GT adapter and the wheel. When mocking it up, I found that the mounting holes did not match up completely.

I busted out my handy Dremel tool with a cutting bit and used this to elongated the holes just a bit.


Now bolt up the wheel and connect the power wire to the horn button and push into place.

And the finished product:

It is worth noting that if you are installing a Grant GT style wheel, make sure to set the adapter to have one of the mounting holes at the 12 o'clock position. The GT wheel adapter has a wheel bolt hole lined up with one of the adapter mounting bolt holes, so it makes it easy to ensure you are getting your wheel lined up.
All in all, took me an hour to install. Took my time and it went together really easy.