Rear Leaf Spring mod with Durango Springs
Well alrighty, It's been a while since I posted about any work on the dartness, and I've been finagling with this and that, fighting with carburetors, putting in new shocks. But the one thing this car's needed since I got it, has been stiffer springs. It loves to bottom out over everything. It rides over bumps like they were waves on the ocean. and the body roll is ridiculous. Don't even get me started on loading it down with heavy stuff.
I don't, however, have enough money for replacement springs. new or used. I did however, have money to go to the junkyard. So I took some measurements, and went looking. Lo and behold, there sat a 2002 Dodge durango, with the back wheels already off. and the leaf springs of the right width, very close to the same length, and what looked like a similar forward bias as my dart's springs. So, $60 and some cursing later they were mine.
And just today I got to put them on. Now, they're not a bolt- in deal. Not by a long shot. So after alot of thinking and asking around, I decided to pull the lower leaves off of the old stock springs, and replace them with the beefier lower leaves of the durango springs.
Here's how I did it:
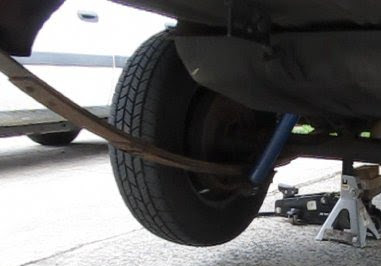
Just your run-of-the-mill 7 3/4 rear under a '75 dart. Note the rustiness of everything under here.
First: I jacked up the back of the car as high as I could. Put it on stands, chocked the wheels, etc.
Second: Undid the shock absorbers, pushed them out of the way.
Third: Removed the four Axle U-bolts. This is a pain in the hindquarters, as there were no threads on the bolts to speak of, just a bunch of rust I had to plow the nuts through. It took time, elbow grease, anf a big wrench, and it fought me all the way. I even ended up breaking one of the u-bolts. After removing them you can remove the tie plates to reveal...
Fourth: ...The spring pack stud thingies. I guess it's kind of a bolt, and kind of a stud, whatever. but it's pictured here.
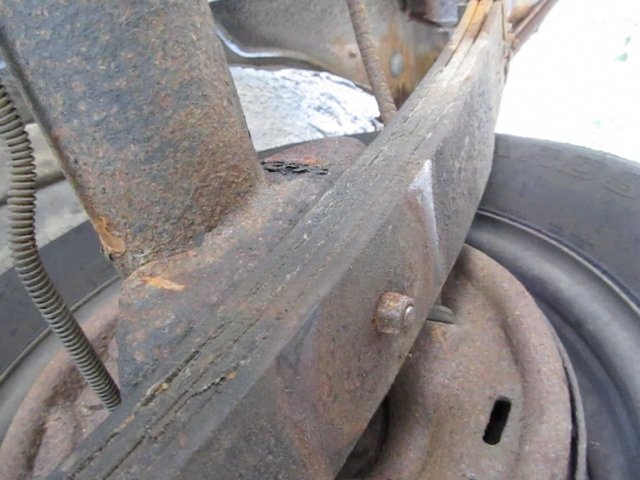
(note axle tube, break backing plate, etc.)
Now, on my axle for some reason, there's an interference fit between the pad that rests on the leaf springs, and the opposite end of that stud, and so the nut can be removed without taking the axle loose. which greatly simplified this project.
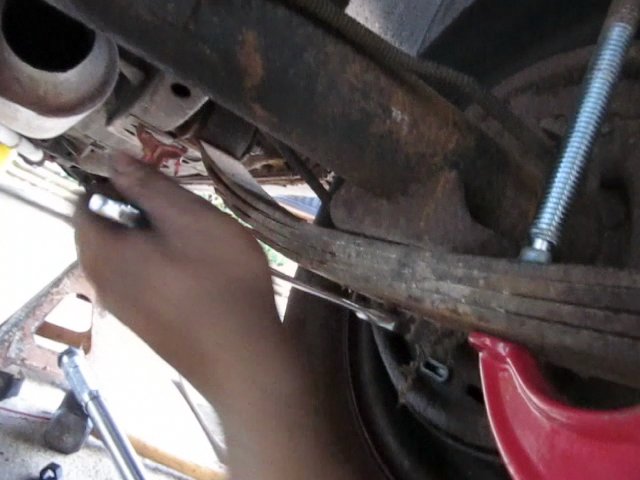
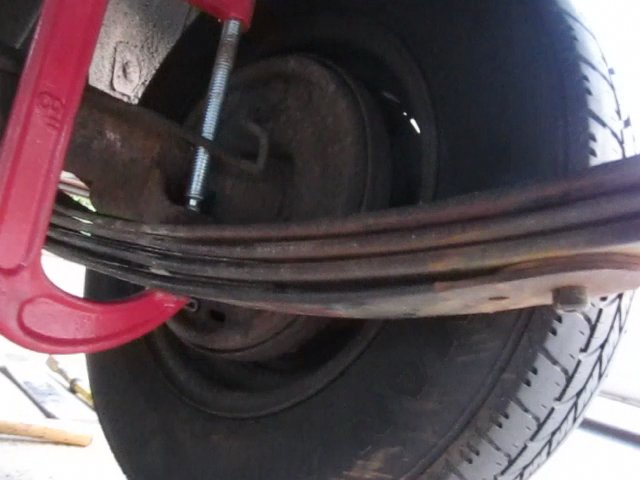
Fifth: Take a decent c-clamp, and clamp down on the leaf spring approximately as shown. This provides a measure of safety for when you take that nut loose.
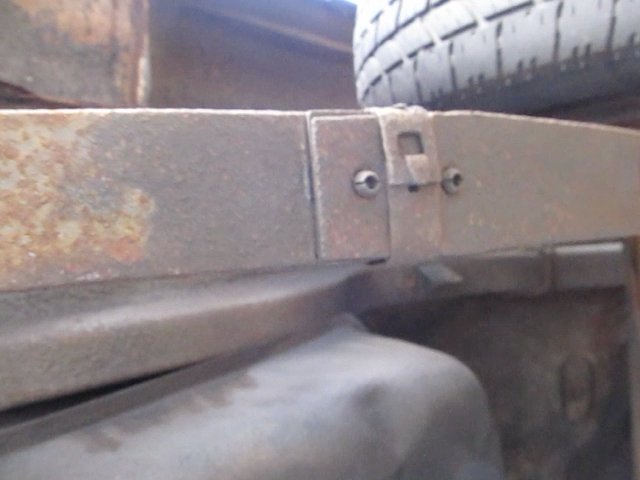
This is a good time also, to take those clips off the leaf springs. I'm not sure what they're properly called. I've heard them called stabilizers, I've heard them called spring clips. I dunno. but this is what they look like:
Now, I don't know what condition yours will be in, but mine crumbled as I took them apart. and I'll have to find or make a suitable replacement soon. yours might survive to be reused. Perhaps, but I wouldn't count on it.
Once you have removed the nut, you can back off the clamp, and the spring pack will gradually come apart, and you'll then be able to remove all the leaves except for the top leaf. (The top leaf is the one that matters, since it puts the diff where it needs to be, and at the angle it needs to be.)
Sixth: Now, you want to take the durango springs apart this same way, however, when taking the stud loose you'll need to put vise grips on the one rounded end of the stud. otherwise you won't be able to get the nut off. IMPORTANT!!!! Make sure you keep the leaves and everything in between the leaves where they were when you take the spring pack apart, or else you'll have squeaky springs that may fail prematurely.
Seventh: Now, set aside the top and bottom leaves of the durango spring packs. you won't be needing them. The stud for the A-body spring pack will not be long enough to accommodate any more than those three leaves.
Eighth: Line up the holes of all your new leaves, and I recommend putting a screwdriver or a drift or something through them to make sure they stay aligned as you put them on. Also note the bias of the springs. The hole should be closer to one end than the other on each and every leaf. The shorter end should point to the front of the car and vice versa.
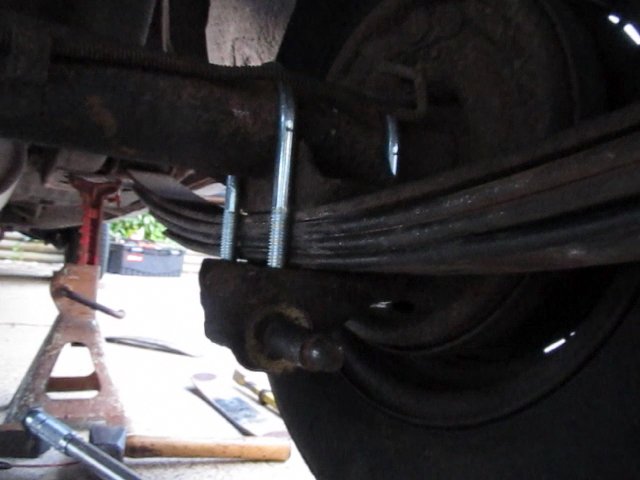
Ninth: touch the tip of your aligning tool to the stud, and slide them over the stud. You might want a buddy to hold them in place while you grab your clamp, and clamp the springs as shown. Once you have some tension on them with the clamp, your buddy can let go, and then you simply cinch down the clamp to compress the springs. Once compressed, there should be enough stud to thread the nut back on it, and you'll want to tighten this down too.
Tenth: Once the nut is snug, you can remove the clamp, And start putting your u-bolts and tie plates back on. Remember when I said I broke one of the u-bolts trying to get the rusted on nuts off? Well nobody anywhere near me carries direct replacement axle u-bolts. So, I went hunting for something close. I discovered that at my local Northern Tool & Equipment they had a perfect fit u-bolt in their trailer section. It even came in a kit.
The Brand is "Ultra-Tow" It's an Axle tie plate kit for 2 3/8" Round tube axles. Comes with 4 u-bolts, 8 nuts, and 2 trailer tie plates (which I'm not going to use) The UPC for it is: 8162856116 And here's a link: http://www.northerntool.com/shop/tools/product_200514156_200514156 It ran me about $20.
Anywho, you put in the factory tie plates (you can toss or keep the ones that come with the kit, but you won't need it for this project) Just like they came out. (except with the new hardware of course.) I torqued the bolts to about "HNNnnngh" foot-pounds. How many is "HNNnnngh" foot pounds you ask? I dunno, but I'm fairly strong, and it's a big ratchet so somewhere around 100 I guess.
Eleventh:
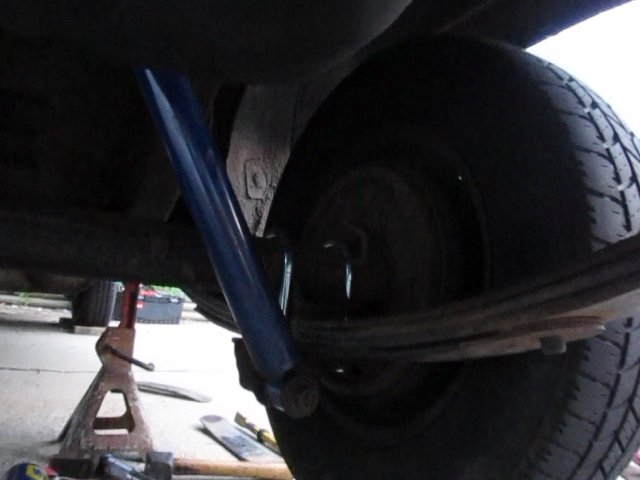
Put the shocks back in place, drop it, and see how you like it.
This spring mod works out to about 2.5-3" of lift over my old worn out springs. (for reference, with 195/70/14's on the back, the fender was just below the edge of the wheel rim before I started.) And the ride is significantly firmer, but it is not at all unpleasant. Bumps, even large ones are barely felt now, the car handles immensely better, It's much more confident in the turns, and you break traction before body roll becomes excessive. :toothy8:
I checked the pinion angle as best I could with the car on the ground. and it was very close. I'm going to let the suspension settle and check it again, but according to some of my friends, it's plenty close enough that I won't have problems. :dontknow:
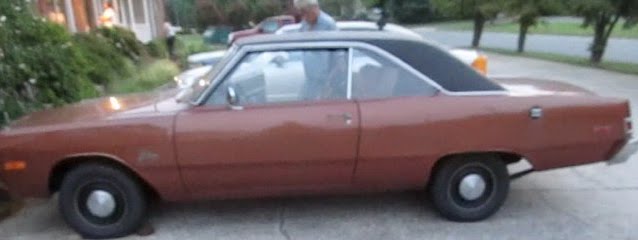
I do think this looks a bit silly, especially with those tiny tires, but that's a price I'm willing to pay for better ride, better handling, and goddamnit, I don't bottom out over speed bumps anymore. :glasses7:
Well alrighty, It's been a while since I posted about any work on the dartness, and I've been finagling with this and that, fighting with carburetors, putting in new shocks. But the one thing this car's needed since I got it, has been stiffer springs. It loves to bottom out over everything. It rides over bumps like they were waves on the ocean. and the body roll is ridiculous. Don't even get me started on loading it down with heavy stuff.
I don't, however, have enough money for replacement springs. new or used. I did however, have money to go to the junkyard. So I took some measurements, and went looking. Lo and behold, there sat a 2002 Dodge durango, with the back wheels already off. and the leaf springs of the right width, very close to the same length, and what looked like a similar forward bias as my dart's springs. So, $60 and some cursing later they were mine.
And just today I got to put them on. Now, they're not a bolt- in deal. Not by a long shot. So after alot of thinking and asking around, I decided to pull the lower leaves off of the old stock springs, and replace them with the beefier lower leaves of the durango springs.
Here's how I did it:
Just your run-of-the-mill 7 3/4 rear under a '75 dart. Note the rustiness of everything under here.
First: I jacked up the back of the car as high as I could. Put it on stands, chocked the wheels, etc.
Second: Undid the shock absorbers, pushed them out of the way.
Third: Removed the four Axle U-bolts. This is a pain in the hindquarters, as there were no threads on the bolts to speak of, just a bunch of rust I had to plow the nuts through. It took time, elbow grease, anf a big wrench, and it fought me all the way. I even ended up breaking one of the u-bolts. After removing them you can remove the tie plates to reveal...
Fourth: ...The spring pack stud thingies. I guess it's kind of a bolt, and kind of a stud, whatever. but it's pictured here.
(note axle tube, break backing plate, etc.)
Now, on my axle for some reason, there's an interference fit between the pad that rests on the leaf springs, and the opposite end of that stud, and so the nut can be removed without taking the axle loose. which greatly simplified this project.
Fifth: Take a decent c-clamp, and clamp down on the leaf spring approximately as shown. This provides a measure of safety for when you take that nut loose.
This is a good time also, to take those clips off the leaf springs. I'm not sure what they're properly called. I've heard them called stabilizers, I've heard them called spring clips. I dunno. but this is what they look like:
Now, I don't know what condition yours will be in, but mine crumbled as I took them apart. and I'll have to find or make a suitable replacement soon. yours might survive to be reused. Perhaps, but I wouldn't count on it.
Once you have removed the nut, you can back off the clamp, and the spring pack will gradually come apart, and you'll then be able to remove all the leaves except for the top leaf. (The top leaf is the one that matters, since it puts the diff where it needs to be, and at the angle it needs to be.)
Sixth: Now, you want to take the durango springs apart this same way, however, when taking the stud loose you'll need to put vise grips on the one rounded end of the stud. otherwise you won't be able to get the nut off. IMPORTANT!!!! Make sure you keep the leaves and everything in between the leaves where they were when you take the spring pack apart, or else you'll have squeaky springs that may fail prematurely.
Seventh: Now, set aside the top and bottom leaves of the durango spring packs. you won't be needing them. The stud for the A-body spring pack will not be long enough to accommodate any more than those three leaves.
Eighth: Line up the holes of all your new leaves, and I recommend putting a screwdriver or a drift or something through them to make sure they stay aligned as you put them on. Also note the bias of the springs. The hole should be closer to one end than the other on each and every leaf. The shorter end should point to the front of the car and vice versa.
Ninth: touch the tip of your aligning tool to the stud, and slide them over the stud. You might want a buddy to hold them in place while you grab your clamp, and clamp the springs as shown. Once you have some tension on them with the clamp, your buddy can let go, and then you simply cinch down the clamp to compress the springs. Once compressed, there should be enough stud to thread the nut back on it, and you'll want to tighten this down too.
Tenth: Once the nut is snug, you can remove the clamp, And start putting your u-bolts and tie plates back on. Remember when I said I broke one of the u-bolts trying to get the rusted on nuts off? Well nobody anywhere near me carries direct replacement axle u-bolts. So, I went hunting for something close. I discovered that at my local Northern Tool & Equipment they had a perfect fit u-bolt in their trailer section. It even came in a kit.
The Brand is "Ultra-Tow" It's an Axle tie plate kit for 2 3/8" Round tube axles. Comes with 4 u-bolts, 8 nuts, and 2 trailer tie plates (which I'm not going to use) The UPC for it is: 8162856116 And here's a link: http://www.northerntool.com/shop/tools/product_200514156_200514156 It ran me about $20.
Anywho, you put in the factory tie plates (you can toss or keep the ones that come with the kit, but you won't need it for this project) Just like they came out. (except with the new hardware of course.) I torqued the bolts to about "HNNnnngh" foot-pounds. How many is "HNNnnngh" foot pounds you ask? I dunno, but I'm fairly strong, and it's a big ratchet so somewhere around 100 I guess.
Eleventh:
Put the shocks back in place, drop it, and see how you like it.
This spring mod works out to about 2.5-3" of lift over my old worn out springs. (for reference, with 195/70/14's on the back, the fender was just below the edge of the wheel rim before I started.) And the ride is significantly firmer, but it is not at all unpleasant. Bumps, even large ones are barely felt now, the car handles immensely better, It's much more confident in the turns, and you break traction before body roll becomes excessive. :toothy8:
I checked the pinion angle as best I could with the car on the ground. and it was very close. I'm going to let the suspension settle and check it again, but according to some of my friends, it's plenty close enough that I won't have problems. :dontknow:
I do think this looks a bit silly, especially with those tiny tires, but that's a price I'm willing to pay for better ride, better handling, and goddamnit, I don't bottom out over speed bumps anymore. :glasses7: