72 duster Build progress
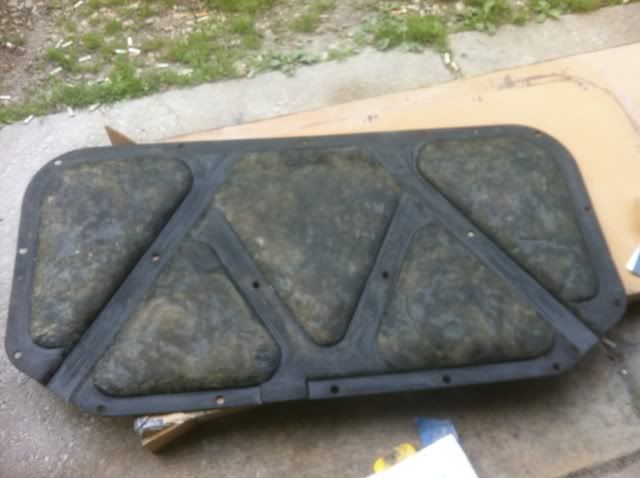
Today I took the better looking of the two hood insulation pads that I had and laid it out. mixed up some resin and coated the entire back side of the pad. I took some strands and bonded them into the damaged areas and added more resin and used my brush to mold it all together nicely. it was just enough resin to soak about half way through the entire insulation pad to add some stregth to it but without leaking through to the side that you will see when the hood is open. Came out great!.
After it all cured I took some 36 grit and just knocked down any high spots. then smoothed it out a little with 180. nothing fancy by any means....its on the back side and will never be seen. It mas mostly to make sure I didnt have any clearance issues or anything when I go to install it eventually.
Im not going to install it until after i have wheeled out the top of the car and bolt my hood scoops on. but I trial fitted it and it looks like it still fits good.
not sure why they didnt do this to the insulation pads in the first place. makes for a much better quality product that will last.
anyhow, here it is.
when I first started on it
2 coats wet

and dry
forgot to take pictures of it after I sanded but basically looks the same.
(p.s. incase anyone was thinking it looked like it was discolored like it had air bubbles or something....it doesn't, its just the different color blend of insulation they used from the factory that shows lighter or darker in spots.)
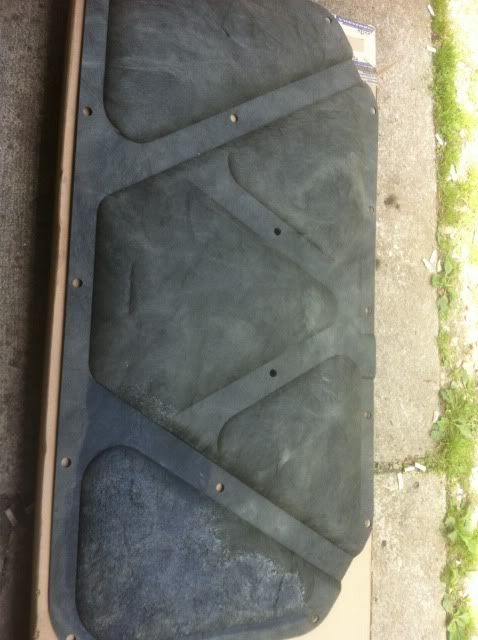
And the engine side still looks factory finish (the colors around the edges isnt where resin bled through....its where my dusty finger prints were during sanding lol).

Today I took the better looking of the two hood insulation pads that I had and laid it out. mixed up some resin and coated the entire back side of the pad. I took some strands and bonded them into the damaged areas and added more resin and used my brush to mold it all together nicely. it was just enough resin to soak about half way through the entire insulation pad to add some stregth to it but without leaking through to the side that you will see when the hood is open. Came out great!.
After it all cured I took some 36 grit and just knocked down any high spots. then smoothed it out a little with 180. nothing fancy by any means....its on the back side and will never be seen. It mas mostly to make sure I didnt have any clearance issues or anything when I go to install it eventually.
Im not going to install it until after i have wheeled out the top of the car and bolt my hood scoops on. but I trial fitted it and it looks like it still fits good.
not sure why they didnt do this to the insulation pads in the first place. makes for a much better quality product that will last.
anyhow, here it is.
when I first started on it

2 coats wet

and dry

forgot to take pictures of it after I sanded but basically looks the same.
(p.s. incase anyone was thinking it looked like it was discolored like it had air bubbles or something....it doesn't, its just the different color blend of insulation they used from the factory that shows lighter or darker in spots.)
And the engine side still looks factory finish (the colors around the edges isnt where resin bled through....its where my dusty finger prints were during sanding lol).
