DIY small radiator Shroud
clhyer. I made very sure to always make note of my orientation since it is off to one side by about 3/4 of an inch.
Valiant 1966 - yeah - pretty similar. Didn't see that though. This one will have way more pictures when done likely, and be on the ultra cheap.
For this project I made my orientation based on if I was the fan, looking at the radiator, and kept that formula throughout. I used blue pen to show up better in pictures, and this is as basic as it gets, assuming someone reading this has few or no power tools. That part will make sense as it progresses.
With that, let's get started.
I used basic power tools, just so that anyone could pretty much make this. I specifically did not use my router on a compass or anything like that, just so people without, would still be able to make this.
You will need a table saw for this. If you don't have one, use a skil saw. If you don't have one, have Home Depot cut you your two pieces, and then you'll have to go to Harbor freight for a $20 Chicago Jigsaw to make your Circle.
Materials - 1 yard of fleece-like fabric, or an old T-shirt.
- 1 yard of fiberglass chop-mat (trust me it's plenty)
- 1 can of resin, depending on your size shroud, 1qt should be more than enough
- 3 or 4 throw away 2" brushes.
- 1 piece of 3/4" ply larger than the surface area of radiator fins
- 1 piece of 1/2" ply same size.
- Duct tape
- 3 nails
First, get the center point of the fan and where it points at the radiator. Measure all 4 directions just to be sure, then measure again. Mess this part up and you may as well scrap the project. If the fan is perfectly center - then easier on you. But in this case it's not.
Second, I got some 1/2" plywood, and some 3/4" plywood. It does not matter which kind, just go get something cheap or left over.
For this particular radiator (slant 6) it has a 17 1/2" tall section, that is 18 1/2" wide.
The fan is 16" in diameter, and I made a hole about 18" in diameter. This allows 1" all the way around in case the engine moves a bit.
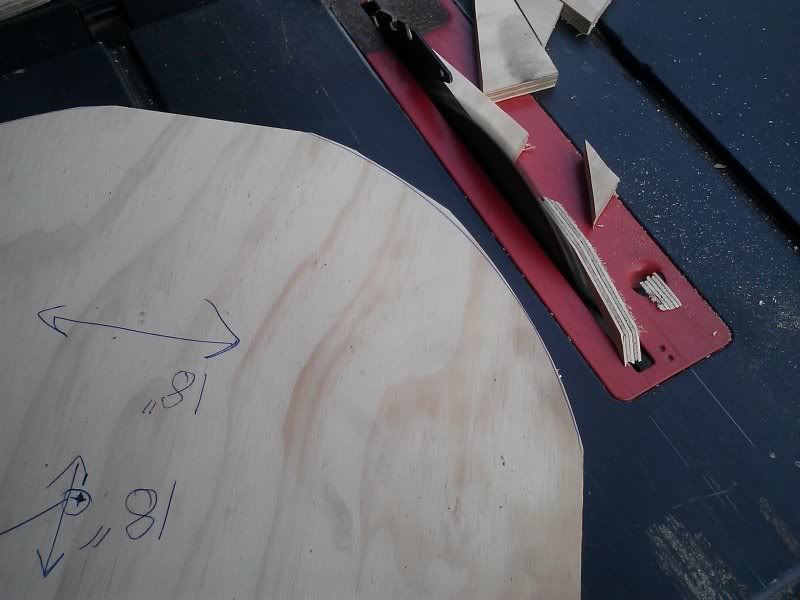
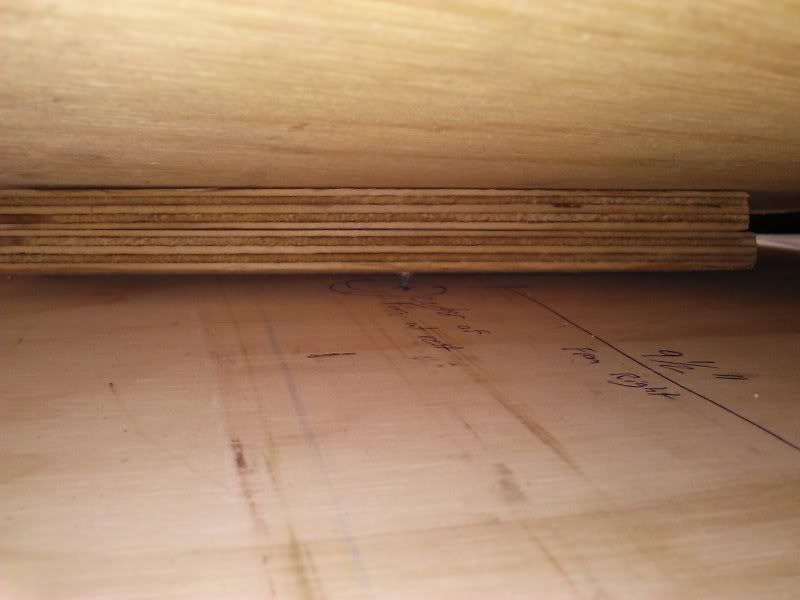
SO cut that 3/4" piece to the shape of the rad surface:
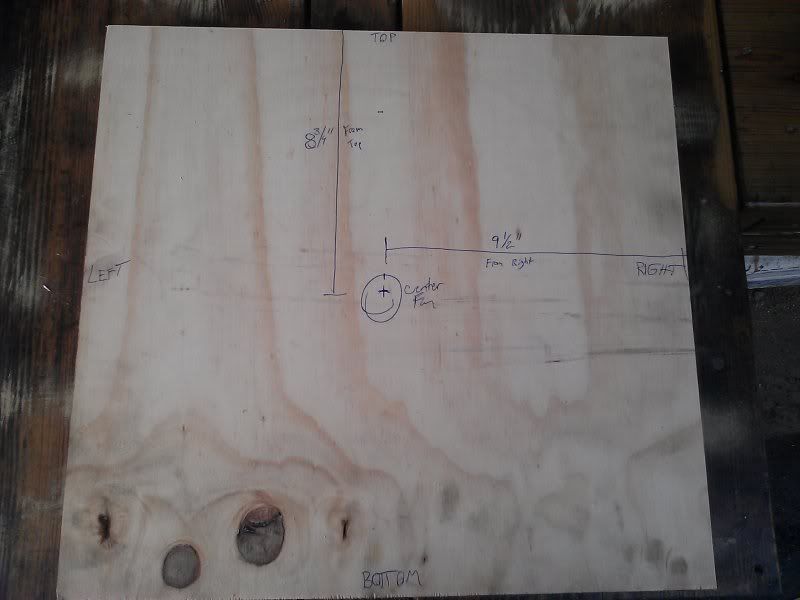
Then. Mark your center point of the fan with a cross, and circle it. This fan centers at 9.5" from the right. And it is 8 3/4" from the top.
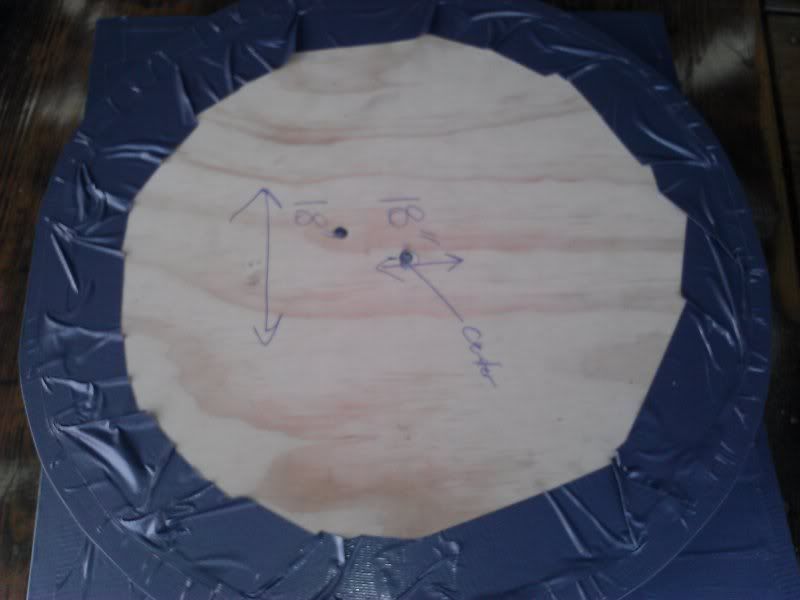
Once you have the piece cut, and the center marked, then it's time to get out your 1/2" piece. For ease of use, cut this piece square to the diameter of the opening, so in this case, it's 18" x 18".
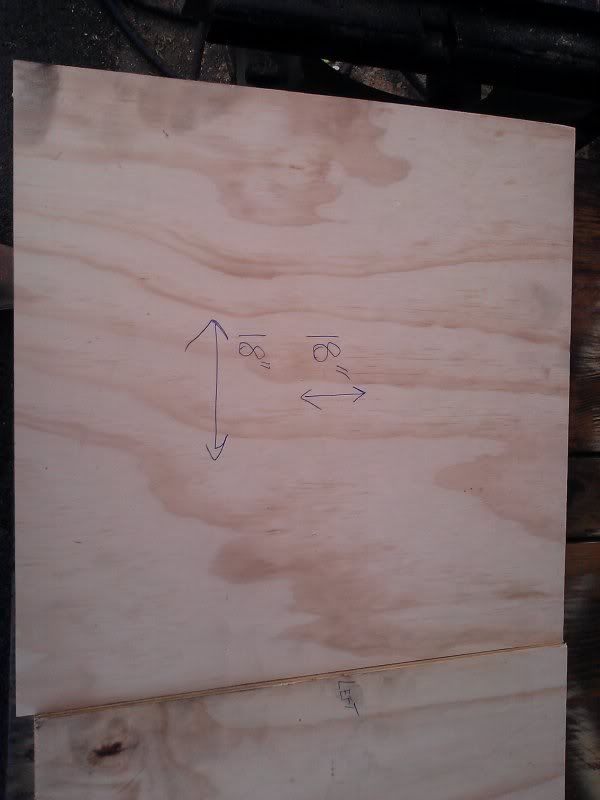
Mark your center, and be sure it's 9" from all sides, or whatever your opening radius is.
After you mark it, hammer a nail into it slightly right on center. (you can use a compass for this part, but right now we're assuming you don't have one. Take a piece of string and tie a small loop in the end, then slip it over the nail. Take the other end and tie a loop so the end of the loop is just over the edge of the board.
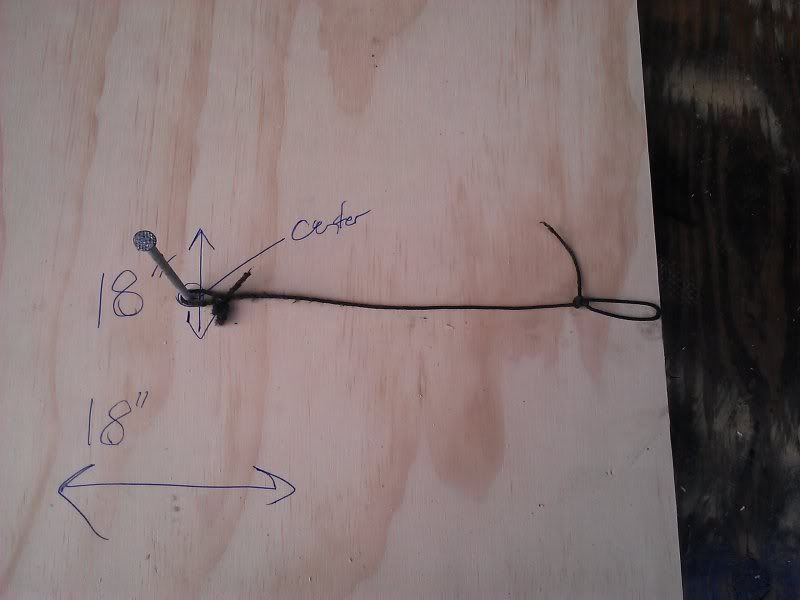
IS this an exact way to make a circle? No. But it is simple. Take a pen or pencil and slip the end of the loop over it, then stretch away from the nail hard, and strike your arc 4 times.
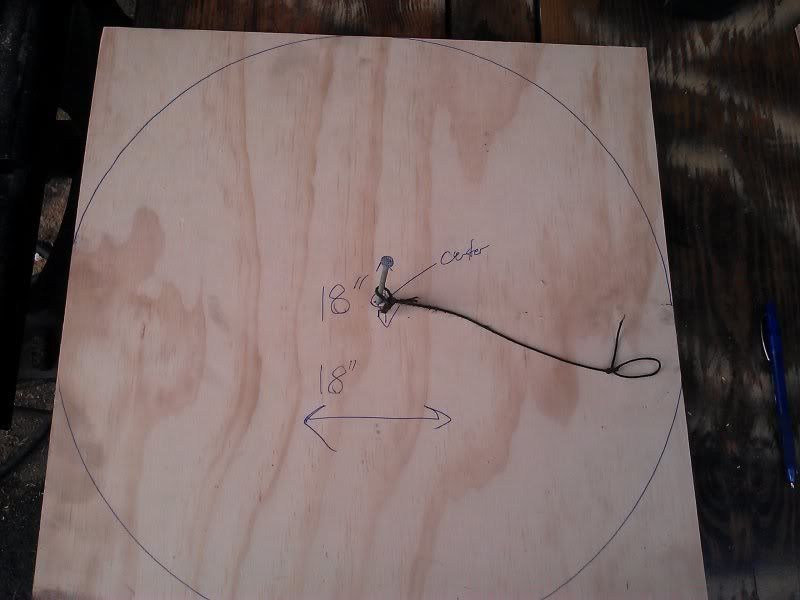
You should now have what looks like a circle. Remove the nail.
If you have that $20 jigsaw (or a good one) cut that circle. If you have a table saw, there's hope for you yet. Move the guard away and work safely with the blade down about 1" above the table surface. Cut several straight lines close to the circles edge, then when you have removed most of the excess material, use one hand as an axle, and move the plywood through the saw in a circular motion. With the excess gone, the table saw will have no problem cutting the circle.
Sand the edge if you must, but only if it's completely awful. Small inconsistencies will not matter in the end.
Take some of the excess 1/2" ply from the first cut you made (to get it down to fan diameter)
and take two pieces of it - so that when they're stacked together it will be 1" tall.
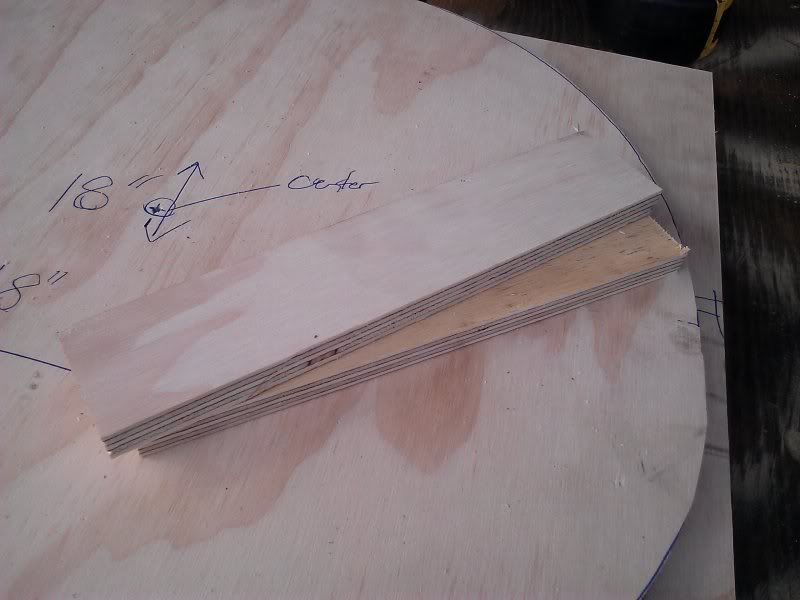
The reason for this is the shroud I'm making needs to sit 1 1/2" away from the surface of the radiator. With 1" spacer below the 1/2" ply, you will have your proper height.
Remember how we needed 3 nails? One is a sacrificial nail. The same one you used to make your circle earlier. Hammer that through the two pieces of scrap so they are nailed together. Then pry them apart. (do not drive the nail all the way through, it will be harder to pull apart).
Take your circle, and insert a new, straight nail into the spot you used to make the circle (center). Drive it all the way through the 1/2" ply, until it just barely sticks into your workbench, or a piece of scrap below it. This means the tip is just barely through. Flip the piece sideways and Push one of your previously nailed scraps on, then hammer more.
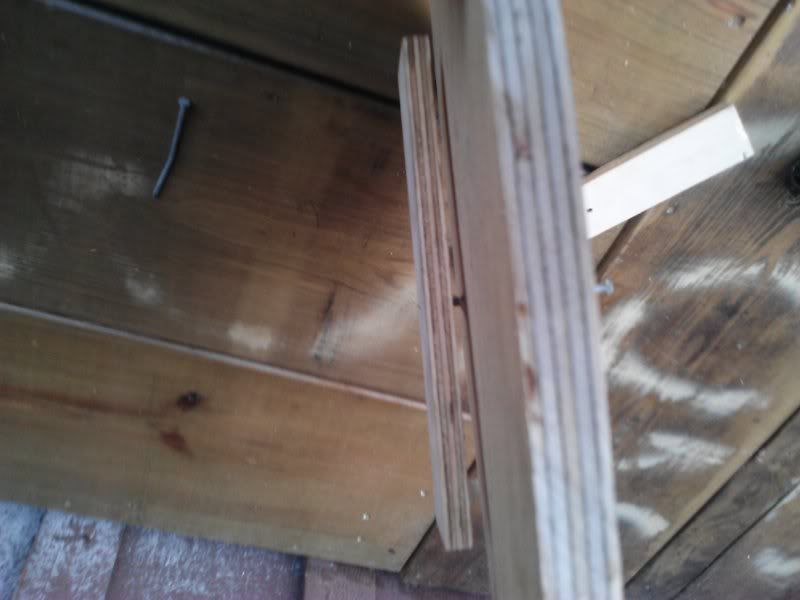
Then place the other on as well, set the assembly on your bench and nail till it sticks again.
Pull it out of the bench, and then set the circle on top of your radiator main surface area piece of 3/4" wood. Look between the two to mate the tip of the nail to the center of your fan center mark (that was made in the very beginning.) IF you circled it, it will be easier to find when looking through 1" of space.
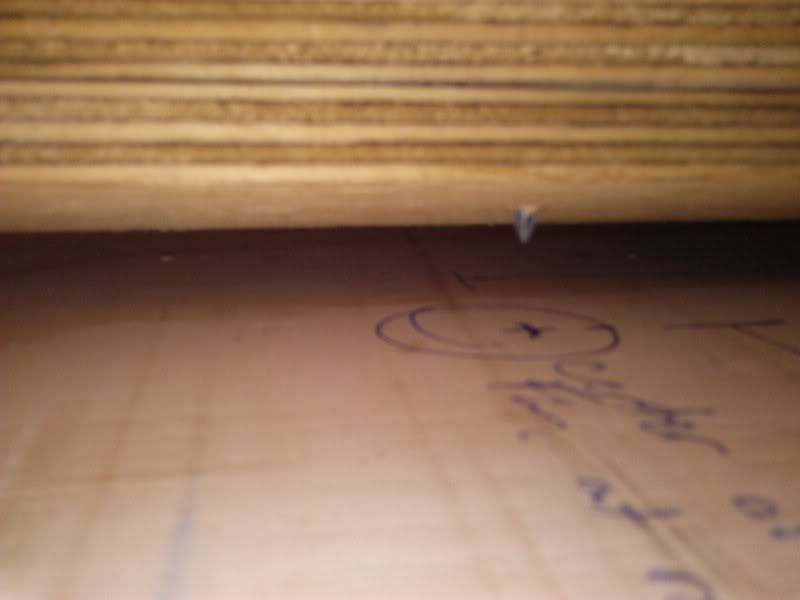
Once you have it where you are confident it is on center, set the piece straight, and hammer them together. This will ensure the center of the circle is at the center of your fan point on the radiator surface area.
Send another nail through all 4 pieces somewhere else. Just make sure it hits all 4. That way the circle will not spin.

NExt comes the duct tape.
Wrap the EDGES of the 1/2" circle, and the EDGES of the 3/4" piece. This is where a lot of the contact will take place on the fiberglass section. Make sure it's nice duct tape with a pretty glossy surface. This will keep the resin from sticking to the wood.

Then cover up the sections you can see of the 3/4" ply, and then make another wrap on top to be safe.
Flip your form over, and either grind off the nails if there is excess, or bend them over with your hammer. If there is no excess, skip this step.
I took the lining out of an old jacket and stretched it over the form. I then duct taped it to the back. You typically use staples for this, but we're going overly simplified here.
Make sure you stretch it out in all directions as far as you can, flip it over, and you have this:
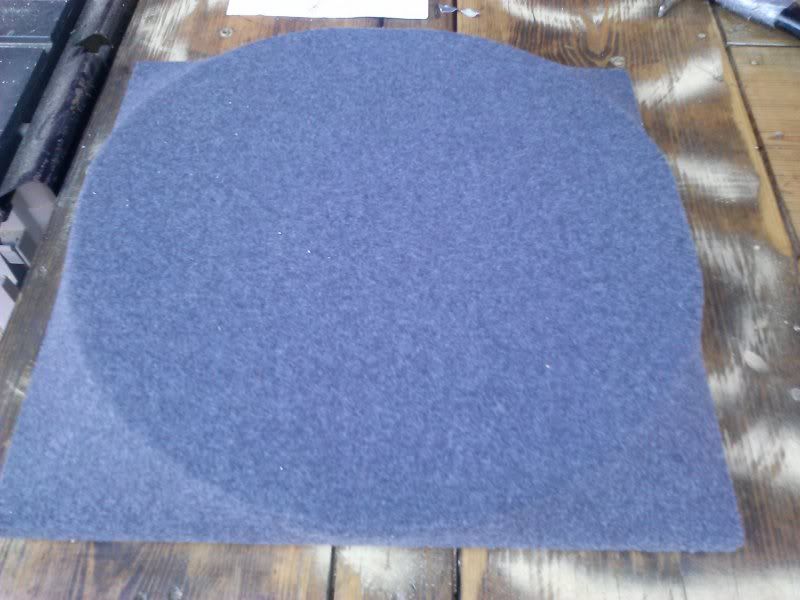
Now your work looks like what you're going for...
NExt post is glassing:
clhyer. I made very sure to always make note of my orientation since it is off to one side by about 3/4 of an inch.
Valiant 1966 - yeah - pretty similar. Didn't see that though. This one will have way more pictures when done likely, and be on the ultra cheap.
For this project I made my orientation based on if I was the fan, looking at the radiator, and kept that formula throughout. I used blue pen to show up better in pictures, and this is as basic as it gets, assuming someone reading this has few or no power tools. That part will make sense as it progresses.
With that, let's get started.
I used basic power tools, just so that anyone could pretty much make this. I specifically did not use my router on a compass or anything like that, just so people without, would still be able to make this.
You will need a table saw for this. If you don't have one, use a skil saw. If you don't have one, have Home Depot cut you your two pieces, and then you'll have to go to Harbor freight for a $20 Chicago Jigsaw to make your Circle.
Materials - 1 yard of fleece-like fabric, or an old T-shirt.
- 1 yard of fiberglass chop-mat (trust me it's plenty)
- 1 can of resin, depending on your size shroud, 1qt should be more than enough
- 3 or 4 throw away 2" brushes.
- 1 piece of 3/4" ply larger than the surface area of radiator fins
- 1 piece of 1/2" ply same size.
- Duct tape
- 3 nails
First, get the center point of the fan and where it points at the radiator. Measure all 4 directions just to be sure, then measure again. Mess this part up and you may as well scrap the project. If the fan is perfectly center - then easier on you. But in this case it's not.
Second, I got some 1/2" plywood, and some 3/4" plywood. It does not matter which kind, just go get something cheap or left over.
For this particular radiator (slant 6) it has a 17 1/2" tall section, that is 18 1/2" wide.
The fan is 16" in diameter, and I made a hole about 18" in diameter. This allows 1" all the way around in case the engine moves a bit.
SO cut that 3/4" piece to the shape of the rad surface:

Then. Mark your center point of the fan with a cross, and circle it. This fan centers at 9.5" from the right. And it is 8 3/4" from the top.
Once you have the piece cut, and the center marked, then it's time to get out your 1/2" piece. For ease of use, cut this piece square to the diameter of the opening, so in this case, it's 18" x 18".

Mark your center, and be sure it's 9" from all sides, or whatever your opening radius is.
After you mark it, hammer a nail into it slightly right on center. (you can use a compass for this part, but right now we're assuming you don't have one. Take a piece of string and tie a small loop in the end, then slip it over the nail. Take the other end and tie a loop so the end of the loop is just over the edge of the board.

IS this an exact way to make a circle? No. But it is simple. Take a pen or pencil and slip the end of the loop over it, then stretch away from the nail hard, and strike your arc 4 times.

You should now have what looks like a circle. Remove the nail.
If you have that $20 jigsaw (or a good one) cut that circle. If you have a table saw, there's hope for you yet. Move the guard away and work safely with the blade down about 1" above the table surface. Cut several straight lines close to the circles edge, then when you have removed most of the excess material, use one hand as an axle, and move the plywood through the saw in a circular motion. With the excess gone, the table saw will have no problem cutting the circle.

Sand the edge if you must, but only if it's completely awful. Small inconsistencies will not matter in the end.
Take some of the excess 1/2" ply from the first cut you made (to get it down to fan diameter)
and take two pieces of it - so that when they're stacked together it will be 1" tall.

The reason for this is the shroud I'm making needs to sit 1 1/2" away from the surface of the radiator. With 1" spacer below the 1/2" ply, you will have your proper height.
Remember how we needed 3 nails? One is a sacrificial nail. The same one you used to make your circle earlier. Hammer that through the two pieces of scrap so they are nailed together. Then pry them apart. (do not drive the nail all the way through, it will be harder to pull apart).
Take your circle, and insert a new, straight nail into the spot you used to make the circle (center). Drive it all the way through the 1/2" ply, until it just barely sticks into your workbench, or a piece of scrap below it. This means the tip is just barely through. Flip the piece sideways and Push one of your previously nailed scraps on, then hammer more.

Then place the other on as well, set the assembly on your bench and nail till it sticks again.
Pull it out of the bench, and then set the circle on top of your radiator main surface area piece of 3/4" wood. Look between the two to mate the tip of the nail to the center of your fan center mark (that was made in the very beginning.) IF you circled it, it will be easier to find when looking through 1" of space.


Once you have it where you are confident it is on center, set the piece straight, and hammer them together. This will ensure the center of the circle is at the center of your fan point on the radiator surface area.
Send another nail through all 4 pieces somewhere else. Just make sure it hits all 4. That way the circle will not spin.

NExt comes the duct tape.
Wrap the EDGES of the 1/2" circle, and the EDGES of the 3/4" piece. This is where a lot of the contact will take place on the fiberglass section. Make sure it's nice duct tape with a pretty glossy surface. This will keep the resin from sticking to the wood.

Then cover up the sections you can see of the 3/4" ply, and then make another wrap on top to be safe.

Flip your form over, and either grind off the nails if there is excess, or bend them over with your hammer. If there is no excess, skip this step.
I took the lining out of an old jacket and stretched it over the form. I then duct taped it to the back. You typically use staples for this, but we're going overly simplified here.
Make sure you stretch it out in all directions as far as you can, flip it over, and you have this:

Now your work looks like what you're going for...
NExt post is glassing: