The Great Pumpkin - '71 Duster
416 progress! Got the cam and timing chain in. Cam is degreed.
New parts! New Dynamic 9.5" converter showed up.
Of course, this wouldn't be a Great Pumpkin post if there were no screw-ups, second guesses or what have you. Here's how it all went down.
So as I mentioned in the last post, I finally got past the rod bolts and I'm all ready to start putting the cam in. But, one small thing left before I do that - install the two little front oil galley plugs. Easy enough, right? Wrong.
Without really thinking about what I was doing, I start knocking them in. I tapped them in with the face of a hammer and they go in easy enough but then I look at 'em and the edges are all mushroomed with metal hanging off. Doh! My wife loves to say haste makes waste and in this case, she was right. We'll keep that between us here but of course this turned into another clusterf*ck.
Getting the plugs out was a PITA. I ended up removing the rear galley plug and poking it out from behind with the tip of a long galley brush. First though I had to chisel it inwards with a screwdriver which of course made a mess. I had to drill the other one and grab it with a needle nose to yank it out. I am an idiot.
So now I have to find two more plugs. I had a freeze plug kit with plugs in it but they were a hair too small. So now I go driving around to every hole-in-the-wall parts store in town and dig through the Dorman boxes trying to find the right ones. More wasted time and effort.
I find a few that look close (555-009, same as what usually come in the MP kits) so I take a shot and bring 'em home. Too big! I am beyond pissed now but no way I am going back out to dig through another dusty old Dorman box. I fire up the grinder and whittle down the edges a smidge then hit 'em with the wire brush to smooth 'em out. Perfect fit now, just snug enough. This time I wise up though and use a socket inside the cup so I don't smush the edges. After a lot of careful tapping, they are in. Frankly, this is the kind of stuff that used to kill me when I was turning wrenches and it still does. Thankfully my paycheck is not affected any more so it's all good, just chalk it up to another lesson learned.
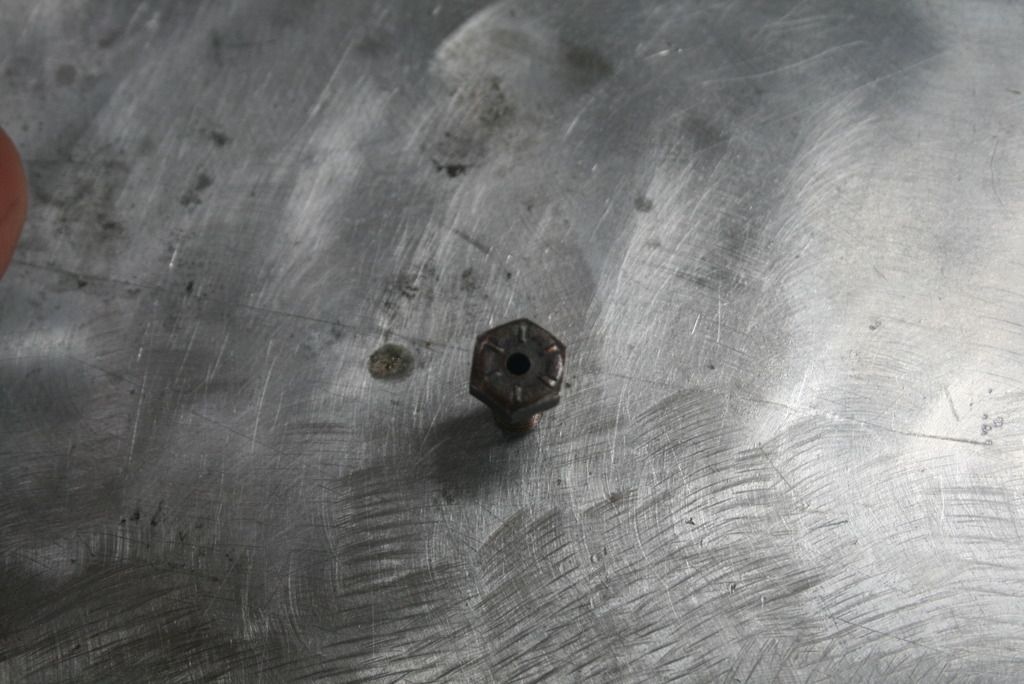
Plug one and two. Some say to drill a 1/64 hole in the left side plug so the chain sees pressurized oil but I personally don't think it's needed. You also need tro drill an extra hole in the tenioner plate fro the oil to come though. I have the older style drip bolt with the hole in it and the tensioner has a built-in drip tab. Plus the slinger splashes oil up from the pan. One of my blocks has the plug drilled but it had a thrust plat and no tensioner. Odd.
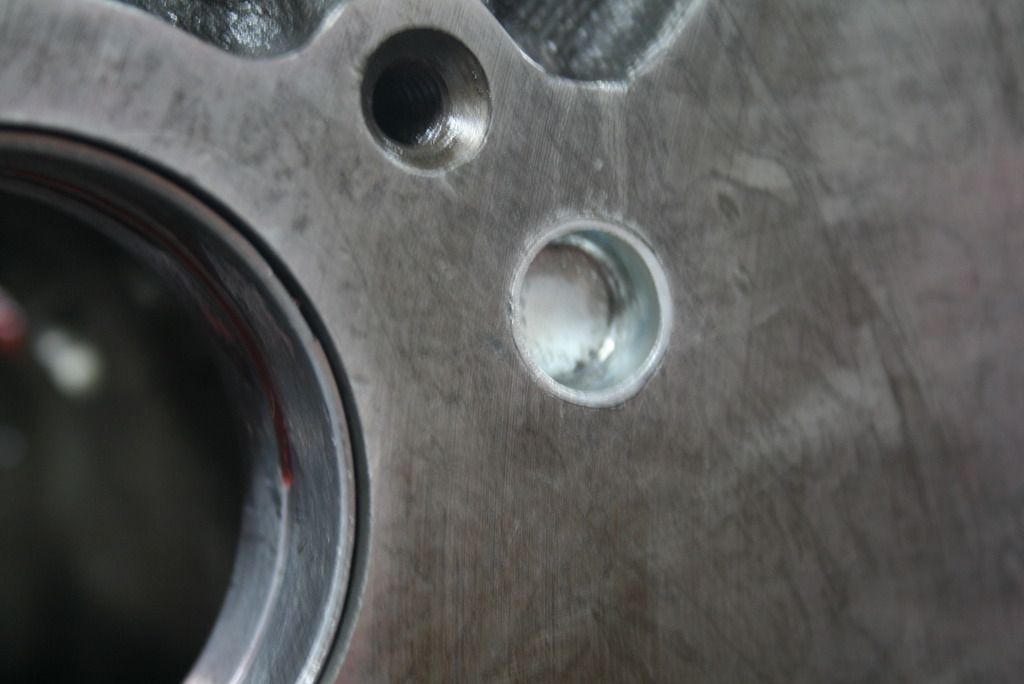
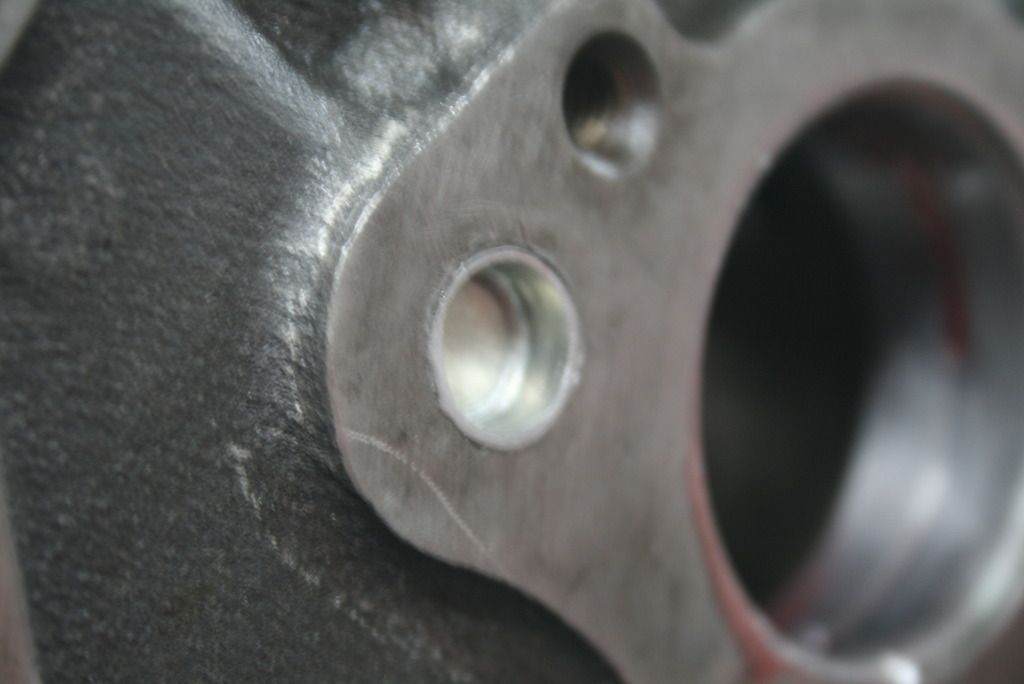
Bolt with oil hole fed by the galley behind it. Goes in the upper right side.
So after the galley plug debacle it's time to get the cam in. That actually goes OK. It's a Comp solid FT spec'd by Brian at IMM. (251/259 @ .050. .593/.585 lift with 1.6 rocker arms) Its all slathered up with assembly lube and it goes in OK. I have a Comp degree kit which comes with a handle to guide the cam in. It takes a little finesse to get the shaft in without any drama, (ba dum bum, tshhh) especially when you have lubricant on your fingers. (ba dum bum, tshhh) Sexual innuendos aside, it was time to start the degree process.
Lube my shaft. Looks like a bloody mess.
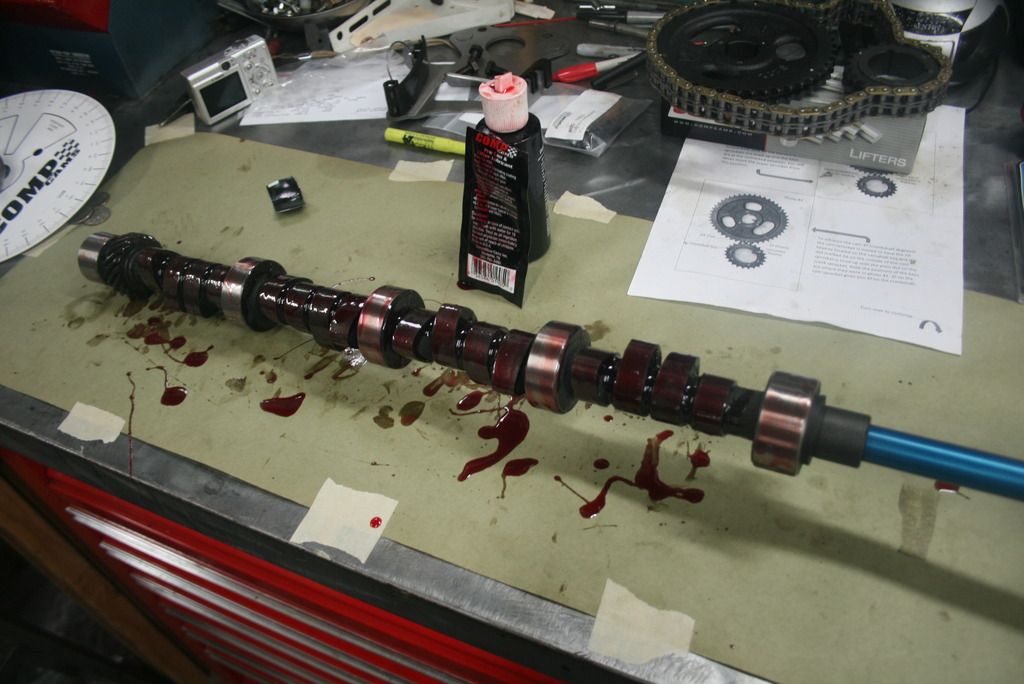
Going in. Note handle on cam end to guide it in.
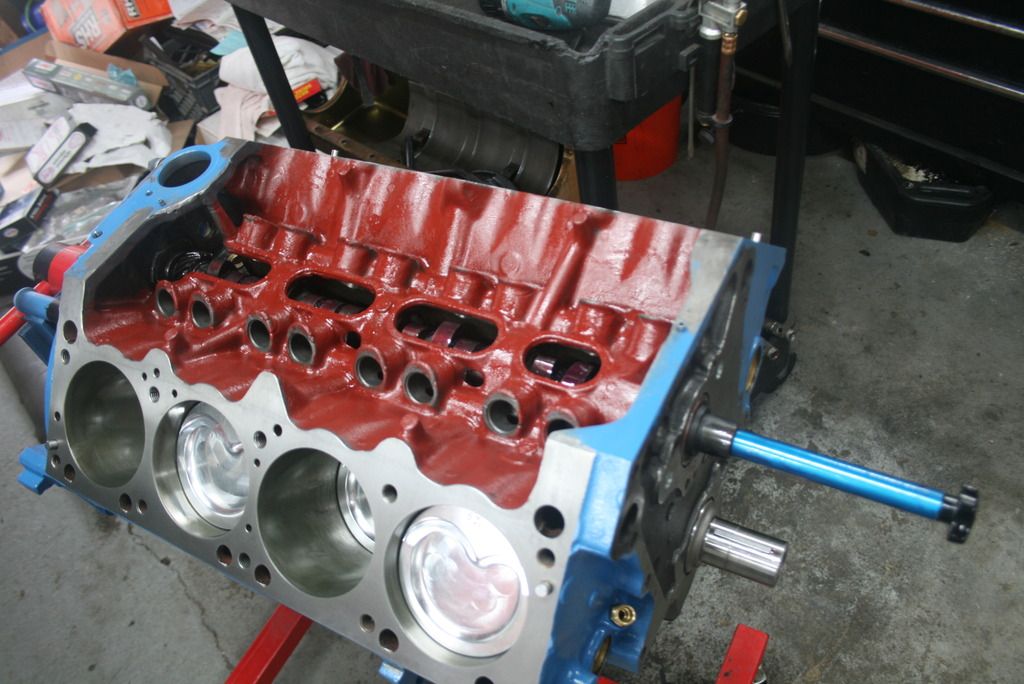
For a timing chain, I got a beautiful Pro Gear timing set from Hughes and a Cloyes tensioner. Now, tensioners are a much-debated item. No small block had one until the 3.9 V6s started having chain problems which the tensioner was apparently designed to help with by reducing chain slack. You can make the argument that they are not necessary if you have a new chain. But, all chains have some slack which is why you need to degree your cam, the timing sets are just not that accurate. And, once a chain runs for a little bit it acquires more slack in it. Now the cam you put in 4 degrees advanced is now only 2 or something. I don't have any direct experience like that but it makes sense so I used a tensioner.
Here is the tensioner installed. Bolts go to 210 inch lbs. or 17.5 ft. lbs.
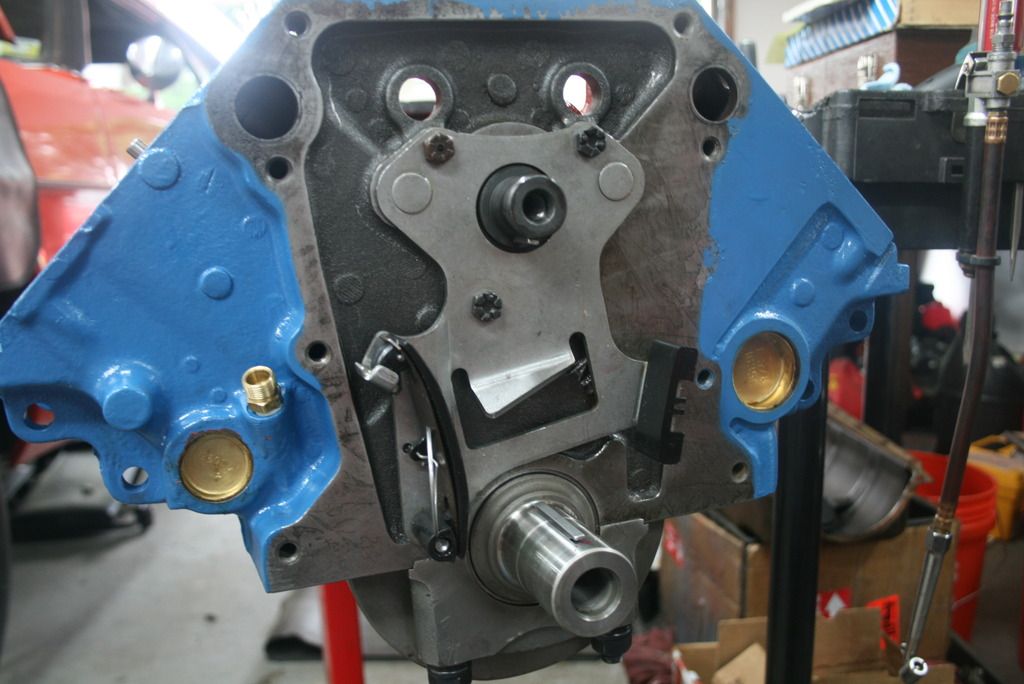
I will be honest, getting a brand-new, tight, high quality double roller chain onto a tensioner is a *****. You either need three hands or a helper. There needs to be enough slack in the chain to be able to install it with both sprockets. But with the tensioner arm pushing inward and effectively shortening the chain, you can't get the sprocket onto the cam. You need to push the arm out of the way as you work the chain into position and wiggle the sprocket onto the cam snout. Plus, the the cam keeps sliding backwards when you try to slip the sprocket on. Impossible!
Somehow, I got it to work without help. I have a long ratchet extension which I used to push the tensioner arm away from the chain while using the cam snout as a fulcrum. I was able to hold the cam from moving backward with the cam handle and got the sprocket on just enough to get it to stay in place. I tapped the sprockets home with a dead blow mallet.
If anyone else deals with this, you should know that the flimsy grenade pin that keeps the tensioner arm in place while you work the chain into position comes out very easily. It's almost useless. The pin goes through a very small hole in a bracket on the back of the arm which nothing of any significant strength could possibly fit through. There's another hole in the tensioner bracket - the pin goes through both and holds the arm until you pull it. If you look at it wrong it pops out, especially after the first time since it is weakened.
I gave up trying to hold the pin in place while installing the timing set. I am hoping the spring steel on the back of the arm did not lose it's ability to keep tension on the chain since I sort of had to force the chain over it but it seems OK, the chain rolls tightly but smoothly which I believe is what you probably want.
So no pin in the tensioner arm means the cam is degreed with tension on the chain. I have read that tensioners can cause a difference of a degree or two. Not sure how much truth there is to that but again, it makes sense since you are effectively shortening the timing chain.
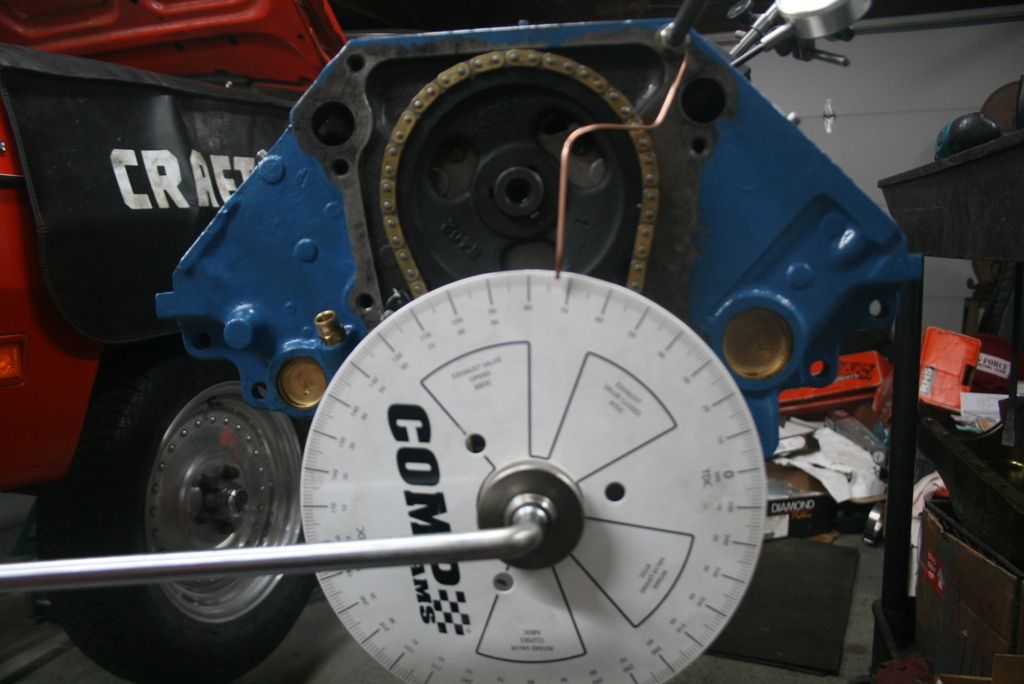
In any event, I put the cam in straight up and 'degreed' it - DEAD NUTS! Wound up at 106.***, cam card said install at 106. (cam is ground on 108 CL with 2 degrees built in) It was only off around a half a degree which is good. Most cam companies say 1 degree either way is OK to run. I called Comp just to make sure I was not totally wrong and told the guy about the tensioner pin- he said run it. I am relieved I don't have to dick around with that timing chain again. There's a part of me that is reasoning the cam was accurate because of the tensioner. Who knows, maybe I just got lucky.
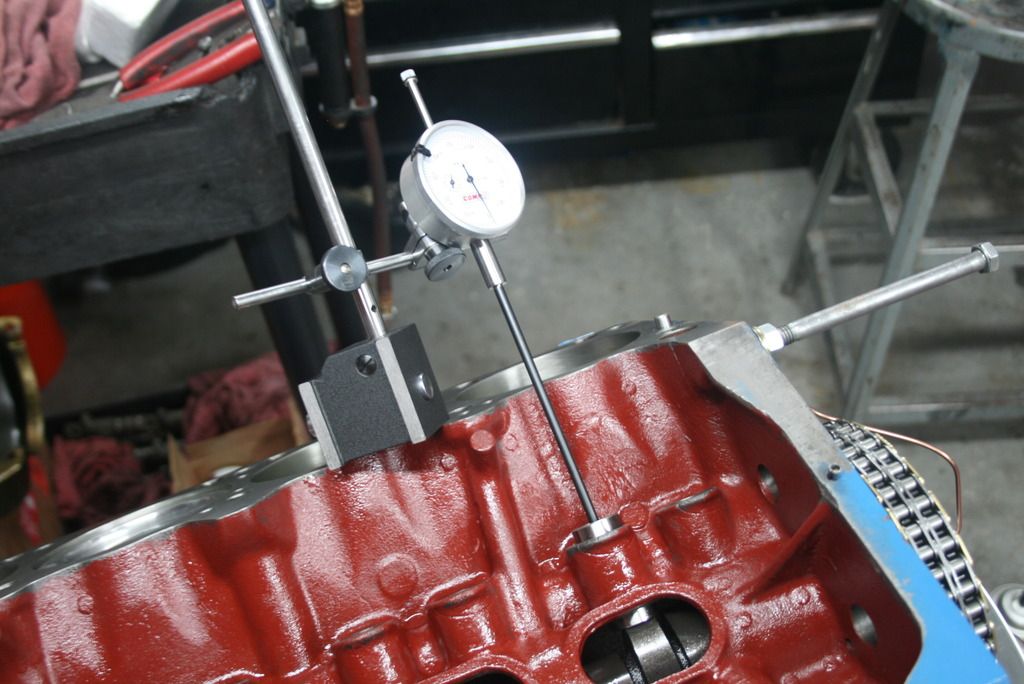
Degreeing the cam. Comp degree kit comes with all sorts of cool stuff beyond a degree wheel; crank holder socket, pushrod attachment for the dial indicator, decent dial indicator and a few more attachments. I chose the kit that does the job with the heads off, seemed easier.
Wheel of fortune.
Checking max lift of the intake lifter.
So the next step is to finish this damn motor. Heads are next, then measure pushrods and check the rocker arms for "proper geometry" as they say.
As mentioned earlier, my new converter showed up. If its anything like what was told to me on the phone, my car will take off like a rocket and drive like a dream. Anything will be an upgrade over the last one I had.
Have not touched anything else on the car for a while. There is some stuff floating around the recesses of my mind that I know I need to take care of but I'm all in on the engine build right now.
More to come.
416 progress! Got the cam and timing chain in. Cam is degreed.
New parts! New Dynamic 9.5" converter showed up.
Of course, this wouldn't be a Great Pumpkin post if there were no screw-ups, second guesses or what have you. Here's how it all went down.
So as I mentioned in the last post, I finally got past the rod bolts and I'm all ready to start putting the cam in. But, one small thing left before I do that - install the two little front oil galley plugs. Easy enough, right? Wrong.
Without really thinking about what I was doing, I start knocking them in. I tapped them in with the face of a hammer and they go in easy enough but then I look at 'em and the edges are all mushroomed with metal hanging off. Doh! My wife loves to say haste makes waste and in this case, she was right. We'll keep that between us here but of course this turned into another clusterf*ck.
Getting the plugs out was a PITA. I ended up removing the rear galley plug and poking it out from behind with the tip of a long galley brush. First though I had to chisel it inwards with a screwdriver which of course made a mess. I had to drill the other one and grab it with a needle nose to yank it out. I am an idiot.
So now I have to find two more plugs. I had a freeze plug kit with plugs in it but they were a hair too small. So now I go driving around to every hole-in-the-wall parts store in town and dig through the Dorman boxes trying to find the right ones. More wasted time and effort.
I find a few that look close (555-009, same as what usually come in the MP kits) so I take a shot and bring 'em home. Too big! I am beyond pissed now but no way I am going back out to dig through another dusty old Dorman box. I fire up the grinder and whittle down the edges a smidge then hit 'em with the wire brush to smooth 'em out. Perfect fit now, just snug enough. This time I wise up though and use a socket inside the cup so I don't smush the edges. After a lot of careful tapping, they are in. Frankly, this is the kind of stuff that used to kill me when I was turning wrenches and it still does. Thankfully my paycheck is not affected any more so it's all good, just chalk it up to another lesson learned.
Plug one and two. Some say to drill a 1/64 hole in the left side plug so the chain sees pressurized oil but I personally don't think it's needed. You also need tro drill an extra hole in the tenioner plate fro the oil to come though. I have the older style drip bolt with the hole in it and the tensioner has a built-in drip tab. Plus the slinger splashes oil up from the pan. One of my blocks has the plug drilled but it had a thrust plat and no tensioner. Odd.


Bolt with oil hole fed by the galley behind it. Goes in the upper right side.

So after the galley plug debacle it's time to get the cam in. That actually goes OK. It's a Comp solid FT spec'd by Brian at IMM. (251/259 @ .050. .593/.585 lift with 1.6 rocker arms) Its all slathered up with assembly lube and it goes in OK. I have a Comp degree kit which comes with a handle to guide the cam in. It takes a little finesse to get the shaft in without any drama, (ba dum bum, tshhh) especially when you have lubricant on your fingers. (ba dum bum, tshhh) Sexual innuendos aside, it was time to start the degree process.
Lube my shaft. Looks like a bloody mess.

Going in. Note handle on cam end to guide it in.

For a timing chain, I got a beautiful Pro Gear timing set from Hughes and a Cloyes tensioner. Now, tensioners are a much-debated item. No small block had one until the 3.9 V6s started having chain problems which the tensioner was apparently designed to help with by reducing chain slack. You can make the argument that they are not necessary if you have a new chain. But, all chains have some slack which is why you need to degree your cam, the timing sets are just not that accurate. And, once a chain runs for a little bit it acquires more slack in it. Now the cam you put in 4 degrees advanced is now only 2 or something. I don't have any direct experience like that but it makes sense so I used a tensioner.
Here is the tensioner installed. Bolts go to 210 inch lbs. or 17.5 ft. lbs.

I will be honest, getting a brand-new, tight, high quality double roller chain onto a tensioner is a *****. You either need three hands or a helper. There needs to be enough slack in the chain to be able to install it with both sprockets. But with the tensioner arm pushing inward and effectively shortening the chain, you can't get the sprocket onto the cam. You need to push the arm out of the way as you work the chain into position and wiggle the sprocket onto the cam snout. Plus, the the cam keeps sliding backwards when you try to slip the sprocket on. Impossible!
Somehow, I got it to work without help. I have a long ratchet extension which I used to push the tensioner arm away from the chain while using the cam snout as a fulcrum. I was able to hold the cam from moving backward with the cam handle and got the sprocket on just enough to get it to stay in place. I tapped the sprockets home with a dead blow mallet.
If anyone else deals with this, you should know that the flimsy grenade pin that keeps the tensioner arm in place while you work the chain into position comes out very easily. It's almost useless. The pin goes through a very small hole in a bracket on the back of the arm which nothing of any significant strength could possibly fit through. There's another hole in the tensioner bracket - the pin goes through both and holds the arm until you pull it. If you look at it wrong it pops out, especially after the first time since it is weakened.
I gave up trying to hold the pin in place while installing the timing set. I am hoping the spring steel on the back of the arm did not lose it's ability to keep tension on the chain since I sort of had to force the chain over it but it seems OK, the chain rolls tightly but smoothly which I believe is what you probably want.
So no pin in the tensioner arm means the cam is degreed with tension on the chain. I have read that tensioners can cause a difference of a degree or two. Not sure how much truth there is to that but again, it makes sense since you are effectively shortening the timing chain.
In any event, I put the cam in straight up and 'degreed' it - DEAD NUTS! Wound up at 106.***, cam card said install at 106. (cam is ground on 108 CL with 2 degrees built in) It was only off around a half a degree which is good. Most cam companies say 1 degree either way is OK to run. I called Comp just to make sure I was not totally wrong and told the guy about the tensioner pin- he said run it. I am relieved I don't have to dick around with that timing chain again. There's a part of me that is reasoning the cam was accurate because of the tensioner. Who knows, maybe I just got lucky.
Degreeing the cam. Comp degree kit comes with all sorts of cool stuff beyond a degree wheel; crank holder socket, pushrod attachment for the dial indicator, decent dial indicator and a few more attachments. I chose the kit that does the job with the heads off, seemed easier.
Wheel of fortune.

Checking max lift of the intake lifter.

So the next step is to finish this damn motor. Heads are next, then measure pushrods and check the rocker arms for "proper geometry" as they say.
As mentioned earlier, my new converter showed up. If its anything like what was told to me on the phone, my car will take off like a rocket and drive like a dream. Anything will be an upgrade over the last one I had.
Have not touched anything else on the car for a while. There is some stuff floating around the recesses of my mind that I know I need to take care of but I'm all in on the engine build right now.
More to come.