DIY Classic Looking Roof Rack
Well, continuing the habit of sucking a lot, here's more.
:D
I was excited when I was done doing charity work helping the city restore a boat today, then came home and discovered three long boxes on the porch! YES! I went right to work.

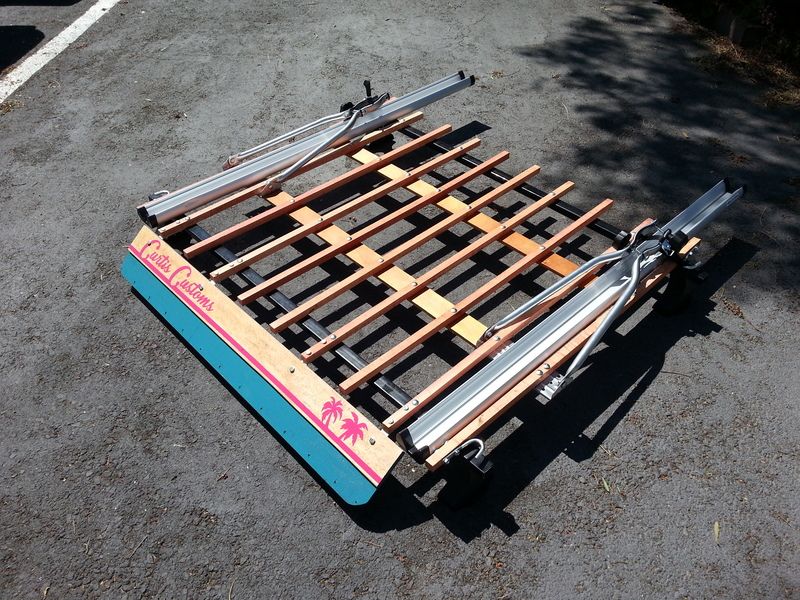
I got the bike carriers and trays out and assembled them. They recommended attaching the carrier part to the cross-members, but that would force me to attach the cross member in a position i did not want it, so i unbolted and freed the lightly glued surface of 2 of the sticks on either side of the rack, drilled new holes in the carriers, and mounted them down to the wood cross members, then reset the sticks on top of them. It bends up slightly to curve over but it's a 1/32" at most. You'd never notice it.
The mount by itself is not structurally that stable, but my goal in the project is to bolt as many things together as possible. I bought a box of 100 carriage bolts and I intended to use them.
The tray that goes across it would make up the rest of the structure.
I bolted the tray down to the bracket using the supplied "T" bolts that go through the bottom of the tray into the carrier bracket, and are relatively hidden. I did not like how that was the only thing really holding it, so I had another idea for that later.
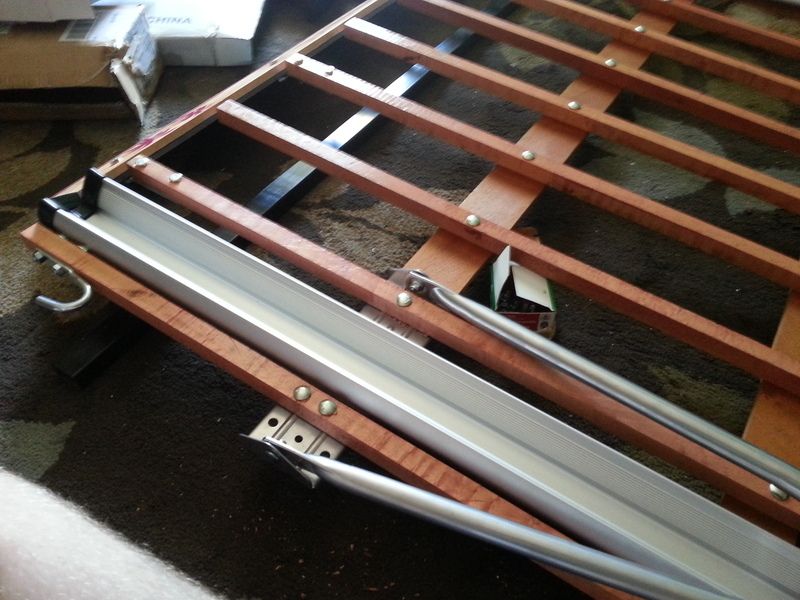
I marked and drilled holes to mount the two cross- bars for the roof rack, which are a steel square tube, with a plastic cover over it.
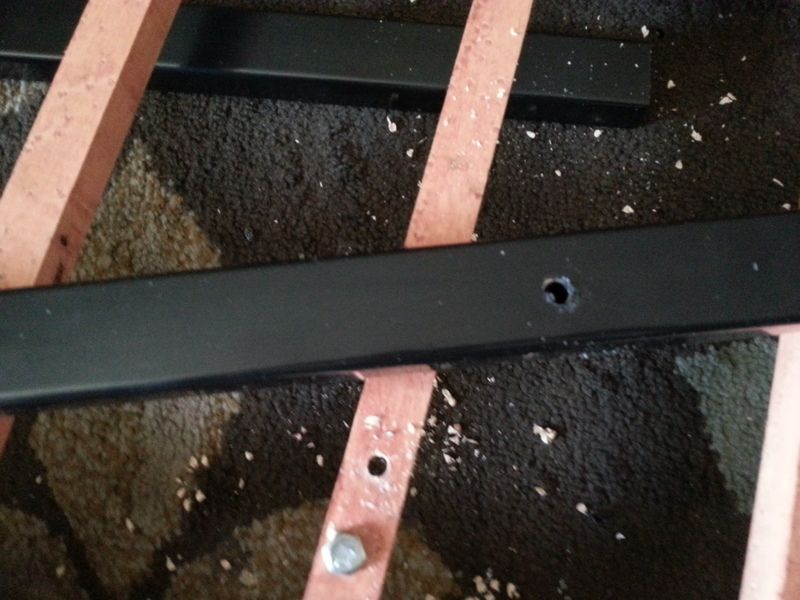
I through bolted those onto the rack and all the flex that the rack originally had - disappeared.
Sorry it's a blurry picture but that's apparently the only one I took.
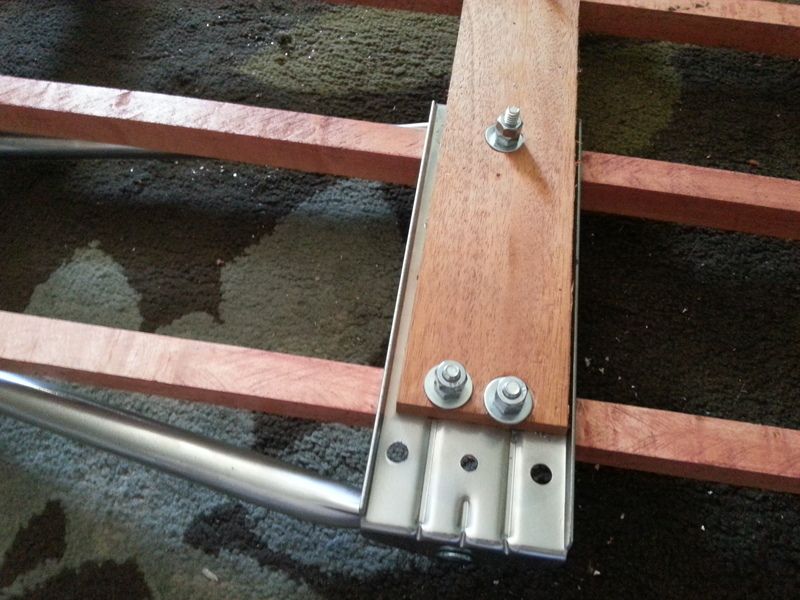
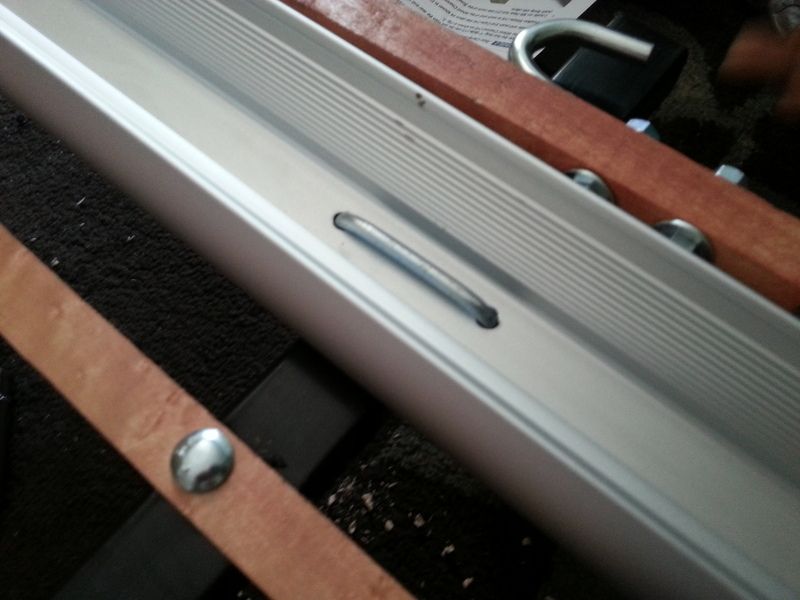
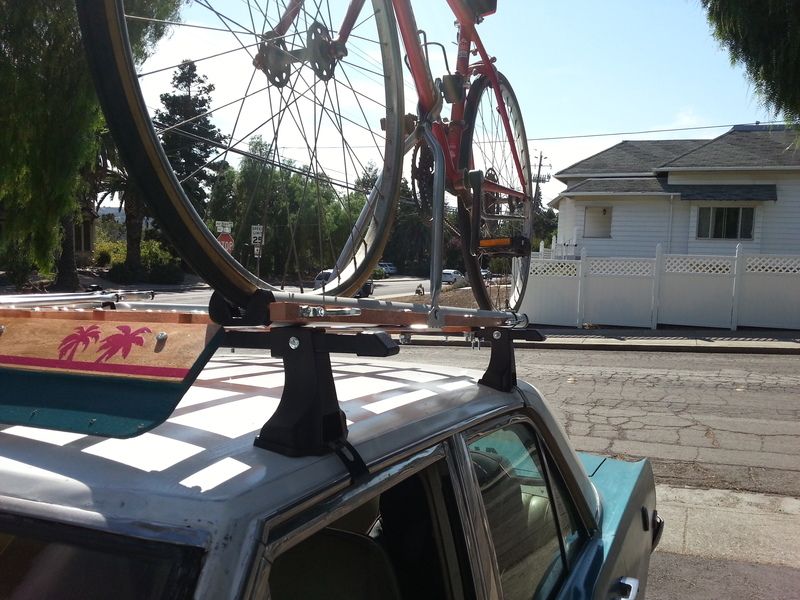
Once both cross-bars were on, I finished my idea for mounting the other parts of the bike trays. I decided to drill straight through them and use a U-bolt instead of a clamp with T-bolts like they included. This is way sturdier.
It makes it so that it is hard mounted all the time. They intend for the bike carriers to be removable, but I don't need that. They are also made in China, and are of exceptionally high quality compared to bike trays I've bought in the past, but the hardware supplied to attach them is severely lacking, but that's ok, because I have a lot of bolts remember?
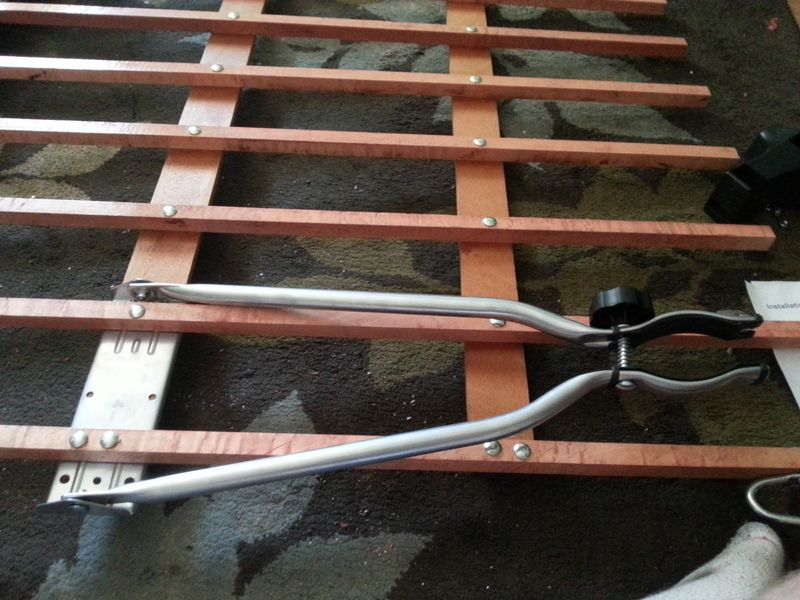
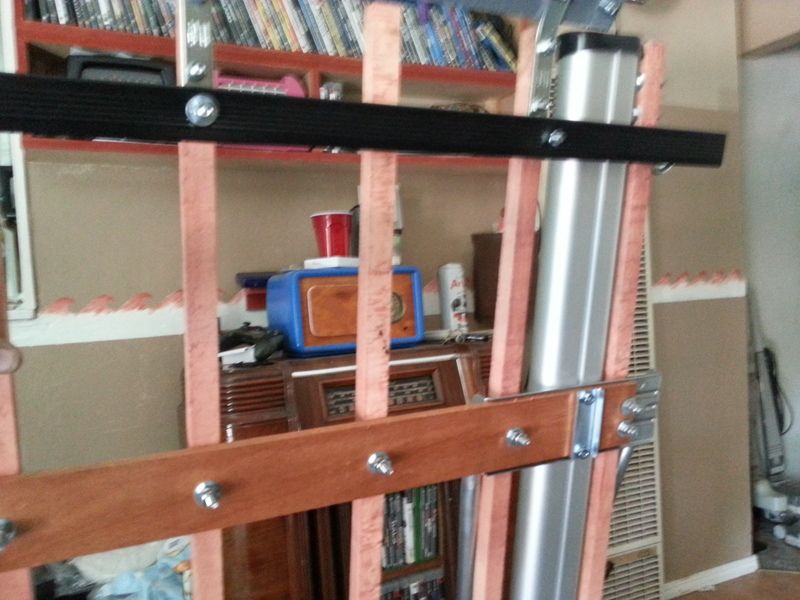
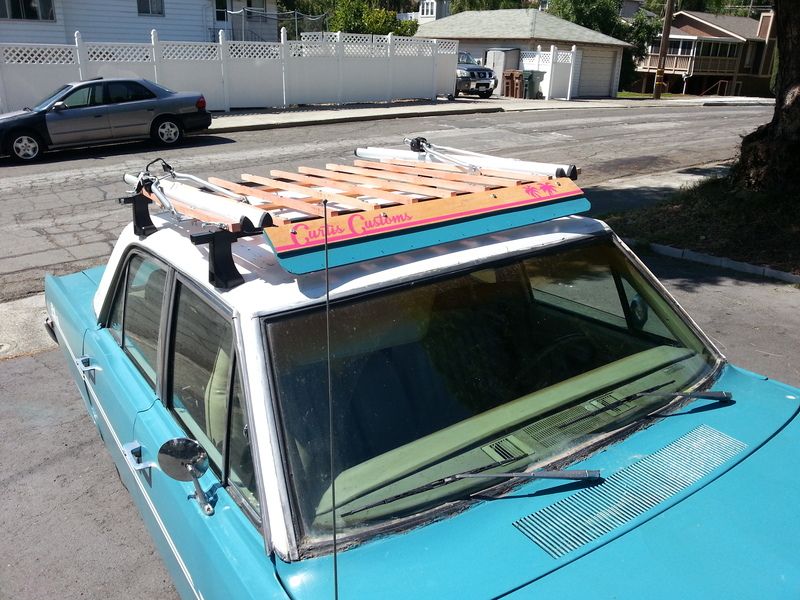
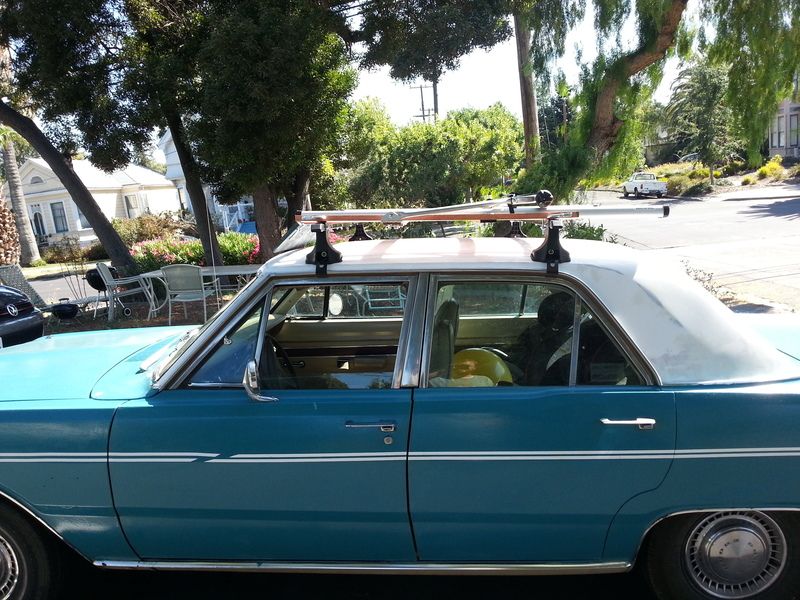
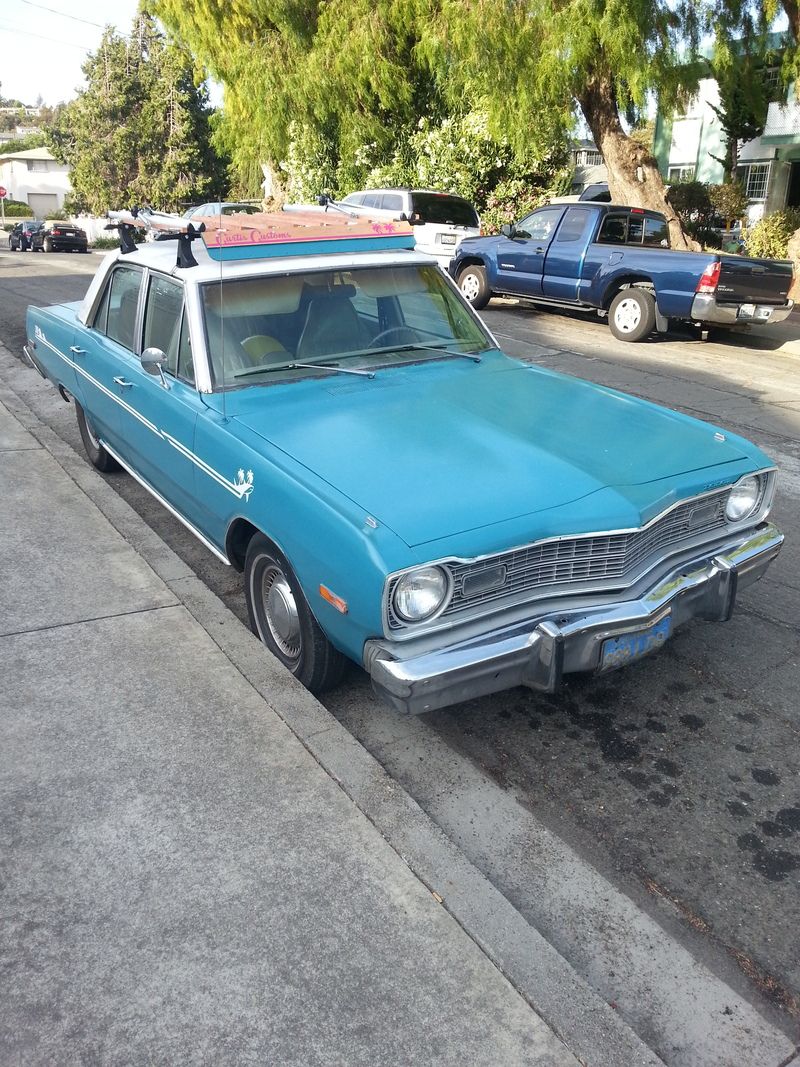
Once both trays and carriers were on, I set the feet on it, but not bolt them down yet, and set it outside for a photo op before going on the car. Wow - that looks cool.
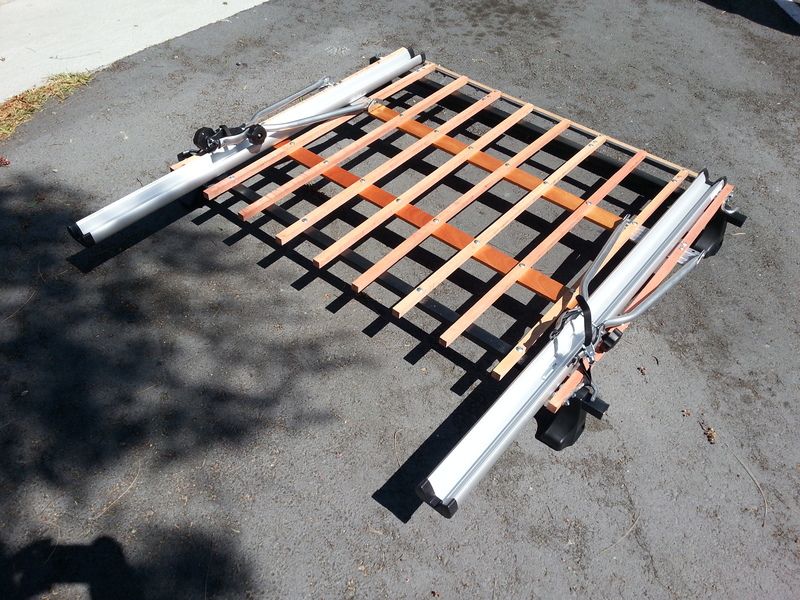
Then just sitting on the roof - no mounting yet.
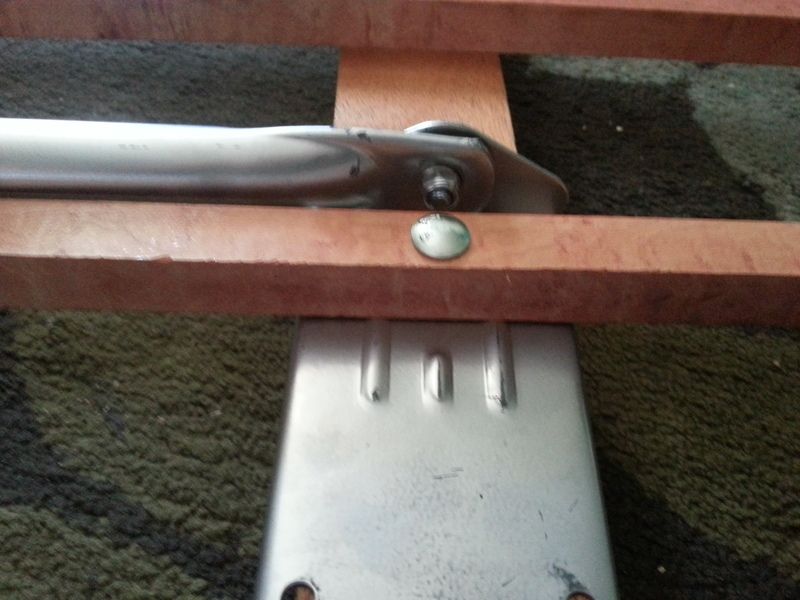
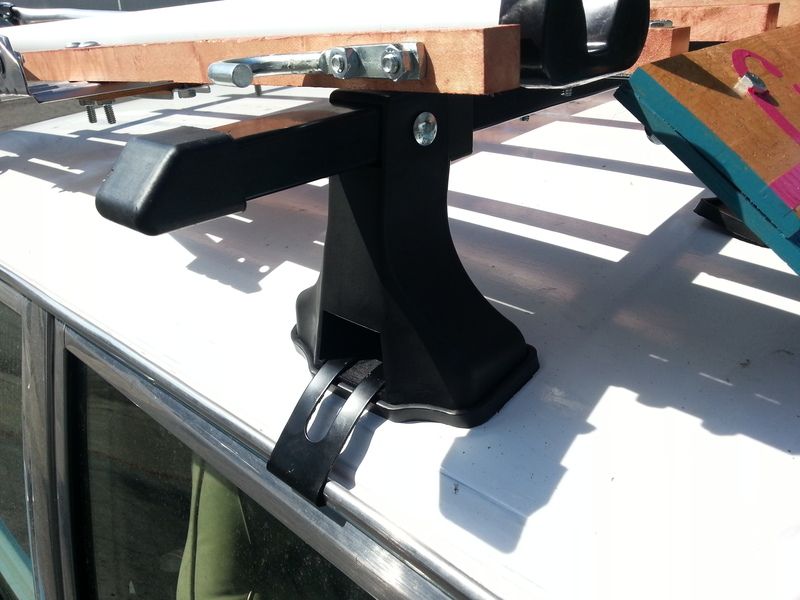
For the feet, I liked the hardware they supplied to attach it to the "Window" of the car, but in my case they go on the gutters and it works nice. But the hardware to secure them to the cross-bars was no more than a clamp with a bolt in it you tighten against the foot base. That is also holding the tension to keep it on the car - no. That is a bad system, so I spent a lot of time getting it aligned, and made it tight without the rubber feet on, then drilled a hole through the foot and the rail and through bolted it together. Clamps would have been no good - it would fall apart.
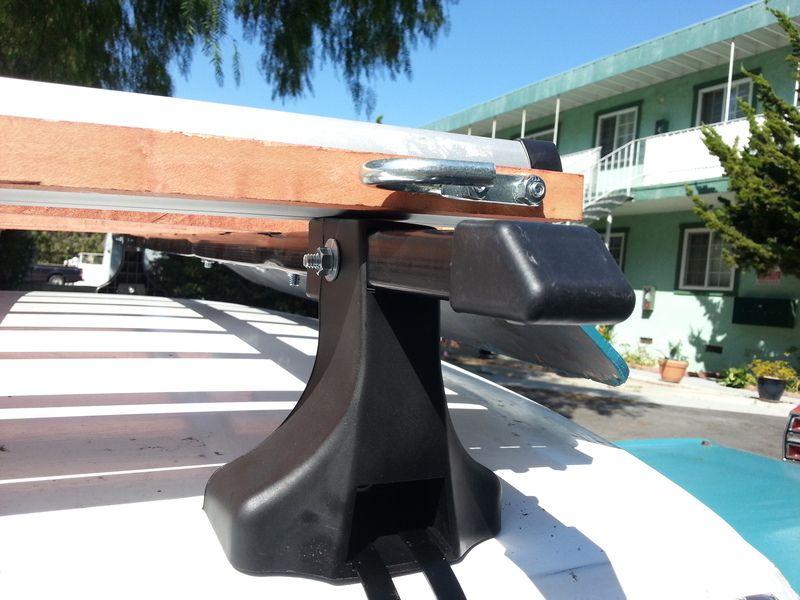
You can see the bolt going through it, I did that for all 4 corners, then loosened the clamps that hold the foot to the gutter, and placed the rubber included pads under them, and retightened. So the whole thing was about 1/4" undersized at that point so everything is super tight. You move the rack - you move the car. It is one unit if that makes sense.
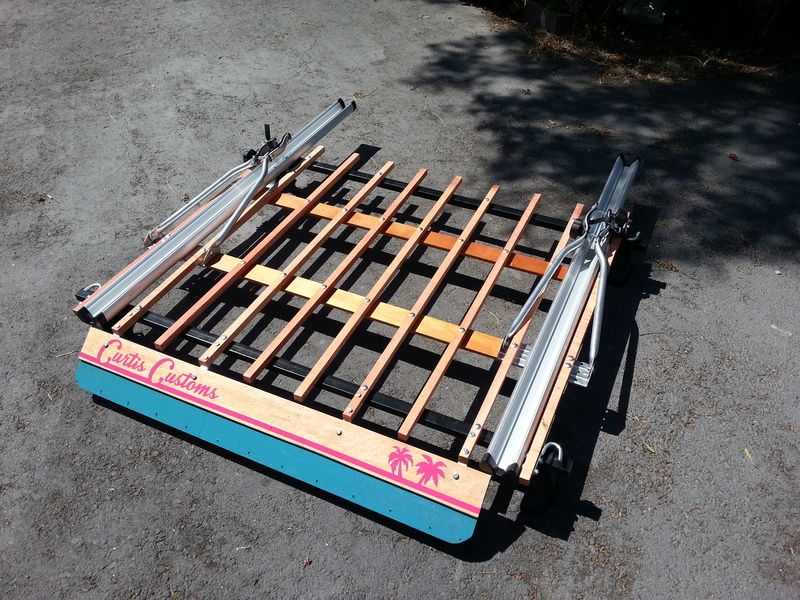
Bike test. Everything fits nice and the carrier was in the perfect spot. It works very nicely. But i would not have trusted the included hardware. The kit itself and the main components are super nice, but the stuff to attach it - was crap. I made a good decision not to use it.
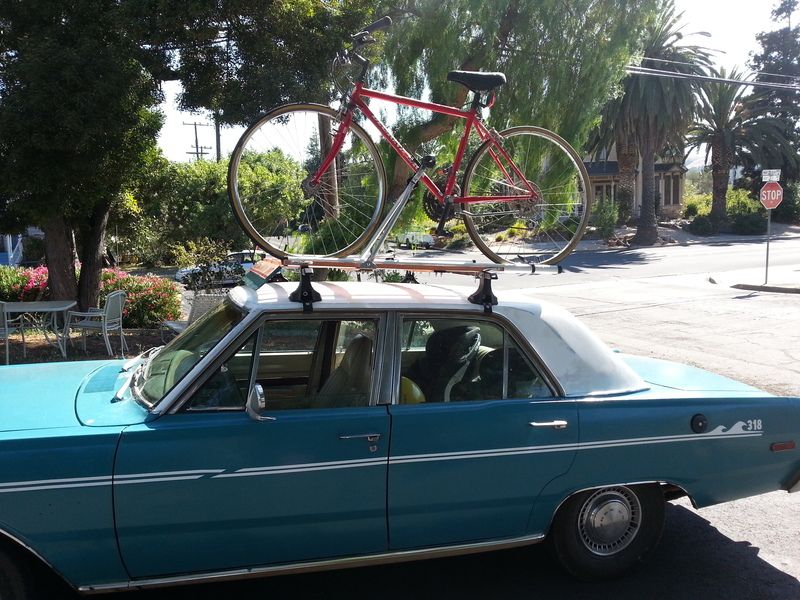
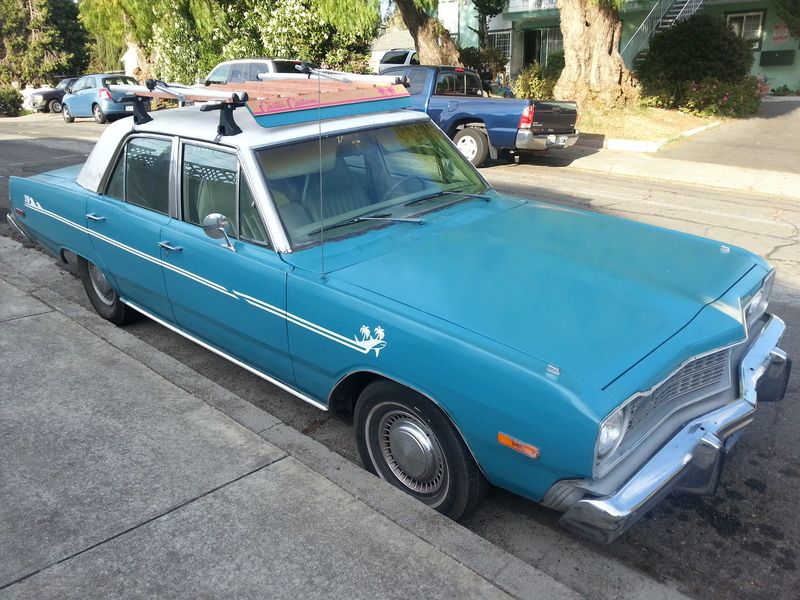
And it looks cool too.
Now someone else request one and pay me some money so I can build it again. That was a lot of fun.
Well, continuing the habit of sucking a lot, here's more.
:D
I was excited when I was done doing charity work helping the city restore a boat today, then came home and discovered three long boxes on the porch! YES! I went right to work.
I got the bike carriers and trays out and assembled them. They recommended attaching the carrier part to the cross-members, but that would force me to attach the cross member in a position i did not want it, so i unbolted and freed the lightly glued surface of 2 of the sticks on either side of the rack, drilled new holes in the carriers, and mounted them down to the wood cross members, then reset the sticks on top of them. It bends up slightly to curve over but it's a 1/32" at most. You'd never notice it.
The mount by itself is not structurally that stable, but my goal in the project is to bolt as many things together as possible. I bought a box of 100 carriage bolts and I intended to use them.
The tray that goes across it would make up the rest of the structure.
I bolted the tray down to the bracket using the supplied "T" bolts that go through the bottom of the tray into the carrier bracket, and are relatively hidden. I did not like how that was the only thing really holding it, so I had another idea for that later.
I marked and drilled holes to mount the two cross- bars for the roof rack, which are a steel square tube, with a plastic cover over it.
I through bolted those onto the rack and all the flex that the rack originally had - disappeared.
Sorry it's a blurry picture but that's apparently the only one I took.
Once both cross-bars were on, I finished my idea for mounting the other parts of the bike trays. I decided to drill straight through them and use a U-bolt instead of a clamp with T-bolts like they included. This is way sturdier.
It makes it so that it is hard mounted all the time. They intend for the bike carriers to be removable, but I don't need that. They are also made in China, and are of exceptionally high quality compared to bike trays I've bought in the past, but the hardware supplied to attach them is severely lacking, but that's ok, because I have a lot of bolts remember?
Once both trays and carriers were on, I set the feet on it, but not bolt them down yet, and set it outside for a photo op before going on the car. Wow - that looks cool.
Then just sitting on the roof - no mounting yet.
For the feet, I liked the hardware they supplied to attach it to the "Window" of the car, but in my case they go on the gutters and it works nice. But the hardware to secure them to the cross-bars was no more than a clamp with a bolt in it you tighten against the foot base. That is also holding the tension to keep it on the car - no. That is a bad system, so I spent a lot of time getting it aligned, and made it tight without the rubber feet on, then drilled a hole through the foot and the rail and through bolted it together. Clamps would have been no good - it would fall apart.
You can see the bolt going through it, I did that for all 4 corners, then loosened the clamps that hold the foot to the gutter, and placed the rubber included pads under them, and retightened. So the whole thing was about 1/4" undersized at that point so everything is super tight. You move the rack - you move the car. It is one unit if that makes sense.
Bike test. Everything fits nice and the carrier was in the perfect spot. It works very nicely. But i would not have trusted the included hardware. The kit itself and the main components are super nice, but the stuff to attach it - was crap. I made a good decision not to use it.
And it looks cool too.
Now someone else request one and pay me some money so I can build it again. That was a lot of fun.