The Great Pumpkin - '71 Duster
Alright, so while I was fumbling around with the engine, I took a break to get my brain straightened out and built the transmission.
I've worked on various transmissions through work and school so I know my way around somewhat but I've never done a performance build up on my own. Getting them out and in is no problem and taking them apart is of course not that hard. Putting it back together obviously takes a little more effort.
It's not unlike building an engine really. You gotta choose the right parts for the application, check your clearances, have some specific tools and know how to use 'em and you must work cleanly.
So this build up centered around a well-used, grimy A999. It' a '76 non lockup unit. The hard parts were in decent enough shape and the clutches even looked OK so it didn't appear too abused, just really dirty. The case was shot though. the bellhousing had been repaired but the mating surface would have needed to be milled flat to work. So I got a 'race prepped' case from A&A but cleaned and re used the original tail housing. I was able to reuse the hard parts inside but went with new clutches and steels, bands and servos. I swapped the valve body from the unit I took out of the car. I replaced most of the bushings and thrust washers too.
I didn't have too much difficulty with it. Save for the proper bushing driver set, I have most of the tools needed to do the job including several flavors of snap ring pliers and a return spring compressor for the direct drum. A local shop did the bushings for me really cheaply and quick so buying the driver set to use a few times didn't make sense.
To get the servos in, I borrowed a burly valve spring compressor from a guy I used to work with. That thing is pro grade beefy and the servos went in without a whimper.
Only thing I could have used was a bench mount holder. Might invest in one for the next trans build up. Wrestling with the case on the bench or on my cart was not the best.
I went slow and steady cleaned everything twice which took forever. I double checked all the clearances where necessary - gear train, front and rear drum clutch packs and end play. I did have to play around with selective snap rings in the drums but the gear train was good. The end play is a little on the looser side but I couldn't really do much about it so I went with what I had. It's within spec just not as tight as I would have liked.
All in all, went together pretty easily. Of course there were a few hiccups but nothing like the engine where I had to go back and re do **** over and over. Most of the missteps were just ordering more parts when I found something I needed but hadn't ordered previously.
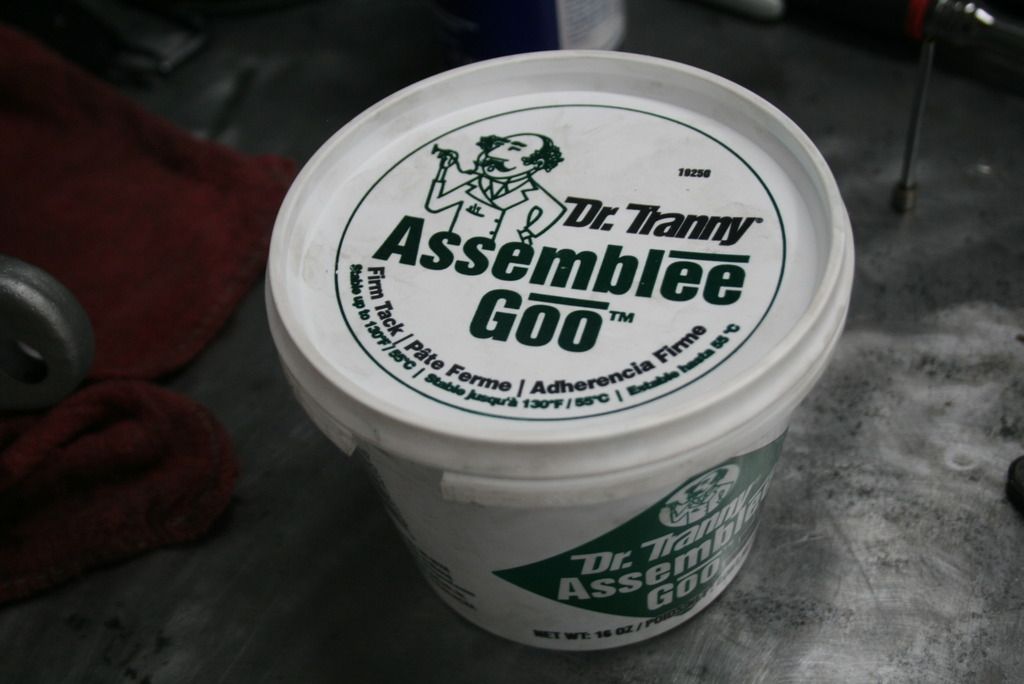
I used transmission specific assembly lube like we used to have at work which is really tacky. It's high quality stuff and not your typical assembly lube. It definitely helps with seals and stuff like that.
The last thing that was sort of uncharted territory for me was line pressure. I bought a line pressure spring from A&A at Carlisle but needed some education on it. I went back and forth on the phone with Turbo Action (who built my valve body) and A&A making sure I had things matched up correctly. There was a question of whether the reverse boost circuit in the valve body had been modified by T/A to reduce the pressure in reverse. (it wasn't) but it was agreed that I could use the spring anyway because the overall line pressure was still faily lo at around 105-110 psi. The spring should put e over 135-140 and potentially up to 150 in gear under load.
Getting the spring in was kind of a *****. You wrangle the spring in behind a plate and force it down while cinching down some little screws. It's tricky to do without a third hand but I managed to get it in and (hopefully) adjusted to the proper point. Since I have the A&A case, there is a bung welded on the pan rail and drilled out to access the line pressure spring to adjust it without dropping the pan. Genius!
Enough babble, here's some pics. I didn't get shots of everything though, sorry picture mongers.
This is the assembly lube stuff. The stuff we used at work was called Smart Blend but this is what I got from the parts place.
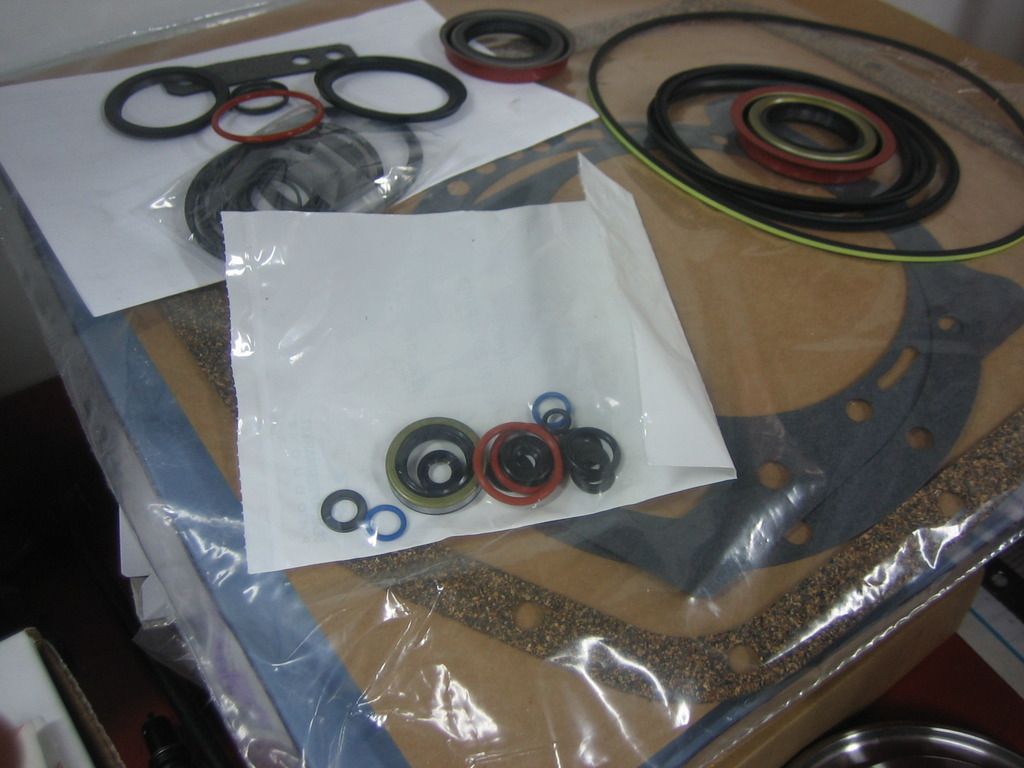
Rebuild kit.
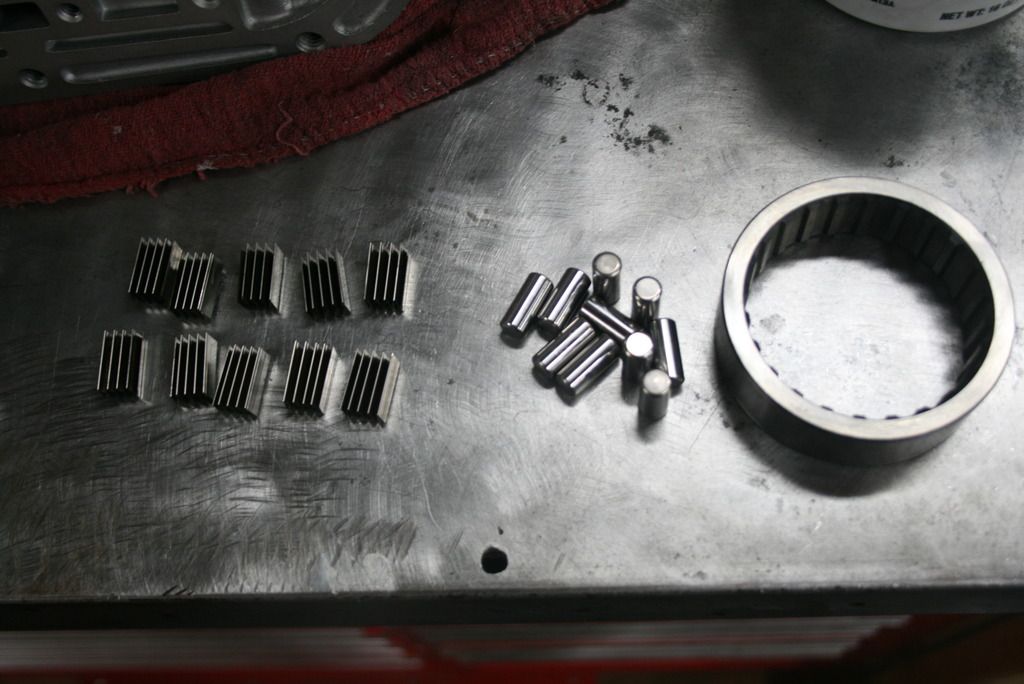
Sprag parts cleaned and ready to install...
...and installed in the case.
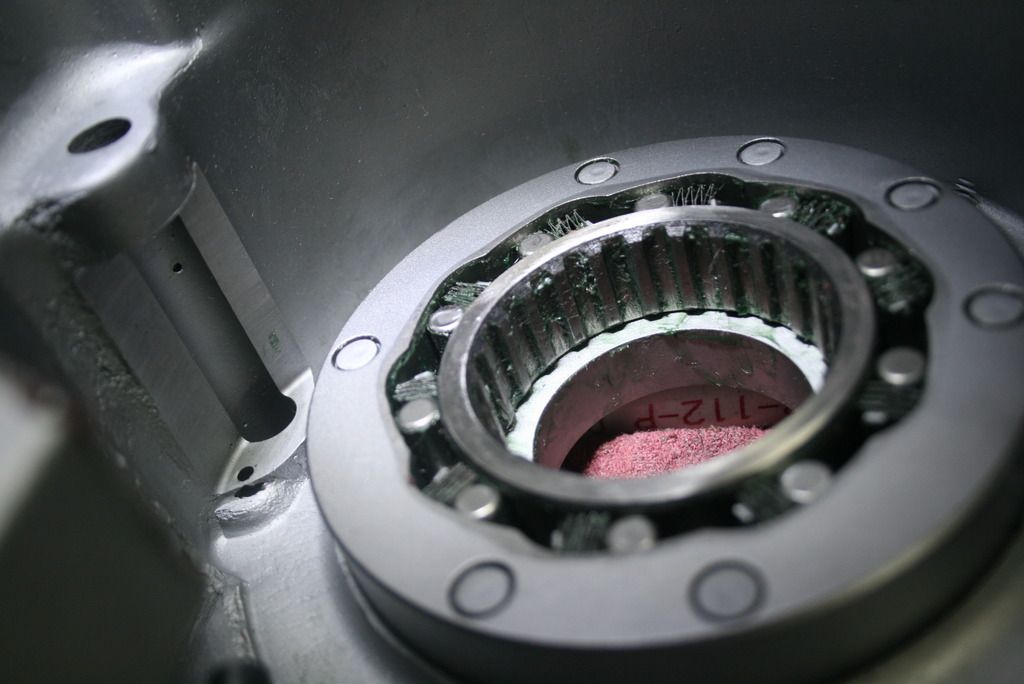
Low reverse drum (which houses the rear planetary gear set) in place.
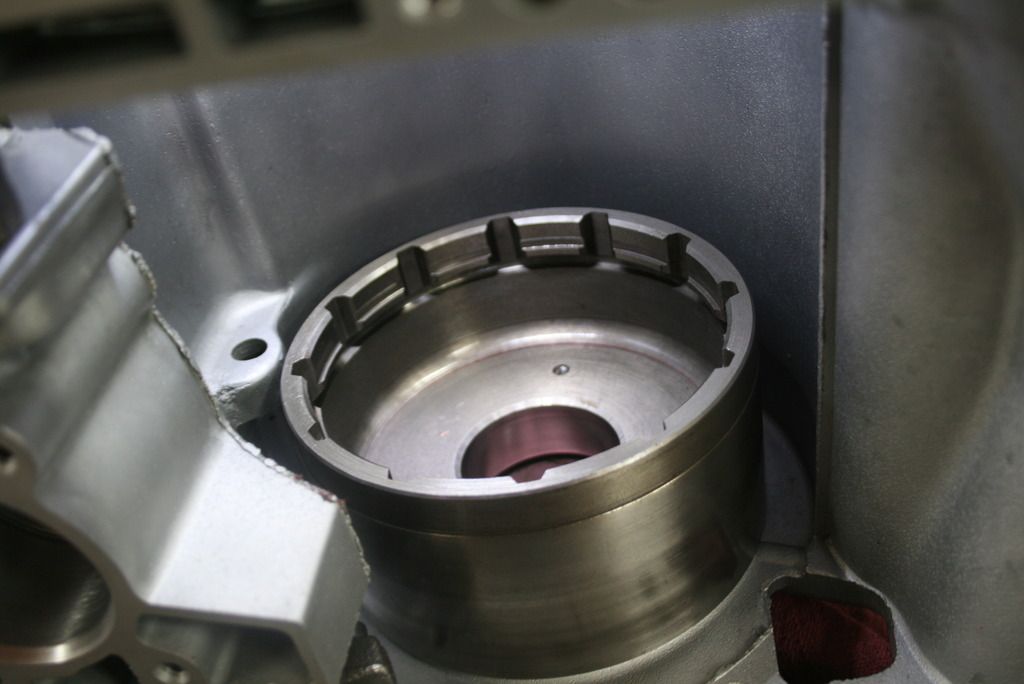
Servo crushing spring compressor in action.
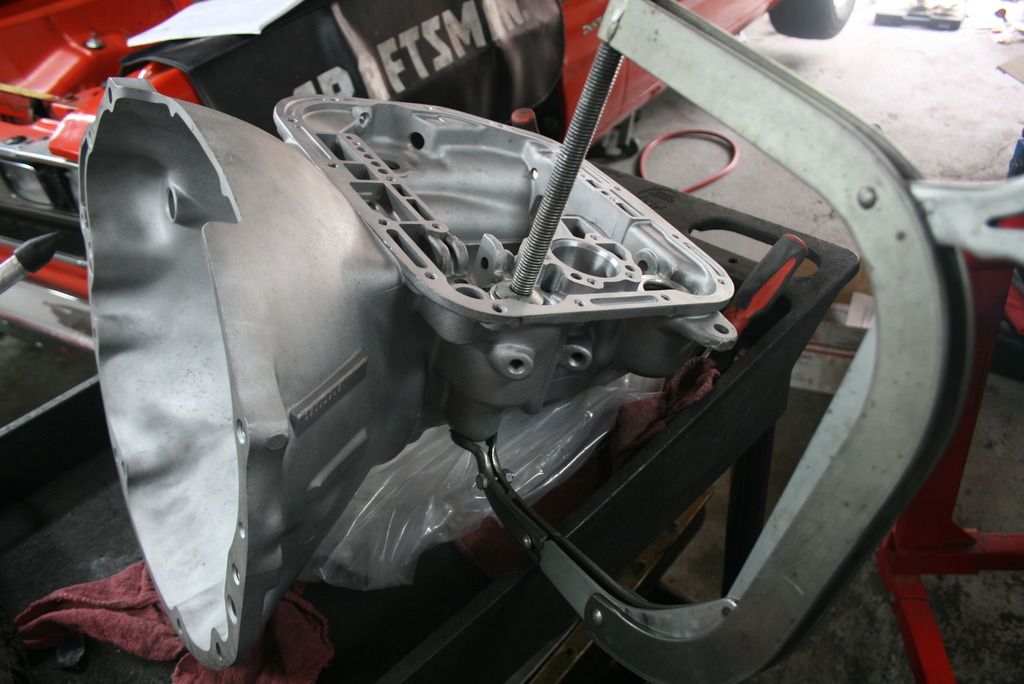
Comparison pic of a factory 3.8 lever and the 4.2. The majority of things I've read about levers say the 5.0 is overkill in most applications.
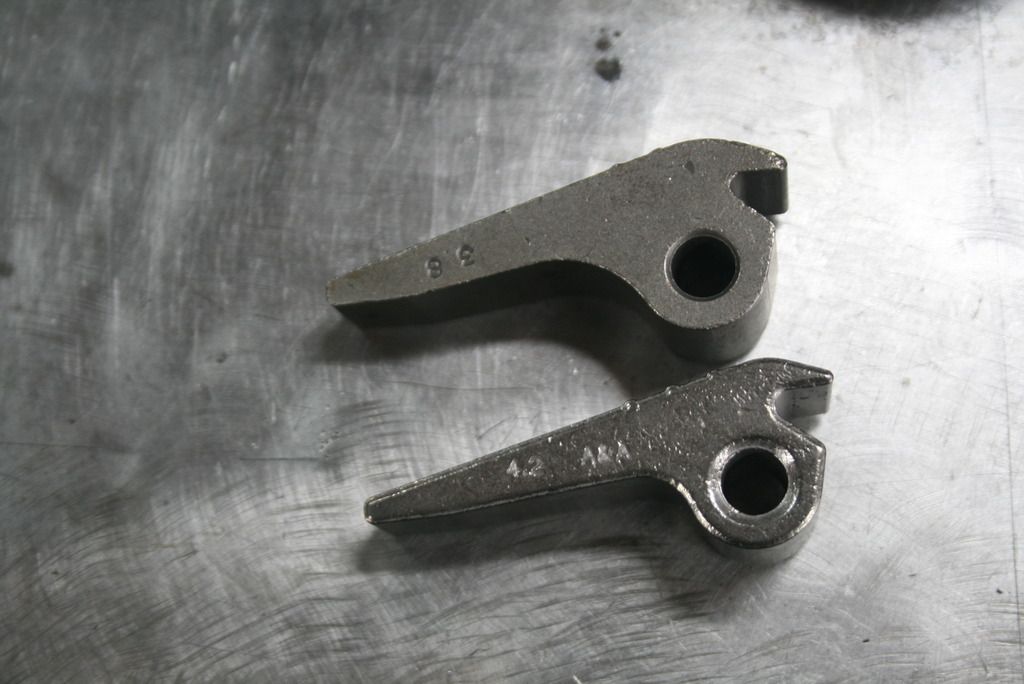
Lever installed. I used a reinforced band strut here but it's not in the pic because the drum is not in yet.
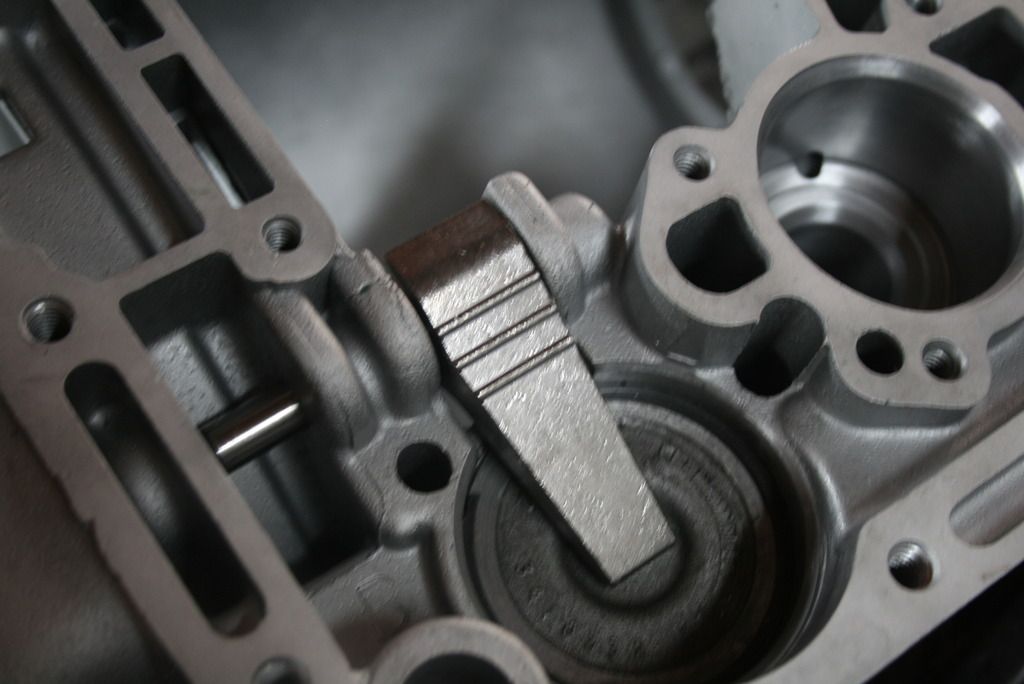
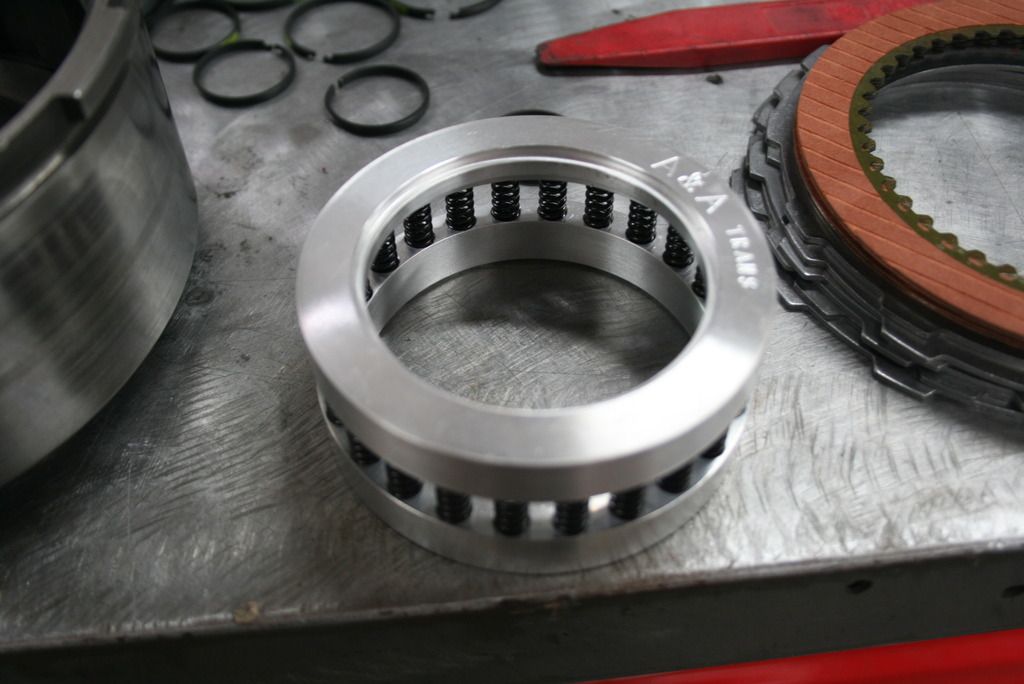
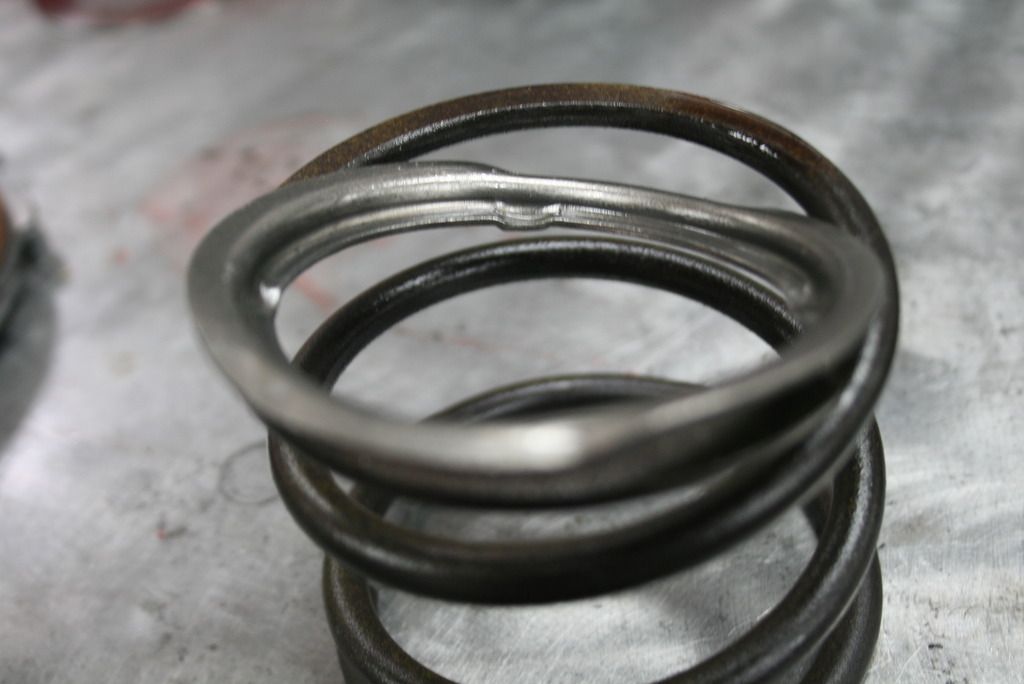
This is a multi-spring retainer for the direct drum to replace the factory part. Its supposed to eliminate shift overlap. The next pic is of the factory spring which according to A&A is wound the wrong way and causes said overlap. Note the spring retainer which got destroyed by the spring compressor.
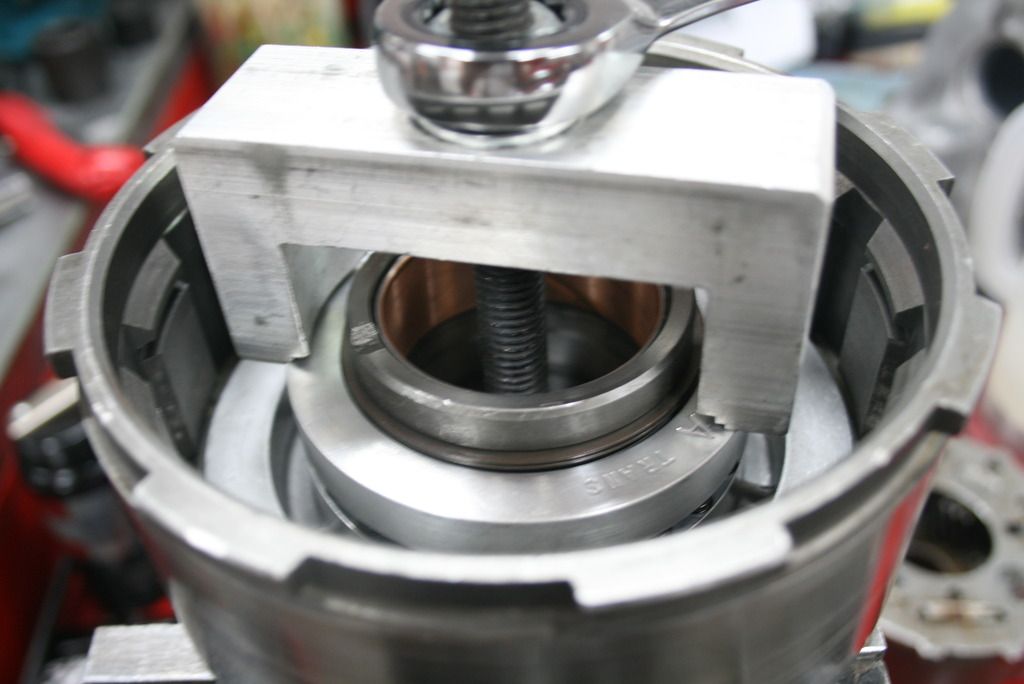
Gorilla spring compressor in action.
Moving towards the front of the trans. This is the old pump bushing. For performance converters, you want a babbit bushing which you can get from most of the vendors. Performance converters have different snout material and the brass bushing chews it up in hsort order - bad.
I didn't have a bushing set at that one point but knew I needed to replace the pump bushing with said babbit piece. I went to the local trans place and the guy looked at me like I was crazy asking for a babbit bushing. He tried to convince me to use a "Sonnax" (genral replacement parts) brass one because it's 'better' but I insisted he get me a babbit one since Dyanamic and A&A both said I need to use it. He found one and put it in. I eventually got a bushing kit later on and had him install the rest of them. I have an extra babbit pump bushing now or next time.
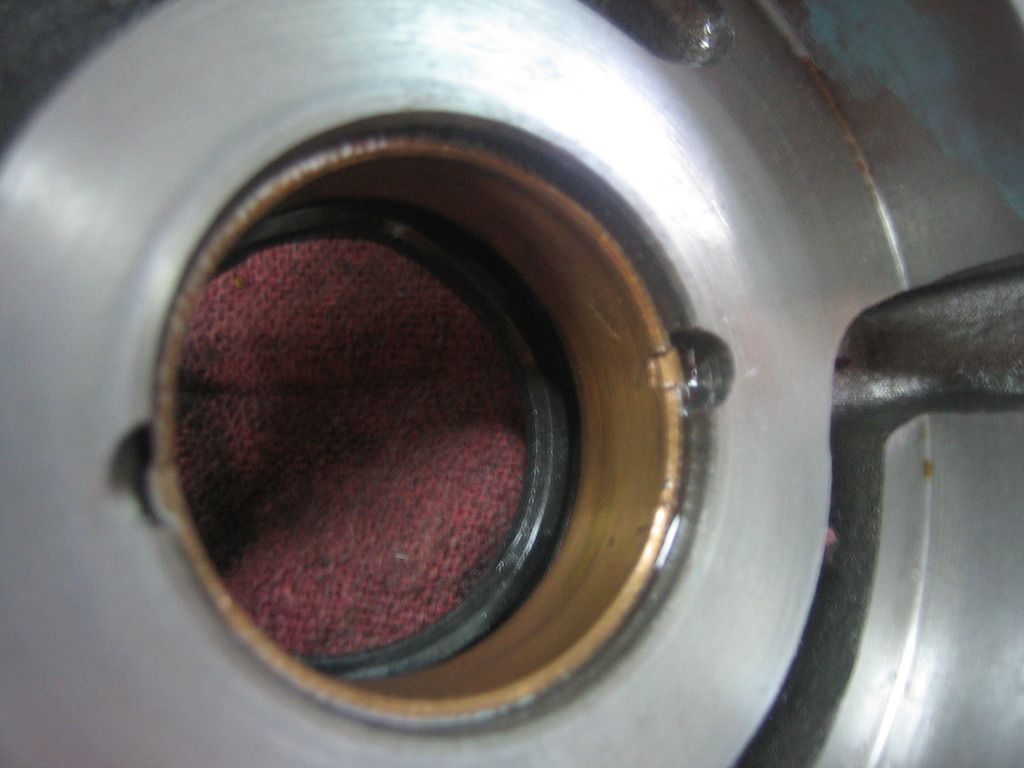
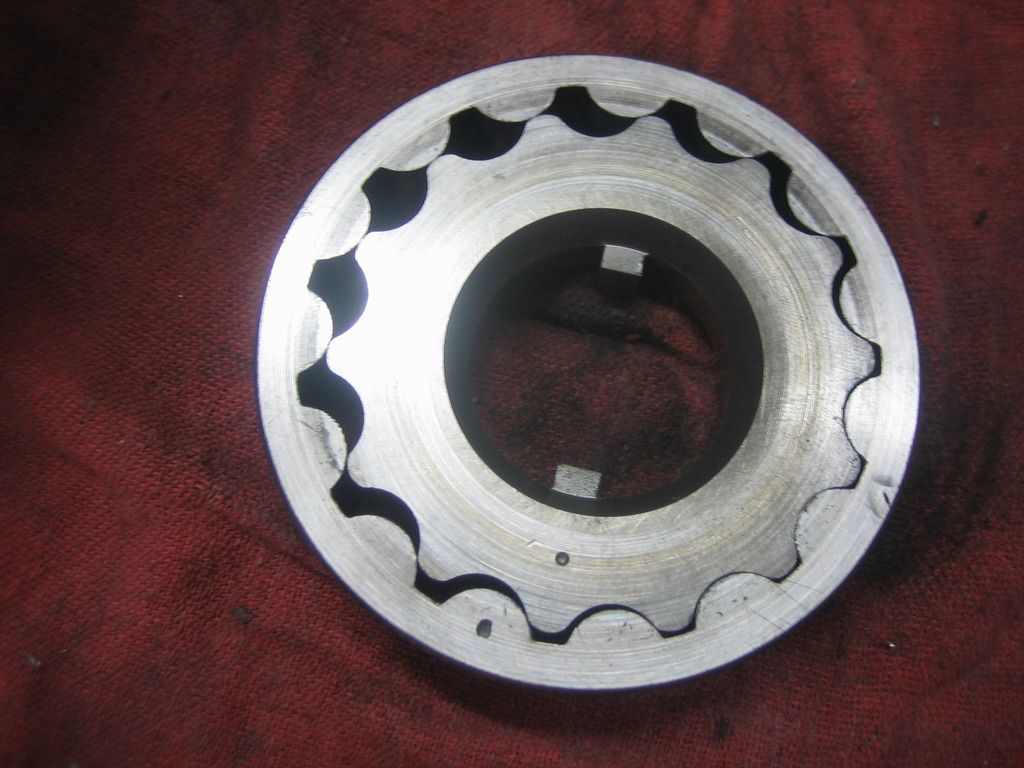
Just a shot of the pump gears cleaned up and ready to go in. There were a few burrs and nicks on the converter hub tangs but no major wear so they got re used.
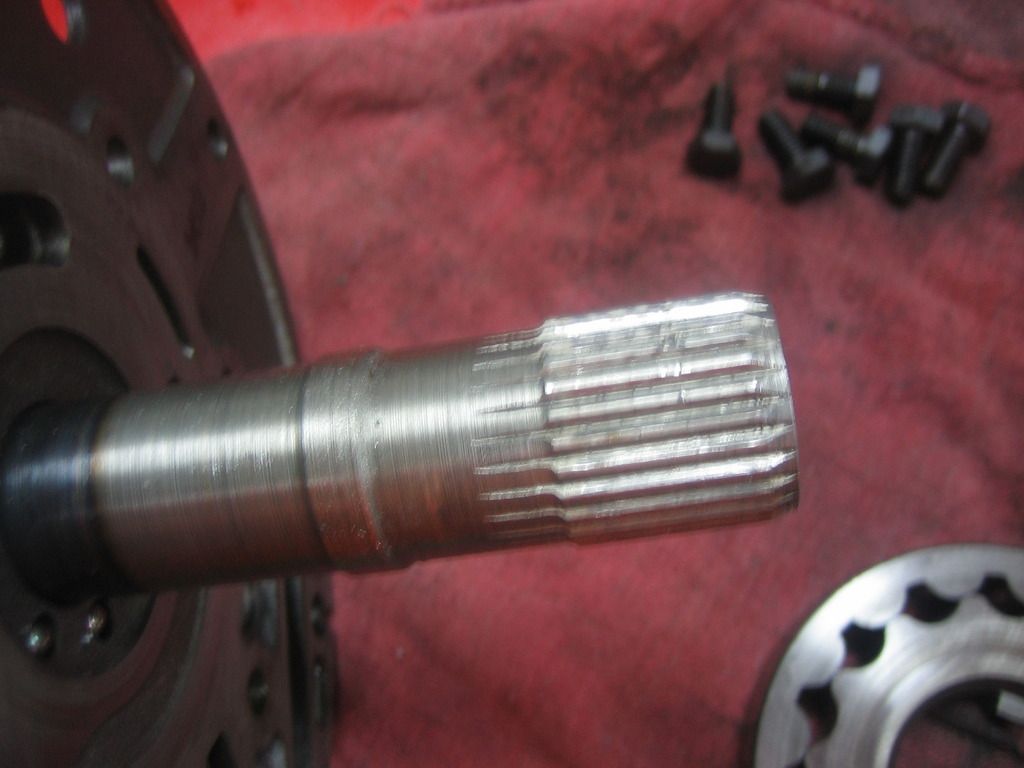
The input splines were a little chewed up si I filed down the burrs with a stone.
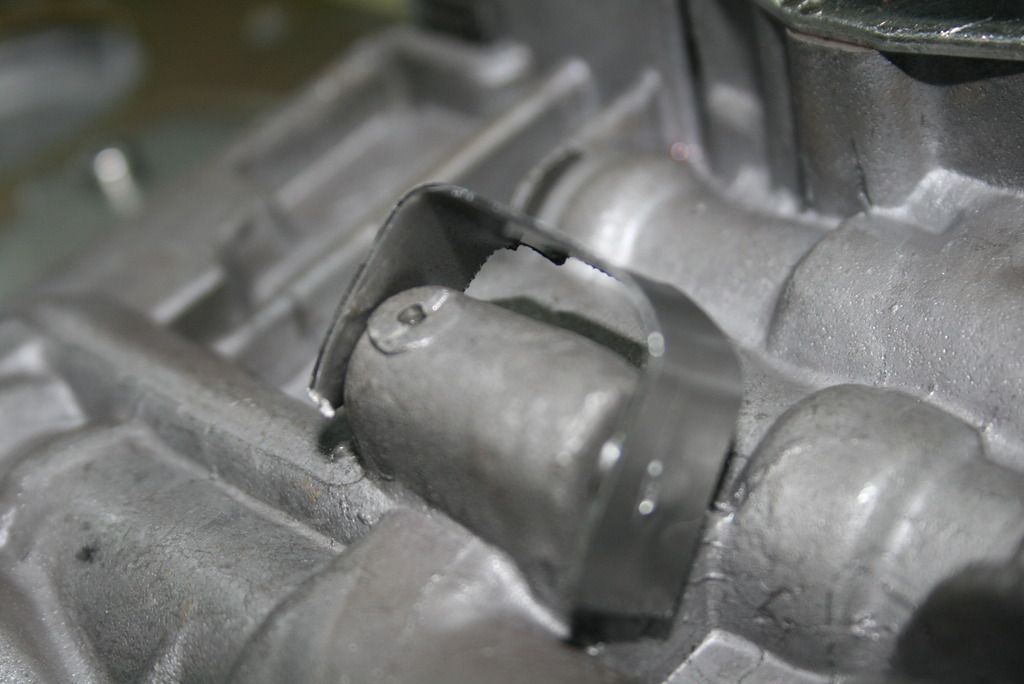
This is a little 'tool' I made to help install the shift tower in the valve body. If you've ever tried to do this without help, it's nearly impossible. There is a spring and a check ball whch you can see in the little housing. The ball rides on the detent rooster comb thing and is held in place with pressure from the spring. There is no way to install the tower while holding the ball and spring in place. I bent a piece of metal and put a dimple in one end to cup the ball. Then I was able to slide the tower in place and release the tool. The ball and spring did go flying once. :D
So that's all the pics I have for now. Thanks for hangin' with me through these last three posts. It was a lot of work to get this all together after my old computer took a dump.
More to come.
Alright, so while I was fumbling around with the engine, I took a break to get my brain straightened out and built the transmission.
I've worked on various transmissions through work and school so I know my way around somewhat but I've never done a performance build up on my own. Getting them out and in is no problem and taking them apart is of course not that hard. Putting it back together obviously takes a little more effort.
It's not unlike building an engine really. You gotta choose the right parts for the application, check your clearances, have some specific tools and know how to use 'em and you must work cleanly.
So this build up centered around a well-used, grimy A999. It' a '76 non lockup unit. The hard parts were in decent enough shape and the clutches even looked OK so it didn't appear too abused, just really dirty. The case was shot though. the bellhousing had been repaired but the mating surface would have needed to be milled flat to work. So I got a 'race prepped' case from A&A but cleaned and re used the original tail housing. I was able to reuse the hard parts inside but went with new clutches and steels, bands and servos. I swapped the valve body from the unit I took out of the car. I replaced most of the bushings and thrust washers too.
I didn't have too much difficulty with it. Save for the proper bushing driver set, I have most of the tools needed to do the job including several flavors of snap ring pliers and a return spring compressor for the direct drum. A local shop did the bushings for me really cheaply and quick so buying the driver set to use a few times didn't make sense.
To get the servos in, I borrowed a burly valve spring compressor from a guy I used to work with. That thing is pro grade beefy and the servos went in without a whimper.
Only thing I could have used was a bench mount holder. Might invest in one for the next trans build up. Wrestling with the case on the bench or on my cart was not the best.
I went slow and steady cleaned everything twice which took forever. I double checked all the clearances where necessary - gear train, front and rear drum clutch packs and end play. I did have to play around with selective snap rings in the drums but the gear train was good. The end play is a little on the looser side but I couldn't really do much about it so I went with what I had. It's within spec just not as tight as I would have liked.
All in all, went together pretty easily. Of course there were a few hiccups but nothing like the engine where I had to go back and re do **** over and over. Most of the missteps were just ordering more parts when I found something I needed but hadn't ordered previously.
I used transmission specific assembly lube like we used to have at work which is really tacky. It's high quality stuff and not your typical assembly lube. It definitely helps with seals and stuff like that.
The last thing that was sort of uncharted territory for me was line pressure. I bought a line pressure spring from A&A at Carlisle but needed some education on it. I went back and forth on the phone with Turbo Action (who built my valve body) and A&A making sure I had things matched up correctly. There was a question of whether the reverse boost circuit in the valve body had been modified by T/A to reduce the pressure in reverse. (it wasn't) but it was agreed that I could use the spring anyway because the overall line pressure was still faily lo at around 105-110 psi. The spring should put e over 135-140 and potentially up to 150 in gear under load.
Getting the spring in was kind of a *****. You wrangle the spring in behind a plate and force it down while cinching down some little screws. It's tricky to do without a third hand but I managed to get it in and (hopefully) adjusted to the proper point. Since I have the A&A case, there is a bung welded on the pan rail and drilled out to access the line pressure spring to adjust it without dropping the pan. Genius!
Enough babble, here's some pics. I didn't get shots of everything though, sorry picture mongers.
This is the assembly lube stuff. The stuff we used at work was called Smart Blend but this is what I got from the parts place.

Rebuild kit.

Sprag parts cleaned and ready to install...

...and installed in the case.

Low reverse drum (which houses the rear planetary gear set) in place.

Servo crushing spring compressor in action.

Comparison pic of a factory 3.8 lever and the 4.2. The majority of things I've read about levers say the 5.0 is overkill in most applications.

Lever installed. I used a reinforced band strut here but it's not in the pic because the drum is not in yet.

This is a multi-spring retainer for the direct drum to replace the factory part. Its supposed to eliminate shift overlap. The next pic is of the factory spring which according to A&A is wound the wrong way and causes said overlap. Note the spring retainer which got destroyed by the spring compressor.


Gorilla spring compressor in action.

Moving towards the front of the trans. This is the old pump bushing. For performance converters, you want a babbit bushing which you can get from most of the vendors. Performance converters have different snout material and the brass bushing chews it up in hsort order - bad.
I didn't have a bushing set at that one point but knew I needed to replace the pump bushing with said babbit piece. I went to the local trans place and the guy looked at me like I was crazy asking for a babbit bushing. He tried to convince me to use a "Sonnax" (genral replacement parts) brass one because it's 'better' but I insisted he get me a babbit one since Dyanamic and A&A both said I need to use it. He found one and put it in. I eventually got a bushing kit later on and had him install the rest of them. I have an extra babbit pump bushing now or next time.

Just a shot of the pump gears cleaned up and ready to go in. There were a few burrs and nicks on the converter hub tangs but no major wear so they got re used.

The input splines were a little chewed up si I filed down the burrs with a stone.

This is a little 'tool' I made to help install the shift tower in the valve body. If you've ever tried to do this without help, it's nearly impossible. There is a spring and a check ball whch you can see in the little housing. The ball rides on the detent rooster comb thing and is held in place with pressure from the spring. There is no way to install the tower while holding the ball and spring in place. I bent a piece of metal and put a dimple in one end to cup the ball. Then I was able to slide the tower in place and release the tool. The ball and spring did go flying once. :D

So that's all the pics I have for now. Thanks for hangin' with me through these last three posts. It was a lot of work to get this all together after my old computer took a dump.
More to come.