Stop in for a cup of coffee
bookmarked - thank you!I saw the conversation earlier today about changing the fluid and filter in the NAG1 transmission. It's really very simple to do and there isn't any magic to knowing how much fluid to replace (even without the dipstick). You can also buy the Miller tool that is used to check the tranny fluid if you really want one. B&M makes one too.
Here's the How-to...
1 Raise the vehicle SAFELY as far as possible and stabilize using jack stands (unless it is on a lift).
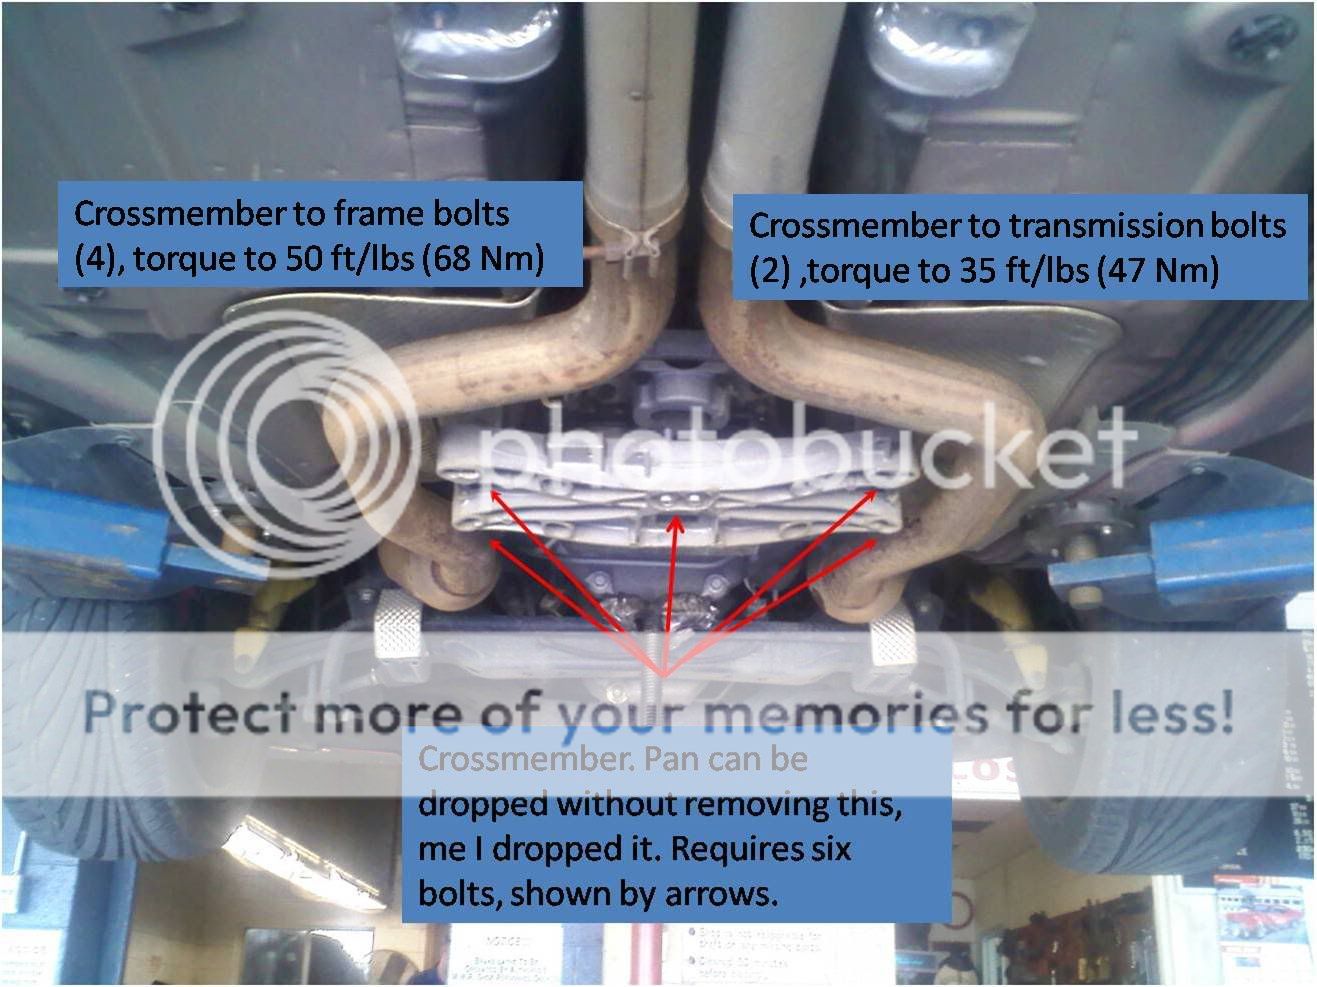
2. You can remove the pan without removing the trans crosamember, if you have the right extensions/universal joints for your male torx bit. Its easier to just drop the crossmember, especially on a lift. The six bolts to do so are shown below.
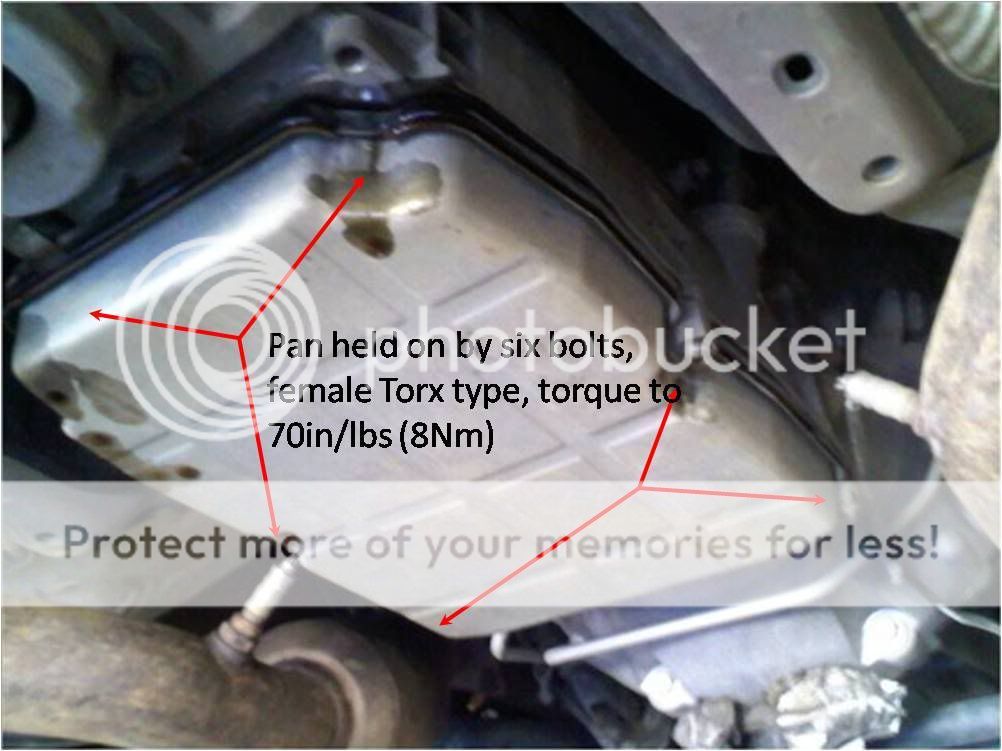
3. Next, you will want to get a BIG drip pan, at least 2 feet across, as this next bit WILL be messy. Lots of folks fit a drain plug the first time, so its not so messy the next time. You will want to break all six bolts loose, just a bit, to ensure you don't have any heartache 5 bolts inThen start loosening them from one corner out, remove that one corner bolt, like you see in the pic. Then loosen the others from that corner out, so that that corner drops down first. This lets a lot of fluid out before you drop the pan completely, making this step not so messy.
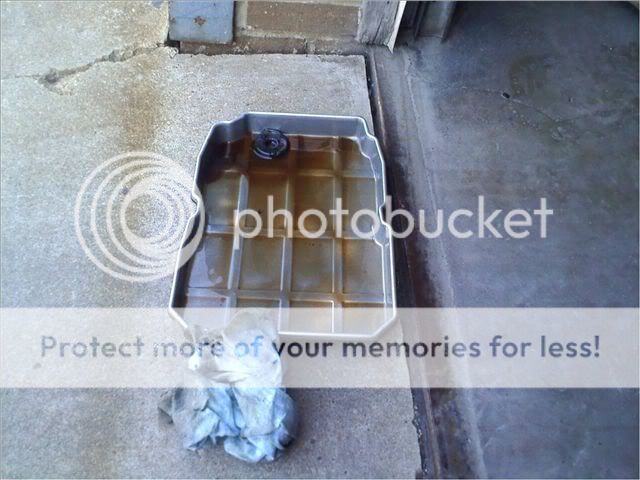
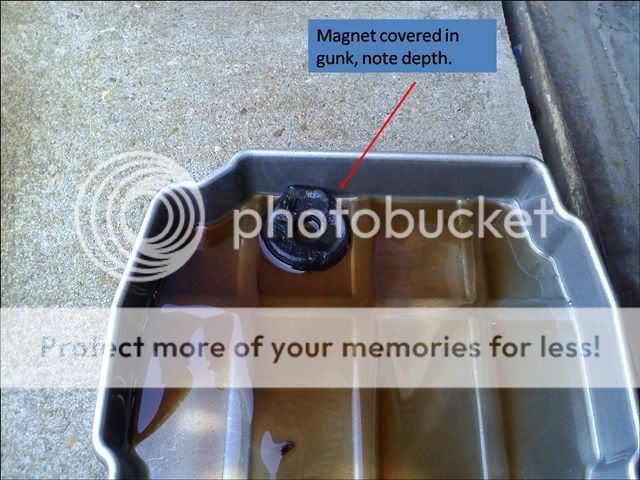
4. So now you have the pan out and drained, and it looks like what you see below. Note the lack of a gasket, that was pulled off before off I took this pic. This pan, and more importantly, that black circle you see, CLEAN them. That circle will be tough, its actually a magnet that traps particles, and as you see from the close-up where I mushed it the goo with my finger.
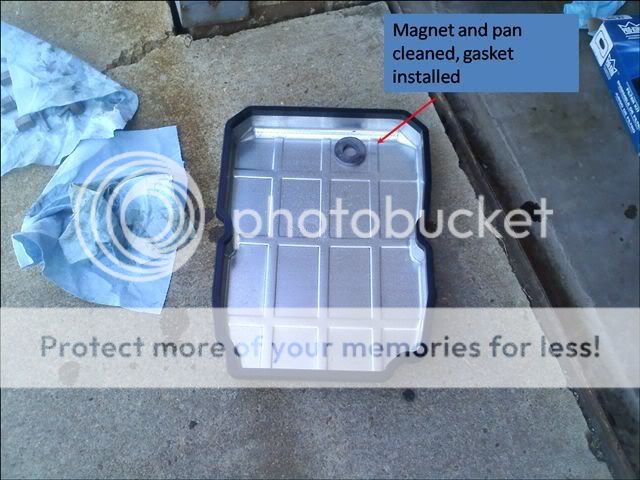
5. Now that the pan is cleaned, install new gasket, if your kit came with one, or clean the heck out of the old one and reuse it. Should now look like this. Note position of the magnet, in back of pan. If you put it in front, when installing the pan, it will draw the filter out of the valve body. Not optimal
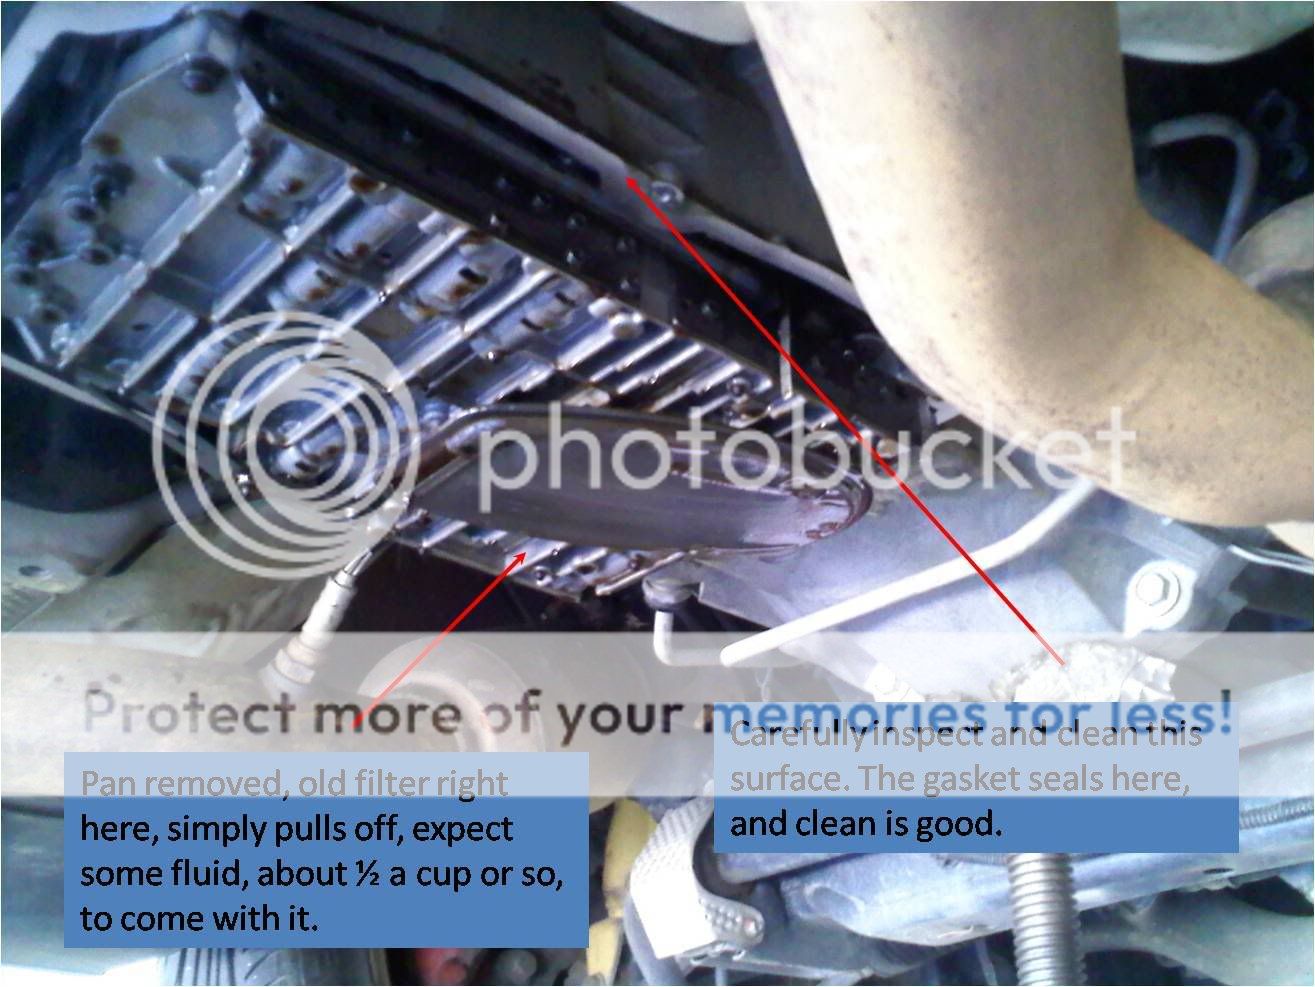
6. Now to remove the old filter and clean/inspect the gasket surface. Here's what it looks like. If its cool enough, use a lint-free cloth to clean, and a then a finger to feel, that gasket surface. Nothing will catch imperfections like a finger. Then just tug the old filter straight down, expect a gush of fluid, safety glasses are a good bet to avoid splashes in the eye.
7. Here it is with the filter removed, and a pic of the new filter. Note the slot in the valve body and the hole the filter tube came out of. These of course match up with the new filter, if not, "get thee to the parts store!". When you push the new filter in, it will sag a little when you let go. That's normal, just make sure its tab is lined up with the slot.
8. Almost done. This is the new filter, note tab and tube. Install, then install pan and cross member and fill with 4.5 quarts.
Here is the link to get a transmission dipstick tool if you want one...
V6 engines https://www.summitracing.com/parts/bmm-22300/overview/
5.7L V8 engine https://www.summitracing.com/parts/bmm-22301/overview/
6.1L/6.4L Engine https://www.summitracing.com/parts/bmm-22302/overview/
