65 Dart Wagon Conversion to a Sedan Delivery
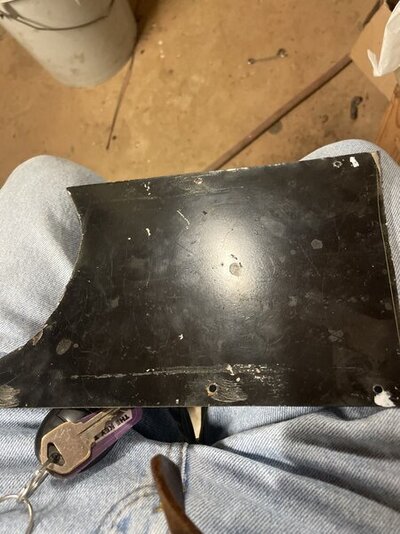
So to continue where I left off, my original plan was to mount the main control module and auxillary ones to the upper kick panel area. I didn’t like that at all. So i considered even higher on the inner panel near the cowl since I could sort of access everything through the instrument cluster opening. I thought about that and how would I secure all the wires in the limited skace I had. IMO that wasn’t really going to work either. So my solution was to fabricate a mounting plate for everything and install it to the lower dash and fresh air vent

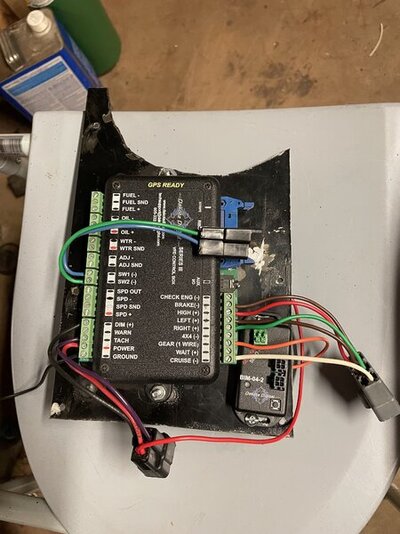
So I welded some machine screws to the plate to hold the main module and the gear position module. I figured I could then work a lot easier to install all the wires then install the modules to the plate. I soon learned 2 hands don’t work to well through a limited size oprning! So back to thinking about it. I finally decided to nake a jumper harness with terminals and connectors so all I’d have to do is plug in from the dash harness. I liked that solution. So i used a 2 terminal connector for Switch 1 abd 2, a 3 terminal connector for the DIM, TACH and POWER wires snd a 6 terminal connector for the 5 wires on the other side - Brake, Hi Beam, L and R Turn signals and Cruise (if added).

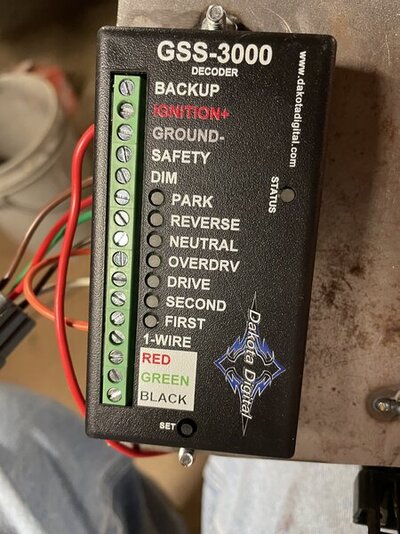
You can also see an orange wire from the GEAR and another red wire from the power wire routed to the back side to the GSS3000 logic module for it’s power and to the 1 wire terminal

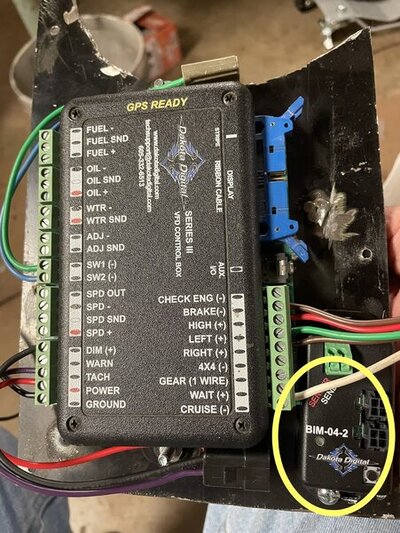
The final module is kind of tucked under the wiring on the right side of the control module and circled in yellow. This is for an auxiliary temperature gauge within the cluster. It could be for transmission or engine oil temperation. This modules plugs into the main control module for its power

I’ve still got to install the wiring from the fuel sender,oil pressure, water temperature and aux oil temperature sending units. After i get the running gear installed and run those cables, i can finish this portion of the job
So to continue where I left off, my original plan was to mount the main control module and auxillary ones to the upper kick panel area. I didn’t like that at all. So i considered even higher on the inner panel near the cowl since I could sort of access everything through the instrument cluster opening. I thought about that and how would I secure all the wires in the limited skace I had. IMO that wasn’t really going to work either. So my solution was to fabricate a mounting plate for everything and install it to the lower dash and fresh air vent

So I welded some machine screws to the plate to hold the main module and the gear position module. I figured I could then work a lot easier to install all the wires then install the modules to the plate. I soon learned 2 hands don’t work to well through a limited size oprning! So back to thinking about it. I finally decided to nake a jumper harness with terminals and connectors so all I’d have to do is plug in from the dash harness. I liked that solution. So i used a 2 terminal connector for Switch 1 abd 2, a 3 terminal connector for the DIM, TACH and POWER wires snd a 6 terminal connector for the 5 wires on the other side - Brake, Hi Beam, L and R Turn signals and Cruise (if added).

You can also see an orange wire from the GEAR and another red wire from the power wire routed to the back side to the GSS3000 logic module for it’s power and to the 1 wire terminal

The final module is kind of tucked under the wiring on the right side of the control module and circled in yellow. This is for an auxiliary temperature gauge within the cluster. It could be for transmission or engine oil temperation. This modules plugs into the main control module for its power

I’ve still got to install the wiring from the fuel sender,oil pressure, water temperature and aux oil temperature sending units. After i get the running gear installed and run those cables, i can finish this portion of the job