71Scamper
Mopar runs thru my veins!
I've only seen one other person post any pictures of what they did for modifications to fit a 4L60E in their car, so I thought I would share my experience (with pictures of course!) This trans was a Keisler setup to begin with and has a PCS programmable TCU. I got in touch with Keisler's successor, Silver Sport Transmission, and they were extremely helpful in getting me detailed instructions on what needed to be done. This is only meant to be a tutorial for those looking to possibly do this swap. Please don't make negative comments on this thread about this install. Greatly appreciated!!!
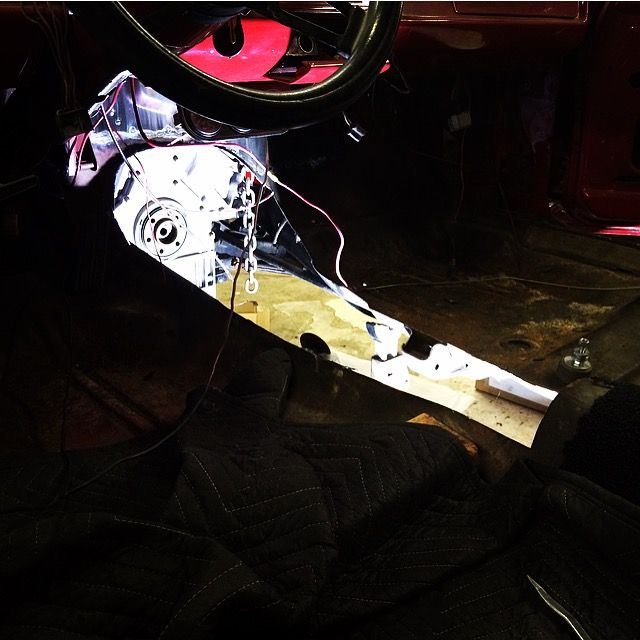
So at first I did a test fit of the trans to see where the tail shaft housing boss would hit on the torsion bar cross member. Without getting the rear of the trans all the way up into place due to interference, about 1 inch notched out would of been just enough for the trans to clear the cross member. I wanted some extra clearance, SST recommends a 1/4" clearance, I went 1/2" more for a total of 1.5". I cut from just inside the cross member bolt holes straight up then around the trans tunnel hoop, but retained the flange that is flat against the floor board.
https://drive.google.com/file/d/0B5Ry6Ee7e36IZE5kYW1Nc05Dcnc/view?usp=sharing
^^^shot from directly underneath the cross member^^^
https://drive.google.com/file/d/0B5Ry6Ee7e36ILTFick81Wm4xZ2M/view?usp=sharing
^^^shot looking directly straight back from crank shaft centerline^^^
https://drive.google.com/file/d/0B5Ry6Ee7e36ITGVMaGZUcGNlTzQ/view?usp=sharing
^^^The piece I removed^^^
What you see inside the cut away area is a piece of 3/16" thick by 2" wide flat steel plate. I made a template out of cardboard (center divider from my beer case lol!) and then bent the plate steel using an oxy/acetylene torch matching the outer shape of the horse shoe like hoop with the card board template. You can actually see a little burn mark in the upper left corner on the template from the hot bar.
https://drive.google.com/file/d/0B5Ry6Ee7e36IWnN6a2ZwYkQ0U3M/view?usp=sharing
Next I made another template for a filler piece to cover the opening of the remaining cross member. I decided instead of using the 1/8" plate, recommended by SST per instructions, to use a piece of 1/4" plate to act as a rib and add rigidity. This is going to be far stronger than the factory setup by the time I'm done.
https://drive.google.com/file/d/0B5Ry6Ee7e36ITEIzWkRNVlN4Mjg/view?usp=sharing
^^^Finished 1/4" thick filler plate/rib^^^
https://drive.google.com/file/d/0B5Ry6Ee7e36IOHhnSEJUWHlKZ3c/view?usp=sharing
^^^ 1/4" filler plate in place^^^
I get paid Thursday and plan on getting my Argon tank filled and will have this all TIG'd up. Stay tuned for the rest of the install....