65 Barracuda Gasser + 1956 325 Dodge Hemi Build

-

chip77

60 Plymouth Valiant
Joined
Oct 23, 2010
Messages
94
Reaction score
30
Location
michigan
Work on my gasser engine swap has started.....yipee! Had the 1956 Dodge hemi gone through by Koffels Place in MI. They did all the good stuff; balanced, bored, crank turned, rods reconned, new pistons, etc.

While that was going on, we pulled the brand X engine out of the car and now have a wide open engine bay. First thing was to completely remove the old engine mounts and clean up the frame rails. The straight axle front end really opens up the space available for the little hemi and that is good!

The first pics show the bare block bolted up to the Hot Heads trans adaptor and just sitting in the car so we can size it all up and check for "apparent" issues. We'll start building the new motor mounts next and once the motor is set put on a HEMI head and fab up the headers.

So my plan is to keep you all updated on the engine install and mods and the building of the short block as we progress through assembly. Hopefully I don't get too excited and forget to take pics as we progress!

Now if I can only get the pics to load!!:banghead:
 
can't seem to get them uploaded. didn't have any problems with members photo gallery, but won't load here!! hmmmmm
 

Attachments

  • 206 (800x600) (640x480).jpg
    52.1 KB · Views: 2,090
  • 201 (800x600) (640x480).jpg
    62.4 KB · Views: 2,051
  • 202 (800x600) (640x480).jpg
    75 KB · Views: 2,025
  • 203 (800x600) (640x480).jpg
    63.6 KB · Views: 2,008
  • 204 (800x600) (640x480).jpg
    68.8 KB · Views: 2,033
  • 205 (800x600) (640x480).jpg
    129.1 KB · Views: 2,045
Work continues on the engine mount fab and mods. Some more pics show boxing the frame rails where the motor mounts will attach. the close proximity to the steering box and the master cylinder. a hemi head sitting on the block to check out how the header tubes will run......notice how the old hemi exhaust ports are nearly horizontal!
Keep in mind the block still is not centered in the engine bay and the motor angle has not been established yet. looks like we will have to do some mods to the trans mount to get the proper attitude.

If anyone is interested the mods are being performed by a very talented young guy named Jim O'Dell. He owns "O'Dells Garage" in Monroe, MI and has some impressive work to already to his credit.

I'm including some pics of some of the engine accessories too. Tri-power with Rochester 2G carbs, the valve covers and hand fabbed valley cover. Hope you enjoy them. Chip
 

Attachments

  • 011 (640x480).jpg
    63.1 KB · Views: 1,937
  • 010 (640x480).jpg
    68.2 KB · Views: 1,913
  • 009 (640x480).jpg
    61 KB · Views: 1,934
  • 007 (640x480).jpg
    56.5 KB · Views: 1,945
  • 006 (640x480).jpg
    74 KB · Views: 1,959
  • 005 (640x480).jpg
    70.5 KB · Views: 1,935
  • 004 (640x480).jpg
    69.3 KB · Views: 1,961
  • 001 (640x480).jpg
    69.8 KB · Views: 1,963
here are the pics of the "goodies"........
 

Attachments

  • 005 (640x480).jpg
    67.9 KB · Views: 1,940
  • 004 (640x480).jpg
    49.4 KB · Views: 1,932
  • 003 (640x480).jpg
    64.4 KB · Views: 1,933
  • 002 (640x480).jpg
    136 KB · Views: 1,939
  • 001 (640x480).jpg
    135 KB · Views: 1,980
Work continues and the fab is starting to take shape. The motor mounts are tacked in, so that means the engine height and angle have been set. One problem that was dealt with was that due to the nose high attitude of the gasser stance the new engine had to be leveled independent of the cars stance. It ends up meaning that we have to raise the trans too to keep the proper angle. One pic shows the space (about 3") from the trans support to where the it will now be located. With the carbs and air cleaners sitting on the top they come just up to the bottom of the hood, so I think the engine height is just right.

the motor mounts had to be modified quite a bit. first to match the correct bolt pattern and second to match the width of the tabs on the block. I purchased two different sets of motor mounts and neither fit correctly. Oh well, it is good to have a good install man. the finished product looks great and should be very strong after gussets and welding is completed.

We also moved the engine forward about 3/4" in the engine bay. You can see that there is plenty of room between the firewall now. After laying the head on the passenger side the closeness of the header angle is evident. the header fab will be interesting! Plan for the headers is to take the brand X fenderwell headers that were in the car already and cut them back about 10 inches (removing the old header flange) and fab new transition pcs matching the hemi ports. Should be pretty neat when it all come together. hope you enjoy the pics......
 

Attachments

  • 015 (640x480).jpg
    66.3 KB · Views: 1,841
  • 012 (640x480).jpg
    130.3 KB · Views: 1,863
  • 011 (640x480).jpg
    57.7 KB · Views: 1,838
  • 009 (640x480).jpg
    54.2 KB · Views: 1,860
  • 008 (640x480).jpg
    63.8 KB · Views: 1,853
  • 007 (640x480).jpg
    67.5 KB · Views: 1,831
  • 004 (640x480).jpg
    49.1 KB · Views: 1,870
  • 003 (640x480).jpg
    68.5 KB · Views: 1,871
  • 002 (640x480).jpg
    62.9 KB · Views: 1,861
  • 001 (640x480).jpg
    73.7 KB · Views: 1,879
more pics!!
 

Attachments

  • 021 (640x480).jpg
    66.3 KB · Views: 1,836
  • 020 (640x480).jpg
    46.9 KB · Views: 1,812
  • 019 (640x480).jpg
    87.4 KB · Views: 1,847
  • 018 (640x480).jpg
    44.4 KB · Views: 1,807
  • 016 (640x480).jpg
    54.8 KB · Views: 1,852
I'm watchin' Great build! Can't wait for what's next! tmm
 
I love watching creative ideas,also like that your adding pics as you build.Many members get ideas from the smallest things.Keep up the great work.:D
 
Thanks so much for the kind comments about my ongoing build. I too cannot wait to see the finished HEMI between the fenderwells.
In the mean time I thought I would throw together a list of the vendors and parts guys I've used to get this far. I've been gathering parts for almost two years now......so here goes.

I found the complete motor in Illinois and drove there to pick it up...my first $1000 expenditure.
Tex Smith's "The Complete Chrysler Hemi Engine Manual" by Ron Ceridono....get it!
Become familiar with the website "The Jalopy Journal" the HAMB. Excellant swap meet section and vast wealth of information and help. This is where I found the engine I bought.
The following vendors are some that I have reciepts from......so I know I used them for something!!
The Internal Engine Parts Group.....Meridan, Missouri
Falconglobal.com
Totally Stainless
Northern Auto Parts
Hells Gate Hot Rods
Hot Heads Racing and Research (your one stop shopping for everything old hemis)
Koffel's Place, Walled lake, MI Machine shop and all things MOPAR engine (248)363-5239 excellent to work with!
Gary's Automotive
Kanter Auto Products
Street Rods, Parts & Memorabilia
Chris Nielson Vintage Racing Cams (re-grind cams and excellent source for parts)
AAAA Automotive (Rochester carbs....tri-power)
White Performance (Mopar ignition stuff)

I have not listed contact info for these places as most of them are either ".com" or a simple search to find them by name. If however anyone needs a phone number, etc. I will be glad to help if I can.

Also I know I am leaving some out.....that is the price we pay for getting old!

I know we'll have some more progress on the fabrication this week so I'll be posting as it is done.

Also, just alittle "history" on the Barracuda. The gasser was built by a guy in Kentucky and I purchased from from the 1st buyer after the build.
The front axle is out of a Chebby van (with disc brakes) and the rear end is a Ferd 8" with 4:10 gears and a mini-spool. It had a sbc roller motor with a built T-350 trans. I decided to keep the T350 and hence the trans adaptor. From the moment I bought the car I knew I would end up with a Hemi between the rails......so here we are!

Thanks again for the interest and encouragement.......I'll keep you posted!
Best, Chip
 
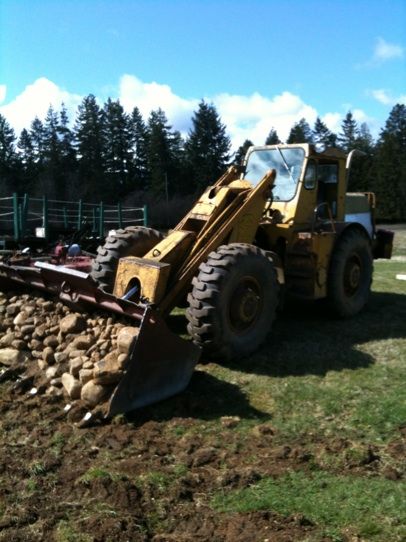
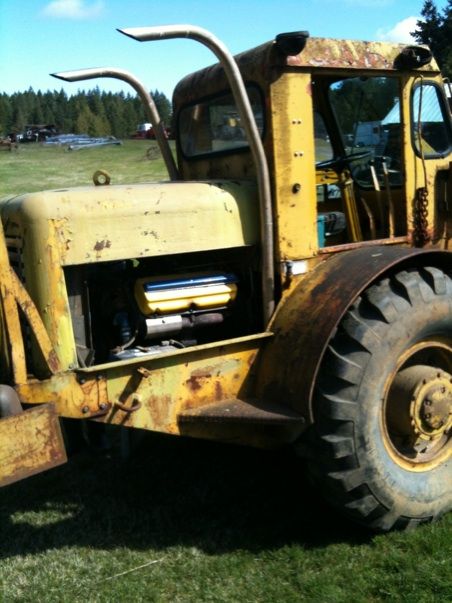
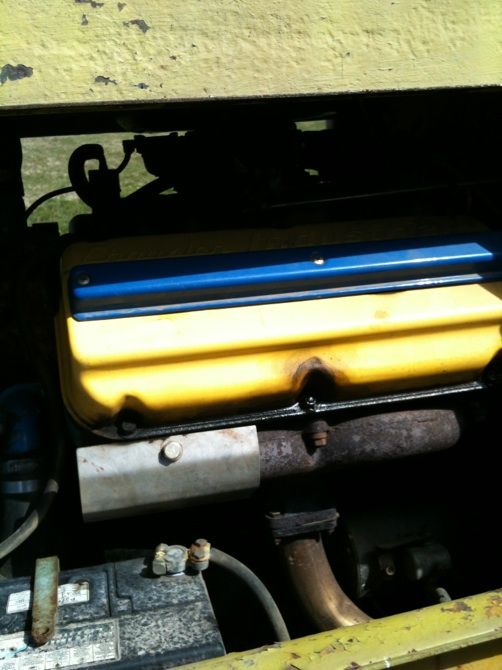
Damn, that is so cool! A friend of mine has a large collection of 1st gen Hemi's, he has fabbed them into everything! He runs a 354 Industrial in his front end loader, which is the same year as the Hemi. That old Hemi with straight pipes and no mufflers sounds pretty awesome when he opens it up to pull stumps.

joe8.jpg


joe9.jpg


joe10.jpg
 
While not really part of the engine fit-up and fab work, I thought I'd keep sharing the ongoing process for the rebuild of the little hemi.
Picked up the finished heads from RSS Engineering today and they look great! New valve guides, new hardened exhaust seats, new one piece stainless steel valves, new springs....you know, all the good stuff, done right. I'll get to throw some paint on them tomorrow and they should be ready to go for the final assembly. The valve train assemblies (rockers and shafts)are already rebuilt (I did them) and I'll pull them out to take pics when I get a chance.
There has been some more work done on the engine fab/install, I just haven't taken more pics yet.
 

Attachments

  • 006 (640x480).jpg
    63.3 KB · Views: 1,574
  • 004 (640x480).jpg
    68 KB · Views: 1,589
  • 003 (640x480).jpg
    72.2 KB · Views: 1,583
  • 002 (640x480).jpg
    65.1 KB · Views: 1,578
  • 001 (640x480).jpg
    63.4 KB · Views: 1,582
I am building a gasser myself...so I find this really cool. I wonder if the axle came from one of those flat nose late 60s vans...
 
Christmas time is a time for families and eating........but now we are back to the build! Some progress was made and the pics will tesify to that.
The new trans crossmember was fabbed and fitted back in.
The headers have been taking up most of the fab time. The passenger side is pretty much done.....after about 30 hours of work. Some of the pics will show the finished product. There is a pic of the brandX flange that was cut off. One thing to remember is that mopar wedges and most other heads have ports that point out to the side. I wanted to retain the fender well look for the hemi and its ports point almost straight down. We picked the hardest side first to do.......and it looks pretty cool! The set of headers that we started out with were pretty well made and I'm sure that helped our build. We'll start on the drivers side tomorrow.....should be a cake walk.](*,)
There are some pics of the templates and "figuring" involved in the header process. One thing for sure, if you don't have patience don't build/modify headers!!
Right now there is about 1/2" clearance between the tubes and where they pass over the frame......think that is enough?

I've also included a couple of pics of the chevy van front axle and disc brake set up. Yep, its from a 60's van or truck.
 

Attachments

  • 060 (640x480).jpg
    52.8 KB · Views: 1,483
  • 052 (640x480).jpg
    67.7 KB · Views: 1,464
  • 053 (640x480).jpg
    60 KB · Views: 1,440
  • 050 (640x480).jpg
    51.2 KB · Views: 1,448
  • 046 (640x480).jpg
    134.6 KB · Views: 1,481
  • 043 (640x480).jpg
    118.6 KB · Views: 1,504
  • 041 (640x480).jpg
    58.6 KB · Views: 1,469
  • 042 (640x480).jpg
    61.9 KB · Views: 1,473
  • 051 (640x480).jpg
    60.9 KB · Views: 1,487
  • 057 (640x480).jpg
    56.9 KB · Views: 1,466
-
Back
Top