was your car optioned with a stripe? i see your fender tag posted, but its hard to read. Our cars seem to be somewhat similar, and the V02 option is very interesting. Im not sure the bodyshop hit my FT6 color just right, im thinking the new water based paints and high solids clear are much more vibrant than the origional single stage paints.
You are using an out of date browser. It may not display this or other websites correctly.
You should upgrade or use an alternative browser.
You should upgrade or use an alternative browser.
Arizona Swinger
- Thread starter bmaudlin
- Start date
-
bmaudlin
Well-Known Member
was your car optioned with a stripe? i see your fender tag posted, but its hard to read. Our cars seem to be somewhat similar, and the V02 option is very interesting. Im not sure the bodyshop hit my FT6 color just right, im thinking the new water based paints and high solids clear are much more vibrant than the origional single stage paints.
My car did not come with the stripe as mine had the body side moldings with the rubber inserts. My moldings were less than desirable, and I wanted to clean up the sides of the car anyway......just thought the stripe might add to the look, as would adding the black out treatment, rear spoiler, etc. I really don't want to clutter up the looks of the car too much, so I'll probably just leave the car as it came from the factory sans the body side moldings. Ben.
My 69 swinger 340 is stripe delete and had the body side moldings, and yes they were less than desireable. I did add a stripe to that car.
ef8340
Well-Known Member
my car is similar too except the colors are swapped light green top with dark bottom, your car looks great hopefully mine will look as good as yours someday
bmaudlin
Well-Known Member
my car is similar too except the colors are swapped light green top with dark bottom, your car looks great hopefully mine will look as good as yours someday
Thanks Terry! Got any pictures of your two tone Dart? Would like to see a 'twin' to my car! Ben.
ef8340
Well-Known Member

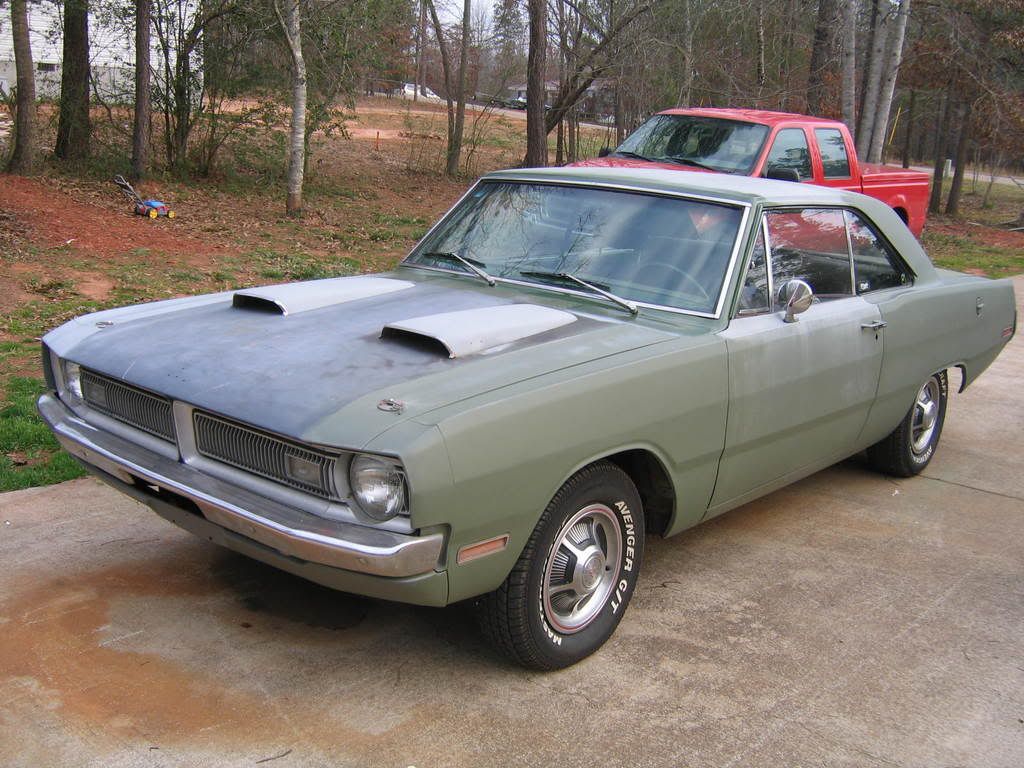
here ya go mine still under construction i also added a pic of the tag. mine is a two tone green,ledger green tail stripe/go-wing, blacked out hood car
bmaudlin
Well-Known Member
a little Saturday afternoon work! Sprayed down good with the mosquito repellent this week, so no problem with the little blood suckers....but trying to wiggle my over-weight 60 plus year old body around and under this car is a struggle to say the least. I'm probably really going to feel it tomorrow! But 'no pain, no gain'! Ben.
Attachments
-
09-29-12 002.jpg73.4 KB · Views: 588
-
09-29-12 009.jpg88.6 KB · Views: 599
-
09-29-12 008.jpg96.7 KB · Views: 569
-
09-29-12 007.jpg80.7 KB · Views: 569
-
09-29-12 006.jpg79.1 KB · Views: 547
-
09-29-12 005.jpg79.1 KB · Views: 580
-
09-29-12 004.jpg81.2 KB · Views: 548
-
09-29-12 003.jpg83.5 KB · Views: 579
bmaudlin
Well-Known Member
a few more pictures of some more progress. Ben
Attachments
-
10-03-12 009.jpg71.7 KB · Views: 547
-
10-03-12 008.jpg59.1 KB · Views: 542
-
10-03-12 007.jpg64.1 KB · Views: 539
-
10-03-12 006.jpg52.5 KB · Views: 544
-
10-03-12 005.jpg70.6 KB · Views: 516
-
10-03-12 004.jpg73.5 KB · Views: 545
-
10-03-12 003.jpg71.2 KB · Views: 541
-
10-03-12 002.jpg127.4 KB · Views: 545
-
10-03-12 010.jpg72.8 KB · Views: 563
-
10-03-12 011.jpg72.5 KB · Views: 544
bmaudlin
Well-Known Member
a little more progress. Decided to add some chrome that originally was not on this car from the factory. Wheel opening moldings and drip rail moldings. Found out that when you install the drip rail moldings on a car that originally did not come with them you have to remove the little connector tabs that join the vertical piece to the long horizontal piece so that the stainless piece will attach properly. A few other items like the brake master cylinder, proportioning valve, swing pedal assembly, roof rail weatherstrip stainless channels and wiper transmission have also been installed. Ben.
Attachments
bmaudlin
Well-Known Member
bmaudlin
Well-Known Member
a few more progress pictures....everything seems to be coming together! All of the front brake lines, hoses and other parts have been assembled, as have all of the front suspension and steering linkage. Have finally installed the wheels and tires, and it's almost ready to roll on the ground! Now we can finally get all of the body lines and gaps corrected. Ben.
Attachments
King_viper98
she be runnin
Thanks for the info on the undercoating it worked out great just completed the underside of my car today.
76orangewagon
Well-Known Member
Love the attention to detail.....I really appreciate a quality build, wish there were more. Keep up the excellent work.
bmaudlin
Well-Known Member
Thanks for the info on the undercoating it worked out great just completed the underside of my car today.
Glad to help! Ben.
bmaudlin
Well-Known Member
Love the attention to detail.....I really appreciate a quality build, wish there were more. Keep up the excellent work.
Thanks for the kind words! Ben.
King_viper98
she be runnin
Where were you able to get all the front brakes like that...or are you that skilled? If you purchased let me know where...mine are probably frozen from sitting for 20 years
bmaudlin
Well-Known Member
Where were you able to get all the front brakes like that...or are you that skilled? If you purchased let me know where...mine are probably frozen from sitting for 20 years
Not anything special was done to get the brake system back to original other than: sand blast the spindles, refinish them with cast iron finish from Eastwood, install new rotor discs on the sandblasted and finished hub and bearing assemblies and purchasing rebuilt calipers from the local parts house. We also had all of the bolts, rotor backing plates and brake lines zinc coated.
Nothing really special or out of the ordinary, just a lot of attention to detail. Thanks for noticing! Ben.
bmaudlin
Well-Known Member
A repaint on the dash and all of its' components; installation of the refurbished VIN plate, and one of the headrests after being painted the correct color. Ben.
Attachments
bmaudlin
Well-Known Member
King_viper98
she be runnin
I have to say I am very particular about my work and I see everything you are doing and I am amazed....beautiful work!
woodchip
Well-Known Member
I agree w/King Viper, you are doing amazing work. I can't wait to see it at a car show or cruise. Keep those pictures coming, they're very motivational.
bmaudlin
Well-Known Member
Some pictures of the seat tracks after they have been restored. Also some pictures of the seat backs after stripping, painting and headrest parts installed....ready to be sent to the upholsterer tomorrow when the Legendary two-tone green seat covers arrive! Ben.
Attachments
bmaudlin
Well-Known Member
another Saturday afternoon getting some more work done on the Dart. Quite a bit of 'fun' installing an engine all by ones' self! It's even more fun installing that cast iron A-833 manual transmission using a floor jack and crawling around on a piece of cardboard.....but it went in a lot faster and easier than I remember; when I used to put clutches in the 69 Swinger 340 back in the early 70's it seemed to be quite a chore! Moving right along! Ben.
Attachments
bmaudlin
Well-Known Member
bmaudlin
Well-Known Member
some clutch linkage and flywheel inspection cover install. Had to shorten the inside end of the clutch torque shaft by 1 inch.....must have been for some sort of 6 cylinder car originally?!? Fits just fine with the modification. Also sent out the drive shaft......the auto. drive shaft is 4 inches shorter than the one needed for the manual transmission. Have not figured out how to stretch the old shaft to fit the M/T, so a new one is in order. Also received the engine and front wiring harness this morning; is certainly going to clean up the look of the wiring under the hood. (Note: the wiring is laying on top of the motor and has not been installed yet, if an explanation is needed!)
One other note: I really like the look of the aluminum valve covers, once the engine was installed. I had thought about changing them for a pair of the original valve covers which I had chrome plated before the engine was installed, but the more I look at the aluminum ones, the more I like the look. The six-pack air cleaner lid has also been chrome plated, so I'll have to install it, and then decide which way to go. Ben.
One other note: I really like the look of the aluminum valve covers, once the engine was installed. I had thought about changing them for a pair of the original valve covers which I had chrome plated before the engine was installed, but the more I look at the aluminum ones, the more I like the look. The six-pack air cleaner lid has also been chrome plated, so I'll have to install it, and then decide which way to go. Ben.
Attachments
-


