Biohazard

-
Swapping fuse blocks means popping out the contacts. I'll clean them off while they're out.


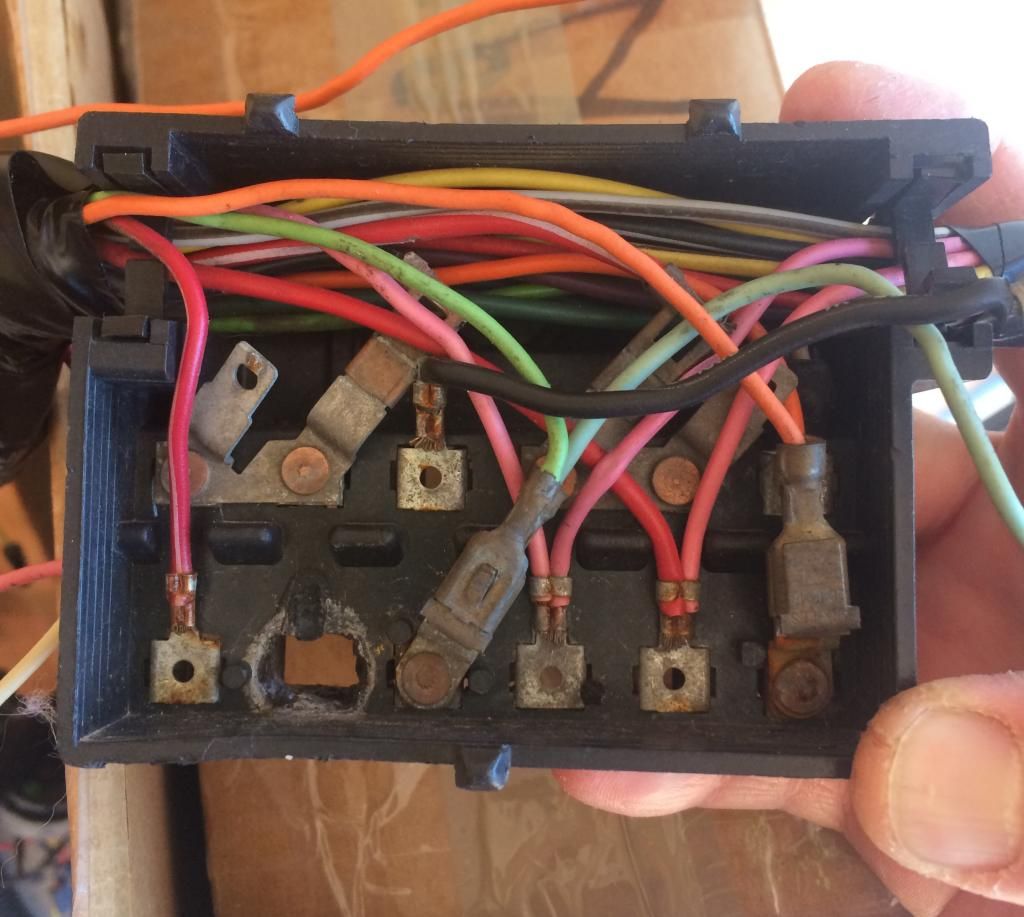
Here is the old fuse block, stripped of its electrical connections.


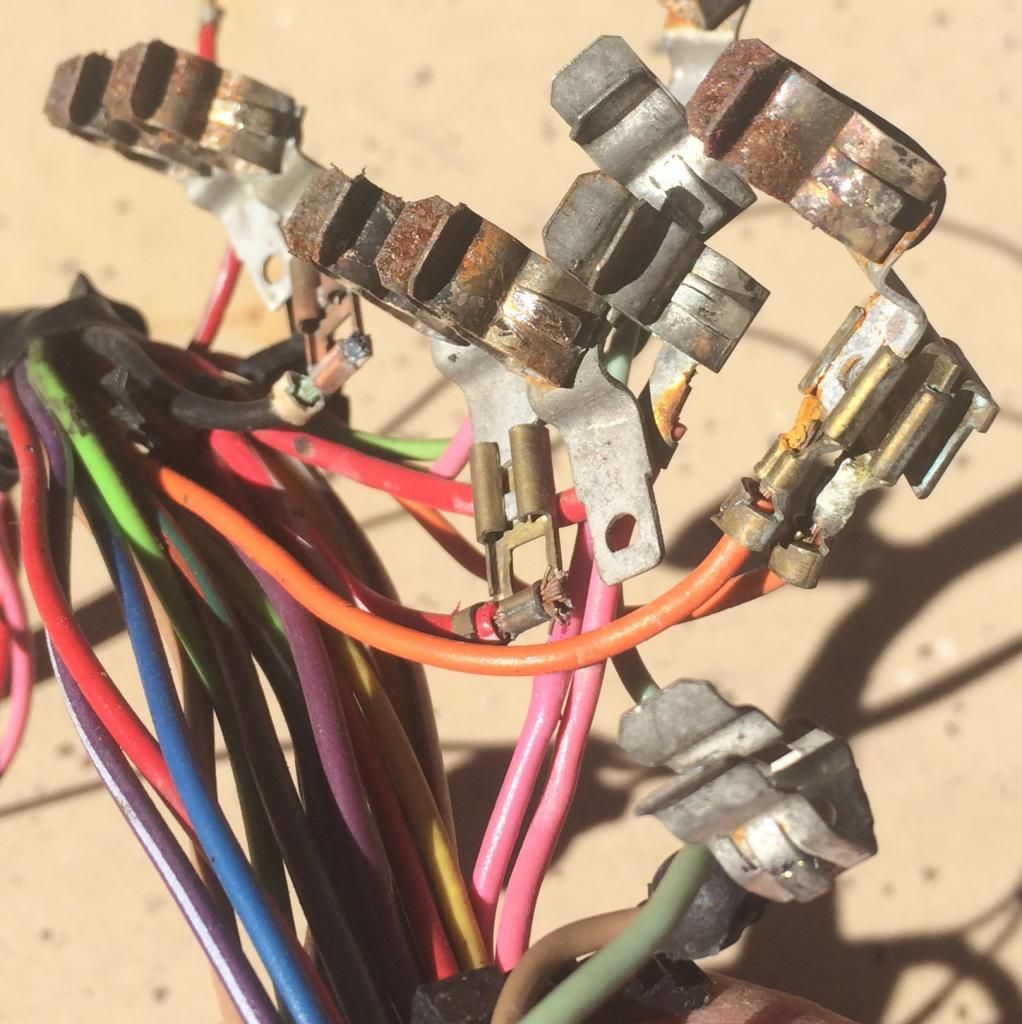
The grodie terminals.


Terminals after the dremel.


To ensure good contact, some tightly rolled 600 grit was used to clean where the fuse clips in.

 
Clean connectors pressed back into the new fuse block.


Looks a little better. Just needs fresh fuses to complete the job.

 
Wiper linkage and pivots lube'd and reinstalled with my home-made gaskets AND the DMT pieces.


Dash almost completely together. Will still need to finish up some connections and repair some wires. Radio and HVAC controller back in, new dash pad installed, and I put that sweet Apipco plastic glovebox in as well. Holy crap, this thing is heavy when you have it all together!!

 
One word: Secure. ;)

Though I'll admit, I was having a hard time figuring out the proper orientation of it. Got a photo? Not above asking for help, that's for sure.
 
Thanks! But I think I'm gonna roll with what I got.

Another action shot for reference. In which you can see one if those wires (orange) needing repair.


Thick adhesive felt strips keep the speaker from rocking and from vibrating against the frame.


Plastic glovebox = useable glivebox.

 
Great question: So let's revisit the 'biohazard' theme for just a moment.....

When the fish was in the single-bay garage, my wife said she couldn't be out there. She was unable, though, to identify what the smell was exactly but was leaning more toward chemical (oil, grease) than organic (mold, mildew). Since then, I've moved the car into the driveway and cleaned the rear end which had a considerable amount of road grime. Wife still thought it smelled funky until I completed the rear axle. Now, she walks by it - no problem.

Just yesterday, I asked her to sniff-check the inside. That didn't have the same happy ending, however. On the upside, the interior smell was classified as chemical and not organic. This actually makes sense since the rear seat spring bases were sprayed down with oil (the plant-based stuff) as a preservative and they are sitting inside the car. (Ditto the steel cargo deck). Interestingly, these aforementioned pieces were never treated with ammonia as I hadn't yet discovered ammonia's effectiveness in killing mold when I washed and oiled them. I do plan to take them out and spray them down with ammonia which will also remove the oil. Since I'm in the desert southwest, I'm less concerned about rust than I was in Alabama.

There's no talk of any mold odor and that's huge. Closing the car up in the garage will tell the real story.
 
Good luck with the "closing up" part. I would hate to hear that the wife smells something after ALL THAT work!!!! (I think I would kill myself if that happened)
 
Mounting the HVAC controller, I slipped some star washers under the screws. There weren't any there before but I thought it would be a good idea.


Why things always seem to take longer than expected:

Needed to install the temperature cable to the back of the HVAC head. Easy enough, yeah? Oh, but that one screw needs some cleaning up before it can get driven into place....


Otherwise, it wouldn't look soooo nice!


Of course that cable got lubed before installing.
 
Over the top Dan!!!!

Will you ever see it again?

Other than knowing for sure it's clean and will not smell!

I am a smoker and mine smelled like an ashtray, even after 24 years of hibernation.

Rest assure it smells brand new now. I did not have to go that far with the small screws!
 
Finish line is in sight. Great work. After the dash whats left?
 
Have you ever considered being a restoration photographer?

Your pic's are so detailed!!!!

Lot's of compliments to You sir!!
 
Gerald, you're right. My therapist pretty much says the same thing.

Actually, that screw wasn't so much about the biohazard issue as much as it was rusty and had been tossed into a small canister, sprayed with oil, and was now just gunky. After cleaning that screw, I had to do the same with the 3 nuts that support the driver's side fresh air duct. Nah, this was really just about cleanliness in general and making sure the threads were smooth.

Restoration photographer? That's one of the reasons I post these pics: I have a car that is 90% or more factory correct so I figured the snaps would be of benefit to some other folk. From some of the feedback and PMs I've gotten, seems to be the case.

69conv (and all) - the path ahead is:
-dash goes in, hook up wiring, etc.
-headliner followed by windshield.
-clean and install the under hood wiring.
-drag it to the muffler shop for full exhaust.
-hook everything up (hoses, belts, fluids)
-get it running right.

That will do it for "this chapter". Finishing the interior (paint, carpet, upholstery) will be chapter next.

There will, of course, be snags, delays, and setbacks.
 
-
Back
Top