1972 Canadian H-Code 340 Dart Swinger Special Resto - Finally started!

-
Looks like you got a lot done! My car had the same original layer of paint on the roof.. Red oxide primer, a green sealer and then Hemi Orange. If you check out my build a few pages back I used rustoleum cold galvenizing paint and polished it for the brake dust shields, it turned out great and looks original.

Looking forward to more progress!
 
I've been cleaning a lot of suspension and brake parts and noticed that pretty much none of them ever had any paint on them and the factory must have assembled these in bare steel. I'd like to retain this look and have been looking for coatings designed for this purpose and had initially chosen Rust Prevention Magic from ECS. I was then on Eastwood's web site and found a coating called EXO-ARMOUR. The specs of being able to withstand 2000 degree's and a 4000 hour salt spray resistance would allow the use on brake parts also seems like the perfect solution. I was curious if any members have tried this product yet and how it's stood up for them. It's fairly expensive but it applied in the very thin film that the instruction ask it would coat most of my parts remembering that its a catalyzed product so once you mix it how ever much you mix it has a pot life will not last that long.

IMG_1895.jpg


IMG_1898.jpg


IMG_1899.jpg


IMG_1900.jpg
 
Last edited:
Family in town last weekend so visiting trumped the Dart but back at it this weekend. Time to start drilling and cutting, grinding and more drilling and cutting. No real surprises found, the rust caused by the flare job was pretty much as expected.

IMG_1921.jpg


IMG_1914.jpg


Another piece of Windsor Ontario Maple found, lol!

IMG_1915.jpg


Like the one I found in the passenger door!

DSC00428.JPG


The trunk floor drops are to thin at the bottom to save and I have new ones so off they come.

IMG_1914.jpg


IMG_1923.jpg


IMG_1926.jpg


Wheel well got hacked with the flare job so that's next so I will go after that tomorrow.

IMG_1929.jpg
 
Last edited:
Back at it today, removed the outer tub Kev (scatpacker), I considered maybe sectioning the tub but after buying the tub and then getting a look at the work involved I decided to put the whole thing in. It's not that difficult and like Randy (Hemiorangeswinger) said its probably a toss up as far as the time to section or replace.

Gonna section in wheel tubs? Or change the whole half.

IMG_1931.jpg


Got a peek down the inside of the rocker and it seems pretty solid and hardly any rust flakes or debris inside but did notice two bondo spaghetti sticking thru 2/3 of the way down so must have gotten a crease in it so I'll have to excise the White Lightning and pull the crease out and weld up the holes.

IMG_1935.jpg


Got the tub and trunk drop roughed in place, going to need some more finessing but they seem to fit pretty decently.

IMG_1936.jpg


IMG_1937.jpg


IMG_1938.jpg


Not a bad weekend for an old painter! lol!

View attachment 1715161737
 
Last edited:
Great progress! I couldn't help but chuckle after seeing the ralley wheel in the rack with snow tire on it. Seen many of those on A bodies in my time.
 
Great progress! I couldn't help but chuckle after seeing the ralley wheel in the rack with snow tire on it. Seen many of those on A bodies in my time.

Thanks 813Demon340, that was the spare tire, the car has sat for so long I didn't even know if there was a tire in the well and sure enough heres a winter gripper!
 
Danny! Boy, when the full back 1/4 is off, it looks daunting - glad you know what your doing!!! Keep 'er swingin' buddy.
 
Great work!
What is it with you guys in Northern Alberta with the quick work and skill on panel replacement? lol
Keep it up, i'm lovin' every minute of it........
 
Danny! Boy, when the full back 1/4 is off, it looks daunting - glad you know what your doing!!! Keep 'er swingin' buddy.

It looks worse then it really is Cliff, the most important part is keeping the structure stable so nothing moves while the panels are off. The rest is mostly reversing the way the panels were welded in by the factory and carefully fitting everything and making sure the flanges are nice and tight before any welding occurs. Trying to get my hands on a resistance spot welder so I can duplicate the factory spot welds. Busy at work again so I'm pretty beat at the end of the day so during the week so not much happening and got the Crosstown Mopar show on Saturday to check out and wish my car was in it! Later pal!

Great work!
What is it with you guys in Northern Alberta with the quick work and skill on panel replacement? lol
Keep it up, i'm lovin' every minute of it........

Were all so poor up hear Dartnut we either fix it ourselves or forget it!! lol! Your not buying it are you! Thanks for checking in.
 
Were all so poor up hear Dartnut we either fix it ourselves or forget it!! lol! Your not buying it are you! Thanks for checking in.[/QUOTE]

Yeah, rrrrrright.............
If you want to see poor, look at my build thread!
On a serious note, if you need a few odds and ends, i might have some parts you can use, just let me know.
Tom.
 
Yeah, rrrrrright.............
If you want to see poor, look at my build thread!
On a serious note, if you need a few odds and ends, i might have some parts you can use, just let me know.
Tom.[/QUOTE]

I checked out your thread quite a while ago, hey you did a good job working with what you got, well done. Thanks for the offer Tom, if you run across a nice rear bumper for a 72 that will likely need re-chroming but is straight and hasn't been straightened before please let me know. Mine had gotten dinged sometime before I got the car and was straightened by a blind man and is full of ripples and waves and I can't trust these chrome platers up here to improve on it should I get it re-chromed. To tell you the truth I'm afraid to take a nice one to them and get back a piece of crap.

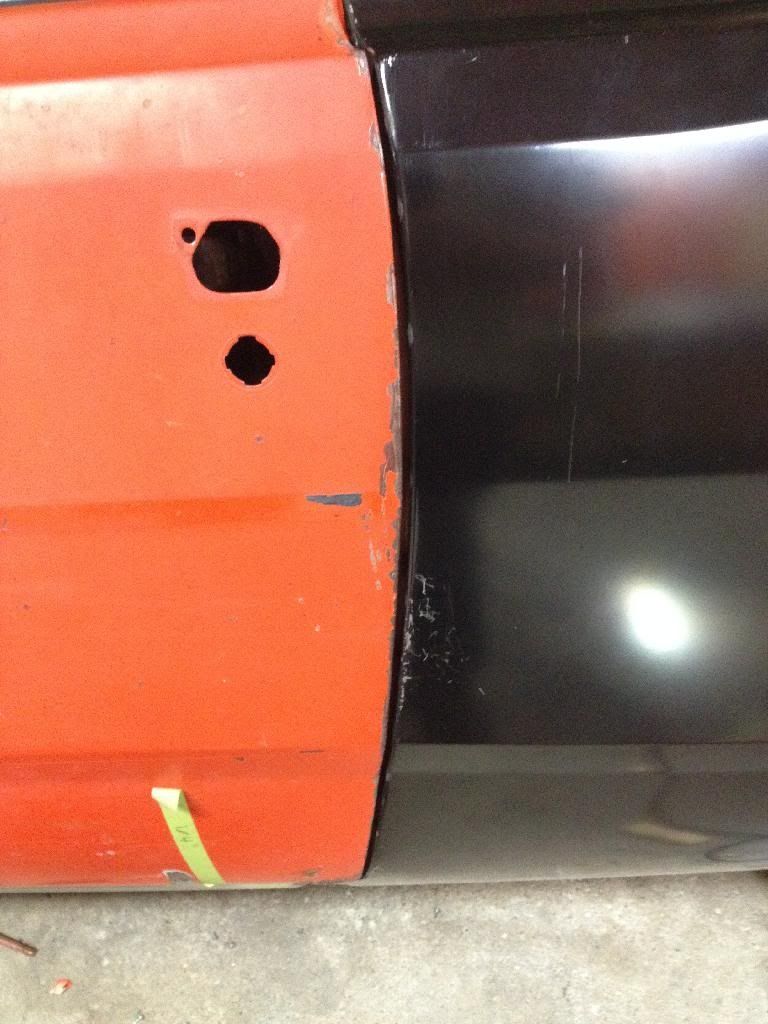
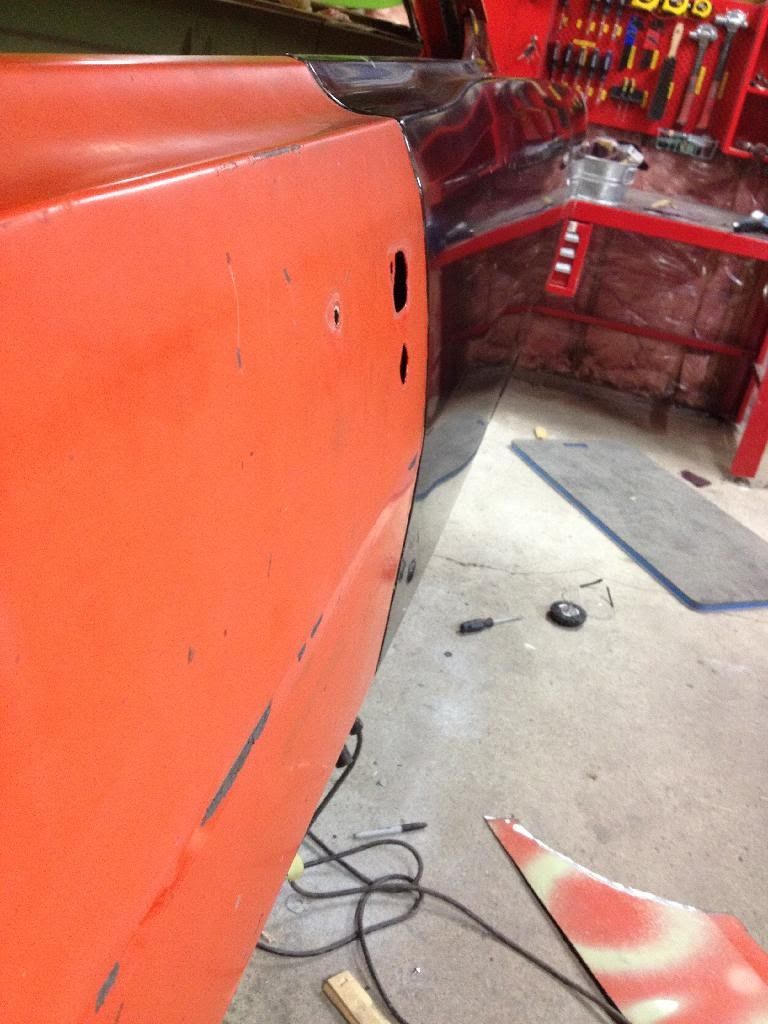
I only managed to work on the car a bit today and managed to test fit the quarter panel. The panel over all fits pretty decent but I do have a few issues with matching up the upper body line too the door, it doesn't seem to have quite the same amount of concave curve as the door and the body line doesn't seem quite as tall and is a bit flatter. I think I will see if Randy's (Hemiorangeswinger) thread ran into the same issue, panel is nice and straight otherwise. I'm running out of clamps holding these three pieces in place, lol. Quite a bit to do thou before any welding happens, some blasting and epoxying and undercoat matching and painting all before the panel goes on to stay.

IMG_1960.jpg


IMG_1961.jpg
 
Last edited:
That's looking really good! I did have troubles with my door to quarter fitment. The gaps were good on the drivers side but the quarter was to curved outward compared to the door.

Here is where mine was out.. Where all the E-coat is scratched off is where I had to flatten the quarter panel out to match the door. Once I did that the bodylines lined up. I have a giant C clamp you can borrow if needed. I just plug welded it from the bottom up squeezing the quarter into the B pillar as I went which in turn made the quarter longer which was needed... My passenger quarter was a bigger nightmare! I hope yours fits good.


Thanks for the tips Randy, sounds like our fitment problems were similar, mine has a slight bulge in the same spot and the flange on mine hits the inside of the B pillar right at that spot so it won't push in so I'll have to grind some of the edge of the flange off so the panel can flatten and hopefully move upward. I know when I pulled the bottom down and over the rocker and clamped it obviously made the problem a bit worse. The door needed a slight adjustment before I removed the quarter but line up nicely, I think I've got slightly more gap then I have and moving the quarter ahead a touch seams to be a bit challenging. Squeezing it upward is what I need to try.

DSC02738%202_zpsfdhzpwzn.jpeg


IMG_1962_zpsumosm68p.jpeg


IMG_1963_zpsyhhei0mz.jpeg
 
Managed to get out and work on the car a bit today, damn hot out thou, and try to track down some of the fitment issues I'm having with my AMD quarter. The problems pretty much are relegated to the front of the quarter getting the upper line to line up, which I am able to obtain but was getting a large gap at the very bottom of the quarter to rocker flange. Part of the problem I found was with the front of the wheel tube was out proud of the rocker too much and the quarter would stop at that point leaving a lot of the gap.

IMG_1995.jpg


The tub can't be adjusted inward and the back of the tub and trunk drop all seem to line up well so my solution was to make a cut at this spot on the tub, hinging slightly at the corner. You can see from the inside shoots when I overlapped it until the tube lined up with the rocker properly then ran some tape along the cut revealing the small amount that needs to be removed and then welded back together.

IMG_1996.jpg


IMG_2031.jpg


IMG_2033.jpg


IMG_2039.jpg


View attachment 1715161757

This brought the tub in alignment with the rocker and when I test fit the quarter again it helped the bottom gap quite a bit without affecting the tub flange to quarter flange any significant amount.

Unfortunately a bigger problem that I found and thought might be just some alignment issues and flustered me was the loss of my door to quarter gap which opened up significantly.

IMG_1972.jpg


IMG_2025.jpg


I finally decided I should measure the AMD quarter panel against the other side for length and found out why I lost my gap.

IMG_2002.jpg


IMG_2003.jpg


I brought in the quarter that I removed and remeasured it with fiberglass tape which has next to no stretch and got the same result.

View attachment 1715161765

View attachment 1715161766

View attachment 1715161767

View attachment 1715161768

So the quarter appears to be shorter than the original, disappointing, I haven't come up with a fix for this yet.

View attachment 1715161769

On the bright side my spot welder arrived! :cheers:

View attachment 1715161753
 
Last edited:
Looking good Danny! I agree, it was pretty warm this weekend.. Kinda kills the motivation sweating like crazy in the garage. That sucks about the quarter being so short on the drivers side and the wheel well tub giving you troubles. Mine was good on the drivers side, but my passenger side one was really short, which is why I welded the 1/8" welding rod down my door edge to get the gap back. I wonder why there's so much variance between stampings?
 
Beautiful project! And I love your caster system! I've been thinking a lot about my project and how to get my car off the floor and I think this will be a perfect solution. Mind if I rip it?
 
-
Back
Top