73' B3 340 Duster pro touring build

-
Where did you purchase this paint? Thanks!:cheers:

Tha Alsa Soft Touch Clear came directly from thier Website.
The Jet Black is Summit Racings brand paint which is made by Sherwin Williams, and the Interior/Plastic Chrysler Dark slate is from a rattle can I also got from Summit but that is an in store sale only item.
 
Man.... I have been gone for a good while. Come back and you have blazed way ahead of when I last seen!
I love the execution on the driving lights! Well done. I too did the same thing a good while ago( http://www.forabodiesonly.com/mopar/showthread.php?t=20895&page=3 ), though I spaced them on either side of the license plate indention. I plan to put rings on the back side to contain the light, but I am really digging the "trim" rings on the front side that you have added! Very clean!
Top notch work man! Inspiring!

Thanks,
I checked out your pics and like the lights in the bumper, they look like they were suppose to be there.
The rings I added were an after thought and I wanted to give the effect of a stamped look with some depth once completed...
 
Some of these I could not obtain an image file, just a link. I imagine you've seen some of them.

Here's a Demon with a modified 340 stipe. I'd say its a successful example of using the stripe line without doing something that does not belong on a Demon.

http://www.moparmusclemagazine.com/..._1009_1971_dodge_demon_modified/photo_10.html

This is a subtle mod to the 340 stripe with door handles in black.

http://www.moparmusclemagazine.com/featuredvehicles/a_body/1971_plymouth_duster/photo_03.html

Very nice stripe mod on the green Duster.

Thanks I have seen the Dusters and really like the Green with Grey combo...I just noticed this time looking at the Picture you posted how distinct and sharp the lower body lines are.....some people don't want them that sharp since its not correct and I actually know someonethat had there Demon re-sanded to soften the lines but I like everything about that car. Thanks
I like the what someone did with the stripe on the picture below... nice brushed aluminum treatment.
 

Attachments

  • dsc_0167.jpg
    32.7 KB · Views: 1,048
  • dsc_0066.jpg
    37 KB · Views: 1,034
  • dsc_0004.jpg
    55.2 KB · Views: 1,049
You have a very sharp eye for details.
That yellow / brushed look is awesome. Very creative.
 
I finally had a chance to make the final version of the Radiator support cove this one is made out of .050" steel but I wont be able to test fit it untill next week then I'll weld the middle together and after some minor body work it will be ready for paint. Thanks for looking ...Enjoy
 

Attachments

  • duster 025.jpg
    26 KB · Views: 952
  • duster 024.jpg
    42 KB · Views: 952
  • duster 005.jpg
    28.3 KB · Views: 952
  • duster 004.jpg
    52.6 KB · Views: 981
  • duster 003.jpg
    60 KB · Views: 1,006
  • duster 002.jpg
    39.7 KB · Views: 1,006
  • duster 001.jpg
    48.5 KB · Views: 957
I also had a chance to make some more progress on the Valve Covers. I bonded the 2" spacer to the cover and sanded the two together to get a perfect fit, the thin line you see is the aluminum epoxy between the two pieces and you can't feel the line when you run your finger over it so when I paint them it will look like a 1 piece 5 1/4" Valve Cover. I also had a chance to make a set of Adjustable Aluminum front fender strut rods to replace the stamped steel factory ones (Last Pic).
 

Attachments

  • duster 032.jpg
    23.3 KB · Views: 988
  • duster 022.jpg
    78.2 KB · Views: 997
  • duster 021.jpg
    44.1 KB · Views: 1,011
  • duster 016.jpg
    39.4 KB · Views: 1,000
  • duster 015.jpg
    35.1 KB · Views: 962
  • duster 013.jpg
    55.1 KB · Views: 973
I met with HemiDenny and borrowed one of his K frames so I could use it to mock up the Frame Motor Mount Brackets, I also made a 2" Aluminum spacer so whem my K frame is Welded together this will insure proper alignment. I made the K frame Jig a few months back and it sure makes proper allignment of all the parts easy. HemiDenny has great Customer Service....I bet if you went to any of the other Suspension builders out there and asked to borrow a K frame for mock up and then have them weld them on there answer would be ......NO. Enjoy the pics.
 

Attachments

  • duster 027.jpg
    53 KB · Views: 934
  • duster 029.jpg
    46.3 KB · Views: 897
  • duster 020.jpg
    74.1 KB · Views: 906
  • duster 018.jpg
    67.5 KB · Views: 913
  • duster 017.jpg
    40 KB · Views: 892
  • duster 009.jpg
    40.9 KB · Views: 921
  • duster 002.jpg
    74.8 KB · Views: 941
I finished up mounting the Spark Plug wires. The brackets attach directly to the Valve cover through a tapped hole and keep the wires tucked in away from the headers and also from hanging over the top of the Valve Cover for a Cleaner appearance. Enjoy the pics.
 

Attachments

  • duster 033.jpg
    51.8 KB · Views: 905
  • duster 030.jpg
    51.4 KB · Views: 910
  • duster 013.jpg
    41.2 KB · Views: 911
  • duster 012.jpg
    65.6 KB · Views: 914
Love that plug wire deal (never seen anybody do that before).

Ross, you are a major innovator. Super clean!
 
Love that plug wire deal (never seen anybody do that before).

Ross, you are a major innovator. Super clean!

Thanks John,
Actually I did this on my Power Wagon back in 2003, I really like the sanitary look so I thought I should do it again on this build.
 

Attachments

  • powerwagon (29).jpg
    82.5 KB · Views: 879
image.php


You know, if somebody very quickly flashed me this picture and didn't
tell me anything else, I would have guessed big-block Ford due to the
dual induction devices and the tall valve covers.

Not that there's anything wrong with that. It just no longer resembles
an "A" motor at first glance.

I thought about trying to level off the tops of the Valve Covers but let that thought go....then it really would look Ford-ish. At least it doesn't look like a Chevy motor.....like 95% of Ford street rods
My goal is to make people do a double or tripple take when they look at the motor and other custom parts of the car.
 
just WOW-looking very cool

Awesome as always Ross..

Thanks For the compliments, I'm just trying to keep everybody interested in the build with unique stuff till the Body comes back from paint. I still wish I could nail down a color with 100% commitment, stopped at the Mercedes Benz dealer to look at the Color of the New CLA from the commercial with Willem Dafoe as the Devil..its called Mountain Grey and it's pretty sharp in person..Anyway Thanks again.:salute:
 
I also had a chance to make some more progress on the Valve Covers. I bonded the 2" spacer to the cover and sanded the two together to get a perfect fit, the thin line you see is the aluminum epoxy between the two pieces and you can't feel the line when you run your finger over it so when I paint them it will look like a 1 piece 5 1/4" Valve Cover. I also had a chance to make a set of Adjustable Aluminum front fender strut rods to replace the stamped steel factory ones (Last Pic).


great minds think alike. made a set of the fender braces for my ride a while back. work awesome.

 
great minds think alike. made a set of the fender braces for my ride a while back. work awesome.


I have to admit (and actually did) back on 5-31 that I was gonna copy your idea when you posted pics ....so actually it's all your idea .....I like the Red ends on yours better.
 
I finally managed to remove the Offenhauser name from the top of the Valve cover Breathers, I Don't really like to advertise if possible. I also decided to custom make a couple Hood pin top nut that will not only lock the hood pin in place but also hold down the the Radiator cover panel...they are a smaller version of the Hotchkis hood pins that are getting modified and thier name removed. The hood pins are 3" and the matching nut is 2".
 

Attachments

  • duster 030.jpg
    57.1 KB · Views: 768
  • duster 031.jpg
    78 KB · Views: 792
  • duster 020.jpg
    76.7 KB · Views: 746
  • duster 027.jpg
    73 KB · Views: 741
Heres where the 2" Nut will go in place of the flay crappy mock up pieces once painted. And the old Offenhauser logo that is now removed
attachment.php

attachment.php
 
simply amazing. I love this build. I wish i had half the talent you have.
 
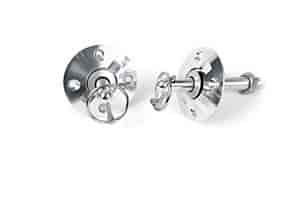
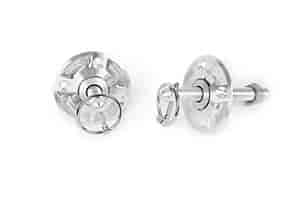
Jegs has some billet hood pins with no advertising also. They are made by Metrom.
These are $99:
667-4478.jpg

and these are $79:
667-4451.jpg
 
-
Back
Top