A 1974 Duster - My 2nd one, 41 years later!

-
Keep up the excellent work Alex...Wish it would warm up here in Michigan, I am ready to got mine road ready. Its all cleaned up ready to roll.

You ain't kidding. I'm so sick of this Michigan weather. 70* last week and 20* this morning. Only in Michigan.
 
The Spaceship command station lunar power braking capsule was returned to the seller today. Just gonna go with manual brakes and a new Master Cylinder aluminum set up from Doc Diff. It will look a whole lot better in the engine compartment.
 
Scuffed and shot drivers door jamb in primer.

IMG_3087 by Alexl5280, on Flickr

IMG_3088 by Alexl5280, on Flickr

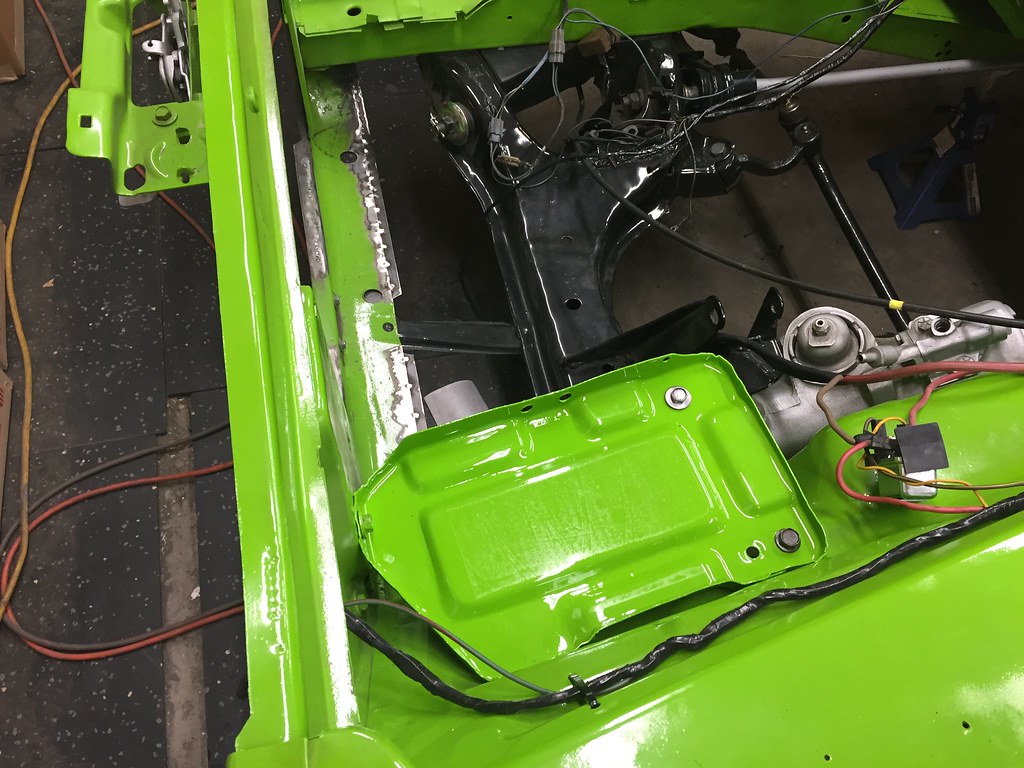
While waiting for the paint to dry...I took apart and cleaned the engine harness/front lights harness. Then re-taped the harness as the factory did with electrical tape. Someone had already jumped the two yellow wires on the seat belt gizmo...I will solder the yellows together and eliminate this contraption. I guess it is called the "interlock" switch. Explained here:

http://www.forabodiesonly.com/mopar/showthread.php?t=14304

http://www.forabodiesonly.com/mopar/showthread.php?p=1969624169

IMG_3090 by Alexl5280, on Flickr

IMG_3091 by Alexl5280, on Flickr

Seat belt "InterLock" eliminated....anyone know what plugs in the dark brown plug?

IMG_3092 by Alexl5280, on Flickr
 
Borrowed Higgs double flare tool, thanks Brian....started running the brake lines. I am using the copper brake line, it is really nice to work with. Anyways, starting at the MC and working my way through the car. Ma Mopar had a loop in these first lines, not sure why....so I have a loop in the lines as well.

IMG_3102 by Alexl5280, on Flickr
 
Awesome looking car, am enjoying the updates

Loop is to provide for the brake line to move without breaking was common on hard lines on vintage stuff with solid mounts
 
Alex, does the copper line have a high enough pressure rating for brake lines?
 
Certainly! Explanation from Jegs:

NiCopp Brake Lines are a seamless copper nickel alloy tubing DOT approved for hydraulic brake systems. They are strong as steel, rust proof and easier to work with than any brake line on the market. This product has been used on several high end European vehicle brake systems since the 1970s including: Audi, Porsche, Aston Martin and Volvo. NiCopp brake line bends 58% easier than traditional steel tubing. Since it is flexible, this allows it to be easily snaked into positions that conventional brake lines cannot. A painstaking job just got easier and quicker!
 
cool, may have to look into it more. Looking good.
now you need some neverdul to shine it up.:D
 
I've got almost all the brake lines made and installed, very easy job with the Copper/Nickel line. I had ordered a 25' length of the line and am about 5' short. So, another 25' will be here on Monday and I will be ready to fill/bleed the brakes. The last piece is to connect the rear lines under the car. I put a union under there, that will connect the last 5' section to the the rear hose that feeds the rear brakes.
This is the line I am using: http://www.amazon.com/dp/B015YGQYW2/?tag=fabo03-20

Higgs or Dave ....I'll have some extra brake line for you!

IMG_3107 by Alexl5280, on Flickr

IMG_3140 by Alexl5280, on Flickr

IMG_3142 by Alexl5280, on Flickr
 
Brake lines done, bleeding next.

Been messing with my wiring, had some good success, other hurdles still need jumping, but making progress. New Voltage Regulator and Ballast Resister. I also found after staring at wiring diagrams that in an Auto trans to 4 speed swap...there is a Clutch safety switch on the clutch pedal and should be a green wire that goes from the pedal to the starter relay. Looked on my pedals and there was the green wire and firewall grommet, with the CSS. Drilled a hole in the firewall and installed the green wire to the starter relay. The auto trans Neutral Safety wire going to the starter relay was a brown wire with yellow trace, swapped it for the green wire. I altered the auto trans harness going to the transmission by removing the center brown neutral safety wire and adding the two correct ends that plug into the A833 for the back up lights. Making progress in small steps.

IMG_3148 by Alexl5280, on Flickr

IMG_3153 by Alexl5280, on Flickr

IMG_3151 by Alexl5280, on Flickr

IMG_3150 by Alexl5280, on Flickr

IMG_3149 by Alexl5280, on Flickr
 
Started bleeding brakes, a few small leaks were present, but a hard pull on a tube wrench fixed them. Installed trunk weather seal on finished jamb. Waiting on engine block to be finished. Going to solder back in the tail lights and make sure all that is working properly. Planning EFI, fuel lines, tank and all that BS.

IMG_3159 by Alexl5280, on Flickr

IMG_3158 by Alexl5280, on Flickr
 
Looks great Alex!! I'd call getting the electrical stuff all working a HUGE success!! I know I was thrilled when I just got my wiper motor to work in my Duster! But my "big" victories are probably a lot smaller than some people's but oh well. Lol

Keep up the good work my friend!

Btw, how did you straighten out your brake line? Did you buy a straightener or just straighten it as good as possible by hand?
 
Just got done looking through all 25 pages of the build! It's an incredibly clean build and I wish my car was 1/4 of what yours was! I'm hoping to get a bit of a tub going this summer but i've never welded so it should be interesting!
 
Hello Canyon! Thanks for the kind words, I am sure you can make your car like this one. I'm just one guy doing this in my garage. Welding. I had never welded before either, it is all in the settings. My Harbor Freight 170 amp welder has performed like a champ, very happy with it and it was bought for $159.99 on sale. The bottle was more expensive than the welding machine, LOL! Thanks again.

Yesterday was a slight bit depressing. I had a pro painter stop by to give me an accurate bid as he could be here and go over the whole car, rather than me trailer the car to his shop for the bid. The bid was $15,000 .... I nearly fell over! He said 100 hrs in blocking/sanding and 2k priming to get it ready to paint. So 100 hrs times $75.00 hr = $7500.00 to get it to the point ready to shoot the Green. Then he wanted another $7500.00 to shoot the green and clear, and some satin black. Next, not spending that kind of money. I would paint it with a broom before I would give someone $15K to paint my car! I'll get this figured out on what to do.
 
Last edited:
WOW!!!! Makes me glad I'm not gonna paint my car for quite awhile and when I do I'll do it myself for that kinda money!!
 
Alex, I wouldn't pay anybody that kind of money. I think you should paint it your self. My last car I did was a '69 Valiant. I paid the guy a bunch of money I got promises and excuses. Well, long story short my twelve year old could have done a better job then him. I was so frustrasted when the car got done I ended up selling it. BTW the painter said he would re-paint for more $$$. Good painter's are few and far between. Read some of the horror stories on here.
 
There's got to be plenty of shops in the Denver area that would be a lot more reasonable. Seems like it should be around $4K at most. That's what I paid for a PPG pearl paint job in CA that included everything your guy quoted.
 
-
Back
Top