Winter time model building thread.

-
if you have a mustang 2 front clip ide like to see a pic,,if thats possible love the mustang and that wild edsel,,,

the super bee im using is a AMT i found on e bay 15 bucks,unopened about a year ago,,,,i have not seen any type of prostreet or promod model kits at the one and only hobbby shop near me,,,

ill be using a dremel cut off wheel to cut the chassis to shorten it,,
You are a brave mad cutting that with a dremel. I have done it that way but its tough to get the cut straight in line across and you end up sanding more to get the edges square. Here is the type of saw I use now. Mustang IIs are not a common kit. Lindburg did make a concept stangII but the detail on the front end is not that good. Most of mine are the 67-70 style.
 

Attachments

  • P1010004 (Custom).JPG
    62.3 KB · Views: 332
  • P1010001 (Custom).JPG
    61.3 KB · Views: 300
Kind of a "pro-touring" theme. The body is a widened '58 Edsel and the entire drivetrain and interior are from a Dodge Viper. It has twin turbo's on the V-10, full Viper suspension. Here are some pics of the build to refresh everybody. :cheers:

That is cool.8) I think I have a Edsel body somewhere. Oh no another project.:toothy10:
 
home,, i just got the dremel, i have never used one.,,. i got a variable speed,, i also have a small saw like the one your showing,,

i was thinking when i cut the floor im going to cut it on a 45 degree if i can,,because the 66 body is an old style kit,,the rear of the floor screws in to the body,, ill drill holes in the s bee floor,,then when i shorten it ill cut the front half on a 45 also,,so the rear is pushing up on the front,,and if i have the room under the interior bucket,,ill add a strip of material over the joint,,,i could only get a tube of testors red glue,,not the model masters,,no one local carries it,, i also picked up some off brand super glue gel,,,which is better for bonding the floor??? thanks

The testors will work better as it actually melts the plastic together. I used snap type cloth pins to hold together while it dried(24 hours).
Try and make your first cut with the saw and shape with the dremel. The straighter the line the better the bond. Also hit each surface with an emory type file(nail), and the glue will bond faster.
 
Yeah, sure would. I remember as a kid walking about a mile (uphill both ways in 6-foot snowdrifts in SoCal. LOL!!!) to the local hobbyshop, Victory Hobby Shop, on Whittier Blvd. in Montebello, CA. I spent a lot of time in there gazing at all the cool kits I dreamed of building. They carried all the plastic (ships, planes, cars) and also HO trains in the back part of the shop. The neat thing was it was less than a block to the city park in one direction and less than a block in the other direction to the neighborhood ice cream shop (Curries). Good times!
We've got a couple of really good shops close to us here in SoCal. Ultimate Hobbies (www.ultimatehobbies.com) in Orange, CA, caters mostly to the RC crowd but has a very good selection of current plastic and paints. Prestige Hobbies (www.prestige-hobbies.com) in Anaheim, CA, is mostly diecast but has an excellent selection of both current and out-of-production plastic kits. They also have a complete selection of plastic paints. Neither carries much in the way of photo etch detail parts.
Check out the following pics of the diecast 1/6-scale replica of the old Greer-Black-Prudhomme dragster at Prestige Hobbies. Over 28" long. Pics don't do it justice as it's gorgeous.
This is #19 of only 300 that were made. Price tag is $1800. I told the owner I'll be sticking to smaller scales since the $1800 is better spent on the build of my '69 Dart.
Enjoy the pics.
damn thats very nice
 
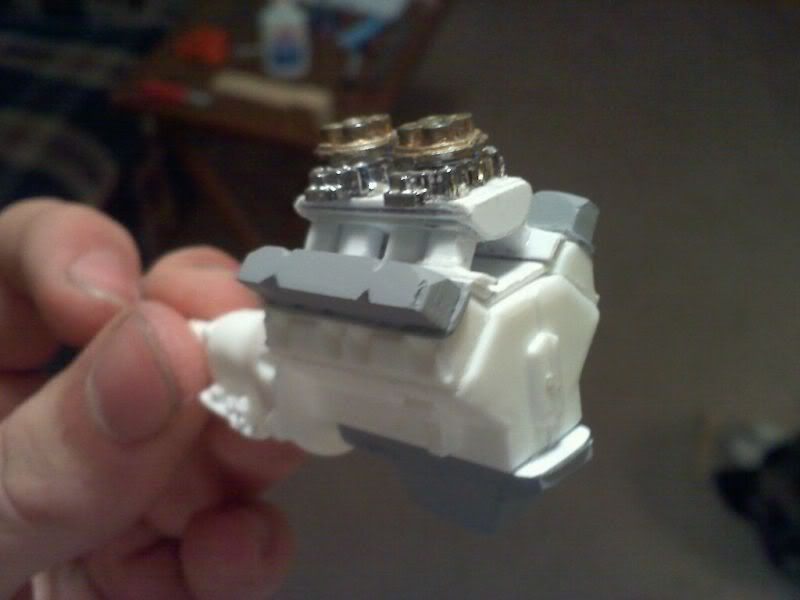
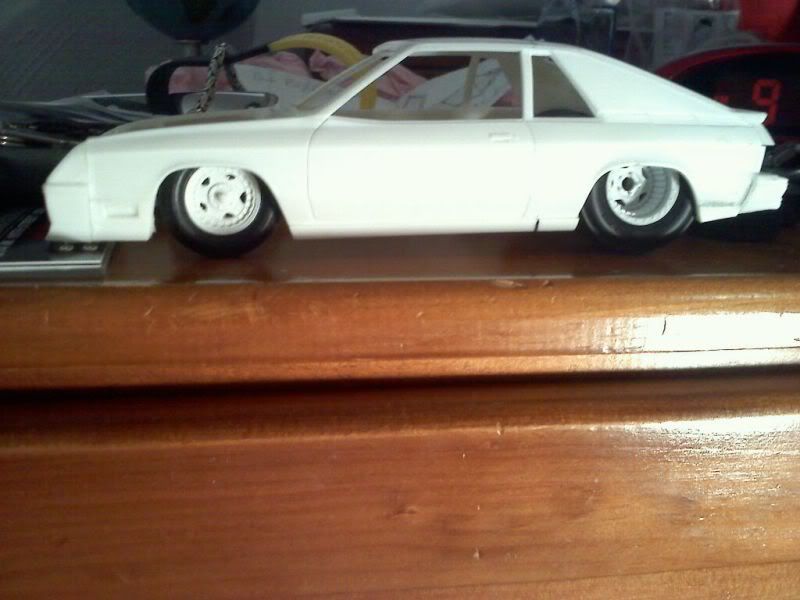
Finally getting some things done on my L-body Charger. Got a lot done to the engine lately. The pic of the body is just showing the slicks and the wheels I bought.

But the Oil pan, valve covers, and intake manifold are all completely scratch built. The covers are 6 pieces each, the oil pan was something like 8-10, and the intake was 15+... and that's a low estimate. This is the first time I have really tried any scratch building. It's fun but time consuming.

20101102213638.jpg


20101103212825.jpg
love that build
 
when i was 10 -14 15 on birthdays and christmas i would get 15 or 20 models! man i wish i had some of those kits still...where do you get that resin 70 swinger?
 
home cloned ok thanks for the filing tip,,,,im going to use a very small C clamp,,, im hoping to get started very soon,,,
then im going to look for 2 small block motors,,from one of the vendors, i dont want to break up this duster model i dont think,,looks like a great kit,,,then look for carbs and engine detail stuff,,,need to order a hood and other parts from the resin guy,,,,

[ bad 440 you built the intake ?? wow im impressed,,/COLOR]
 
So Im just starting to get back into doing model. Since im laid up with a broke leg. I found some cool photo etched parts for a 68 dart model that i picked up in September. How are you guys attaching these to the model. I have seen several different chemicals but i dont know which on is the best.

Thanks guys!


I have done it very carefully with super glue. Wipe off any excess glue before aplying.
 
I've read in Scale Model magazine of guys using a small dab of Future floor clear instead of super glue to avoid the white fume haze. Haven't tried it yet, but I will later. I'm also building a 68' Dart w/ photoetch.
 
I finally got round to finishing the Toolpost Grinder, then ground the crankpin of the crankshaft. I'm now machining the rest of the crank now.
I had to make the pulleys as I'm using a Mitsubishi Magna 2.6 lt 4 cyl water pump belt. The stone is for a chainsaw sharpener, but it fitted the bill for what I wanted it to do.
 

Attachments

  • IMGP5445.jpg
    88.2 KB · Views: 434
  • IMGP5454.jpg
    83.2 KB · Views: 445
  • IMGP5457.jpg
    95.4 KB · Views: 453
  • IMGP6556.jpg
    92.7 KB · Views: 439
  • IMGP6560.jpg
    86 KB · Views: 448
  • IMGP6559.jpg
    94.5 KB · Views: 433
  • IMGP6557.jpg
    81.1 KB · Views: 442
I finally got round to finishing the Toolpost Grinder, then ground the crankpin of the crankshaft. I'm now machining the rest of the crank now.
I had to make the pulleys as I'm using a Mitsubishi Magna 2.6 lt 4 cyl water pump belt. The stone is for a chainsaw sharpener, but it fitted the bill for what I wanted it to do.


This looks a 1:1 build.8)
 
I got most of the crankshaft finished today.....apart from needing locater pin holes to mount gears, flywheel, etc......just got to finish clearancing the crankcase for the conrods.....when I get to make them.....:)
The crank is one piece, made from 4140, 38mm diameter ground-to-size round bar. The crank pin is 0.500" diameter......shaft ends are 17mm diameter.....with M6 x 1.0mm threads in each end.
 

Attachments

  • IMGP6562.jpg
    87.8 KB · Views: 413
  • IMGP6564.jpg
    62.7 KB · Views: 418
  • IMGP6567.jpg
    102.1 KB · Views: 418
  • IMGP6580.jpg
    80.7 KB · Views: 420
  • IMGP6582.jpg
    56 KB · Views: 405
  • IMGP6584.jpg
    75.1 KB · Views: 415
  • IMGP6585.jpg
    67.1 KB · Views: 439
  • IMGP6586.jpg
    64 KB · Views: 412
I just bought a Jo-Han 69 Road Runner and the AMT 68 Road Runner kits. I can't wait to get started. It has been a LONG time since I played with models. I will be needing a few parts if any of you can help by either selling them to me or telling me where I can get them please. :)

Revell 440 with all parts including four speed
Six Pack set up
Headers
Torque Thrust wheels with BFG tires.

Resin parts
Six Pack hood
Six Pack air filter

I will post pics as soon as I get the cars. :)
 
hey guys. any updates on your model builds? since its been raining here i started to work on my twin front engine dragster some more. i also picked up this little red wagon kit yesterday. it was 40 bucks, but i just had to have it.
 

Attachments

  • P2200323.jpg
    57.9 KB · Views: 349
  • P2200324.jpg
    65.6 KB · Views: 339
  • P2200325.jpg
    85.1 KB · Views: 334
those wheels come off the 55 chev steet machine ?

Yes they did. I thought they would look good on it. But they are 1/24 scale to they look a little big. The chrome was all scratched so I painted them with alclad polished alunimum. I had to change the firewall and a few other things because the detial of this kit was very poor.
 
well the dragster is almost done. its still raining here. so i guess i will start on the fiat bodied dragster next.
 

Attachments

  • P2240343.jpg
    84.1 KB · Views: 300
-
Back
Top