1970 Duster project in Sweden

-
Thanks for the kudos. Any grade A cotton fabric will work, I just used what I had. Tee shirt had weld pop burn holes in the front. The back was perfect and no holes. Just right size for a shroud. I used cut wooden blocks to make the spacer from the round disc to the radiator side. I screwed them in multiple places around the perimeter to hold the disc up. Notice how the fan hole is offset in the shroud like the repop one you showed, because the engine is offset to the right. I stapled the Tee shirt fabric tightly to the back side of the frame to make sure theres no wrinkles. I ended up using wire to pull it tighter.

Putting about 5 layers of resin on the front will make it stiff enough to pop from the mould and maintain its shape with just the resin and fabric. If you put more, that's even better. This allows you to able to final machine sand without hitting the fabric. When you put the fiberglass on the inside, what I did was screw it down to the plywood work table top with drywall self tapping screws and wide washers in the circular part to hold it flat, then fiberglass the inside. Also make the mould to where your fan is I believe half in and half out of the shroud. This helps with scavenging.

I cant wait to see what yours looks like when done. Take your time between resin coats and let it dry thoroughly before scuffing and applying more resin. Once you primer, sand and paint, nobody will ever know.
 
Last edited:
Wow! That shroud looks great, thank you for taking the time to share and explain. I was thinking of doing it in thin metal, but this looks like something I might be able to wrap my head around too now that I have this to go by. Awesome! :thumbsup:
I thought about aluminum, as I am an aircraft sheetmetal fabricator by trade, but even the idea of making it from aluminum seemed like a bad idea to me. There was just no way to ever make that look good. I dont like cobbled up crap, or homemade science project looking stuff. Then the idea of making it out of fiberglass popped up from seeing how people make the custom moulded speaker enclosures with fiberglassed cotton fabric over particle board to make the shapes. Then I thought hmmm, why not make a mould with a release film, use grade A cotton fabric and once the shape is made, pop it off and fiberglass the Inside. And so i did, and it turned out great.
 
Last edited:
The circular piece I cut out of the center , I fashioned up pieces from it to stiffen up the top and bottom of the shroud. I glued them in place with JB weld, then fiberglassed over them.

Screenshot_20230526-071527_Gallery.jpg
 
So work got in the way of working on the Duster again. But, I was able to do some work this weekend. I thought I made an awesome score of a used 22" shroud here in Sweden. Well, not so much. The shroud started to sag, I did some reading here on FABO and read that people had a lot of problems with repop shrouds. It did fit very well to begin with and seemed to help my cooling issue. I don't know if I am going to try and reinforce it or maybe try and use it as a mold and fabricate one as you so kindly posted great advice on @moparmat2000. Now, I dont know much about these kind of things, but something in the material made it sag. So when making my own I would need to use materials that can withstand the heat.
 
Standard fiberglass and resin like for boat repair will typically hold up well. The key with the cotton over the mould is to layer up the cotton with multiple layers of resin to get it to hold its shape well before popping it out and layering up the inside. Use the heavy duty fiberglass matting. In the US it's called 7781 series. Orient the layers 45° to a corner. It lays in better because both length and width strands are allowed to bend. I used 2 layers of 7781 for the shroud and 1 additional layer of it at the metal bracket pickup points to reinforce it a bit. It took me about a week to make mine, because each time I scuffed and added a layer of resin, i had to let it cure. Then the ssme with the fiberglass and resin on the inside. Patience has its rewards. Keep your mould when done. You may have a need to make another for someone else. My mould is hanging on the wall of my shop, just in case its needed again.
 
Standard fiberglass and resin like for boat repair will typically hold up well. The key with the cotton over the mould is to layer up the cotton with multiple layers of resin to get it to hold its shape well before popping it out and layering up the inside. Use the heavy duty fiberglass matting. In the US it's called 7781 series. Orient the layers 45° to a corner. It lays in better because both length and width strands are allowed to bend. I used 2 layers of 7781 for the shroud and 1 additional layer of it at the metal bracket pickup points to reinforce it a bit. It took me about a week to make mine, because each time I scuffed and added a layer of resin, i had to let it cure. Then the ssme with the fiberglass and resin on the inside. Patience has its rewards. Keep your mould when done. You may have a need to make another for someone else. My mould is hanging on the wall of my shop, just in case its needed again.
Thank you.
 
Here is a little update. When I have had the time I have been working on crossing of things on my "to do list". I have been taking it for longer and longer test drives too. Recently I have been working on the cooling system because the temp crept up when idling. When driving the temp would stay around 180, but when stopping and idling it would creep up and I would shut it off at 215. Yesterday I did some tuning with a timing gun and a vacuum gauge. I had about 18* initial timing when starting. I increased the initial a little and it picked up rpm and vacuum. I backed the idle rpm's back down and did the process again until I had reached a peak vacuum on the gauge and the engine would no longer pick up rpm. I then backed the initial off just a touch and it is now at 25*. I have the distributor set so it can get a total of 37* total timing now. It was a very hot day yesterday, while idling and driving around very slow the temp now stay at 194 and when cruising it's at 179. I did nothing with the carburator yesterday. The AFR is at around 12.5 at idle and cruising at the moment. It's the Edelbrock AVS 650 out of the box. Would you call that a little rich?

So it seems to like this initial timing, I have no problems starting the car at all after shutting it off hot, and starting it again after 15 minutes.

I don't have a clutch fan, I have a 18" Derale flex fan at the moment, and a repro fan shroud that doesn't seal very well. So there is room for improvement. I have a stock 22" radiator that I have flushed 3 times with it out of the car with citric acid. I think I want to go with a stock replacement clutch and fan. Could anyone point me in a direction where I can get that and what would work on my car? Should I measure from the water pump to the radiator to know exactly what I need or is there a stock replacement fan and clutch?

IMG_4041.jpeg


IMG_4042.jpeg
 
I bought this fan and clutch off of a member here. I posted a WANTED ad and he responded. He even shipped to the states from Canada. It is basically a copy of the MP viscous fan kit DCC-4120758 that they quit producing for some reason. I haven't had a chance to bolt it on with the reproduction shroud that I also bought, but it should be going on soon.

dcc-4120758.jpg
 
OEM brass radiator or thicker aluminum one? If it's a thicker aluminum one, then use a fan clutch from a 1990 jaguar XJ6 it fits and is a fair bit shorter. It should come with a centering bushing for the mopar pump shaft, and is SAE thread. With that I used an 18" 6 bladed fan made for a clutch. I got it from summit. I think it's made by flexalite.
 
Last edited:
I bought this fan and clutch off of a member here. I posted a WANTED ad and he responded. He even shipped to the states from Canada. It is basically a copy of the MP viscous fan kit DCC-4120758 that they quit producing for some reason. I haven't had a chance to bolt it on with the reproduction shroud that I also bought, but it should be going on soon.

View attachment 1716107714
What's funny is thats a stock 1980s chrysler fifth avenue fan and clutch. Junkyard part all day long. MP sold that as a hop up part ?? LOL. I very rarely bought anything out of the MP catalog
 
Last edited:
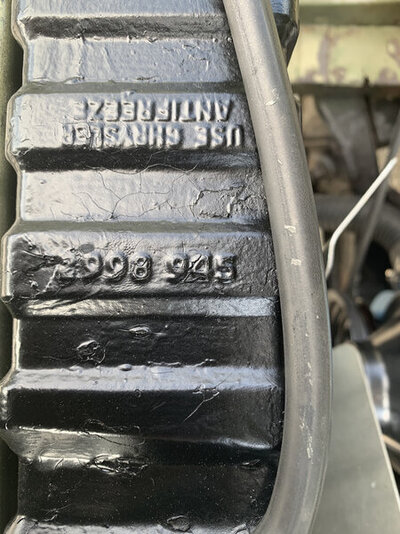
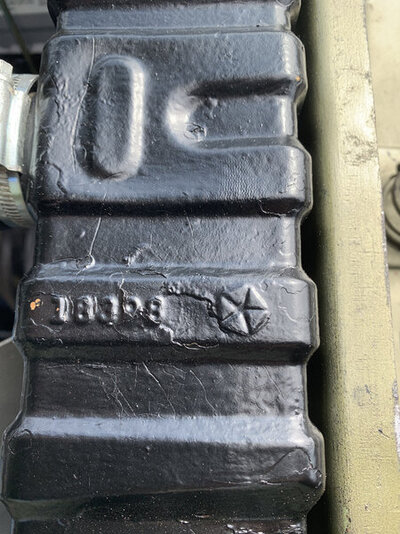
Thanks for the feedback guys. I believe it's a OEM brass radiator.


IMG_3958.jpeg

IMG_3959.jpeg
 
Changed oil and filter yesterday and started it for the first time this year. Because of work I rarely have time to work on it these days. I keep a little book to document what I have been doing, and this thread is also great to go back and look at what you did last. You think you will remember everything, but no :) Hope you all have good times working on your cars!
 
-
Back
Top