1970 Duster, Trans-Am-inspired "Pro Touring" build

-

MopaR&D

Nerd Member
Joined
Jan 4, 2008
Messages
5,528
Reaction score
2,829
Location
Augusta, GA
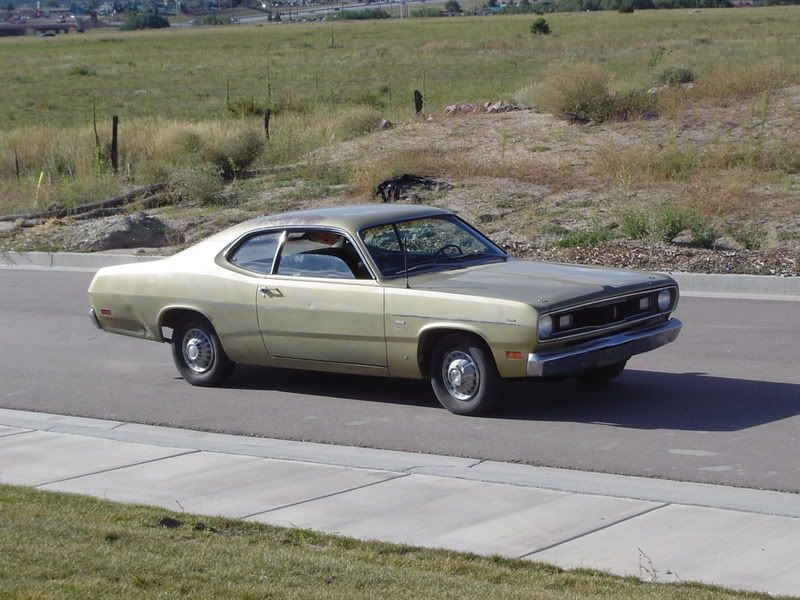
I finally decided to start a thread about my 1970 Duster that I'm in the process of finishing up a drivetrain swap on. My dad bought me this car in 2008 and it started as a mostly-original stock 318-2bbl, 904 car.

The day I brought it home:
DSC00797.jpg


Over that next year or so I proceeded to remove the 318 and upgrade it with a Lunati Voodoo 60401 cam, Performer intake, Carter AFB 625 cfm carb, and dual exhaust. Being a rookie at old cars however I overlooked the fact that the 105k-mile bottom end was in terrible shape and once it was back together it would burn about a quart of oil every 10 days. Was still quick enough to keep up with my friend's 2002 Subaru WRX with a few bolt-ons though.

http://s54.photobucket.com/albums/g100/Cornt440/?action=view¤t=DSCN4986.mp4

Around June of 2010 I decided it was time to make my vision of my Duster as a true muscle car a reality. I put the front up on jackstands and proceeded to remove the engine, K-frame, front suspension, radiator, and pretty much everything else related to the drivetrain from the cowl forward. Since that time I have been stockpiling parts and now, a year and half later, I am getting ready to put it back together. First some specs on the subsystems of the car.

Engine:

-- 1975 360 LA block, already bored .060"-over; I had it honed for moly rings and hot-tanked with new cam bearings installed. Also new ARP main cap bolts
-- Stock '75 cast crank, balanced and cleaned up with a .020/.020 turning and polishing
-- Stock con-rods, balanced but reusing original rod bolts (I bought new ones but didn't realize how much it would cost to have them pressed in so I decided not to)
-- New Clevite 77 main and rod bearings, clearances plastigauged around .003" for both mains and rods (yes a bit loose but do I care at this point? lol)
-- KB-107 flat-top zero-deck hypereutectic pistons + rings, valve reliefs lightly ground to remove sharp edges
-- Melling standard-volume oil pump
-- Stock 360 car oil pan with home-made baffle welded in
-- Factory replacement iron 360 Magnum heads, untouched except for some more light grinding on the chambers to reduce sharp edges
-- Hughes Engines 1110 valvesprings and 1278 retainers, stock valves and locks
-- Stock Magnum 1.6:1 rockers, pedestals, etc.
-- Fel-Pro .039" head gaskets, final quench distance around .042" with static compression checking in at 10.42:1
-- Reusing the Lunati Voodoo 60401 cam and lifters from my 318, to give me a dynamic compression of around 8.71:1. http://www.lunatipower.com/Product.aspx?id=1543&gid=287
-- Mopar Performance LA-Magnum conversion pushrods, probably be a bit too short but we'll see how it runs
-- COMP Magnum double-roller timing chain, and Mopar Performance timing chain tensioner
-- Edelbrock RPM Air-Gap intake for Magnum heads
-- Vintage 340 Hi-Po driver-side exhaust manifold, big-outlet (2 1/8") passenger-side Magnum truck exhaust manifold
-- Also reusing the Carter AFB 625 cfm carb from my 318
-- Lastly some vintage Mickey Thompson ribbed valve covers painted wrinkle black
-- Almost forgot ignition, I have a Mallory HyFire-6A box with parts-store electronic distributor and Autolite 3929 plugs

As you can imagine I'm building this engine for TORQUE, I don't imagine it will spin much above 5000 RPM. Some may say that I have too small of a cam for the compression but at the 5500-ft. elevation I live at I'm going to need all the cylinder pressure I can get. I intend to use 2.94:1 rear gears and a 2800-stall converter so I wanted to keep it smooth and able to get some semblance of gas mileage lol. Some pics of it going together:

311214_2163074988664_1000278591_32033406_1305347959_n.jpg

296671_2163074788659_1000278591_32033405_2077641323_n.jpg

312661_2318020262199_1000278591_32149558_595859163_n.jpg

305700_2349634692540_1000278591_32165063_1405668586_n.jpg


More to come, I'll get into the suspension and other stuff as time allows.
 
Good job tearing into the motor and gettin' it done. Maybe you'll surprise your WRX friend when you pass him!

Before you start tearing into the suspension though, (You can upgrade the T-bars, get substantial leafs shocks & bushings etc. later.) I'd be thinking about that 105K tranny behind the new motor, as well as the 3rd member. A lot of people forget about the "stuff" you cant see.

What rear end is in the car? If it's a peg-leg, then your gonna be changing a lot of tires:poke:.

Just my .02
 
Thanks for the kind words guys...

Good job tearing into the motor and gettin' it done. Maybe you'll surprise your WRX friend when you pass him!

Before you start tearing into the suspension though, (You can upgrade the T-bars, get substantial leafs shocks & bushings etc. later.) I'd be thinking about that 105K tranny behind the new motor, as well as the 3rd member. A lot of people forget about the "stuff" you cant see.

What rear end is in the car? If it's a peg-leg, then your gonna be changing a lot of tires:poke:.

Just my .02

You are right, I actually wore out my old bone-stock 904 shifting it manually all the time under full throttle to where it would take SECONDS to shift gears. I bought another 904 that was already rebuilt with a shift kit, stronger internals, etc. as well as a 2800-stall TCI converter (I know, not the greatest but we'll see).

I also landed an 8 3/4" rear (742 case) out of a '67 Coronet with factory Sure-Grip and 2.94:1 gears, exactly the setup I was looking to run. The stock leaf springs are saggier than... (nevermind LOL) and I'm going to get new ones of those too.

I'm setting this car up more for road-racing and spirited cruising through the heaven-like mountain highways of Colorado. I already bought 1" torsion bars from Just Suspension as well as a full '73-up BBP front disc brake setup and front suspension parts. The car came with factory Kelsey-Hayes manual front disc brakes and I'm keeping them manual, I LOVE the extra feel and modulation of manual brakes.

I also bought and installed a Firm Feel Stage 2 power steering box back when I took the 318 out the first time since the old one was super sloppy. I also rebuilt the front end once already but cut a few corners that became noticeable later one, main one being too-thick strut rod bushings pushing the lower control arm back out of position and allowing only 2* or so of caster (nominal is 5*+ for modern PS car). Now as it's going back together I'm going to make sure it's all done the RIGHT way.

Hopefully this Sunday I'm going to be putting the engine back in and during that time I'll use my cousin's much-better camera phone to take lots of picks of the car and parts I'm going to use.

A pic of me with the car when it was still a driver:
19272_1234792062171_1000278591_30593060_4975513_n.jpg
 
Hey Khalid, just thought I'd say hi and thanks for the 302 heads, we'll make sure that they get to a good use. You and my son would have some in common, he's taking a semester off from Iowa State's materials engineering program and trying to work on his Duster as money allows. We just got done with the 1" tbars, all new bushings, etc on the front end, now we just need to get the heads on and the engine solid again.

It was great meeting you, although a bit chilly. Good luck on your Duster, and if you ever need anything, let me know.

Scott
 
Sweet car! I go to school in Flagstaff, AZ (originally from southern California) and we're @ 7,000ft elevation and it kills anything naturally aspirated:( Brought my dakota up here freshmen year and it wouldn't even spin the tires lol can't imagine my slant six duster:mrgreen: good luck with your project you have deeper pockets than me!
 
Hey Khalid, just thought I'd say hi and thanks for the 302 heads, we'll make sure that they get to a good use. You and my son would have some in common, he's taking a semester off from Iowa State's materials engineering program and trying to work on his Duster as money allows. We just got done with the 1" tbars, all new bushings, etc on the front end, now we just need to get the heads on and the engine solid again.

It was great meeting you, although a bit chilly. Good luck on your Duster, and if you ever need anything, let me know.

Scott

Thanks Scott it was nice meeting you too, it didn't even cross my mind to consider you might be a FABO member haha... Let me know how the heads work out for you and I'd like to see your son's Duster when it's done. I need to have mine done by the 21st or so of this month (my parent's house is supposed to be closing by then) so I'm kind of in a time crunch with finals and all but it gives me motivation to get it back together. However in case I can't get it running and driving on its own by then would you happen to know anyone with a truck and trailer and maybe a good place to store my car in Denver until it's done?

dusterdan--tell me about it with the high altitude, every N/A car here needs as much help as it can get. The worst is driving through the mountains up steep grades at even higher altitudes, puts any engine to the test and is not a fun time with anything less than a 6-cylinder or turbo-4. That's why I want a high-compression torque monster that will push strong at any RPM.
 
Wow I didn't realize how long it's been since I last posted in here. So a lot has happened since then, my parents house has been sold since December 30th and everything is out of there. The new engine is in the car and it is very close to being ready for the first start-up. Needless to say I've learned quite a bit over the past couple months when it comes to modifying old cars to this extent, mainly that I will never attempt this again until I have a job with a yearly salary LOL!! Not to mention my own garage... The car has been parked at a local Monument auto shop since the end of last year as I put it back together so I can drive it up here to my apartment in Denver.

Some pics of the engine going in the car:

392048_2204782090188_1566466709_31617303_1382068650_n.jpg

388008_2204786130289_1566466709_31617307_685399065_n.jpg

387220_2204787730329_1566466709_31617309_595490242_n.jpg


Here's the car more recently, soon after I got the front suspension back together and the new wheels and tires on. You may notice the wheels stick out pretty far; the 15 x 7" slotted mags have too little backspacing (3.25") and the 215/65R15 Firestones rub the fenders badly when turning. I found a pair of new 15 x 7" big-bolt Rallyes at a big swap meet last weekend in Denver with the factory 4.25" backspacing which should make the tires fit from what I've read on here.

The other big issue was with exhaust. I had an old 340 driver-side manifold that had been brazed to fix a crack; unfortunately the brazing material interfered with the head when the manifold was mated to bolt on. After a couple hours with a grinder I got enough material off so it would sit flush with the flange; only to find I had broken through to the crack! AHHHH!!! :banghead::banghead::banghead: So I took the way out that seemed most worth the money and bought a set of Hedman Tight Tubes shorty headers. The downpipes had to be fab'd anyways so I figured it would cost as much as a replacement 340 manifold.

406220_2751436057323_1000278591_32333463_662702890_n.jpg


So at this point all that's left to do is swap the wheels, fill it with oil and antifreeze, and put in a new billet oil filter plate and stud. I stupidly put the old one on backwards with the 3/8" socket extension drive outwards and broke the stud when I went to remove it. The stock stamped filter plate didn't seal when I went to prime the oil pump and spewed oil all over the ground. Once that's done we'll see if it starts, hopefully it won't blow up or seize after all this hard work and spent money!
 
Another update... I've made a lot of progress since the last post, including swapping the slotted mags for Rallyes and getting the engine fired up for the first time. I had the floats set too low in the carb so it couldn't run for more than 10-20 seconds before stalling out, but when it did run it sounded GREAT!! It took me a while to charge the battery up so it would crank fast enough but once it did it started right up and ran smooth with no misfiring, the timing even sounded decent even though I just set the damper at 8* and eyeballed the distributor. Oil pressure was great too, I primed it of course and after starting it shot up to 80 psi and stayed there. I didn't put it in gear and drive it but the throttle response revving it up a bit was CRAZY, way quicker than any car I've ever driven or heard in person (which doesn't mean all that much but still). I'm super excited to get this thing on the road, all it needs is to top up the fluids and get the front-end tightened up and aligned and it's good to go! Oh not to mention a seat needs to be bolted in lol...

Here's with the new wheels, I should've thought to get closed-end lugs duh:eek:ops:

432182_2974311509070_1000278591_32409380_58647876_n.jpg


And the engine before plug wires were put in

401264_2974311709075_1000278591_32409381_884495576_n.jpg


P.S. I should probably explain the strange name too, my cousin and I were trying to think of nicknames for my car and it started to get really technical and nerdy as usual. Brainchild because it represents a bunch of new ideas, Triathlete because I want it to go, turn, and stop as well as get decent gas mileage and cruise on road trips. Yeah it's pretty lame I need more ideas if you got them LOL
 
Really getting a lot done there kid.. Glad you got everything worked out on that exhaust. And from experience, having the seat bolted in when you tromp on it is a very very good idea lol..

Grant
 
Moving right along in good fashion Kid :cheers:
I save the picture of the engine on the k frame before it went in under for referents :clock: Thank you =D>
You are doing a great job and staying busy it looks like and will be hitting the streets safely soon :burnout: =D>
 
Thanks guys it feels great to finally have this thing running, I drove it around a bit today and it runs totally different than before. The converter is pretty loose which might take some getting used to, hopefully my tranny won't overheat until I get the money for an auxiliary cooler. But this thing just 'gets up and goes' so effortlessly, it's amazing. Only issues so far are a leaking timing cover bolt (coolant), my temp. gauge doesn't work, and the back-up lights come on in forward gears (???). Carb needs to be tuned a bit too (pump shot or step-up springs). Should be pretty easy fixes, anyone have any ideas on the back-up lights though? Tomorrow hopefully the shop will get the alignment done and then I'll be hitting the road.
 
Another update, I've gotten the timing dialed in and finished up a few odds and ends including adding a Derale auxiliary trans. cooler. This thing runs GREAT, has tons of torque and can easily spin the tires even with 2.76 gears, also at 5500 ft. elevation to boot. It's also effortless to drive, it's comfortable going anywhere whether through the city or cruising at 85+ MPH for hours on the highway.

Here's a cold-start (85*F ambient temps) video I took today with my new smart phone, the sound quality is actually very good. Ain't technology amazing?

[ame="http://youtu.be/dzOWDkwx5nw"]302 Found[/ame]

More videos to come, hopefully I'll get a couple at the drag strip before the season's over.
 
Thanks for updating.Always reading your posts.Nice job ,so far.
 
Hey guys figured I'd give an update here with some pics. Major changes since my last post in this thread include a swap to a factory-style torque converter and an 8 3/4 rear end! Whoohoo! The rear came from a 1967 B-body, I had the spring perches moved inboard to match up to my springs and a pair of custom-manufactured (for me) 15x8" Rallye wheels from TruDesign Wheel here in Denver. I also added another leaf to my spring packs by cutting the ends off another pair of main leaves and drilling holes for the plastic pads; this raised the back end substantially and helped firm it up improving my cornering and launch abilities.

Here's before the axle-and-spring operation

1441180_10201608253340397_864313780_n.jpg


And after:
10442421_10202833902220853_4352232796565611308_n.jpg
 
Also this past month I was loaned a 489 center section by fellow FABO'er "nothingbutdarts" with Sure-Grip and 4.10 gears which I recently swapped in to feel the difference compared to the 2.94 gears my 8 3/4 came with. It is like night-and-day, takes off like being shot out of a cannon but screams on the highway like it lost top gear lol. I'm hoping to take it to a Test & Tune at my local drag strip (Bandimere) this Wednesday and see what kind of times I can pull; I'm thinking low 14's (remember I'm at ~6000 ft. above sea level)
 
Hey guys holy crap it's been a while, didn't realize it had been this long since I worked on my own car. Goes to show how good cars they are ha! I finally got a job and some cash in my pocket to spend on upgrades. My plan is to get some 3.91 gears and drag radials to hit the strip this summer but before I can do that, I figured I need a proper readout for my engine vitals.

Old dash setup, say "good riddance"!
11182251_10205004609007166_80578272035700297_n.jpg


The original speedo went out a little over a year ago, I didn't want to spend $150 to have a rebuilt piece of crap so I bought an aftermarket piece of crap LOL... one of those "Equus" gauges from the Irish parts store. It conveniently broke three months after the warranty was up and I decided it was time to do it right. So I ordered one of the plastic instrument panels from Classic Dash, here it is with the gauges mocked up:

11209654_10205004609127169_2007064239536980618_n.jpg


I am also redoing the wiring to eliminate the fire hazard Ammeter gauge circuit and bypassing the alternator straight to the battery using the original fusible link and a new separate one going to supply the stuff inside the car, with a nice 10-gauge wire going straight through a hole in the bulkhead connector. I will reuse the original dash wiring for the sender wires and just change out the water temp sending unit, the fuel gauge I got is supposed to work with the factory sender in the tank and the oil pressure gauge was added several years ago so it already has its wiring in place. Same with the tach.

More pics to come I will try to cover this project properly...
 
Thanks Tim, had a big D'OH! moment just now though, I realized this plastic panel has no provisions for turn signal lamps! I think I'll just drill a couple holes shaped like the ones on the back of the gauges and use two more of the same lamps. Ugh how annoying... #-o
 
Thanks Tim, had a big D'OH! moment just now though, I realized this plastic panel has no provisions for turn signal lamps! I think I'll just drill a couple holes shaped like the ones on the back of the gauges and use two more of the same lamps. Ugh how annoying... #-o

I wouldn't sweat it,Khalid. Seen professional interior gays, fail on this one.
 
Interior gays? Lol couldn't resist... so i got everything wired up nice but the turn signal lamps don't work right; i think it's because they're LEDs as opposed to bulbs so the lack of resistance is screwing up the current flow. I need to test the resistances with a multimeter and proceed from there...
 
OK so the new dash install is finally DONE! Lots of hours spent making up the huge web of wires now residing behind the instrument panel, here's the final result:

https://scontent-dfw.xx.fbcdn.net/hvideo-xtp1/v/t42.1790-2/10528219_10205033666613588_1107445900_n.mp4?oh=4c68995378d82ad99dbf3c715876586b&oe=554D790B

The problem with the turn signal indicators was that I had wired them backwards :eek:ops: forgot that LED's can only be wired one direction. Switched the polarity and now it's all good! It's so nice now to see what my actual engine temp is in degrees, and the new voltmeter is so accurate I can easily tell when the alternator is charging or not.
 
Been a while, some major and minor mods since my last post... Compiling pics at the moment stay tuned
 
Arrrighty so first (but most recent I guess) I cut a hole in my hood and installed a dual-snorkel scoop. But this wasn't just your flimsy aftermarket fiberglass piece; it's an ORIGINAL Mopar replacement hood scoop from the '70s I scored from none other than my good friend and fellow FABO member Dave Bonds.

Pics of before, last time I washed the car before I cut the hood...

20160706_160253.jpg


20160706_160309.jpg


20160706_160345.jpg
 
-
Back
Top