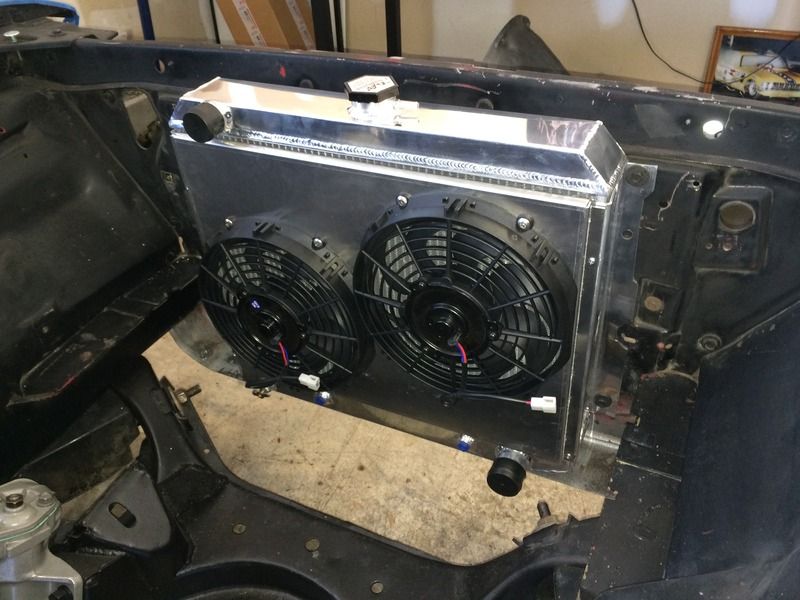
The more I read about people having issues with those champion radiators, the more I'm glad I didn't splurge for one. But it sounds like you're gonna get it whooped Brian. Like flyfish said though, anything aftermarket seems like it takes some sort of massaging to make work. It sometimes is a PITA but worth it in the end.
You are using an out of date browser. It may not display this or other websites correctly.
You should upgrade or use an alternative browser.
You should upgrade or use an alternative browser.
408 Build Thread
- Thread starter BrianT
- Start date
-
The bracket that the shroud bolts to is bent and needs to be straightened. Once straight, I can drill a hole. The bracket is too close to the radiator to just slip a nut and bolt in there, so I'm going to look for a speed nut that fits. Even if I find a speed nut that fits, I'll have to use a very short machine screw to keep it from screwing into the radiator that sits 1/4" behind the bracket. Not anything impossible, but not as simple as "drill a hole and bolt it up".
Ah, gotcha. Good luck, there is light at the end of the tunnel, you're almost done, hang in there.
****, there wasn't a full days worth of work today, so I came home around noon determined to get this radiator/shroud problem straightened (no pun intended) out. I knew that I had some speed nuts left over from a car speaker installation so I grabbed those off of the shelf. Next, I needed a way to pull the fan shroud mounting bracket in towards the radiator so that the shroud holes will line up. I talked to a buddy at work and he has a pipe clamp that I can borrow, but I'm working now and need another idea. That's when an idea came to me.
I grabbed two blocks of scrap wood and my ratcheting motorcycle tie down. I wrapped the tie down around the radiator and put the blocks of wood against the bracket to take the brunt of the pull. I also laid a large piece of cardboard on the radiator itself to prevent damage to the core. I tightened the ratcheting strap one click at a time and kept checking the mounting holes on the shroud, it was moving!!! When I released the strap, the bracket moved back a little as I knew that aluminum would do, so I tightened the strap again and gave it a few more clicks. Within ten minutes, all four holes (I had to finish drilling the factory hole) lined up great. Sorry I didn't take a picture of this, but I was on a roll and working on the kitchen table! I used the speed nuts and some short screws to to mount the shroud to the radiator.
I used stainless steel hardware to mount the fans to the shroud, and that was pretty uneventful. When I went to test fit the whole assembly to the car, one of the mounting holes didn't line up, so I took some quick measurements and drilled into the mounting bracket. I bought four new reproduction mounting bolts off of eBay earlier in the week and used them to secure the radiator to the core support. I still need to figure out the wiring, but I definitely made some headway today!

Nothing really to add this weekend but I saw this and immediately thought how true it was! You gotta laugh to keep from cryin'.


j par
Well-hung Member
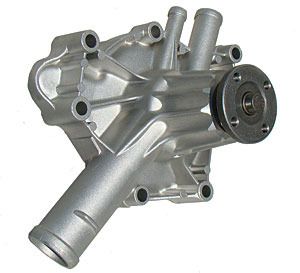
So as not to go through all ten pages of this thread - what kind water pump are you using ? The reason I ask is because it looked like I had miles. I took out radiator & fan I'd mocked up. Later put in motor, looked like I had miles. Then I finally got to put the radiator & fans back in-- yikes ! It's very tight.
I'm going to be running this Milodon 16250 water pump and yes, I think it's gonna be tight. I have a four row core going in there, so fingers crossed!

The more people I talk to the more I don't trust the two smaller electric fans. I may end up going back to the MP viscous fan set up that I was running before.

The more people I talk to the more I don't trust the two smaller electric fans. I may end up going back to the MP viscous fan set up that I was running before.
j par
Well-hung Member
As I'm sure you know, I have the 410 stroker with iron 596 heads. Now granted we've been having some
65 to 72○ days and thats not full summer heat, but so far 160 - 180 almost not hot enough.
my combo: gutted thermostat (no burping for break in), stock 2 core brass, homemade shroud. 2 electric fans i bought here from a member. Now i say this because it's what's working for me.
i know from experience as you get closer to the big day you start triple checking. Then you start reading all the arguments back and forth like ma mopar had a team of engineers design it this way. How could you think you could do any better and all that stuff. it brings on so much second guessing mostly because of the anxiety you have about starting the new motor and all the time and money you've invested in it. my personal advice and this is just my 2 cents is to do it the way you want to, and have all the precautions in place, a fan in front of it and a hose to cool it down if things get out of control during break in. have fun ! don't overthink it! oh yeah and good luck getting any sleep the night before you start it!! LOL View attachment 20150307_144030.jpg
View attachment 20150211_152210.jpg
I appreciate your advice, and you're right, I'm double guessing and even triple guessing everything! Luckily I have a good builder and trust his judgment. He's steered me back on course a couple of times when I tried to change directions midstream. My engine is full roller and will be broken in and tuned on their dyno probably before I get out there. They will leave it on the dyno so that I can see a few pulls before I take it home. Show me the baby, not the birth!
j par
Well-hung Member
okay my next word of advice from experience with a stroker that has probably less horsepower than you're going to have" take it easy at first!" that thing will get out from underneath you quicker than you think! and I say this to get you jazzed up and excited for the fun you're about to experience!
I just dropped off the drive line at the local driveline shop and they said wow it's got new u joints already? I just said I needed to be made as safe as possible because the power of the motor is incredibly, well in the words of on lookers "BEASTLY!!"
I just dropped off the drive line at the local driveline shop and they said wow it's got new u joints already? I just said I needed to be made as safe as possible because the power of the motor is incredibly, well in the words of on lookers "BEASTLY!!"
Lonewolf3165
Living the Dream!
Glad to see you're making good progress again Brian! I'm looking forward to seeing the results too!
fishy68
Tyr Fryr's Inc.
I'm going to be running this Milodon 16250 water pump and yes, I think it's gonna be tight. I have a four row core going in there, so fingers crossed!
I only have a 2 core but their 1" cores so I think it might be real close to the same thickness of yours. When I first put the radiator in I put one big electric fan on it that nearly covered the radiator and it had to be a thin line fan. Your 2 fans will give you a little more room since their thick part (where the motor is) is offset from the water pump.
BTW: in the end I took the big electric fan off cause it was still running hotter than I liked and I put on a viscous fan and it cools better than the big electric fan. Your experience may not be the same, just sharing mine.
BTW: in the end I took the big electric fan off cause it was still running hotter than I liked and I put on a viscous fan and it cools better than the big electric fan. Your experience may not be the same, just sharing mine.
I appreciate the advice. I ran a MP viscous fan set up with no shroud and a C body radiator for the last ten years and was having similar results as j par. It always ran right at 180 regardless of the outside temp. Never even thought about my car overheating. Now it's in the back of my head. I've got to stop worrying/over thinking these things!
j par
Well-hung Member
Duster vs Camaro: [ame]http://youtu.be/nRBdjpE-JUA[/ame] Some more stuff to keep you jazzed up 12.51 @ 113 mph he got the jump on me , but those big cubes ate him up by a full second in the end ! :burnout:
CH3N02
Member
I had a radiator/fan set up like that. It it did get hot because the shroud cover too much of the core. We ended up opening up the area around the fans etc and it worked just fine after that.
Awesome build!!
Awesome build!!
This has nothing to do with the engine swap, but I've wanted to put a sway bar on the Dart since the first time I drove it ten years ago. Back when it had a worn out suspension, nine inch drum brakes, worn out shocks, etc. Now, it has all new EVERYTHING in the front suspension and this is the last piece.
I had decided on the Hellwig 55906 three years ago after PMing Dave@Hellwig and getting his recommendation. It's a 1 1/8" hollow bar for weight savings and it's a bolt on. It has all of the nice HD hardware and poly bushings. Sounds like a no brainer to me? I found one on eBay, open box for $56 cheaper than Summit with the same free shipping. Happy Easter to me. Something else that I can install and then wrap up before painting the engine compartment!

I had decided on the Hellwig 55906 three years ago after PMing Dave@Hellwig and getting his recommendation. It's a 1 1/8" hollow bar for weight savings and it's a bolt on. It has all of the nice HD hardware and poly bushings. Sounds like a no brainer to me? I found one on eBay, open box for $56 cheaper than Summit with the same free shipping. Happy Easter to me. Something else that I can install and then wrap up before painting the engine compartment!

j par
Well-hung Member
Well ? Anything new ? !? :coffee2:
No, not much. I can't get my painter buddy over to work on my engine compartment and when I called the machine shop this week, they said it would be a couple more weeks before my engine goes on the dyno. I'm a patient man, but both are pushing my limits now.
j par
Well-hung Member
O- I know so well!!! When December 20th turns into March 6th &#$!@# my patients where wore down to a nub! On the other hand - when I took the car out for the first test drive and I grabbed second gear and mashed down hard on the loud pedal, i wasn't thinking - boy, that machine shop sure took a long time?? Actually the ONLY thought going through my head was- IF I DON'T GET THIS CAR STRAIGHT QUICK I'M GOING TO GET HURT ! !!!! Well a month passes after that and I go back to the machine shop and I go straight up to Ted and say ARE YOU LOOKING TO KILL ME ??!! He just smilled and shook my hand and said "another satisfied customer!!":burnout:No, not much. I can't get my painter buddy over to work on my engine compartment and when I called the machine shop this week, they said it would be a couple more weeks before my engine goes on the dyno. I'm a patient man, but both are pushing my limits now.
"Stay thirsty my friend "!!
acpat
Well-Known Member
any progress ?
A friend of mine went to the machine shop last week to check on the progress of his 340 and said that my engine is now THIRD in line for the dyno. Every time I call them, they say a couple more weeks. I've been busy with work and my daughter's graduation, but my goal was to have it back on the road by this weekend, Memorial Day. Bummer.
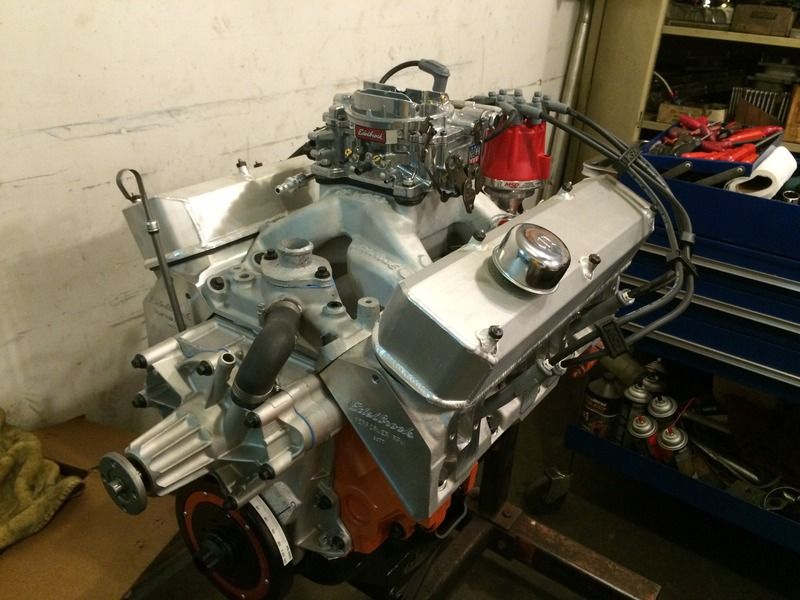
I got tired of waiting on them, so I took a drive out to the machine shop today. I was pleasantly surprised. My engine is completely together and even sitting next to the dyno!
I spoke with Doc and Pat for about a hour and they assured me that it would be bolted on and running in the next couple of weeks. Sound familiar??? The other good news is that it's all bought and paid for, and I shouldn't owe them any more money including the dyno/tune time. I have some money saved up but now I can spend that on a decent convertor and exhaust. If I could just get my painter over here to finish up the engine compartment...

I spoke with Doc and Pat for about a hour and they assured me that it would be bolted on and running in the next couple of weeks. Sound familiar??? The other good news is that it's all bought and paid for, and I shouldn't owe them any more money including the dyno/tune time. I have some money saved up but now I can spend that on a decent convertor and exhaust. If I could just get my painter over here to finish up the engine compartment...

j par
Well-hung Member
That looks great ! I'm going to quote the movie Spaceballs and have to say ludicrous speed! Lol at the very least Ludacris torque! Maybe and this is a BIG maybe, you'll be able to stab the loud pedal down past halfway in high gear (with street tires) without getting completely out of control? In the first couple of gears - forget-a-bout-it.. Oh boy your going to have fun !!
I got tired of waiting on them, so I took a drive out to the machine shop today. I was pleasantly surprised. My engine is completely together and even sitting next to the dyno!
I spoke with Doc and Pat for about a hour and they assured me that it would be bolted on and running in the next couple of weeks. Sound familiar??? The other good news is that it's all bought and paid for, and I shouldn't owe them any more money including the dyno/tune time. I have some money saved up but now I can spend that on a decent convertor and exhaust. If I could just get my painter over here to finish up the engine compartment...

Nice... Can't wait to see the dyno digits...
360duster
Well-Known Member
cool, also pretty interested in the dyno sheet, maybe i´ll step up to the cam you´re using....got the XR286HR at the moment.
Michael
Michael
-


