Thanks RRR! If I ever make it to GA with it, I’ll be sure to look you up for a rideNice progress, Don! But chop, chop Hop Sing. I wanna ride. lol
65 Dart Wagon Conversion to a Sedan Delivery
- Thread starter 65 Dartman
- Start date
-
No pics but am finished with the passenger seat back and got the extremely nasty passenger seat cushion torn down and ready to assemble tomorrow or maybe in a day or two.
No pics? WTH? I mean seriously? LOLNo pics but am finished with the passenger seat back and got the extremely nasty passenger seat cushion torn down and ready to assemble tomorrow or maybe in a day or two.
That looks nice! I sure wish you would do a how to on them.Here you go Rob:
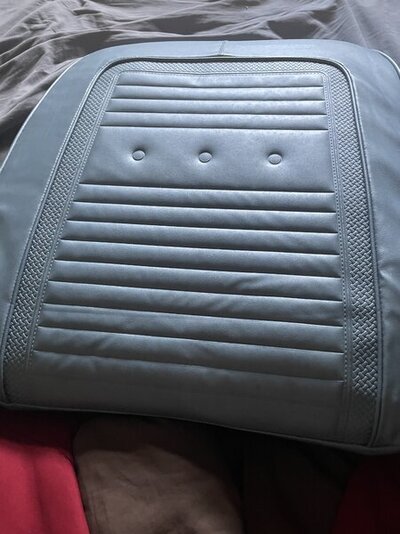
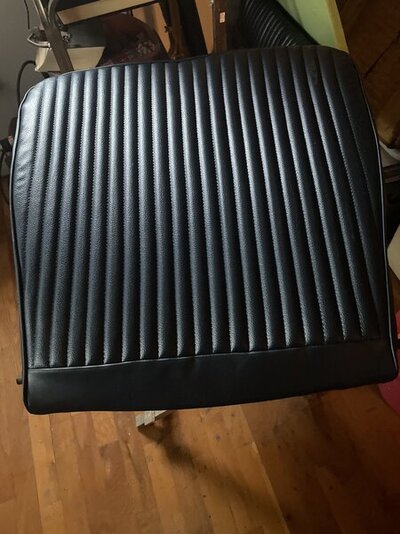
Completed passenger seat back
View attachment 1716214795
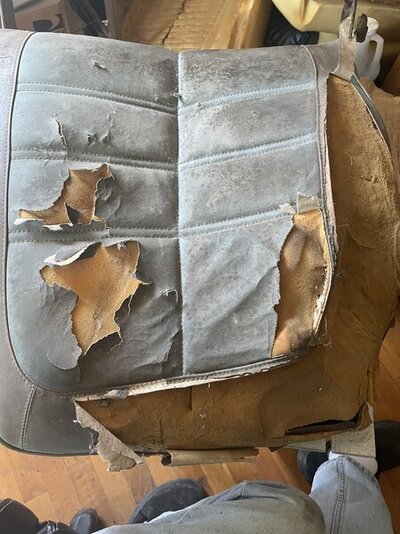
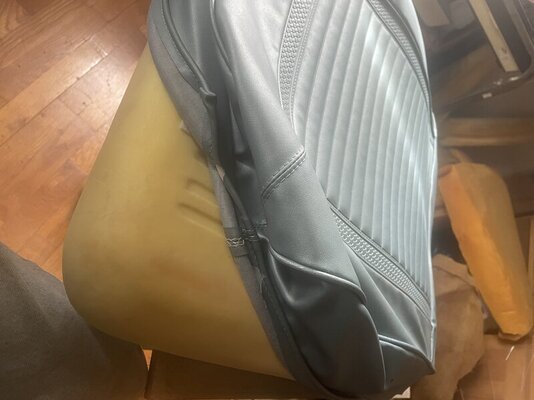
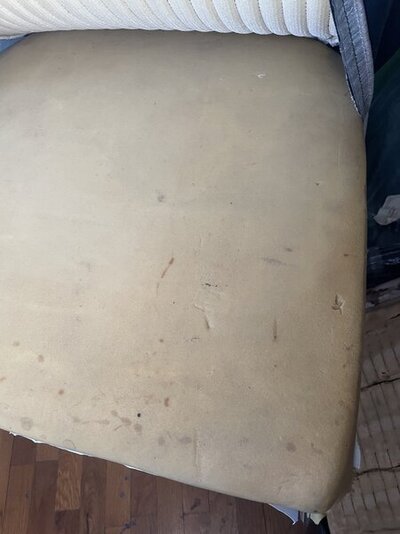
Before pic on the passenger seat cushion:
View attachment 1716214796
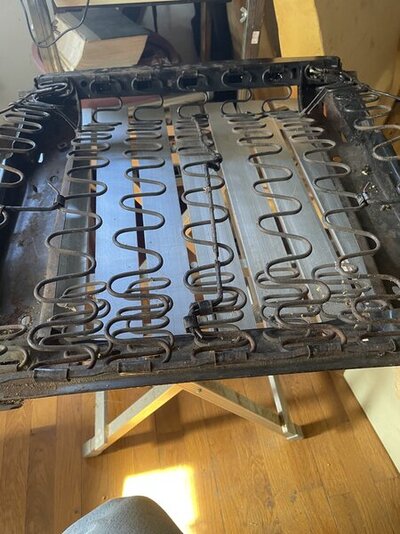
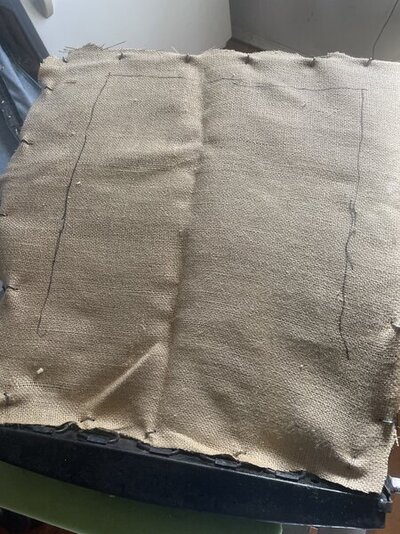
Passenger seat cushion stripped of the old foam, burlap and cover:
View attachment 1716214794
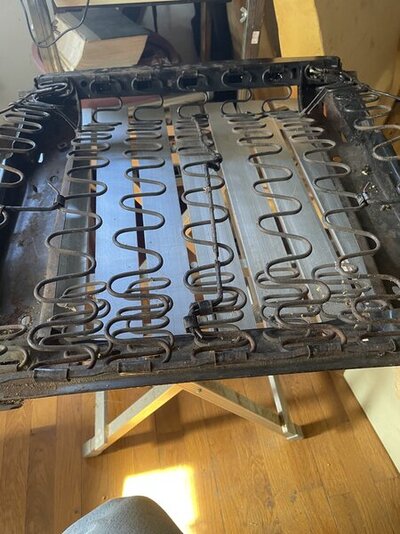
I got started on the seat cushion today. Where I left off
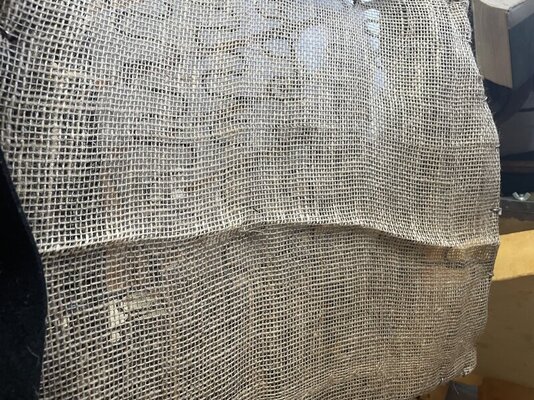
First, hog ring the burlap around the perimeter of the springs
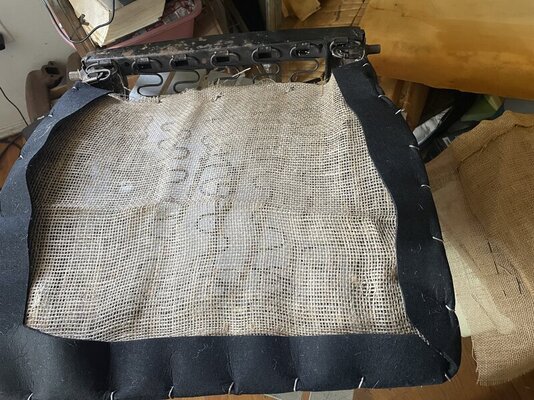
Then hog ring the
felt over the burlap also around the spring perimeter
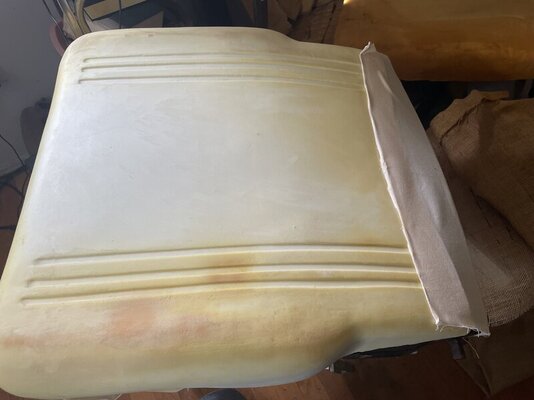
After gluing muslin at all 4 sides of the brand new Legendary seat foam, the foam was fitted to the prepared seat frame. The muslin was then hog ringed to the appropriate places on the seat frame - front, rear and sides.
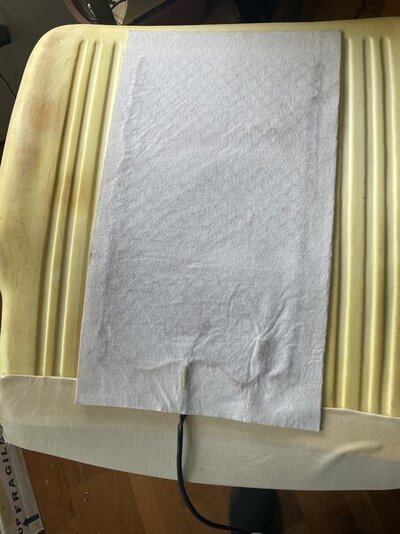
Then added the cushion’s heated seat pad
Then I spent the afternoon wrangling with the cover. I got 3 of the 4 corners mostly in place. Once I finally get the last cornersort of in place, I’ll work the erinkles out and hog ring it to the frame. Getting the cover over the foam is easier said than done. I tried Jerry’s @sgrip65 baby powder suggesstion and that was a no go. Legendary makes it look very easy - not in this amateur’s opinion
TO BE CONTINUED

First, hog ring the burlap around the perimeter of the springs

Then hog ring the
felt over the burlap also around the spring perimeter

After gluing muslin at all 4 sides of the brand new Legendary seat foam, the foam was fitted to the prepared seat frame. The muslin was then hog ringed to the appropriate places on the seat frame - front, rear and sides.

Then added the cushion’s heated seat pad

Then I spent the afternoon wrangling with the cover. I got 3 of the 4 corners mostly in place. Once I finally get the last cornersort of in place, I’ll work the erinkles out and hog ring it to the frame. Getting the cover over the foam is easier said than done. I tried Jerry’s @sgrip65 baby powder suggesstion and that was a no go. Legendary makes it look very easy - not in this amateur’s opinion

TO BE CONTINUED
Last edited:
Scott's dart
Well-Known Member
This thread is a great read! You're doing some awesome work! Would you happen to know which kit you bought for the heated seats?
I’ll go back and see if it’s in my buying history on AmazonThis thread is a great read! You're doing some awesome work! Would you happen to know which kit you bought for the heated seats?
EDIT: sorry i can’t find anything recent. There are so many varieties that fit under the seat covers you should be able to find something suitable for your A body
Last edited:
CONTINUED FROM POST 1031:
With a lot of tugging on the seat cover, pushing on the foam, having a 2nd pair of hands (my trusty helper - the wife), got the cover slowly pulled over the corner bit by bit until it was in place. Still had a lot of pulling on the cover to get it hog ringed on the back (5 hog rings), tunnel side (4 hog rigs), door side (3 hog rings and front (7 hog rings)! Other than painting the seat cushion side covers and seat back rear covers, the seats are 95% done.
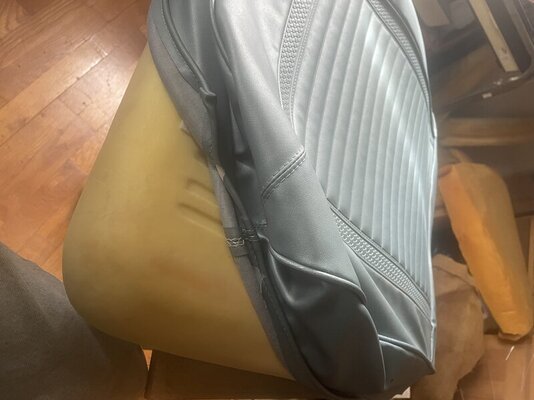
Before:
After:
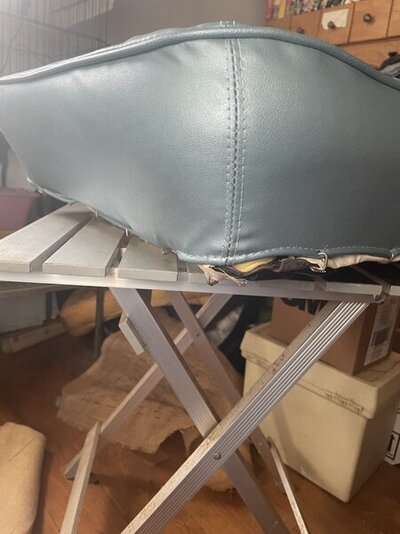
With a lot of tugging on the seat cover, pushing on the foam, having a 2nd pair of hands (my trusty helper - the wife), got the cover slowly pulled over the corner bit by bit until it was in place. Still had a lot of pulling on the cover to get it hog ringed on the back (5 hog rings), tunnel side (4 hog rigs), door side (3 hog rings and front (7 hog rings)! Other than painting the seat cushion side covers and seat back rear covers, the seats are 95% done.
Before:

After:

Hi Don, Pulling, Tugging, and Stretching and using the hog-ring pliers....simultaneously.....New definition for multi tasking. Looks great!!CONTINUED FROM POST 1031:
With a lot of tugging on the seat cover, pushing on the foam, having a 2nd pair of hands (my trusty helper - the wife), got the cover slowly pulled over the corner bit by bit until it was in place. Still had a lot of pulling on the cover to get it hog ringed on the back (5 hog rings), tunnel side (4 hog rigs), door side (3 hog rings and front (7 hog rings)! Other than painting the seat cushion side covers and seat back rear covers, the seats are 95% done.
Before:
View attachment 1716215918
After:
View attachment 1716215919
mygasser
Well-Known Member
and the wife there to witness that men 'can' multi taskHi Don, Pulling, Tugging, and Stretching and using the hog-ring pliers....simultaneously.....New definition for multi tasking. Looks great!!


Martythetrimmer
Well-Known Member
Scott's dart, not wanting to crash Dartmans post, there are many seat heaters on ebay. Fitted one for a mate 11 years ago. Still works fine, as good as some expensive units I've bought! Of late I've been fitting ones with 5 or 6 heat settings, much better than the hot or even hotter settings on many 2 stage units. I think most people that say they don't like heated seats have only tried the 2 stage units. Personally I won't trim seats for myself without heaters. Just finished a retrimming seats of a car I've owned for 30 plus years. Fitted heaters to the rear seats as well as the fronts!!This thread is a great read! You're doing some awesome work! Would you happen to know which kit you bought for the heated seats?
Fantastic write up, Don! Thanks!
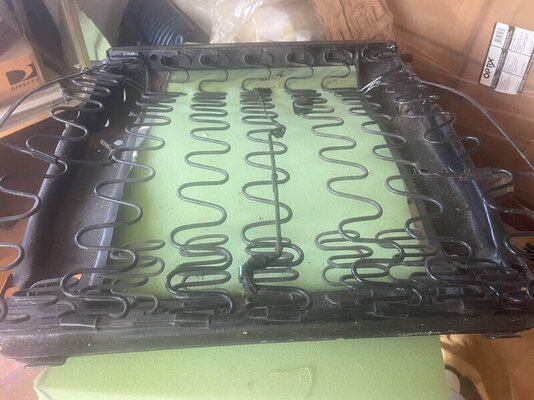
Even though I’m virtually done with the wagon’s front seats, I’m a glutton for punishment. I’ve got a complete 67 Charger interior to do. Why a Charger interior you ask? I had bought a nasty, rusty 67 Charger a few years ago. A Mopar friend and I were at a junkyard and spoted a 67 that had just been brought in. Needless to say I stripped anything that was useable including the complete trashed interior - front buckets, buddy seat, and rear buckets. While at the Mopar nationals I ordered a complete 67 Charger interior from Legendary - seat covers and new foam. Same color interior as the Charger I had. In due time everything arrived. Later my Mopar friend made me an offer I couldn’t refuse for for the Charger and it changed hands. I kept the seats from the junkyard and the brand new upholstery. I decided to try and reupholster these seats and bring everything to the Nationals to see if I could sell them to some lucky Charger (or other) owner. So I’ve got 5 months to get them done. It’ll probably take that long to get them done after my experiences with these Dart seats! Pics to document the passenger seat cushion:
L


L
Last edited:
Great work Don. I like the heated set!I got started on the seat cushion today. Where I left off
View attachment 1716214997
First, hog ring the burlap around the perimeter of the springs
View attachment 1716214998
Then hog ring the
felt over the burlap also around the spring perimeter
View attachment 1716214999
After gluing muslin at all 4 sides of the brand new Legendary seat foam, the foam was fitted to the prepared seat frame. The muslin was then hog ringed to the appropriate places on the seat frame - front, rear and sides.
View attachment 1716215000
Then added the cushion’s heated seat pad
View attachment 1716215001
Then I spent the afternoon wrangling with the cover. I got 3 of the 4 corners mostly in place. Once I finally get the last cornersort of in place, I’ll work the erinkles out and hog ring it to the frame. Getting the cover over the foam is easier said than done. I tried Jerry’s @sgrip65 baby powder suggesstion and that was a no go. Legendary makes it look very easy - not in this amateur’s opinion
View attachment 1716215011
TO BE CONTINUED
Thanks! I am upholstering a 67 Charger interior to sell. No heated seats or power lumbar in them!
Passenger side tracks attached to the reupholstered seat cushion and power seat base attached to the driver’s seat frame. At least 10 years ago I prepped the power seat base to accept bolts through the seat frame. Yes, I knew way back then I was going to have a driver’s power seat.
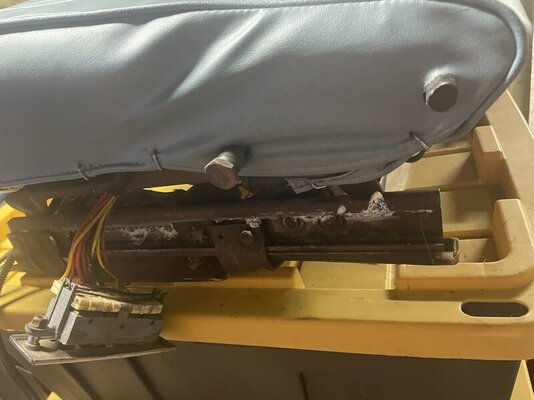
I need to find a permanent Home for the controls - either in a side cover Hiding the tracks (which has to be done irregardless) or in the stock sest side cover. Since there is no seat adjuster bracket and knob, I will use the opening in that panel to house the controls for the power lumbar

I need to find a permanent Home for the controls - either in a side cover Hiding the tracks (which has to be done irregardless) or in the stock sest side cover. Since there is no seat adjuster bracket and knob, I will use the opening in that panel to house the controls for the power lumbar
Whenever it warms up enough, I will be painting passenger and driver’s rear seat panel and passenger right side seat panel and get the seats installed. Until then, I started assembling the rest of the parts on the K Frame. Previously I loosely assembled the rebuilt lower control arms and the Helwig sway bar. Set this assembly on my roll around frame

Then installed my rebuilt and upgraded (by Steer and Gear) power steering box. I used the OEM bolts refinished in black phosphate.

Then loosely installed the 73-76 ball joints and disc brake spindles with the previously installed caliper adapters. I installed the spindles so that the calipers are to the rear to avoid any interference with the sway bar.


Everything is loosely fastened pending being torqued to specs at the appropriate stage
Then installed my rebuilt and upgraded (by Steer and Gear) power steering box. I used the OEM bolts refinished in black phosphate.
Then loosely installed the 73-76 ball joints and disc brake spindles with the previously installed caliper adapters. I installed the spindles so that the calipers are to the rear to avoid any interference with the sway bar.
Everything is loosely fastened pending being torqued to specs at the appropriate stage
I had to strap the K Frame and everything so far installed to the roll around (orange strap). It kept wanting to tip over. I used the red strap to hold the spindles from flopping over till they were secured to the upper ball joint

Looks great Don! Can't wait to see the engine/tranny combo there! You'll save alot of time when you can assemble like you do!I had to strap the K Frame and everything so far installed to the roll around (orange strap). It kept wanting to tip over. I used the red strap to hold the spindles from flopping over till they were secured to the upper ball jointView attachment 1716242410
Now it’s time to clean and paint the conterlink

Add the NOS idler arm to the K Frame

and add the NOS pitman arm to the steering box

The tie the two together with the centerlink

Next will be add the solid tie rod sleeves and NOS 11/16ths toe rods. Leave them in their natural finish or paint black?

Add the NOS idler arm to the K Frame
and add the NOS pitman arm to the steering box
The tie the two together with the centerlink
Next will be add the solid tie rod sleeves and NOS 11/16ths toe rods. Leave them in their natural finish or paint black?
mygasser
Well-Known Member
i'd paint them, even if they were left bare from the factory. it's not like this is a factory correct concours build, with your mod's it's better than it ever was. 
neil.

neil.
mopowers
Well-Known Member
Looks great! I'd paint them.
So the score is 2 to Zip to paint them
And the sleeves are black

Decided to pack the inner wheel bearings fir each rotor and set them in place

Then tap the seal in place

Decided to pack the inner wheel bearings fir each rotor and set them in place
Then tap the seal in place
Last edited:
-

