72 duster Build progress

-
Its also another massive morale booster to see it out in the sun all one color.. Looks great Jerrod..
thanks bill

:burnout::thumleft::cheers:
I'm anxious to haha

oh ya nothing like car **** :)
ill have more soon!

now throw some lights in it and go drive it a bit. will help with the motivation some, as well as the burnout. you need quality time in the car, not working ON the car to keep the fires burning. after building a bunch of cars, its the best advice i can give.

looking great though. youre a better man than me. i farm averything past metal work out.

michael
i would except id be to tempted to keep driving it, if i wait it and let thebsuspense keep building it gives me more motivation tobget it finished lol
 
I have to agree with you Jerrod.. I was very tempted to put the Dart together enough to drive it once in was in primer.. You know, take it for a spin, burnouts and all that good stuff.. but I knew deep down if I did, I would never finish.. LOL .. It was hard to resist.. but it was worth it...
 
yep, the body lines look excellent- nice to see it getting so close:thumleft:
Thank you!

I have to agree with you Jerrod.. I was very tempted to put the Dart together enough to drive it once in was in primer.. You know, take it for a spin, burnouts and all that good stuff.. but I knew deep down if I did, I would never finish.. LOL .. It was hard to resist.. but it was worth it...

I will still find time to back it out for a burn out or cruise around the block real quick lol.

anyhow....taking a bit of a break on body work....I think what I am going to do next is drop the tank and clean it out real good (seen rust settiment in my fuel filter) and every once and awhile then engine bogs a little at the top end when I rev it and you can watch the carb empty the fuel out of the filter when it happens. (last time it did it i took the line off and blew air through it and started it up and it ran good again for awhile) so im fairly sure that theres some crud in the bottom of that tank. I got a new fuel pump to just for the heck of it. I do still need to get a filler tube grommet because mines dry rotted from being 40 years old lol.

after i get all that done I am hoping i can work up the cash to get my transgo tf-2 shift kit and drop the pan and valve body and while im right there installing that i will install new shift shaft seals ( got a pretty good trans leak and im pretty sure thats where the leaks coming from. and also while I am right there i am going to install my new stainless braided kick down cable i have yet to install.

THEN Ill get back on the body work. I am HOPING I can have the car painted and basically about done by july. but ill just have to see how things go.

ill keep you guys all up to date on what im doing as i do it
 
Do you have the Plum Crazy paint already or are you waiting till time to paint to get it? just askin those lines sure are crisp. Speedracerx where's the pic of the stripe on your car :). Leave that Grand-baby alone :) just kidding. LOOKS GREAT DUSTERDUDE72.
Brad
 
Nope ive already had all my paint and clear for quite some time bow. I used some of it to do Ny engine bay awhile back but just a couple of weeks ago i went and bought more Colorado and i got bore Gardner and reducers and bought all my sealer in preperatiin of paint!. That's just how serious i am about getting this car done soon finally lol. Thanks on the lines, gave LOTS of work into getting them where i wanted. The fenders both still need a little tuning to get where i am happy with them yet though.
 
I should have known I only see it every time in your avitar, sorry brain cloud brain fart something went wrong. Would love to see the car in person some time when I come up to Mich. when I see my friend.
 
haha,dont worry....happens to the best of us even.

if your ever out this way drop me a line.
 
dropped the gas tank yesterday, inside and the sending unit all looked like new, put new lock ring and gasket in it (still need to get a new filler tube grommet for it though) ,blew out all the lines,cleaned out the filter,put a new fuel pump on. then today I took a break because our little girl has been keeping me up all night and I have been running on empty lately because of it lol.

but ill try to get the tank all installed back in the car tomorrow and then ill just have to put in a new filler grommet once I get one.

then I think the next project i tackle is going to be dropping the trans pan so I can put my new shift shaft seals in place. but before i do that I would like to get a new transgo tf-2 shift kit to put in since im going to be right there already.
and while I am there I will hook up my kick down cable.

THEN its back on to the body work to get it ready for paint.

I am HOPING I can get it painted by the end of june. but we will see how things come together and go from there. if all goes smooth I don't see why that wouldn't be an obtainable goal.
 
PROGRESS UPDATE!!!!

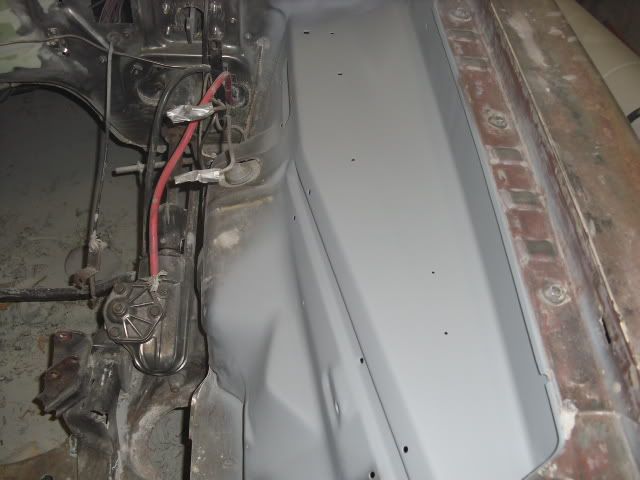
OK so.....yesterday I didnt get much done on the duster but today I did alot of "mudding" ,hand sanding,blocking and priming.

I filled in any imperfections in the metal with a smear of light bondo and sanded it out smooth....I hammered out the factory warps in the metal from the spot welds on the inner fenders so now its all nice and smooth.

I sprayed with rattle can primer and used it as a tracer for my block sanding so I could see all the high and low spots.....I re chamfered all the factory holes in the body panels so they are all nice and clean with a gradual tapper instead of the factory jagged edges.

I then FINALLY got to try out my new paint gone I bought last summer.

normally when I sprayed before I would spray with a syphon feed paint gun....but my new gravity feed hvlp gun is SOOOO much nicer.....I can run on minimal air pressure and I get nice smooth even coats of paint and it looks very nice.....the pictures (below) dont do it as much justice as in person!.

after priming it I then re sanded it out with 400.

I still have to finish smoothing out the firewall as well as a few other areas (tomorrow) and then prime it up again......but this is what I accomplished today anyhow.

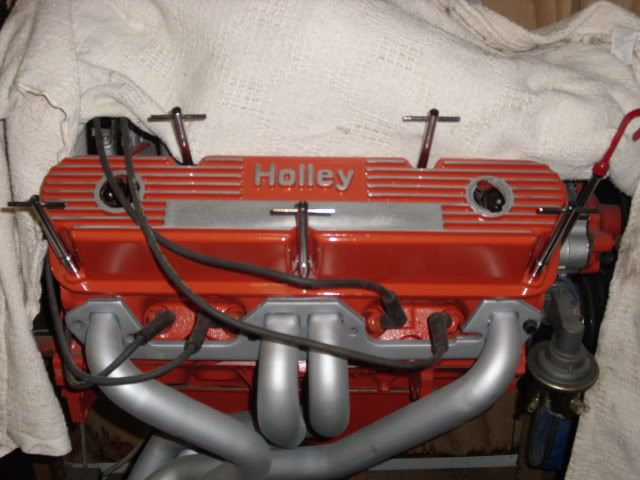
AND I picked up a nice new set of valve cover T-bars!!!!

of course ...I have mopar 5 bolt valve covers and everyone only cars about chevy and sells 4 t-bars in a package...so I had to buy 3 packages just to get the 10 I needed (with two spares left over) but it looks nice and was worth the $50.00 I suppose.

tell me what you guys think so far!

Nice shiny new t-bars
DSCI0826.jpg


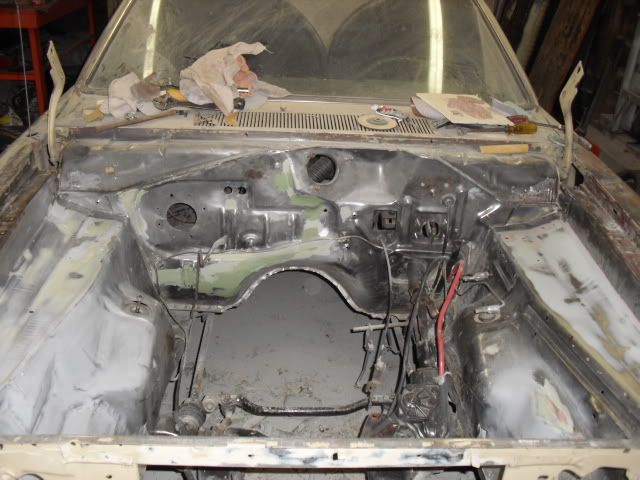
during body work
DSCI0819.jpg


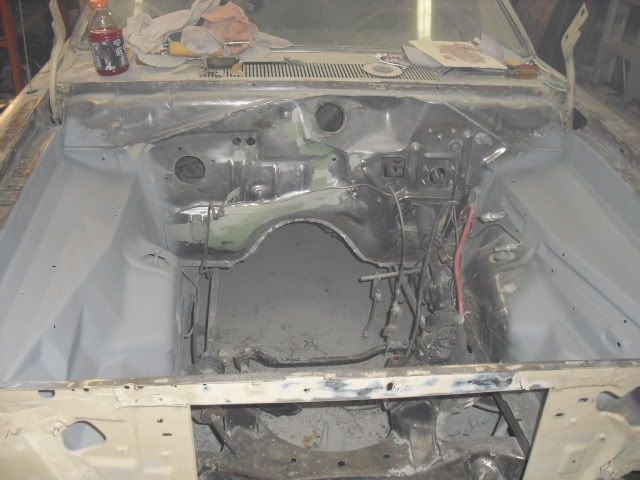
after priming
DSCI0820.jpg


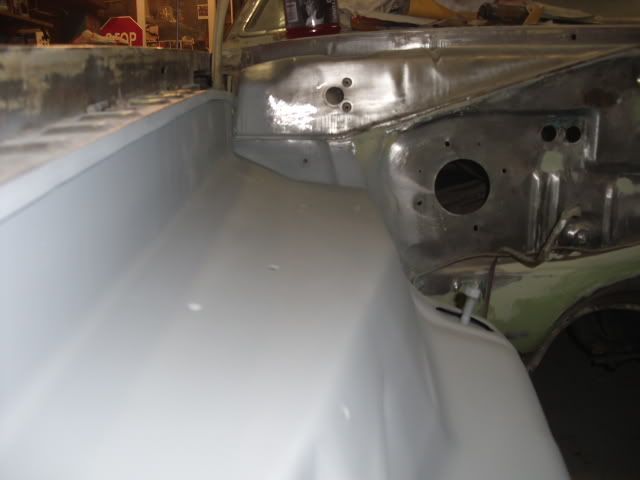
side shot at that super clean steel (fresh off the stamping press clean lines!)
DSCI0821.jpg


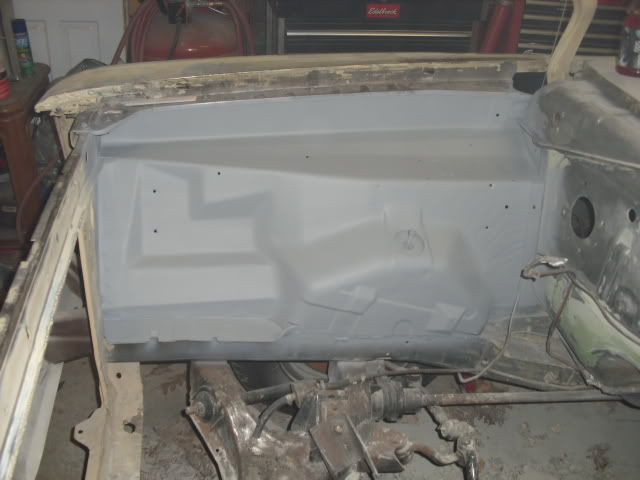
drivers side inner fender top...also you can see how clean the spot where I welded in a patch panel to cover the old battery tray hole was
DSCI0822.jpg


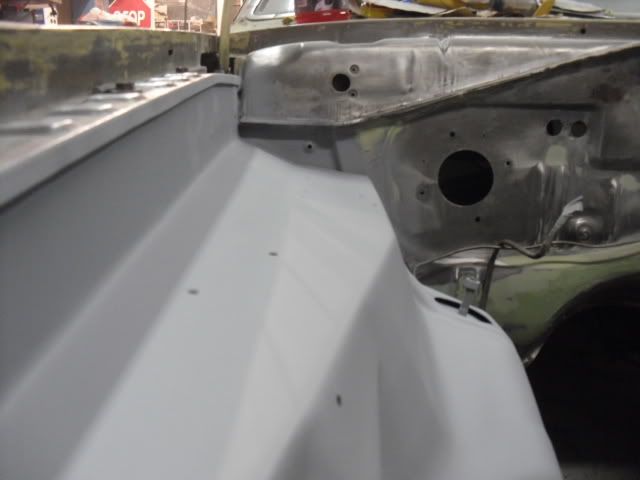
and a couple of pictures sighting down the passenger side top to give everyone and idea at just how "crisp" looking it came out
DSCI0823.jpg


another
DSCI0824.jpg


what did you prime this with? Can? or gun?
 
well,going backwords guys. I was block sanding and noticed a few spots when I got down to metal I seen surface rust. Not sure how it happened because I prepped everything and used prepsall on everything before primer and had 2 water filters (one on line,one on gun) and my tank was drained. The steel was nice and clean before primer.

so as of right now I have been sanding and whenever I find a bad spot I am taking it back down to metal and getting it clean again and using wax and grease remover on it again and re etch priming it.

I hate it when you finally feel like your taking a step forward just to get set 3 steps back!. I had it all set up to be painted next weekend. but this crap is going to set that back by a week or 2 or so probably.

I guess ill keep sanding and find any areas effected and clean them up and etch primer them again and then once all thats done and out of the way I will prime it one more time,sand,then spray the sealer. And THEN it can be ready to go in for paint.

its days like these that I just want to be done with it already...:banghead:


We had pretty much the same thing happen with the buggy... and it does suck. Set backs always blow.. Its just good you found it now, and its a quick fix.. Stay positive my friend, your still a lot closer to the finish line than you think.. And dont feel too bad, I had the buggy out for just two weeks, and shes down already LMAO ...
 
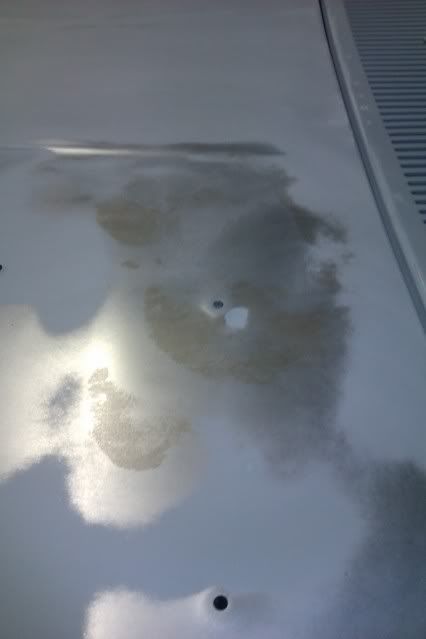
Been working on the duster on and off ..... this is what i have been dealing with
IMAG0422.jpg

I have found these spots all over the car......only thing i can think of that would have caused it would be the primer I got must of had moisture in it somehow......so I am not even going to risk it....I am just going to go buy some better primer to use this next time around because I do NOT want to deal with crap like this again.

I am basically stripping all the primer back off......one panel at a time,getting the steel nice and clean again anywhere I am finding those spots,then airing off the dust,then wiping down with a dry rag,then wiping down with prepsall,then wiping down with a dry rag again and then spraying etching primer down....then moving on to the next panel. doing it this way avoids any bare metal from being exposed for very long and breaks the work load up into sections for me so that it does not feel like such an overwhelming task. doing it this way I have got about half of the car done already. and the quarters and fenders are both slicked with a skim coat of filler for the most part....so i shouldnt have to deal with these issues in those areas. so I basically have half of the roof to go and both doors and then I will be ready to spray the car with primer and block that out and then spray sealer and ill be back on track for getting it painted!. a couple more hoops to jump through, and I hate feeling like I am going backwords.....but I would rather find the issue now and fix it than after its in paint and ruin my paint job months or years down the road.

IMAG0427.jpg


IMAG0424.jpg


IMAG0426.jpg


and to top it all off, today I toasted my SECOND sander I have used on this project ( the last one was a craftsman and only lasted a few hours.....this one I have used for over a year and has seen some long hours....so I expected it I suppose lol).so that little set back is slowing me down from finishing up too lol.

anyhow. the goal is to try and get all of the car sanded down and re prepped and what not and spray primer by mid next week to next weekend. Then Ill block it out and seal it....after that I should be ready for paint finally. hopefully everything goes smooth and there is no more issues.
 
Let me know what type of primer you use. So far Im going to use PPG shopline paint, 2021 clear but dont know what type of primer. I also did sort of a hack job removing the tail panel I need and I and the body guys have some work to do once I can get it spot welded. But I wish I was are with your project!
 
Ill message you some time within the week and let you know what i end up going with. I know I am going to be using a 2k high build urethane primer. Just not sure what brand yet until I get to the paint shop and see what kind of deals they have going on what brands.

as for the tail panel job your in the middle of......fun huh? LOL. look back into my thread and you will see what I did removing the old and installing the new. I ended up doing it (along with all the metal work) all by my lonesome....which i would say was the worst part.....being that i didnt have an extra set of hands at times that would have came in "handy" lol. otherwise,the job wasnt to bad. I actually dont mind metal work to much.....its the "body work" that i hate doing.

Ive still got a little ways to go before I can call the duster done ( you can never really call them done though).......I should have been sending it in for paint this weekend but of course the issues i ran into are pushing that date back....so hopefully all goes smooth so i can stay on track with my goal.
 
well your new panel is NEW haha I am using one I needed to take off another car, so I butchered it bad! And when I dropped it on the floor the part that spot welds on to the 1/4 panels bent under and tore so not its really ugly and then the bottom part of the trunk does not really rear far enough down to be tacked to the bottom of the car trunk part, if any of this makes sense, I will try to post pictures tomorrow in my thread.
 
didnt know you had a thread going, Ill check it out.

not sure on what kind of a budget your on....but you can get a new tail panel decently priced. I think mine was selling for $279.00 on jegs.com and I spoke with a women through emails at jegs and I think she discounted it quite a bit if i remember correctly. I want to say I got the panel for around $230 shipped.

if the panel you got for yours is just a matter of a couple bent edges ( I am assuming your talking about the 'flaps" that spot weld at the ends and are hidden by lead from the factory) its nothing a little hammering and grinding wont solve. and I think from what your saying is the bottom doesnt quite meet up with the trunk floor.....which I beleive.....that is an issue with swapping tail panels.....I want to say to put a dart sport or demon tail panel on a duster (or vice versa or swapping one of them to another...cant remember which off hand) that there is some slight differences ...one of which being the issue with the trunk floor area. it can be remedied with a little creative fab work so its not that it cant be done.....its just not a DIRECT swap in some cases if I remember correctly.
 
Posted the pictures and it was a 71 duster panel to a 73. The picture I posted of the panel is the good side..tomorrow the BAD side
 
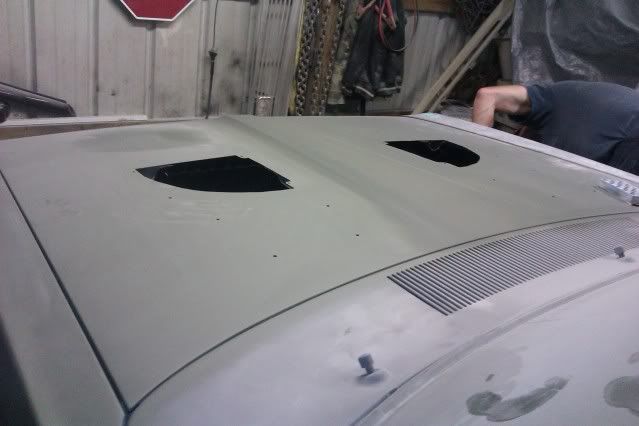
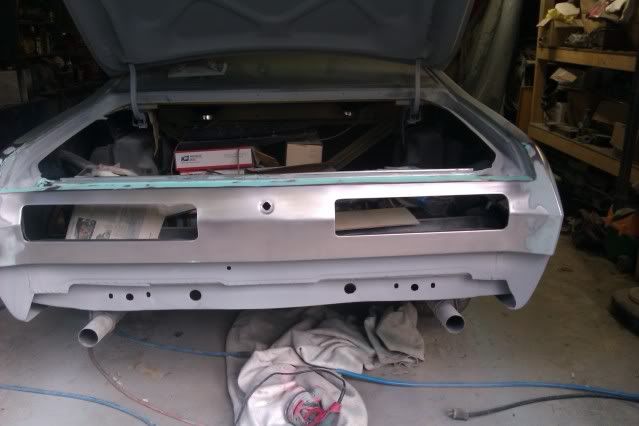
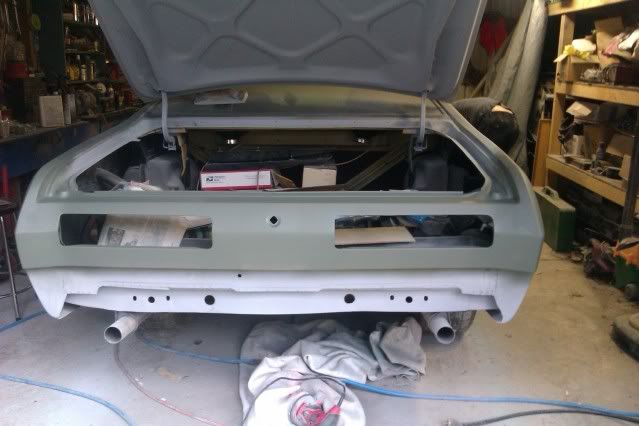
havent forgot about you guys, just been busy. stripped the car back down to metal and re etch primed it and tweaking in a few things here and there. going to TRY to get it in to paint this weekend. Still need to finish a few things and then mask it and prime it and block it and seal it and scuff it and then its ready for paint. Ill keep you guys up to date as I go.

Oh and I have a new carb on the way too so thats more news lol
 
Nice! Mine finally went to paint! He said the factory paint was in really good condition, so he is going to just sand it down and take the dents out and fix the tail panel and fill the wholes in the engine compartment! Then paint!
 
Lucky you, my factory paint was less than perfect and being that i had plans for so much metal work, and that the previous owner did some shotty body work that was hidden... i just decided to take it to metal. It was alot more work but ohh well, done now lol. Some days i wish i had the funds to pay to have all the grunt labor done, or a bunch of friends willing to come lend a hand. But ive done a good majority of the project on my own with the exception of my father when he is able to help. . But with as rough as its been going it alone , i don't think i want to go through the hassel of restoring any more cars. Maybe scuffl and squirts but nothing of this magnitude again lol.
 
i don't think i want to go through the hassel of restoring any more cars. Maybe scuffl and squirts but nothing of this magnitude again lol.

Amen.. lol.. Even though I didnt go it alone, I still wouldnt want to go through everything I went through with the buggy a second time.. I told my wife if we ever get one for her, we will buy it already done, or as reasonably close as possible.. LOL .. She has her sights set on a 69 Charger.. LMAO .. The chances of me ever having enough cash to buy one of those done (hell, even rough needing total resto) are slim to none.. so im in the clear LOL
 
-
Back
Top