72 duster Build progress

-
yup, you can get the m in rattle can. Normally I wouldnt use rattle can on something like the duster but being accessories on the car ( grille ,spoiler,hood scoops)...I wasnt to worried about it. And I have been using these products for years and they have held up well and are good quality so I knew what I was using ahead of time and not just trial and error spraying lol.

I highly recommend them to folks, you cant beat the factory looking sheens and textures,ease of use and cost.

if your on a budget its deffinetly a good option.

and in person if you were to look at my stuff you would swear it was straight from the factory.
 
AWESOME!!! Thanks Jerrod, looking good. :cheers::cheers::cheers::burnout:
 
been busy busy busy guys.....

Put a leveling kit on my truck today...so that ate up alot of my free time. But I did finally get the right u joints, installed them in the drive shaft and then installed the drive shaft in the duster.

I also got all my grille and headlight hardware today...so I now should be able to get started on all of that tomorrow im thinking. Ill take pictures of course of what work I do and keep you guys posted. keep checking back because the updates should start rolling in soon lol
 
AWESOME!!! Thanks Jerrod, looking good. :cheers::cheers::cheers::burnout:

sorry man, I missed that you had posted. no problem,your welcome.

Heres some links to the stuff I used on the grille in case your interested in duplicating my results.

I used the silver for the grille fins- https://encrypted-tbn3.gstatic.com/...iC02oc9tbqMWzg8qpibGY6ZNbfoaCfCj6MG5TO5NE9sEd

This is the black I used for the grille,hood scoops and spoiler- http://shop.advanceautoparts.com/wc...ge//N3276/large/7141216_dpl_TP70_pri_larg.jpg

also another good product they make that I have used for alot of stuff (not grille related but worth a mention) is their etching primer....it works really good.- https://encrypted-tbn2.gstatic.com/...QSxMByZd_bsp0hFweWfcvOxanaAiNlkryktwICTB5hCoQ

on my cnc'ed metal duster sign that I ended up painting body color and setting on the package tray (few pages back in the thread). I had let the sign sit out in the garage for over a year and it got really rust.....so I sanded one side down to clean metal and left the other side nice and rusty and for test purposes I sprayed the self etching primer on both sides and then hung it back on the garage wall for a couple months. (in humid,hot and cold conditions)......and even after all that time ....BOTH sides didnt show a SPEC of rust!.....so that etching primer does a really good job at stopping and preventing rust.

I of course sanded it all down later when I was ready to smooth it all out for paint and re etch primed it and then 2k primed it and then base cleared it.

I know you didnt ask about that paint...but I figured I would mention it for you and anyone else who may be able to use the info lol
 
Cool thanks a whole lot buddy, great info there. I do have another question though :) what did you use for fixing cracks and most of all the plastic mounting tabs that break, crack or ect. on the grill and other places. Sorry if you already mentioned it.

Brad
 
Cool thanks a whole lot buddy, great info there. I do have another question though :) what did you use for fixing cracks and most of all the plastic mounting tabs that break, crack or ect. on the grill and other places. Sorry if you already mentioned it.

Brad

I think I mentioned it on the last page of the thread when I posted all the pics during restoring the grille. But just incase Ill explain again for ya.

wherever there was a crack in the grill I took my dremmel tool with a small rotary bit on it (not a necessary step but it just saves a little time during the next step) and I carved a " V " into the crack.

I then took a soldering iron and let it get nice and hot.

Then I poked the tip of the iron into the crack and melted the V ....not enough that the soldering iron melted through to the other side but melted atleast a good 70% of the way through the thickness of the plastic.

and once it cooled I did the same process on the reverse side of the crack. that way I knew that the crack had been fully bonded back together from both sides.

after doing this you will have a ridge of melted plastic the spilled up over the edges of the "V"......so I took the soldering iron and melted that ridge of plastic back into the " V " which filled the crack back up.....I then ran the iron back and forth down the crack...super heating it and at the same time smoothing it out at the same time with the iron to insure that all the plastic melted and fused together nicely.

at this point its pretty smooth and shouldnt need much filler work being that not really any original material was removed.

but in my case I did decide in a few areas that I wanted to add a little extra plastic as filler. and I had an old grille out of my 05 f150 sitting in the shed so I went and snapped a couple chunks of the abs plastic off the back of it and then held a chunk with needle nose pliers and touched my soldering iron to it until I got a gob of melted plastic on the tip and then I just worked that melted plastic into any low spots that I was working on.

for the busted /missing tabs on my grille.....I took some of those chunks of abs plastic that I had from my f150 grille and I took a pair of side cutters and clipped the pastic to the shape that I wanted....and I held it in place where the missing part was at and I basically did the same process with the soldering iron to melt the "new" tabs into the grille. and then applied more melted plastic as filler where it was needed.

if your working in a screw hole area of a tab where for instance you need an oblonged/oval hole or round hole....dont worry about if you cut it perfectly with the side cutters....a tip ill give you is that I took the soldering iron and melted my screw hole openings to the shapes I desired.

once thats was all done I took a sanding disc on a wizzy wheel and I just sanded down any of the areas I worked on with it (sanding disc makes quick work of sanding the plastic).

once thats sanded down...its pretty close to paint ready at that point.
But I personally decided to mix of a little body filler to insure its smoothness. so I mixed up a small batch and took a credit card (easier to apply filler on the contours and tight areas due to the flexibility of the card versus a filler paddle)....I slapped some on.

then sanded it down with 180,then 220,then 320, then primed,then painted.

And the grille is just as stront as factory....after i did the work I twisted the grille.purposly put ALOT of pressure on the areas that had cracks,pulled,pryed.....held at one end with the other end extended in front of me to try and put alot of stress on it....and it didnt budge at ALL .....rock solid.

alot of guys will dink around with buying expensive jars of plastic welding solutions or dual syringe mixable stuff and then find down the road that it didnt hold or that the cracks show back through.....to each his own...but I personally have always welded plastics like this and always had good results.....and its free LOL
I think that should explain it all in depth for you and any one else that is interested. if you have any more questions just let me know.
 
AWESOME Jerrod exactly what I wanted to know, and sorry for making you repeat it but I understand all of it. I work with soldering Irons all day at my job, just din't think of using them there cool buddy thanks. Keep Moparin cause we love da pics. LOL

Brad
 
Hey guys, the duster is now officially 100% road legal!.

But that's not the best part lol.

Check out what I went ahead and did below!

null_zpsbcaf8c40.png
 
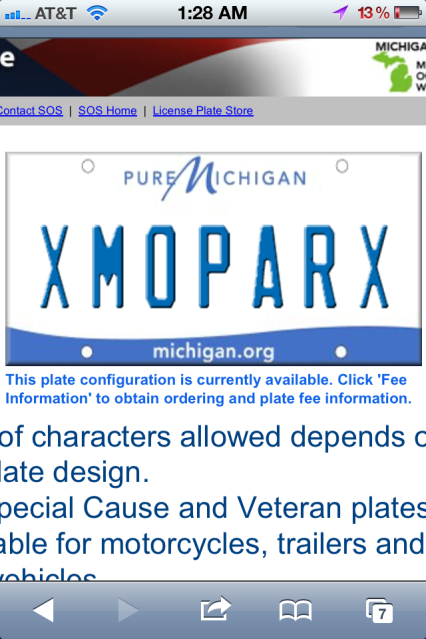
Thanks guys, I thought it was a niffty Idea. I had a few others in mind but they were all taken. luckily though that one was available. The "X" on each side look almost like a border to the word "MOPAR" which I thought would look neat.

Anyhow. That aside, I havent got much done the last few days. My wife is in the middle of starting a new job and her hours are strange so I have been taken care of the kids alot . That and I have been doing some work on my truck. But what has REALLY put a damper on getting things done is this stupid michigan weather lol. Just the other day we were in the 80's and right now its raining and in the upper 30's. and by the time the weather warms back up....my wife will be back to work which....of course.....this weekend I had planned out to bust *** on the duster because I had some free time....and then the weather gets crappy lol.

ill get back to it soon though. I did manage to get a little bit done though. I started checking to see how the grille was going to fit....I had it previously set up to accept the 69 valiant grille....and with this grille I have a few things that are in the way clearance wise so I am going to have to do a little rerouting of some things to get my clearance that is needed.

I also need to make a trip to the hardware store and get a bunch of nuts/bolts/washers...etc..etc... for mounting my hood latch support and upper grille support and stuff.

anyways, I just wanted to let you guys know I wasnt leaving you hanging. Just going to be a couple days before I can get back into the full swing of getting some things done and getting some updates rolling. But soon! so stick around!
 
ughhhhh.....this weather sucks HAHAHA.

Tuesday its suppose to start warming back up and start getting sunny again. so hopefully sometime this week I can get back to work on things.

Ill keep you guys in the loop!

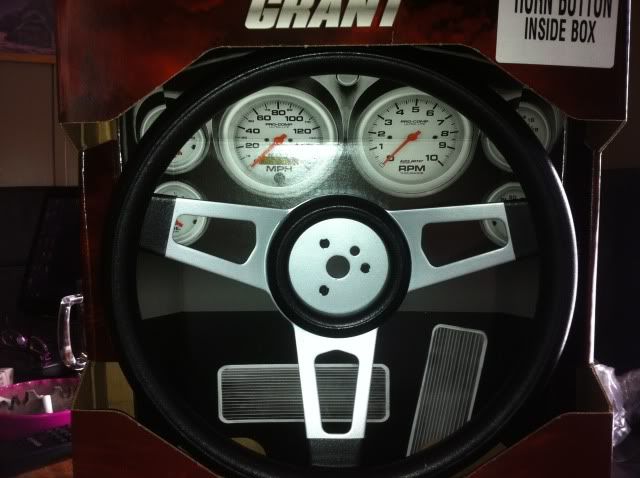
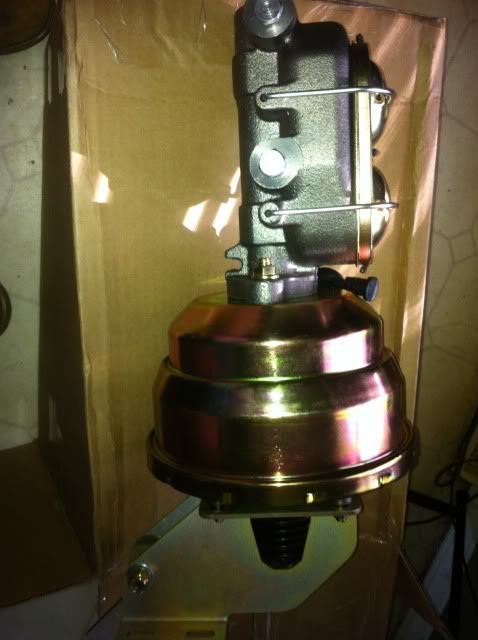
I did manage to get a new brake booster set up ordered , also ordered a new kick down cable , and ordered a new grant challenger 860 steering wheel (looks like the old tuff wheels) . so I got some goodies to put on once they arrive!

if anyone needs a factory 8" keg style brake booster I have my old one up for grabs ,would be great for a rebuild ( I think it didnt hold vacuum)...but it was really clean!.....or would make for a good core. If anyones interested in it let me know. I also have a nice driver quality set of sill plates from my car (should work in most 2 door model a-bodies)....Ive got a set of new ones on the way for the duster.

I also have a "brand new" master cylinder thats currently on my duster that will be for sale. I bought it new when I converted to manual brakes ( its a master cylinder for front power disc brakes though)....and its about a year old and only has about 15 miles worth of actual driving on it.

I also will be selling my old chrome 3 spoke grant steering wheel if anyone is interested.

And I will also be selling my old "new" stainless braided kick down cable. I bought it new and put it on the duster.....but I think it has a bur or something on one of the ends that was holding the cable up inside the sheeth....so I ordered a new one. But it may be able to be reused or at the very least cannibalized for the connecting points and just replace the cable or something.

if anyones interested in any of the stuff just send me a PM
 
Hey guys, Incase any of you go looking for "Dusterdude72's" threads and cant find them....if you hadnt noticed I had my usename changed to xMOPARx (matches the new licence plate lol). Just wanted to mention it so none of you get confused.

in other news....today is the first day the weather has been decent here in almost a week. But I still cant get anything done because Im pulling daddy duty today. I should be able to get back to work on it come thursday I am hoping though.

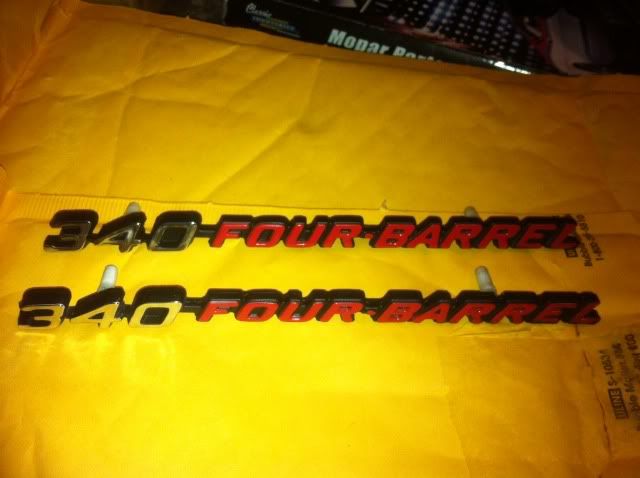
Soon I should have my new parking light lenses,brake booster set up,340 four barrel emblems for my hood scoops,grant 860 steering wheel,sill plates,kick down cable,molded hood insulation, and some other odds and ends. so I should be able to find some stuff to keep busy with lol.

stay tuned
 
Are you gonna add the 4" holes for the Scoop's. Sorry if it's been asked already. Can't wait for more pics.

Brad
 
Are you gonna add the 4" holes for the Scoop's. Sorry if it's been asked already. Can't wait for more pics.

Brad

The previous owner had the great idea of cutting the hood scoop openings to the shape of the underside of the hood scoop itself (2 pie shapes) rather then a circular hole on each side.

I didnt want to spring for a new hood or try to graft in patch panels on the hood being that when the scoops are in place you cant tell anyways.

That and I was toying with the idea of eventually getting a 6 pack style hood so I didnt want to go too overboard on time with this hood.

the way the previous owner cut the holes....serves a purpose I suppose. It was just overkill on their part lol.

Heres a picture from last year just after paint to give you an idea of what I am talking about.
 

Attachments

  • IMAG0760.jpg
    108.4 KB · Views: 248
Sorry I remember now dah. Shows how quickly my memory goes LOL. That's not that bad I guess, like you said serves the purpose. Thanks Jerrod

Brad
 
Sorry I remember now dah. Shows how quickly my memory goes LOL. That's not that bad I guess, like you said serves the purpose. Thanks Jerrod

Brad


Hey don't worry about.... I've got some pretty dumb memory issues sometimes too lol.... For example... I can be working on something, go to grab a 9/16 wrench.... Looking around..... Where the heck did that thing go?...... Oh..... Wow...... It's in my hand!. Hahaha
 
The parts are finally starting to come in.

new grant 860-


new power booster and master and bracket set up-


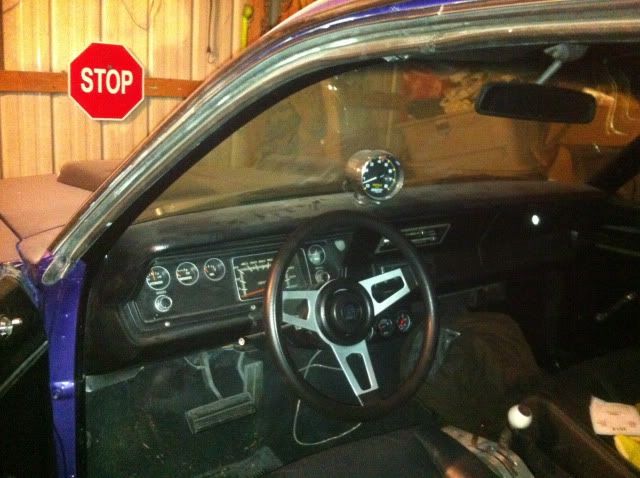
And here it is after I tossed it on real quick. (dont mind the mess, I still havent finished buttoning up the interior and its covered in an inch of dust from sitting lol)-


should be more stuff tomorrow and more updates. keep checking in guys.
 
was going to get some work done on the duster today but got side tracked. Battery crapped out in my wifes vehicles, so I spent a good part of the day hunting down a replacement. Then had to get into the loom and get some more slack because the terminals were junk and I had to cut them off and put new ones on, then I finally put a clamp on her tail pipe because it came loose from the muffler and was bouncing around and was annoying lol.

then I finally went to tinker with the duster...fired her up....vroooooom.....cough cough.....crap, out of gas!.

so I had to go get some gas, back it out of the garage and turned it around and backed it into the garage so I could have some more room to work on the stuff I need to do at the front of the car. And by that point it was starting to get dark so I called it a night.

but tomorrow I should be able to get some stuff done to it.

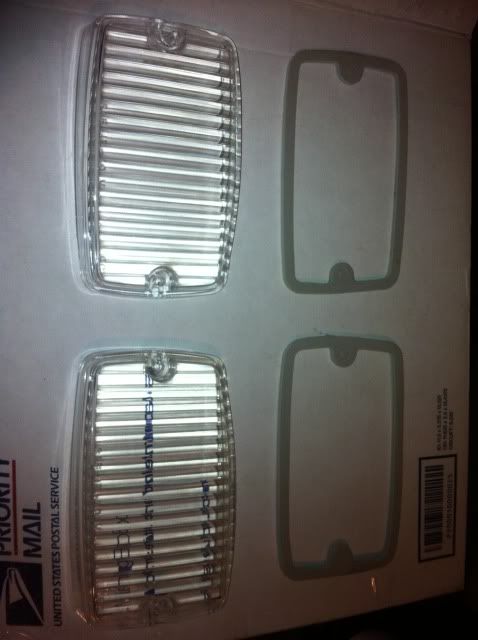
I did however get my new kick down cable in the mail today and I also got my new front parking lenses!.

it was so hard finding a set too....either people wanted ridiculous money for them or they were not very good quality or they were back ordered for 4-6 weeks.

I finally got ahold of roseville moparts and them guys were very helpful. They called their supplier ahead of time to insure that they had some in stock....I went ahead and purchased them and 2 days later they were on my door step and they are EXCELLENT quality!.


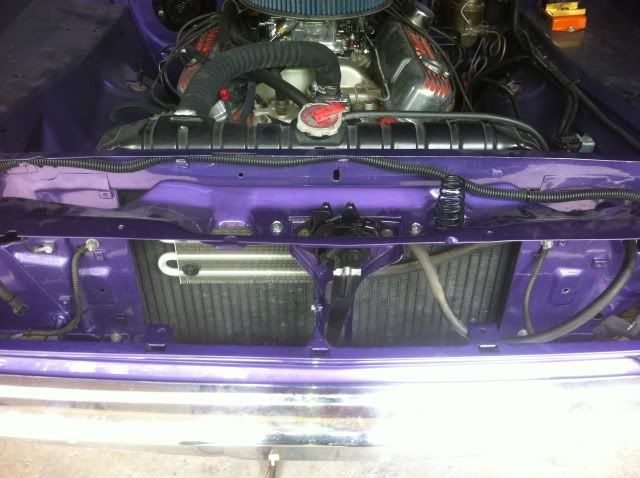
tomorrow im going to try and get my transmission lines re routed,get some nuts and bolts put in the upper grille support and hood latch assembley,need to do a little wiring for the parking lamps,put all the new headlight and grille hardware in. and then the grille can be installed. hopefully everything goes smooth so I dont spend to much time dinking around with stuff lol.

but thats where things stand for now....so check back in guys, should have some more interesting updates and pictures by tomorrow im thinking.
 
Some more goodies showed up today!. Got both of my new hood scoop emblems!.

null_zps94ac2e0f.jpg


Today I did some running around to hardware stores, gathering nuts and bolts and wiring connectors and grommets and stuff

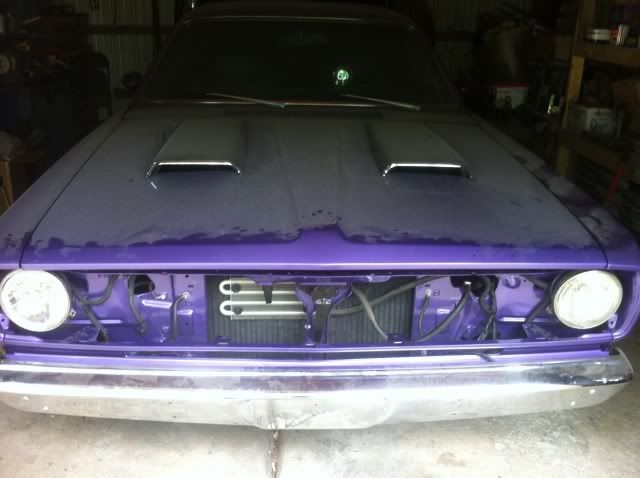
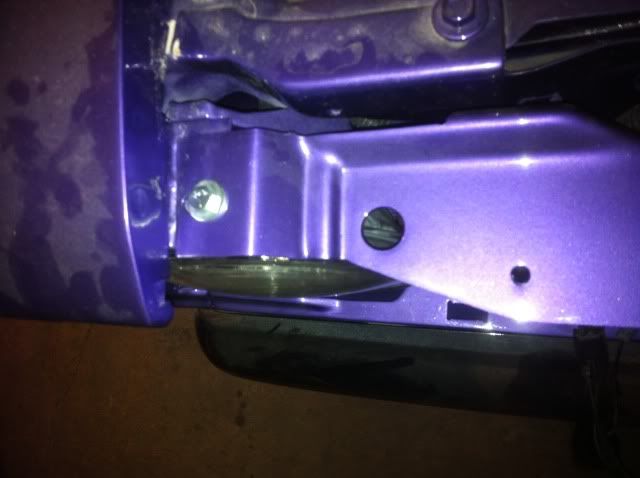
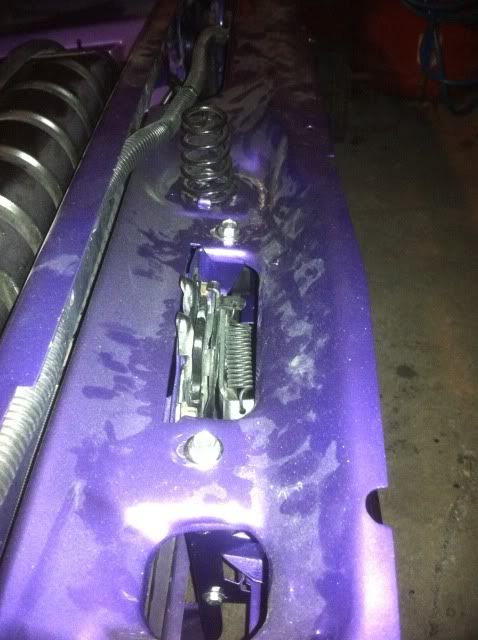
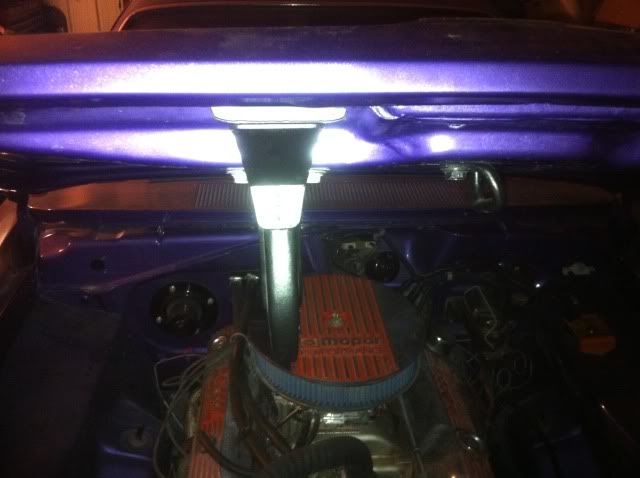
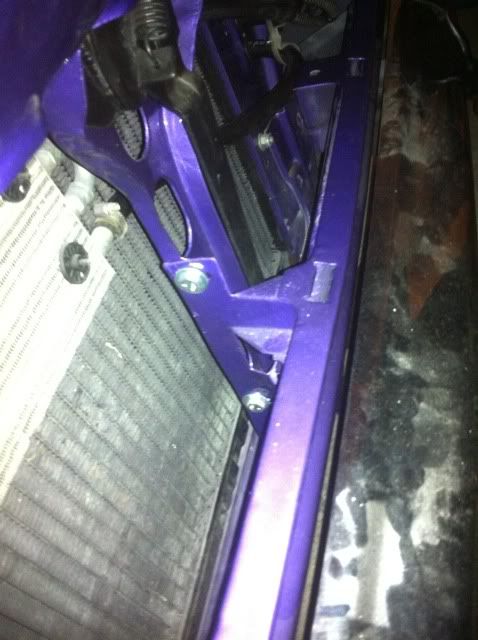
Today I finally got all of my front end in place and tightened up as far as filler panel, upper grill support, hood latch support, hood latch, hood spring, hood striker, hood release handle and that kind of stuff, I tapped all the threads to get the paint and gunk out of them, I put all of the nuts and bolts and washers on the polishing wheel for some added shine ( engine bay itself is caked in dust and needs a good cleaning still lol). Got everything lined up nicely. And for the first time in years the hood now closes and latches on its own!. No more bungy cords to keep the hood closed LOL.

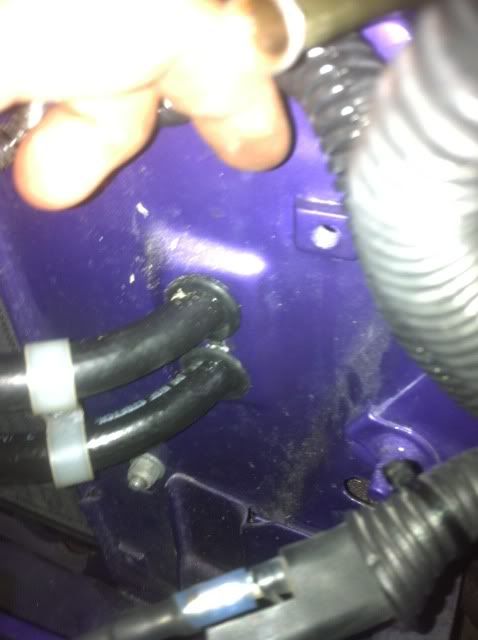
Also today I did some wiring for my front parking lamps and I also drilled new holes in the core support and installed rubber grommets and rerouted my trans lines through them..... Now I won't have clearance issues with my grille like I was having.... And i ran them nice and comfy and clean.

Tomorrow I should be able to start putting the grille an everything back in the car and once that's done I'll move onto another stage of final touches!.

I like that most of what's left is semi easy stuff to do.... This time last year I was covered in sanding dust and it felt like the car would never be done lol. I've made leaps and bounds of progress over a years time and it feels good to be nearing completion of the projects.

Here's some pictures of some of the stuff for you guys to check out. Check back tomorrow because I will have grille pictures posted most likely!

null_zpsafd5256f.jpg


I know I know.... It's very dusty lol. Going to wash it as soon as I'm ready to wheel out the paint
null_zpsef816349.jpg


null_zpsee7de295.jpg


null_zps7022b869.jpg


null_zpsfa3198d1.jpg


null_zps9c25af52.jpg


null_zpscf32e138.jpg
 
Looking real good! I bet you can't wait to take her out, give her a bath, and just cruise
 
oh boy, long day.

and nothing went super smoothly so it was just one of them days when I had to "talk" to all the nuts and bolts and everything lol.

so .... I finished wiring up all my turn signal wiring, got it all in loom and nice and tidy, all my turn signals and headlights and reverse light and license plate lights worked....but I couldnt get my hazards or my brake lights to work for some reason.

and I knew I had it all wired right, so I was racking my brain on what the heck was going on....kept thinking maybe I had a bad ground or something......finally it dawned on me that last year when I was working on my glove box light that I accidentally popped a fuse and never replaced it.

so I put a fuse in and BAM.....everything was working again!. so now I have all my lights working.

then I spent some time on the hood latch adjustment and I kept messing with it and messing with it until I got it set pretty good.

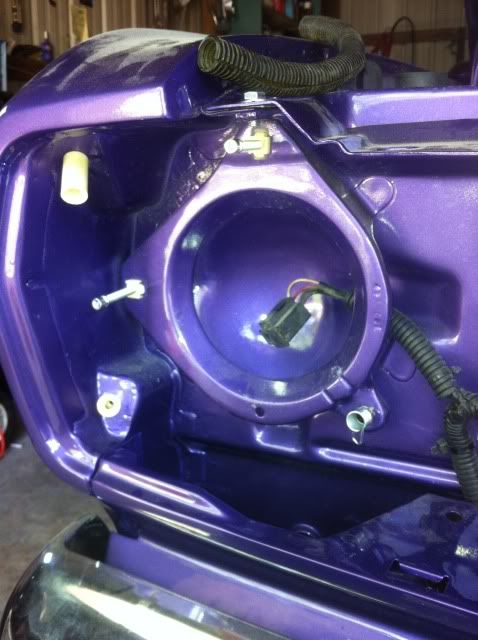
I installed all the new headlight hardware.....getting the old springs out were a pin because the old strew heads were stripped out....but I finally got it and got all the new stuff installed.


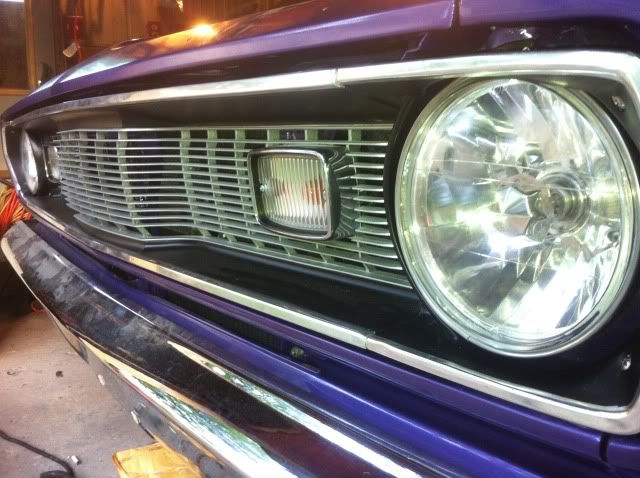
got all the new grille hardware and bezel hardware installed.....and the previous owner of the duster had changed one fender over to a 73 and up style fender which the headlight bucket area is SLIGHTLY different than a 72 and the hardware kit I got was for a 72.....and the plastic push in pedastal mounts that the headlight bezels screw into were a little bit to high on that one fender. so I ended up having to grind it down by about a 1/4" and rebeveling the end of it where the embossment of the bezel recesses into it. and after all of that the bezel finally matched the flushness of the other bezel.

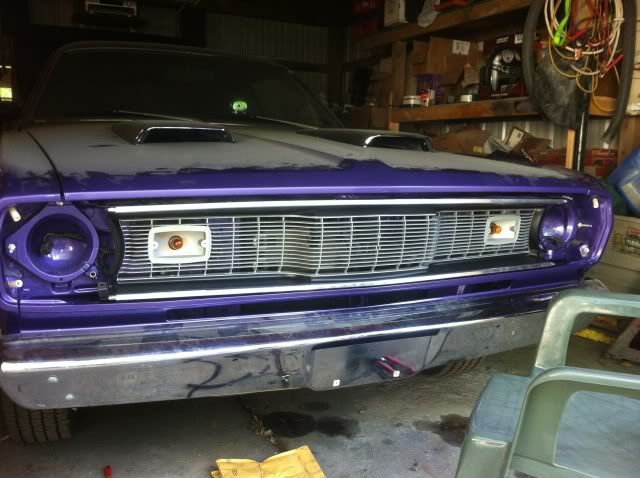
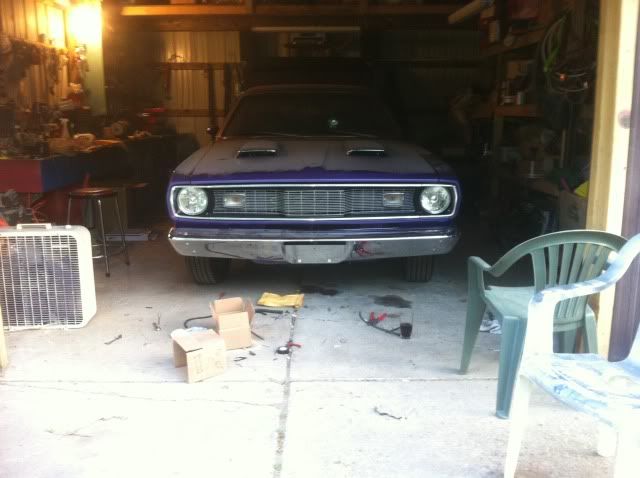
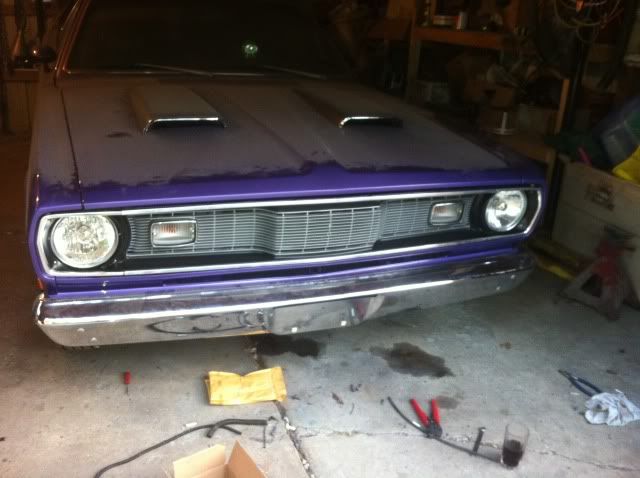
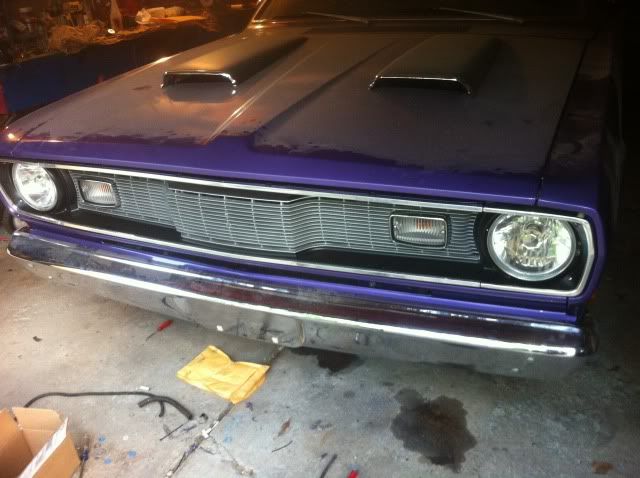
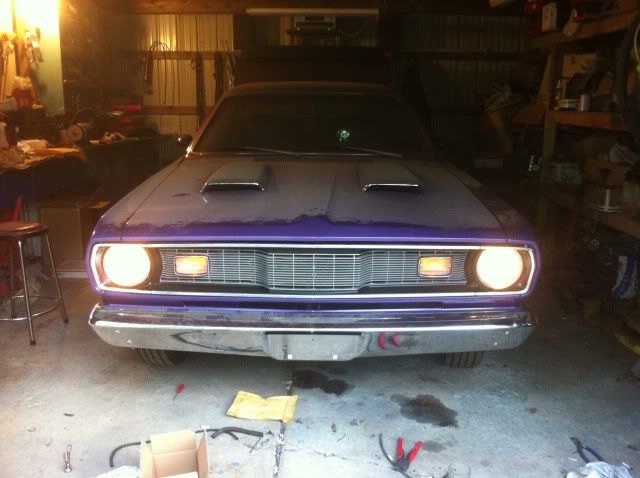
installing the grille was a little tricky....by myself so lining things up were a bit troublesome. But I got it in there.


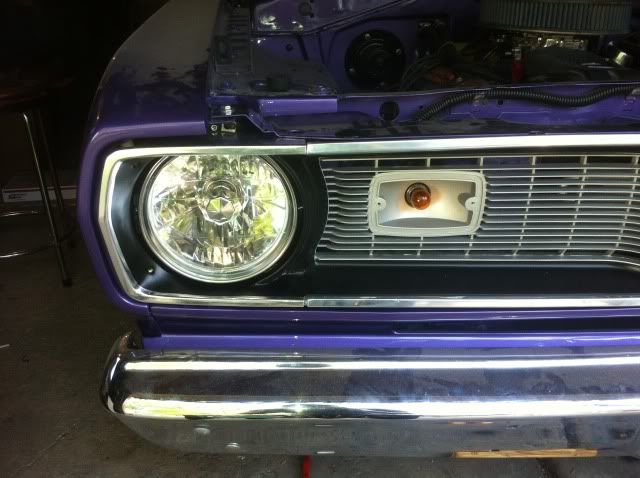
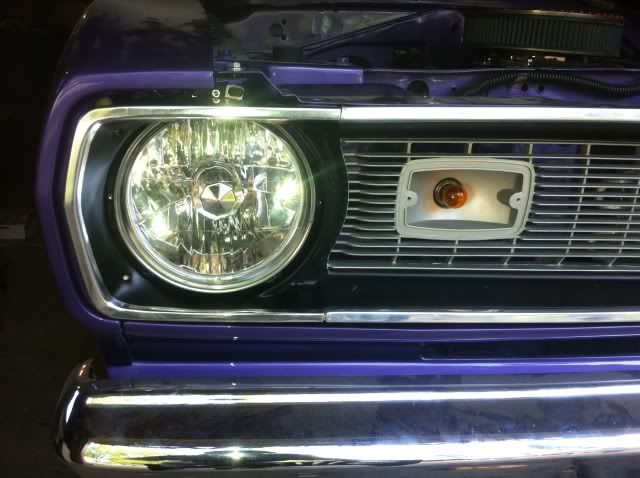
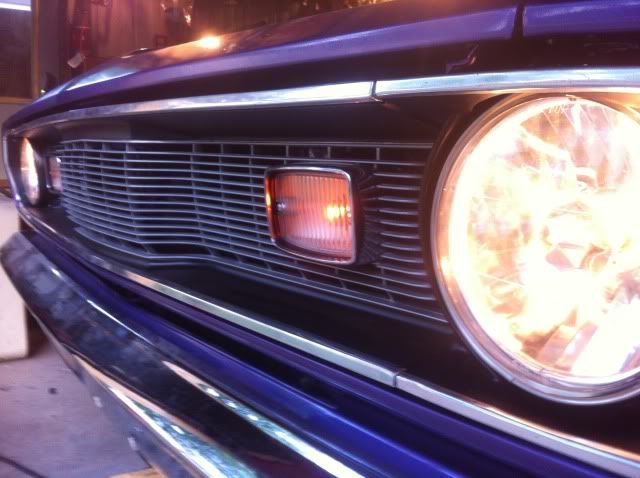
then I got the new H4 crystal headlights put in and bezels on.


and put the new parking lenses in and the chrome bezels.

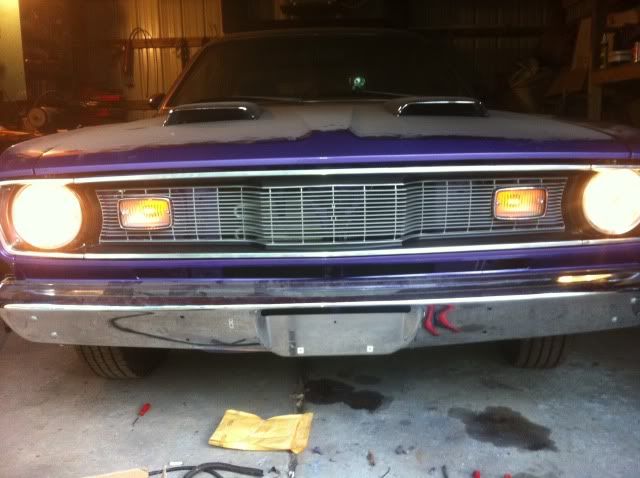
I got it all installed and looking good. its not PERFECT......but everyone that looked at the car couldnt tell the issues until I pointed out what I was talking about....maybe im just being to picky?

on the lower bumper filler panel there is a SLIGHT bend in the metal which makes a section of the grille gap look a little bit bigger...but nothing I can do about it.

the one fender that is a 73 and up fender has a SLIGHTLY different contour than the other fender which makes the upper gap look a little bigger on one side versus the other.

not to mention im working with 41 year old parts....and I dont think they were even exactly perfect from the factory when they were brand new lol

like I said....I might be just being to particular with it.....but what issues I mentioned there really isnt anything I can do a whole lot about so hopefully its not as bad looking as what I see from my perspective lol.....I tend to do that alot because I take pride in my work and try to do as best a job as I can when im doing something.

anyhow...thats where im at on it today.....let me know what you guys think!!!


If there is one thing the Buggy has taught me, its that we will find a zillion things to nit pick about our ride.. things that look like glaring problems, that drive us nuts.. .that no one else ever notices.. As you said, the parts are over 40 years old.. and most of the things we do to make these cars 'perfect' actually makes them better than they were new..

I had all kinds of issues with my grille and bezels in the Dart.. and there are a ton of issues that you probably wouldnt notice unless I pointed them out.. but to me they feel like something everyone will see right away LOL

Let me put it another way... the grille and bezels in your car look SWEET!!! lol.. Now stop driving yourself crazy and give that baby a bath!

Car looks awesome my friend
 
HAHA

Thanks Bill

And yeah I was planning on giving it a bath today but I went to fire it up and my battery was dead from all the testing of lighting and wiring I did throughout the day and then it started getting dark out. So I will probably do that tomorrow. And then I have to figure out what task I want to tackle next. Lots of little things left to do.

I think the next task should be to drive it some!! lol
 
-
Back
Top