AlV
Crabs in a barrel
Hi FABO, As I plan for my first transmission rebuild (My 69's original A727) I've been contemplating which rebuild kit to go with... sounds easy but when one is not really familiar with all of the required pieces and the vast number of kit configurations on the market the selection can become daunting.
In preparation for the rebuild:
-I've scoured this website for related threads and reviewed the feedback posted by FABO's knowledgeable members.
-Watched the 727 rebuild Video posted on youtube 4 times to get a basic understanding and perform mental rebuilds as I followed along.
-Ordered the handbook and the DVD
-Took note of the suppliers from various posts
-Took note of the qualities of the Bands, friction plates, steels and things like bolt in sprags as described in the posts.
-Etc.
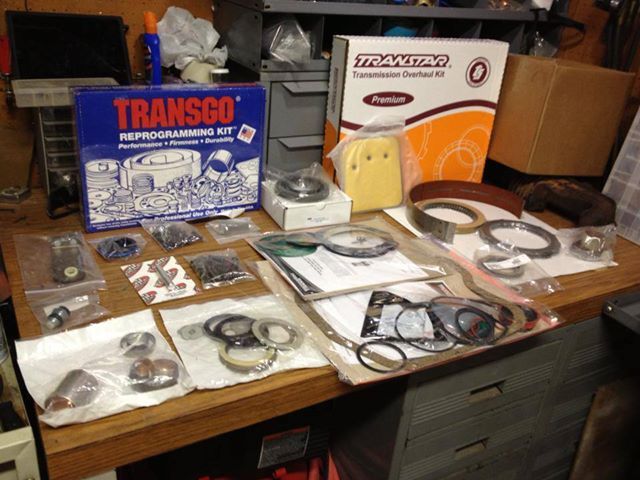
After going to supplier sites I notice that there are a wide range of rebuild kits with varying prices and parts (Bulkpart.com has rebuild kits and rebuild kits in a Box). There seems to be two basic setups, Kits for 62-70 and kits for 71 and above.
Which begs the following questions from (this overly analytic person),
How comprehensive should the kit be? (a good solid baseline)
What are the differences between the 2 generations of 727? (this seems like a pitfall)
I've established some criteria for my build:
1. 1969 A727 (62-70 generation kit)
2. This transmission kit will immediately back a 400HP engine (I would like to plan for growth and build for up to 500HP).
3. A comprehensive Rebuild kit ensuring all of the necessary and required bits and pieces are replaced or upgraded with quality parts.
4. The rebuild kit doesn't need to have a shift kit since I Will install a transgo- tf2 kit.
5. ??? (insert what I am missing here)
If you've made it this far in my post you're awesome (lol), Bottom line is I'm looking for your thoughts on a solid (comprehensive) rebuild kit for a 1969 A727 along with some recommendations of should do's.
Thanks!
AlV
In preparation for the rebuild:
-I've scoured this website for related threads and reviewed the feedback posted by FABO's knowledgeable members.
-Watched the 727 rebuild Video posted on youtube 4 times to get a basic understanding and perform mental rebuilds as I followed along.
-Ordered the handbook and the DVD
-Took note of the suppliers from various posts
-Took note of the qualities of the Bands, friction plates, steels and things like bolt in sprags as described in the posts.
-Etc.
After going to supplier sites I notice that there are a wide range of rebuild kits with varying prices and parts (Bulkpart.com has rebuild kits and rebuild kits in a Box). There seems to be two basic setups, Kits for 62-70 and kits for 71 and above.
Which begs the following questions from (this overly analytic person),
How comprehensive should the kit be? (a good solid baseline)
What are the differences between the 2 generations of 727? (this seems like a pitfall)
I've established some criteria for my build:
1. 1969 A727 (62-70 generation kit)
2. This transmission kit will immediately back a 400HP engine (I would like to plan for growth and build for up to 500HP).
3. A comprehensive Rebuild kit ensuring all of the necessary and required bits and pieces are replaced or upgraded with quality parts.
4. The rebuild kit doesn't need to have a shift kit since I Will install a transgo- tf2 kit.
5. ??? (insert what I am missing here)
If you've made it this far in my post you're awesome (lol), Bottom line is I'm looking for your thoughts on a solid (comprehensive) rebuild kit for a 1969 A727 along with some recommendations of should do's.
Thanks!
AlV


") Thanks for all of your advice and help!
Thanks for all of your advice and help!


