Father-Son 1974 Duster Project

-
Might be able to rent on from your local machine shop or the garage where you get your cars fixed.

The 1 Ton foldable Cherry picker is $180 at Harbor Freight and you will use it more than you think http://www.harborfreight.com/1-ton-capacity-foldable-shop-crane-61858.html

Lets hope not! I have dropped the slogan " We do nice, but we do it twice " from my catalog. Besides, I have a fellow member who lives close by who offered the use of his engine hoist. I hate to always cry poor here, but that $180.00 will damn near buy the radiator we need...:D
 
Our motor is about complete, 904 is getting the shift kit installed, have the right flex plate and stock high stall torque converter. Motor mounts are on hand, and I have the stock 2 bbl kickdown linkage and I'm not sure, but I don't think it will work with my Holley..

I hate to make lists! However, here is a list of things I need to get to get Misty moving and stopping on her own
  1. filler tube gasket
  2. tank to pump fuel line
  3. Mopar electronic distributor with hold down
  4. HEI module
  5. coil
  6. spark plugs
  7. spark plug wires
  8. all hoses
  9. stock radiator
  10. fan
  11. shroud
  12. starter relay
  13. battery
  14. battery cables
  15. fuel pump to carb line
  16. stock air cleaner element
  17. thermostat
  18. power brake booster with master cylinder
  19. brake line to wheel cylinder hoses
  20. front and back brake wheel cylinders
  21. rear brake shoes
  22. front brake pads
Now I need to throw up:wack:
OK that's a little better. We also need:
  1. transmission cooling lines
  2. floor shifter
  3. manifold back 2.5" dual exhaust
Also need to figure out what we need to do the Alternator gauge bypass upgrade.
I love this project, it is very rewarding to make progress. But I have to admit, It was less stressful when we were tearing her apart, cutting, hammering, grinding and welding away....

I hate lists:banghead:
 

Attachments

  • mist.jpg
    129.2 KB · Views: 442
Trying to reuse your 2 bbl kick down linkage may be a pain. I just picked up the Lokar kick down cable and a bracket to attach it to my Holley for just over 100 bucks in Canada. It should be less for you. From what I read it clears up a lot of headaches with kick down linkage to go with a cable kick down.

Cley
 
You are making good progress.
I got my duster back and running and the fresh 340 I started on my engine stand 3 years ago, had a lifter stick which polished a pushrod and rocker arm pretty good.

I am also glad you did not buy the exhaust manifolds off me, ended up using them on my car.
 
Do you have a good exhaust shop near you, may be cheaper to pay them to bend up pipes for the car.

I spent $230 including shipping for TTI manifold pipes, and $250 for a Summit header back duel system, I spent about a week making everything work.
Even put a connection using header flanges behind the cross member so transmission and engine changes are easy. Had to buy one extra 18" piece of straight pipe.
 
You are making good progress.
I got my duster back and running and the fresh 340 I started on my engine stand 3 years ago, had a lifter stick which polished a pushrod and rocker arm pretty good.

I am also glad you did not buy the exhaust manifolds off me, ended up using them on my car.

Im happy to hear you got the 340 in and running!
 
Thanks man,
I did learn a lesson, loosen the rocker arms up when you let a motor sit.
Bought one lifter to replace the wood pecker in my engine, tore it apart tonight, but Summit will not have me a lifter until Friday.
 
I'll be shitting bricks when we get to firing our motor! It's been sitting since April of 2013.

Just more to think about. Here is a pic when the intake was off, it has not been rotated since, but it been wrapped most of the time, and it's in our mostly climate controlled garage...
 

Attachments

  • cam1.jpg
    51.2 KB · Views: 440
  • cam2 (1).jpg
    40.7 KB · Views: 439
Make sure you prime it before even trying to start it.
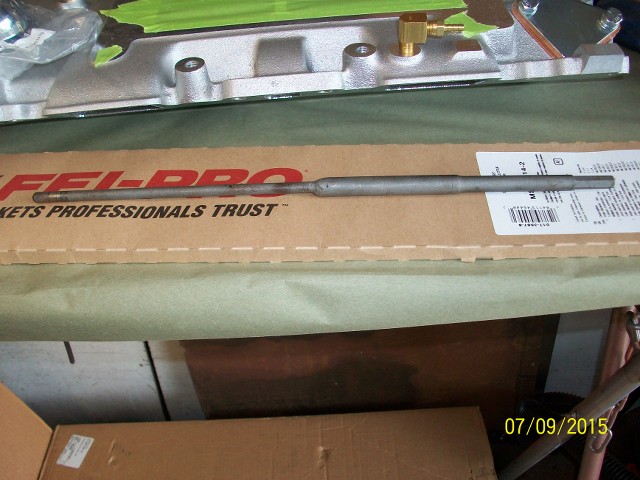
I can loan you a home made prime tool.
I made it from a mopar distributor gear and a mopar push-rod.
 
That list is shorter than you think. Waiting to hear you warm up those exhaust manifolds!
 
Great job on everything. I enjoyed reading all the pages. You give me inspiration to do my quarter panel repair and also getting under the car and de greasing and painting! Gonna follow your lead!

Alex
 
I'll be shitting bricks when we get to firing our motor! It's been sitting since April of 2013.

Just more to think about. Here is a pic when the intake was off, it has not been rotated since, but it been wrapped most of the time, and it's in our mostly climate controlled garage...

I also posted in small block tech. Since our motor has been sitting since the summer of 2013, see pics in post 609. What should I do if anything to lube it up before it goes in the car to be fired for the first time? Maybe some kind of spray lube in each cylinder and rotate if by hand before filling it with oil and priming it before cranking it?
 

Attachments

  • motor3.jpg
    45.9 KB · Views: 377
That list is shorter than you think. Waiting to hear you warm up those exhaust manifolds!
You and me both Wanye!
You know Duane is going to be grinning from ear to ear that day........
 
Do not be discouraged by the lists. I started by putting them on ruled notebook paper. I just did another one the other day, and my garage looks like a parts warehouse. Almost there!
 
Here is shot of my garage with Misty tucked in.. After we got the body done and got the car back from the paint shop, we put up double shelving on the back wall and half way down both sides. I have a ton of parts to work with and more to buy, so there will be no trip out to Carlisle for us this year, going to put the cash we would have spent on bumpers into getting odds and ends we need to get the motor in the car.
 

Attachments

  • full.jpg
    47.6 KB · Views: 349
Here is shot of my garage with Misty tucked in.. After we got the body done and got the car back from the paint shop, we put up double shelving on the back wall and half way down both sides. I have a ton of parts to work with and more to buy, so there will be no trip out to Carlisle for us this year, going to put the cash we would have spent on bumpers into getting odds and ends we need to get the motor in the car.

I skipped last year for similar reasoning. Maybe next year our cars will be ready for the trip.:D
Or the following year... I never thought it would take so long, but no rush. I just keep plugging away.
 
I skipped last year for similar reasoning. Maybe next year our cars will be ready for the trip.:D
Or the following year... I never thought it would take so long, but no rush. I just keep plugging away.

Keith you're right, there is no rush, and I'm more positive than ever we will be driving theses cars to Carlisle one day...
 
I also posted in small block tech. Since our motor has been sitting since the summer of 2013, see pics in post 609. What should I do if anything to lube it up before it goes in the car to be fired for the first time? Maybe some kind of spray lube in each cylinder and rotate if by hand before filling it with oil and priming it before cranking it?


I made a tool to prime a small block from a distributor shaft and a push rod.
Basically you remove the distributor drive gear and insert it in and hook a drill to turn the oil pump.
There are two different spots one oils the right cylinder and the other oils the left.
You have to turn the crank slowly with the drill running to find them spots.

You could just buy hexigonal bar stock and it would accomplish the same thing.

RD3KL9.jpg
 
Thanks for the advice:D
I am clueless as to how to install and set the distributor, set the carb make adustments and so forth. I've got a lot of reading-learning to do.

For sure, I can get it dropped in and bolted up, no worries....

I've heard in more than one place that it's important for the motor to fire on the first try or you run the risk of damaging the new cam. The thought of me putting that motor in the car, hooking it up, and turning the key for the first time and it actually running is utterly ******* ridiculous to me :wack:
 
The dealer rebuild kit was simple to put together, and it looks right to me.
I'm wondering what the small cardboard squares are for?
I'm fixin' to grease this badboy up and put it back in the car.
Stop me if I'm screwing up :protest:
 

Attachments

  • cup.jpg
    31.9 KB · Views: 313
  • cardboard.jpg
    24.4 KB · Views: 337
So far I can line up two bolt holes from this bracket with two on this power steering pump.
There are two different holes that line up with bolts on the block assembly. Again if I'm completely wrong give me a shout. I need to degrease this stuff and do a good cleaning so I can mock it up. It was 40 years since I last had an A-body that was in one piece, and all this stuff was disassembled just before we bought the car. I assume there is one belt that drive the alternator and the power steering pump since I see no immediate way you can adjust belt slack at the PS Pump. So I am assuming any and all tightening and adjustment happens at the alternator. This is a AC car and we plan to restore it at one point but not now.
I will look at my 72 Chrysler chassis manual to see if there is a belt path schematic, although this car is a 74.
 

Attachments

  • PSP.jpg
    117.3 KB · Views: 300
I was sifting through some of my baskets of parts looking for the PS pump bracket when I found this short harness. I did not remove it when we disassembled the car, it was in a box in the trunk. anyone know what this is for? It's intact , but whatever it was connected to had it's plugs cut away. I hate it when people just start cutting stuff :banghead:
 

Attachments

  • h.jpg
    107 KB · Views: 289
  • he.jpg
    100.2 KB · Views: 284
  • hoe.jpg
    106 KB · Views: 265
Since we are getting ready to to put the motor back under the hood, I wanted to make a modification/fortification to the outer steering column. I have seen a various screws and bolts run through the cage portion of the outer column to keep the collar where the shifter arm has been cut off from rotating.
We decided to make a piece of sheet metal and tack weld it across the large slot in the outer column and put a plug weld in the middle to keep the inner sleeve from rotating.
It worked out well.
 

Attachments

  • column.jpg
    117.5 KB · Views: 299
  • lockstrip.jpg
    121.7 KB · Views: 297
  • weld.jpg
    97.7 KB · Views: 318
  • weldin.jpg
    126.8 KB · Views: 289
-
Back
Top