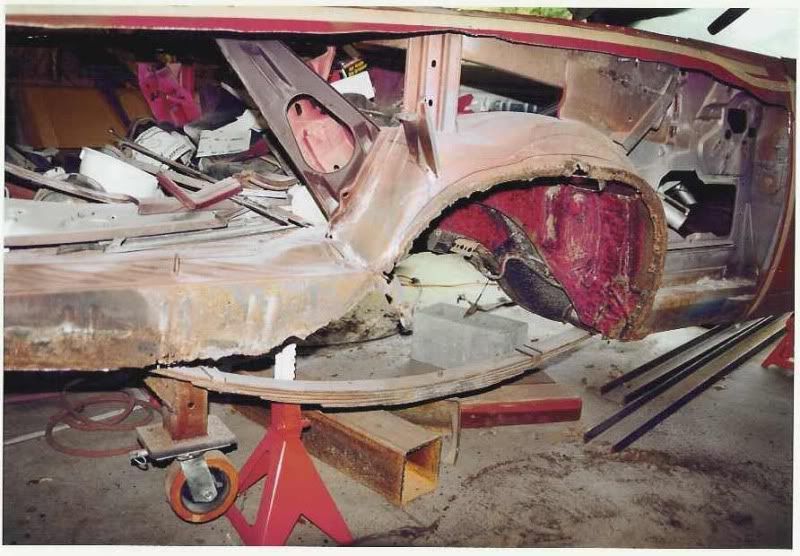
Holey mackerel

-
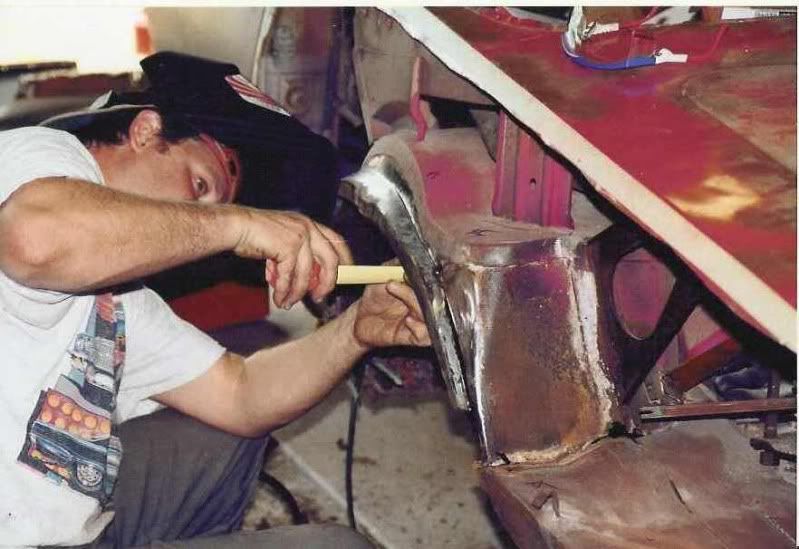
the wheelhouse caps will have to be rebuilt but i will do this after i get the inner and outers in. i was able to use what was left of the inner as a pattern for the new inner. i used a white marker to trace out the form and then cut it down with an air saw. then i popped in my holes for welding.
 

Attachments

  • DSCF4020.jpg
    27 KB · Views: 410
  • DSCF4036.jpg
    34.8 KB · Views: 419
  • DSCF4035.jpg
    30.3 KB · Views: 409
  • DSCF4033.jpg
    28.4 KB · Views: 396
  • DSCF4032.jpg
    32.2 KB · Views: 401
  • DSCF4031.jpg
    33.7 KB · Views: 385
  • DSCF4022.jpg
    30.2 KB · Views: 406
  • DSCF4021.jpg
    26.6 KB · Views: 393
I was lucky on mine as the inners were still decent (just a couple small patches) but the outers were toast. I had bought a notch for parts and used the outers from it. Measured off the distance i needed and welded in the replacement piece. Still had to fab a bit of the replacent as the donor had the wheel wells cut for slicks.


i trimmed away the remnants of what was left of the pulverised metal and fitted the fresh wheelhouse in place. then i took the papaer template i previously made for the outer and did a trial fitting on the donor wheelhouse. cut that out and test fitted it to the car. it fit nicely so i traced my pattern out on the new outer wheelhouse.
 

Attachments

  • DSCF4045.jpg
    24.6 KB · Views: 413
  • DSCF4044.jpg
    33.3 KB · Views: 391
  • DSCF4043.jpg
    33.3 KB · Views: 366
  • DSCF4042.jpg
    33.6 KB · Views: 387
  • DSCF4041.jpg
    27.9 KB · Views: 403
  • DSCF4040.jpg
    27.2 KB · Views: 390
  • DSCF4038.jpg
    37.9 KB · Views: 389
  • DSCF4037.jpg
    36.8 KB · Views: 392
Fantastic progress, Rick! I must say, never seen any project car down this far before. Outstanding work!
 
next came the trunk floor dropoff, the rear body panel and the quartereverything fits very nice once i get the drivers side mocked up and hang the doors it will come apart so that i can weld everything on the inside out.
 

Attachments

  • DSCF4054.jpg
    31.5 KB · Views: 380
  • DSCF4053.jpg
    36.7 KB · Views: 406
  • DSCF4052.jpg
    32 KB · Views: 391
  • DSCF4051.jpg
    34.2 KB · Views: 381
  • DSCF4050.jpg
    37.9 KB · Views: 401
Nice work. Sleeves plug welded in.

sleeves are there. nothing will be welded until the mock up is complete

I was lucky on mine as the inners were still decent (just a couple small patches) but the outers were toast. I had bought a notch for parts and used the outers from it. Measured off the distance i needed and welded in the replacement piece. Still had to fab a bit of the replacent as the donor had the wheel wells cut for slicks.


got a ways to go...

That looks great

thanks

Fantastic progress, Rick! I must say, never seen any project car down this far before. Outstanding work!

thanks all it is is a big puzzle
 
I predict this one will be a keeper when you are done.
 
sleeves are there. nothing will be welded until the mock up is complete

Cut myself short there, was just commenting that I saw that it would be sleeved and plug welded when finished. Its a clean and strong way to stub in a rail. Nice clean looking work.
 
This thread is better than the shows on Velocity or Spike.
 
today i moved over to the drivers side. mase my patterns in form with the other side and cut the new inner and outer wheelhouse halves to fit. placed them into position one by one, and then it was time to put the left quarter panel up into position.now that the fit has been conquered. i will tack weld what i can reach so nothing moves, and then remove the outer panels to finish the inners up. in the process the patching of the caps will take place. one other thing before i weld i'll install the decklid and hang the doors to check the lines and gaps.
 

Attachments

  • DSCF4066.jpg
    33 KB · Views: 297
  • DSCF4065.jpg
    34.5 KB · Views: 264
  • DSCF4064.jpg
    31.2 KB · Views: 266
  • DSCF4063.jpg
    30.4 KB · Views: 269
  • DSCF4062.jpg
    32.2 KB · Views: 259
  • DSCF4061.jpg
    31 KB · Views: 266
  • DSCF4060.jpg
    21.7 KB · Views: 267
  • DSCF4059.jpg
    26 KB · Views: 274
Being a fabricator I can tell you Im amazed at the progression of your car. Hope you keep it up and get to enjoy the fruits of your labor. Great biuld!:blob:
 
Now as I stated previously the rear wheelhouse caps needed their own attention. Once again I took a traced out a pattern and transferred this to clean white sheet metal.from there I was able to trim these pieces out with my air nibbled. Pre-drilled all my plug weld holes. Trimmed away all the garbage from the cap, and clamped my pre-cut patches into place. From there they were permanently welded

View attachment 1715097108

View attachment 1715097109

20170921_093736.jpg


20170921_095827.jpg


20170921_095841.jpg


20170921_095952.jpg


20170921_113710.jpg


20170921_114417.jpg


20170921_114422.jpg


20170921_114636.jpg


20170921_132719.jpg
 
Last edited:
-
Back
Top