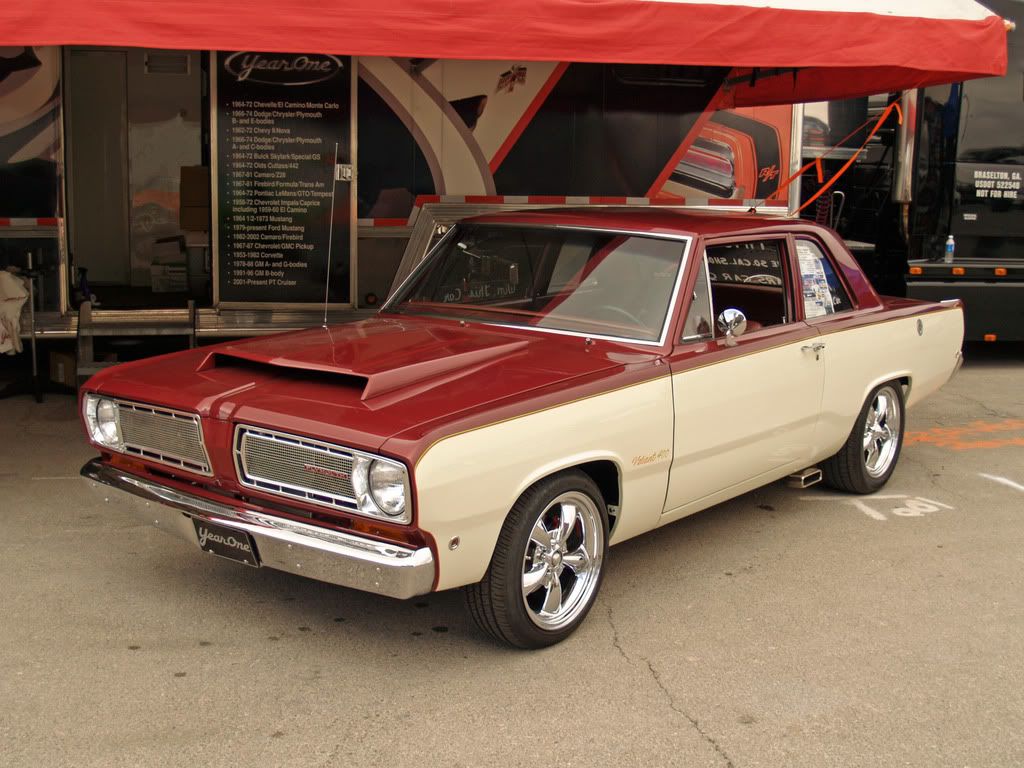
Little $250 69 Valiant

-
Don't go looking for rust! You WILL find it! :angry7:

I knew the quarters had rust, but..........In the trunk under the seam sealer back by the tail lights! That was news to me! Fortunately it didn't go all the way through. Ill treat it with a rust converter and go from there!
Here is some of tonight's endeavor!
Oh things I found in the quarter's..... A big wing nut, 5/16" bolt, pair of pliers, wine cork, all thread, red electrical tape pieces, a nickel, and plenty of rust, and sound deadening chunks.

Rust! 001.jpg


Rust! 002.jpg


Rust! 003.jpg


Rust! 004.jpg
 
Glad to see one of us is making some progress!

How did the bumper look, if not like chrome, maybe like satin or polished aluminum? I'd like to know just because.
Alan
 
OK first off, don't get crazy about all the dents and dings in the bumper. ITS MY OLD ONE! :cheers: I replaced it because of its condition! I powdered this one so I didn't screw up the current one if I didn't like it!
So here are several pics. My plan now, is to leave it out in the rain and see how it holds up in the weather. It hasn't been clear coated. The clear coat tends to yellow in direct sunlight, so I opted to pass that chance all together. Over all, my initial thoughts are IM DOIN' IT! It doesn't have the shine of chrome of course but as an alternative to the cost of real chrome and the fact that my car is mildly custom, it wont look too out of place. I hope to finish the bumper up soon so I can get a finished product!

Bumper 1.jpg


Bumper 2.jpg


Bumper 3.jpg


Bumper 4.jpg


Bumper 5.jpg


Bumper 6.jpg


Bumper 7.jpg
 
Well my wife and son had some sort of stomach flu, so needles to say I took any chance I could to not catch it myself! I got then taken care of, and headed to the garage. Started looking at what needs to be done that is quiet..
So, I started working on the door because the gap was too large and the door was too low. Here are a few pics. I managed to get it better than it was, but it seems the door now needs to be un-sprung???? LOL Its a tad twisted it seems. I may just leave it.Its not too terrible.

The first two are the front area of the door at the cowl. One taken from front one from back. The other 3 are the end result. While the door closes nicer and lines up better, the gap is still a bit large for my taste, so I may add to that edge when I got to weld in the new quarter patches. May just weld some rod to the edge like the pro's do.

Door alignment 006.jpg


Door alignment 007.jpg


Door alignment 008.jpg


Door alignment 009.jpg


Door alignment 010.jpg
 
I used to draw cars all the time. Never bothered to draw the Valiant how I wanted it. Finally did it this morning. Enjoy. Hope you like it. The idea here is "gunmetal gray" Pearl blue, and a blacked out hood. Hood scoop, and Formula S badges on the rear quarters. Large rims 17"/18" or so. and a Spoiler by Randy, with my custom bumper with driving lights.

Valiant drawing.jpg
 
Well I cleaned out the gutters! Nope not on the house... Ok so it was the drip rails, same thing! I tried to get that stuff to come out peacefully, but it resisted.
As I fired up the torch, I said "Resistance is Futile". No not really, but the torch worked great to loosen that stuff up. I heated it just enough to break down the 40 year old "seam sealer" or what ever that stuff is. It was cracking and separated from the rail itself. Needless to say, there was rust underneath some of it. I plan to treat the surface rust and then replace what I removed.


Anyone know of a proper product to use here? Here are some pics of todays finished product.

Drip rail 001.jpg


Drip rail 002.jpg


Drip rail 003.jpg


Drip rail 004.jpg


Drip rail 005.jpg
 
Those wheels in your drawing look like a set of late model Mustang Bullitt wheels. They are 4 1/2 inch pattern 17", and can be had fairly cheap as the mustang guys are starting to customize them. A simple wheel center emblem change is all that's needed.
 
You got some nice body work going on there!! I like the look of the "chrome" powder coat, a friend of mine used that stuff on his truck bumpers and they look great. Not too shiney, not too dull. Keep 'em commin'!!
 
The correct tools for the job make body work soooooooooooo much easier!!!!!

Yeeehaaaaaaaaaaaaaaaa


very nicely said!
 
Really digging the thread....as was said before....just watching someone else making progress brings motivation to do the same.

I have a 72 duster and I see alot of things you are doing that I think would work well on my duster aswell.

Thanks for all the great tips aswell.

And I too need to know what the heck is that "seem filler" they use in the drip rails lol? mine is doing the same thing
 
I'm thinking that for the money your bumper looks pretty darn good. It's nice to have alternatives to chroming, and might be easier to hide a mix of steel and fibreglass bumpers, like I'm going to (probably) do. I know you can have 'glass chromed, but it sure ain't cheap! The artwork looks pretty good too. Keep up the progress!
Alan
 
"Those wheels in your drawing look like a set of late model Mustang Bullitt wheels. They are 4 1/2 inch pattern 17", and can be had fairly cheap as the mustang guys are starting to customize them. A simple wheel center emblem change is all that's needed."

Thanks, I am pretty sure Im going to run the Bullit rims, when I get a bit further into this. Got other places to spend cash on this thing as of now. :(


"You got some nice body work going on there!! I like the look of the "chrome" powder coat, a friend of mine used that stuff on his truck bumpers and they look great. Not too shiney, not too dull. Keep 'em commin'!!"

Yeah, Im pretty happy with the "sheen" on this, we shall see how it does in the weather. Thx for the compliment on the body work. Im no body man thats for sure!


"Really digging the thread....as was said before....just watching someone else making progress brings motivation to do the same.

I have a 72 duster and I see alot of things you are doing that I think would work well on my duster aswell.

Thanks for all the great tips aswell.

And I too need to know what the heck is that "seem filler" they use in the drip rails lol? mine is doing the same thing"

I was looking to get motivated on my car so I started frequenting the site lately. It worked! I have finally started working on it again!
I just started a thread to find out what that stuff is.


Thx for the compliments guys!!!
 
1, dig it out, and i try to get it all out cause it takes too long to blast it out.
2, blast, and sand, and brush, and clean it out real good(bodywork time)
3, por-15 the bottom,inside of outer lip
4, etching primer
5, seam sealer
6 2-k primer
7 wetsand, paint.
8 drive it like i stole it!!!!
at least thats how i do it.
 
Hahahaha progress! I replaced the rotted quarter section on the drivers side today. Pretty happy with the results! Ill post pics tomorrow! I also realized that I only need to install a wiper, and a bulb in the tail light and I can get it inspected to drive it NOW!!!! I have a few days off so I plan to head up to get it inspected in the morning. Man Im siked! With the left quarter being patched, Im half way through my last big hurtle!!!
 
1.
2. Console Carpet
3. Coil bracket
4. Put another coat od Fiberglass on the dash pad and Fill and Sand, and repeat!
5.straighten, and polish Door sill plates, and install.
6.refinish Steering Wheel and re-install
7. paint and re-install my column sleeve.
8. Build new glove box "box" w/ radio accommodations
9. Install overflow tank. (may Fabricate a really cool one)
10.Have headers "clearanced" around the steering linkage
11.
12.Finish custom front bumper driving light install.
13. Fabricate custom rear window defroster from ceramic auto heater I have.
14. Make new rear dash panel to cover rear deck.
15. Remake door panels? (maybe)
16.Insulate trunk with Dynamat or similar product.
17.
18.
19.
20.
21. Begin Body Work. <------------Being done!!!!!!
22. Paint
23. Install all new exterior seals
24. Finish painting wheels to look "torque thrust D" style.
25.Damn near complete at that point!
 
While Im not a fan of Bondo, Ill have to use some here! Its not too horrible. They dont make patch panels for the quarters on these Bodies, so I had to fab up my own. Just used a few good sized clamps and a piece of pipe to roll the edge. After that it was just a bit of tweaking by hand, trace my patch, cut the old junk out, and start tacking!
So here it is before and after.

Rust! 002.jpg


Left Quarter repair 001.jpg


Left Quarter repair 005.jpg
 
-
Back
Top