You are using an out of date browser. It may not display this or other websites correctly.
You should upgrade or use an alternative browser.
You should upgrade or use an alternative browser.
Show us your home made tools
- Thread starter fishy68
- Start date
-
NeeMa
Member
Made a Dolly to move around the complete drivetrain including front Suspension. Took me 3 hours.
![IMG_5200[1].jpg IMG_5200[1].jpg](https://www.forabodiesonly.com/mopar/attachments/img_5200-1-jpg.1714963931/)
![IMG_5201[1].jpg IMG_5201[1].jpg](https://www.forabodiesonly.com/mopar/attachments/img_5201-1-jpg.1714963932/)
Last edited by a moderator:
needsaresto
Well-Known Member
- Joined
- Nov 13, 2004
- Messages
- 7,603
- Reaction score
- 266
Cheap intermediate shaft removal tool.
1 - 6" length of 1" Schd. 40 PVC
1 or 2 as needed zip ties
a little muscle
This reminds me of my cheap seal driver solution. Went to the muffler shop and grabbed a small chunk of appropriate sized pipe when I was stuck,because seal was bigger than all my sockets. Worked just fine,and much cheaper than a seal driver tool kit.
67Dart273
Well-Known Member
Underway with a transmission jack for use under my hoist. Start with "your standard orange, 1 each" Horrid Fright cherry picker. Add a few scraps of steel
the idea is that the lower "parallal arm" will stabilize the transmission platform and allow for tilt. The plan is to construct a lead screw type deal at the outer end of the lower arm, where the clamp is now. This will allow to manually tilt the trans front / rear.
Also, a long enough screw (might as well use 3 foot redi bolt) will allow for lengthen / shorten of the arm(s) if needed for whatever the situation seems to be.
Or at least "that's the plan" LOL
Last edited by a moderator:
67Dart273
Well-Known Member
Well got the "first draft" done today. I didn't spend a lot of time on this, just "welded right through" the zinc, LOL. I've grown to HATE zinc. Adjuster is common "redi bolt" "all-thread" whatever you know it as. I used "plenty" in case I want to telescope the arm in a hole or two. Used two connector nuts, one for a crank to fit, and the other to move the "carriage." Piece of 1/2" tube welded at right angle allows for movement


Last edited by a moderator:
fishy68
Tyr Fryr's Inc.
Looking good Del
67Dart273
Well-Known Member
Looking good Del
Thanks I'll need your help on this LOL
diymirage
HP@idle > hondaHP@redline
I don't have a picture of it but I came up with a pretty nifty tool today
it is a 2 foot long aluminum tube, maybe about 3/16 of an inch thick with a 1/8 internal diameter
I grabbed about 6 foot of 6 pound test fishing wire which I doubled up and fed through it so there was a loop at the bottom end of the tube
I left it sticking out maybe 3 inches
now I could reach right into the hole of the fender where the hood hinge sits and I could reach all the way down into to fender and slip the loop over the neck of the bottle of locktite I accidentally knocked down in there
pulling on the ends of fishing wire I could tighten up the loop around the bottle so I could lift it out
4spdcuda66
Well-Known Member
I made this wheeling machine out of stuff I already had lying around the shop. The upper wheel is a timing belt tensioner out of an Xterra, and the lower wheel is out of a pillow block. Note the radius on the lower wheel. Both are sealed bearings.
The adjusting screw is an idea I got right out of this thread! Another FABO member built a rotisserie and I used his idea for the outriggers he built for his rotisserie. I still need to do the final welding, but I tried it out with the adjuster tacked up, and it works great!
The sample pieces were hammer formed on a shot bag a few years ago and nearly forgotten. I wheeled the piece on the right. BIG difference in surface quality. It may be hard to see in the photo, but the piece on the left is really bumpy from hammering, while the piece on the right is smooth from wheeling.
Now I need to get some sheet metal and finish making the patch panels for my car! Maybe I'll be able to bring my build thread back from the dead! Thanks FABO!!
Last edited by a moderator:
draginmopars
Well-Known Member
This is more of a fixture, than tool
used a head gasket to locate/ drill the holes,
then used head studs and washers
to attach the plate to the block
it is a piece of C-channel,
used to hold the mag. drill
to drill/ tap for a external cooling fitting
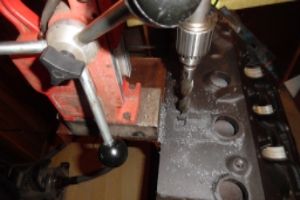
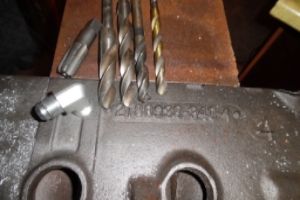
used a head gasket to locate/ drill the holes,
then used head studs and washers
to attach the plate to the block
it is a piece of C-channel,
used to hold the mag. drill
to drill/ tap for a external cooling fitting


hemicbx
Active Member
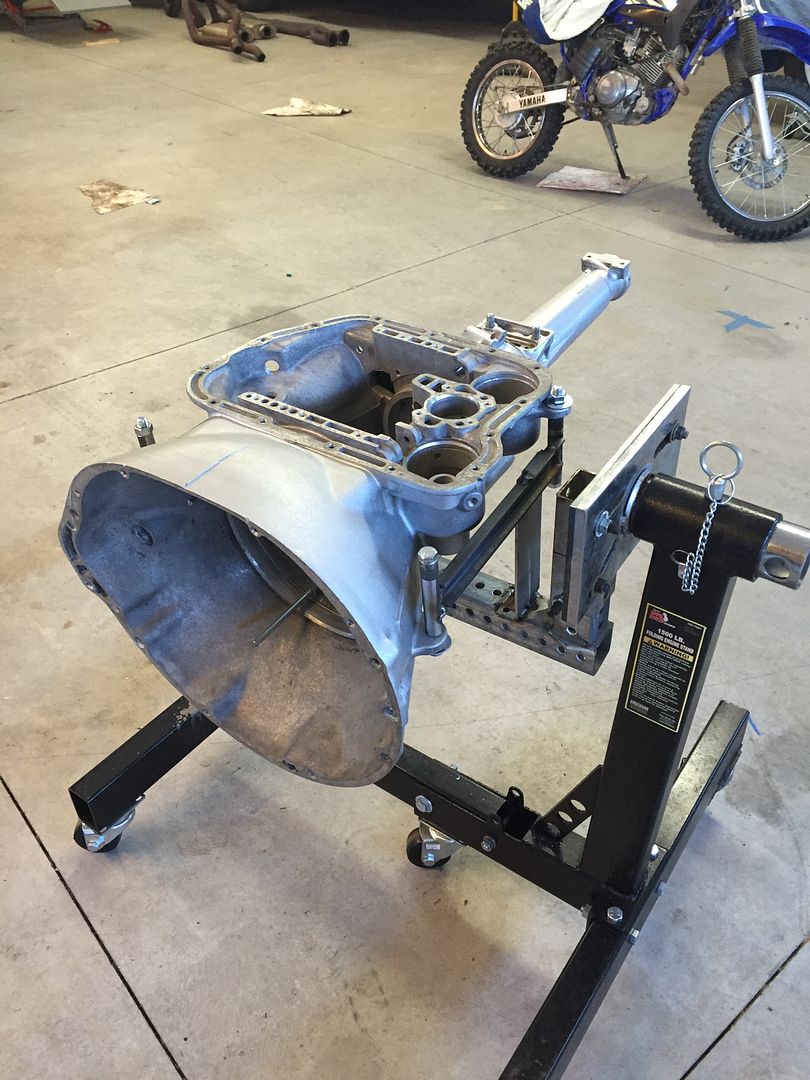
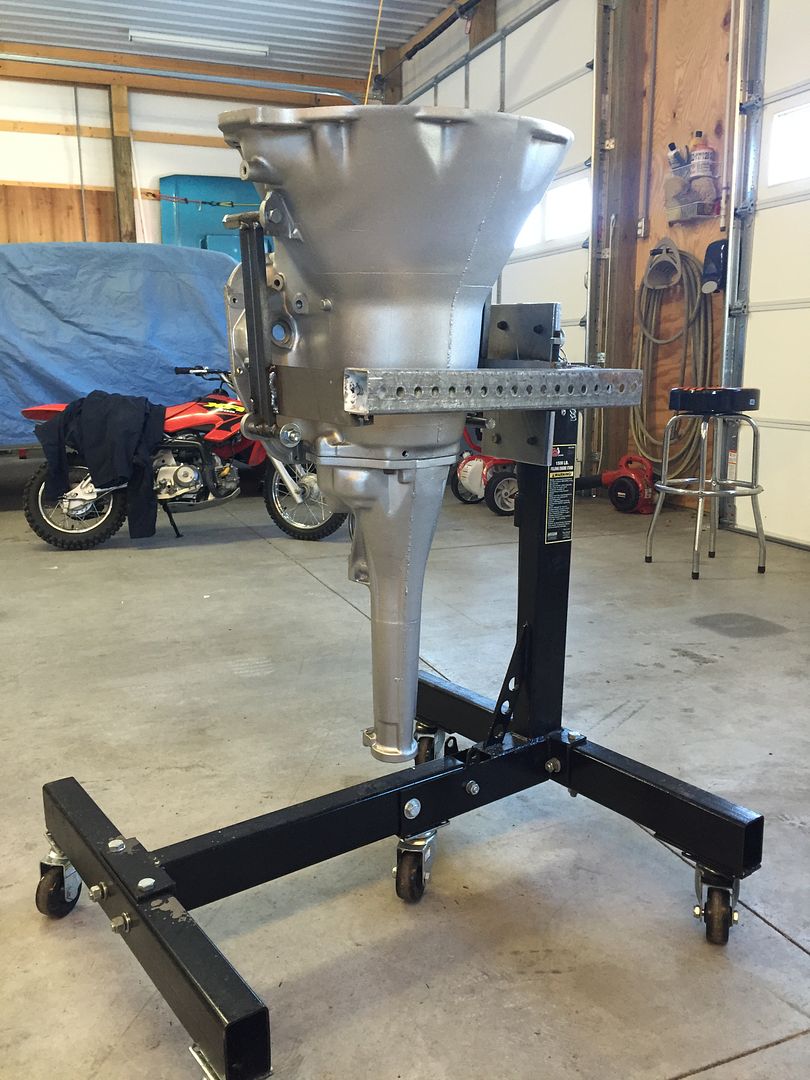
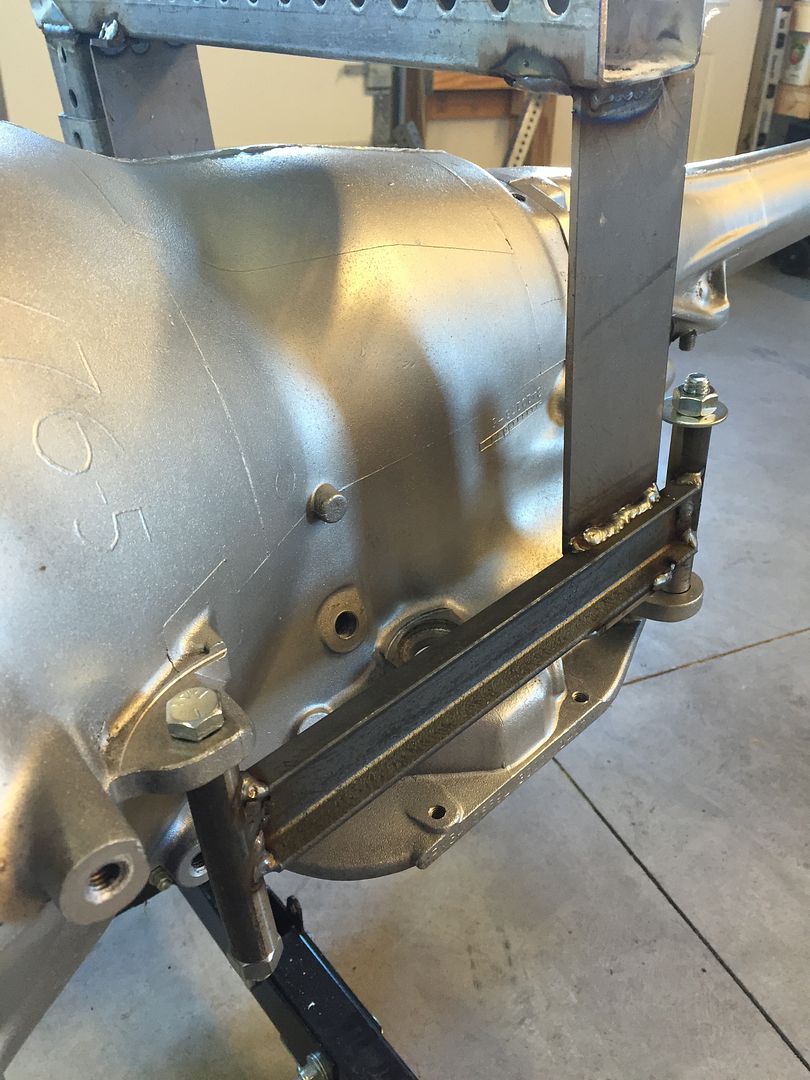
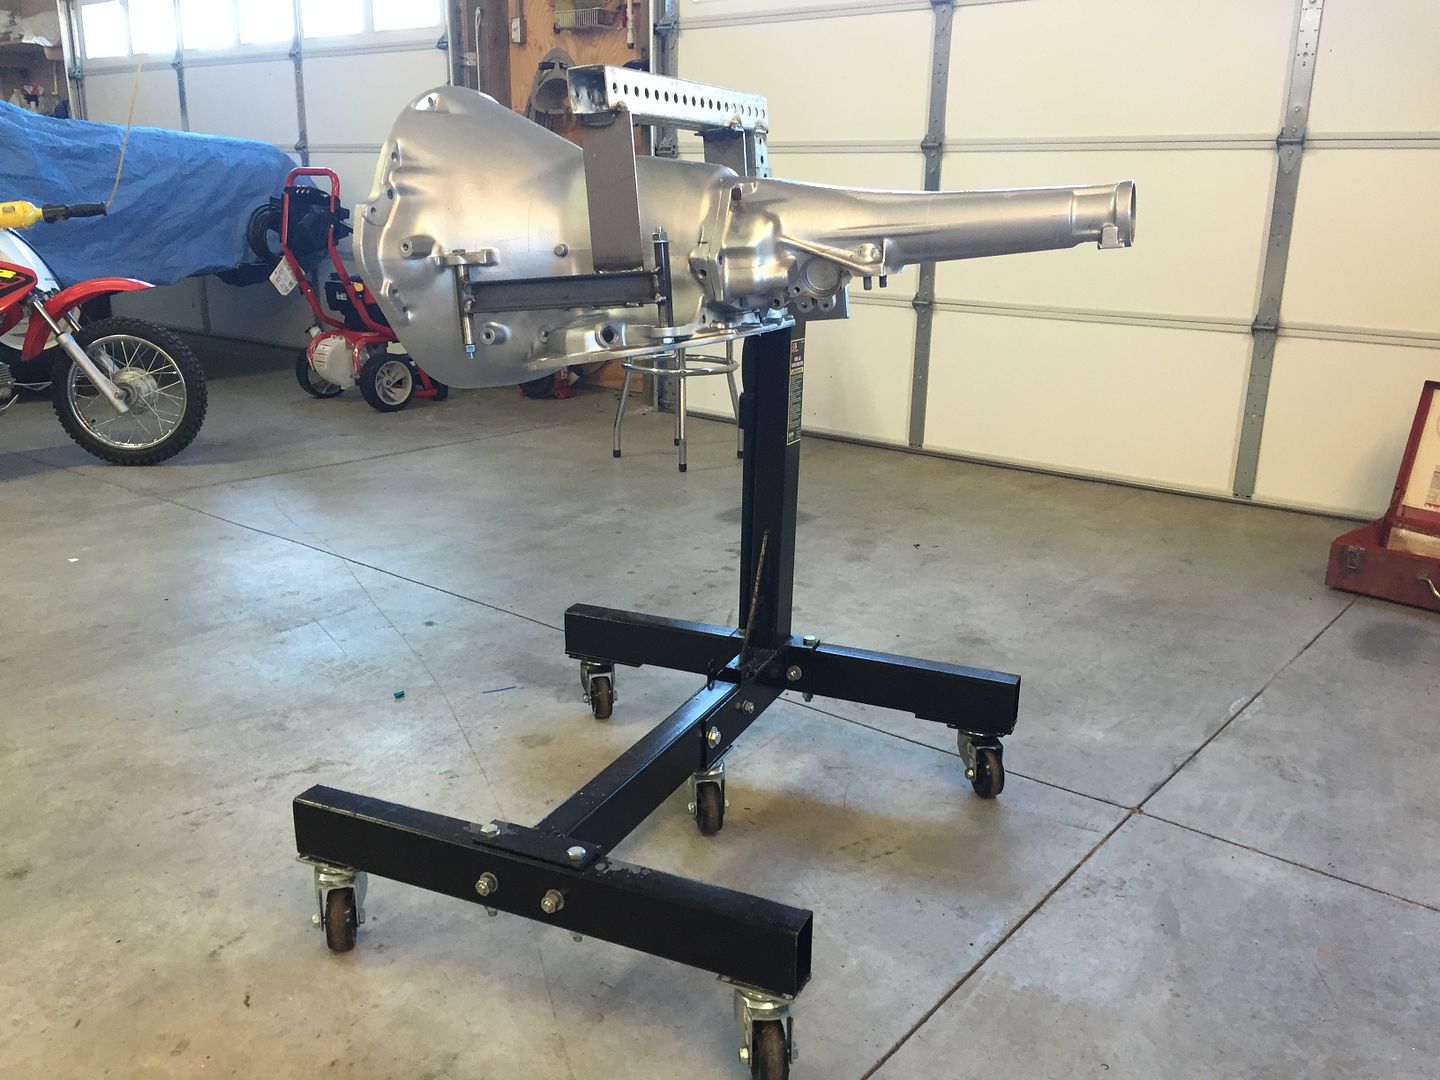
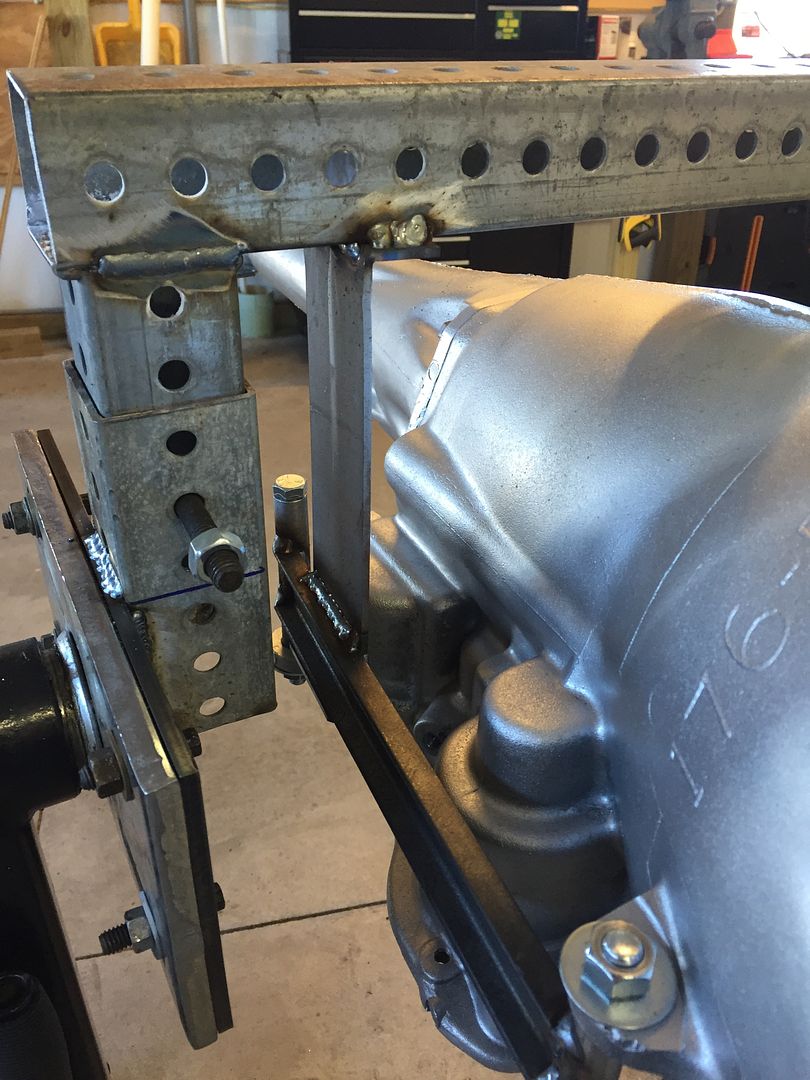
Today, RS23VOA & I build up a transmission adapter for an engine stand. We needed a fixture that let us rotate the trans pan-up or bell-up for assembly. Here's what we came up with using mostly recycled material


DIY TRAILER RAMPS


 Totally random but I came up with this in a pinch yesterday after blowing my wife's rear end in The middle of Death Valley. I borrowed a trailer from a friend but he didn't have the ramps it came with. So after giving it some thought I came up with something. 4"x12"x8' lumber and 1/2"x6" eye bolts. The eye bolts are for strapping the boards down to the frame of the trailer to keep them from moving. It worked! The wood didn't flex and this is a 4100lb truck. Total was about $70 at Home Depot. You can place a few small pieces of wood at the ends to help climb onto the thick board.
Ferdinandbites
Well-Known Member
Here's some I made.
First one is a Holley carburetor stand. Hey don't laugh, it works.
Second one is a spark plug air hose attachment tool. When heads are on engine, this holds valves closed for changing valve springs or seals.
Third one is an engine plate for pulling engines. This one I made but didn't weld. I don't trust my welding skills.
Fourth is a tool for turning the adjusters on an 8 3/4 rear. A fine example of my early welding ability. LOL
View attachment 70172
View attachment 70173
View attachment 70179
View attachment 70181
could have used a stand like that last night for my carter bbd
Ferdinandbites
Well-Known Member
67Dart273
Well-Known Member
genius
DEFINATELY going to have to tuck this one away in my mind!!
Logan
Well-Known Member
Sorry if posted by someone earlier but I was having trouble pushing my fuel filler tube into the tank today so I placed a worm type hose clamp around the tube and used it to pry the tube into the tank using a screw driver at the edge of the hole in the floor. Had to reposition the clamp a few times to get it all the way in.

jomoper
Mope or Nope
So I made this the other day. After modifying a set of 273 rocker arms I got to thinking how do I know for sure that the oil will be getting to the top of the valve stem and not just hitting the side of the spring where its of no use? So i modified an old rocker shaft with a fitting to connect to My air compressor. I then plugged all the remaining holes . Installed the shaft on the head removed one bolt filled the shaft with oil.Then tested the spray pattern varying the air pressure from 20-80PSI. I now know for certain that I drilled the new holes correctly as I could see the oil spraying directly at the point of contact between the rocker arm and valve tip.


Last edited:
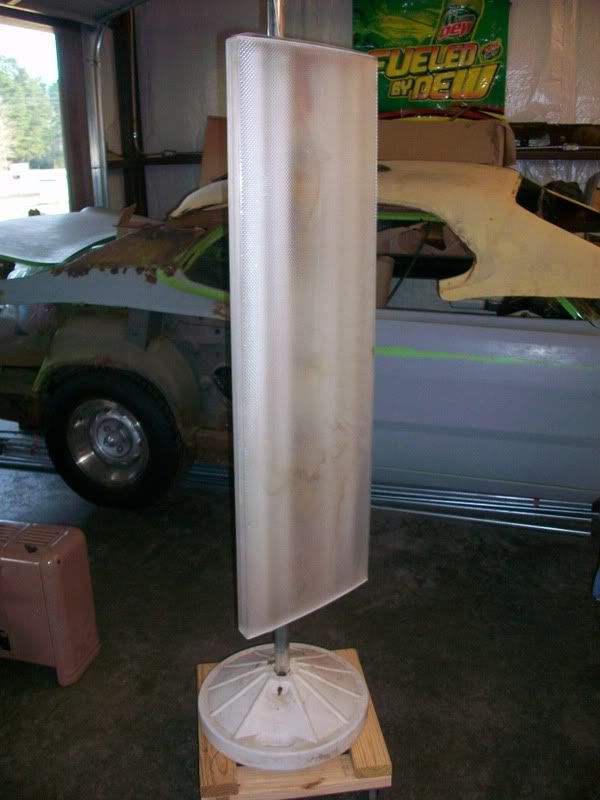
That is way cool, I'm definitely making one of theseMy portable bodywork / shop light... Made out of 4' fluorescent light attached to a patio umbrella pole mounted on wheels....
fishy68
Tyr Fryr's Inc.
So I made this the other day. After modifying a set of 273 rocker arms I got to thinking how do I know for sure that the oil will be getting to the top of the valve stem and not just hitting the side of the spring where its of no use? So i modified an old rocker shaft with a fitting to connect to My air compressor. I then plugged all the remaining holes . Installed the shaft on the head removed one bolt filled the shaft with oil.Then tested the spray pattern varying the air pressure from 20-80PSI. I now know for certain that I drilled the new holes correctly as I could see the oil spraying directly at the point of contact between the rocker arm and valve tip.View attachment 1714955643View attachment 1714955644
Actually, oil hitting the valve spring is of good use. It cools the spring. Not saying you don't need oil hitting the contact area, just saying if it hits both it'd be beneficial. Good idea to check it the way you did for sure
pishta
I know I'm right....
My friend made a curved 3/4 ratchet...for the tight spots.

not really, he bent it setting the preload on a Ford 4X4 pinion. Ratchet head is still tight! He used a floor jack on a 4' cheater pipe to apply like 800 ft/lbs to the nut. Yeah, that's HF Pittsburg brand. HF wouldnt take return...! "It wasnt used as designed" Ha ha!
not really, he bent it setting the preload on a Ford 4X4 pinion. Ratchet head is still tight! He used a floor jack on a 4' cheater pipe to apply like 800 ft/lbs to the nut. Yeah, that's HF Pittsburg brand. HF wouldnt take return...! "It wasnt used as designed" Ha ha!
fishy68
Tyr Fryr's Inc.
LOL... When I was a kid before the days of harbor freight I bought some cheap wrenches from Wal-mart cause I didn't have the money for anything better and I bent a 3/4" wrench just like that trying to get a flexplate off a 383. I kept it in my toolbox for yrs cause it was useful in tight spaces, as long as the bolt wasn't too tight.My friend made a curved 3/4 ratchet...for the tight spots.
View attachment 1714963632
not really, he bent it setting the preload on a Ford 4X4 pinion. Ratchet head is still tight! He used a floor jack on a 4' cheater pipe to apply like 800 ft/lbs to the nut. Yeah, that's HF Pittsburg brand. HF wouldnt take return...! "It wasnt used as designed" Ha ha!
needsaresto
Well-Known Member
- Joined
- Nov 13, 2004
- Messages
- 7,603
- Reaction score
- 266
LOL... When I was a kid before the days of harbor freight I bought some cheap wrenches from Wal-mart cause I didn't have the money for anything better and I bent a 3/4" wrench just like that trying to get a flexplate off a 383. I kept it in my toolbox for yrs cause it was useful in tight spaces, as long as the bolt wasn't too tight.
Lol and people pay good money for wrenches that are pre bent.. I bought a set of s wrenches for the hard to get spots,but sometimes you need a longer wrench. Heating up and bending a box/open end works.
pishta
I know I'm right....
The carb studs on a Mazda/Courier 2.0 are under the carburetor and you need a bent wrench to get them off, almost like a crows foot. HF advertises their version of this Rapi-Drive for "hard to get at" screws...Uh, thats not what it's for....


Have them at work,four 6 inch bolts I cut the heads off of.I use them to guide heads on when reassemblying Mopar engines.Learned this from another Mopar fanatic.I have a slot cut in them so I can remove them with a screwdriver.These work in the car as well.I still have to make some for the new hemis.
-

