Slant 6 Turbo 68Dart Project

-
Yeah I bought them off Summit and it said 220k but now i see there's a possiblity that's wrong. I wonder how to find out...
 
Yeah I bought them off Summit and it said 220k but now i see there's a possiblity that's wrong. I wonder how to find out...

You probably could find out by calling ARP; don't bother with Summit... I don't think they even know...

It probably doesn't matter, anyway.... but, if it were going into MY engine, I'd like to know.
 
Well, the ARP's are not actually 220,000PSI as you said Bill. I don't doubt they'll still do their job though.

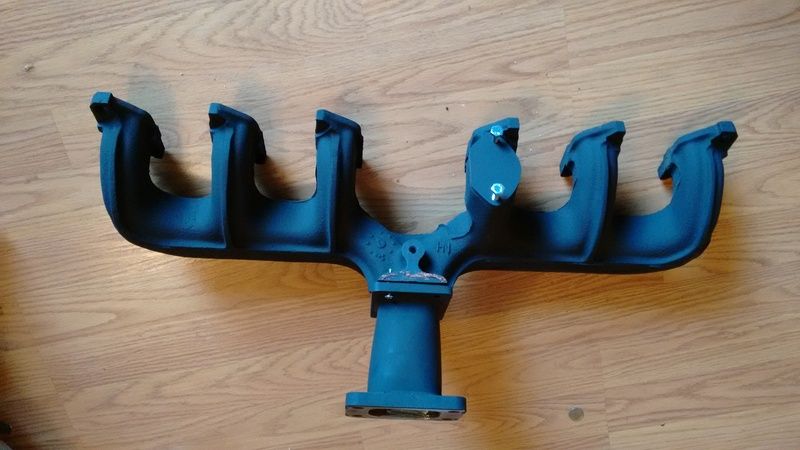
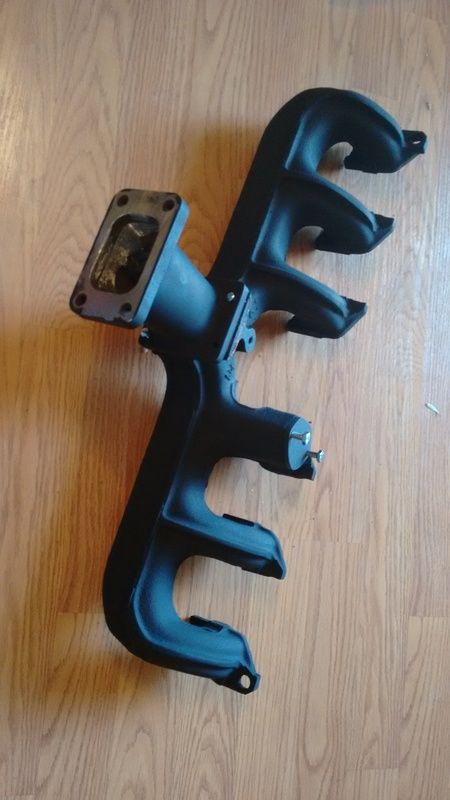
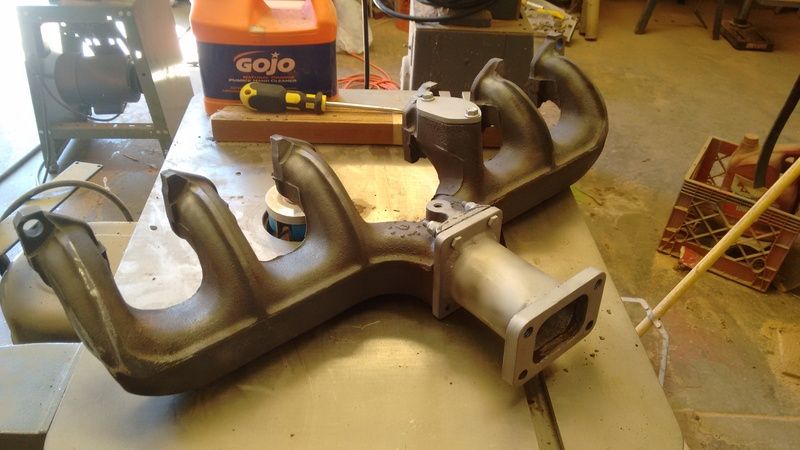
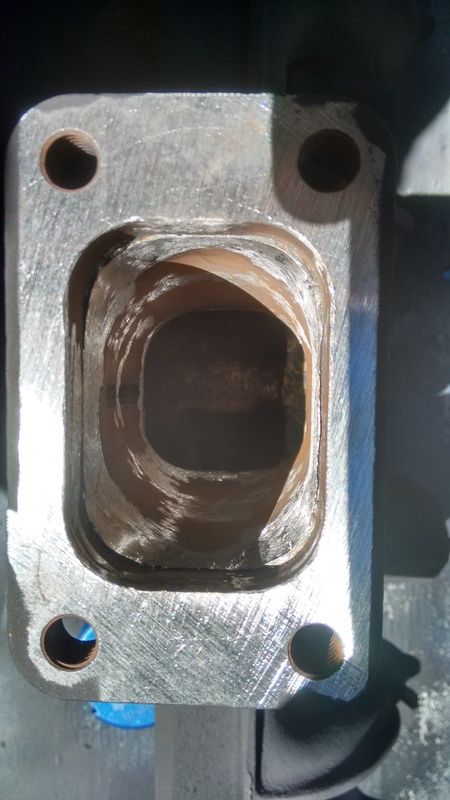
This morning I got my adapter and hacked manifold back. The original custom header design was scrapped due to time constraints and the person welding them was very hard to keep contact with. Oh well though, this was plan B, I call it the Surge Pipe, even though I've seen a few people make these. (It's like a part that skips the pishta pipe)

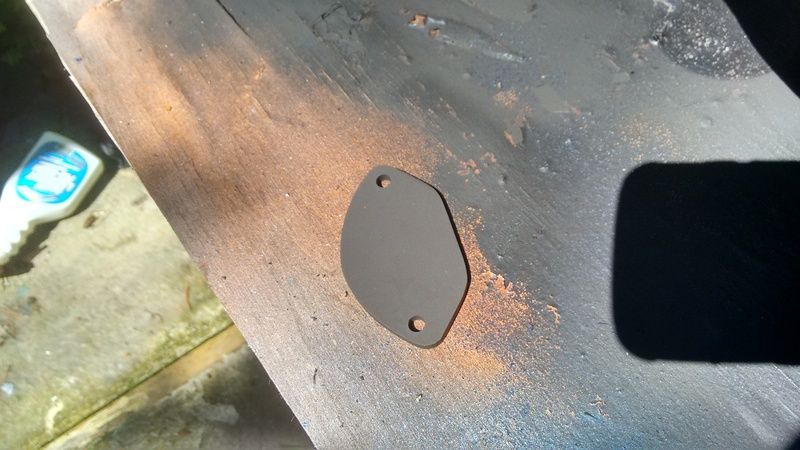
Anyway, I had the idea, and dropped it off to my favorite exhaust shop, and after three weeks he finally made the flange adapter to holes I drilled and tapped, and it will hang with a U bolt as well going through the intake holes that used to hang the exhaust manifold and the kickdown lever. It should be fairly sturdy. He also made a custom block off plate to get rid of the open choke pocket cover. I coated all three pieces with ceramic and ordered some exhaust gasket material, tomorrow I'll go to the hardware store and source some G8 bolts for all of it.

All in all - I'm very happy with how it turned out.


It also leaves room in the future to drop an external wastegate out of the pipe. It's very thick walled steel and he did an awesome job forming it, and naturally the welds are way better than I could hope to ever do.
 
Well, the ARP's are not actually 220,000PSI as you said Bill. I don't doubt they'll still do their job though.

This morning I got my adapter and hacked manifold back.
It also leaves room in the future to drop an external wastegate out of the pipe. It's very thick walled steel and he did an awesome job forming it.

That stuff all looks REALLY GOOD, David! I am always pleasantly-amazed at the great quality of your work!

And, I am sure those ARP studs will be fine; they are so much better than the OEM stuff...

I can't wait to see this thing run!!!!!!!! It's gonna be awesome!:blob:
 
Well, the ARP's are not actually 220,000PSI as you said Bill. I don't doubt they'll still do their job though.

This morning I got my adapter and hacked manifold back. The original custom header design was scrapped due to time constraints and the person welding them was very hard to keep contact with. Oh well though, this was plan B, I call it the Surge Pipe, even though I've seen a few people make these. (It's like a part that skips the pishta pipe)

Anyway, I had the idea, and dropped it off to my favorite exhaust shop, and after three weeks he finally made the flange adapter to holes I drilled and tapped, and it will hang with a U bolt as well going through the intake holes that used to hang the exhaust manifold and the kickdown lever. It should be fairly sturdy. He also made a custom block off plate to get rid of the open choke pocket cover. I coated all three pieces with ceramic and ordered some exhaust gasket material, tomorrow I'll go to the hardware store and source some G8 bolts for all of it.

All in all - I'm very happy with how it turned out.


It also leaves room in the future to drop an external wastegate out of the pipe. It's very thick walled steel and he did an awesome job forming it, and naturally the welds are way better than I could hope to ever do.
How did you come to the conclusion as to where to cut the manifold? Also, was the manifold cut with a band saw, machined or both?
 
How did you come to the conclusion as to where to cut the manifold? Also, was the manifold cut with a band saw, machined or both?
Sorry for the delayed response. Work has been fairly busy and I don't check on much online. BUT NOW I am ramping back up with the Dart. It's getting painted, new engine I am in the process of assembling, etc.

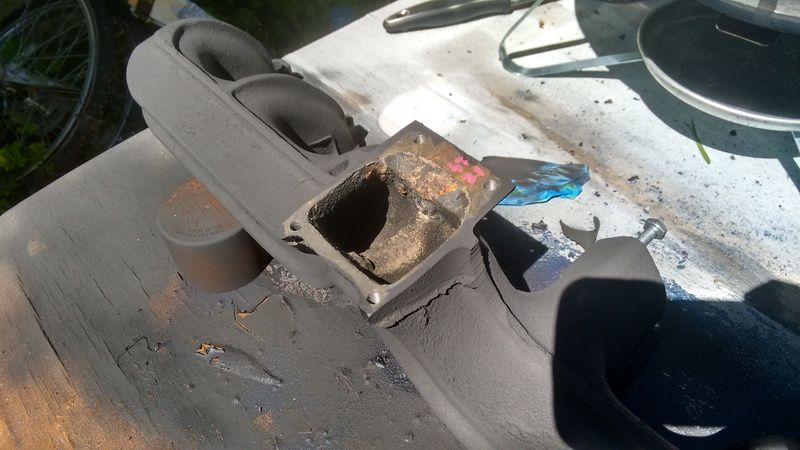
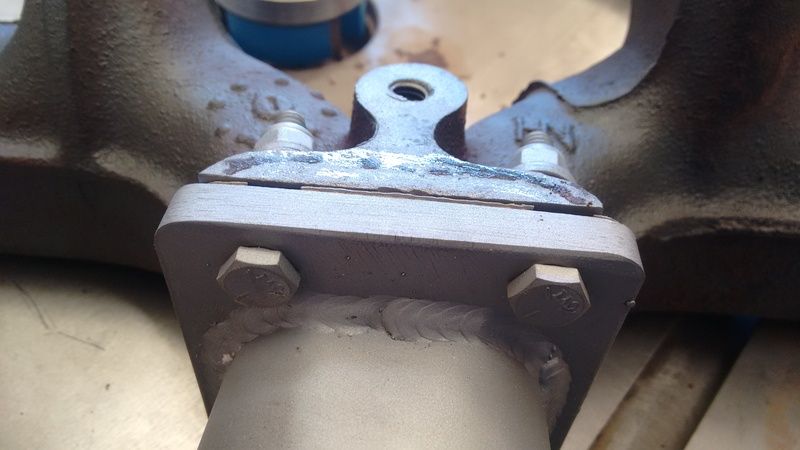
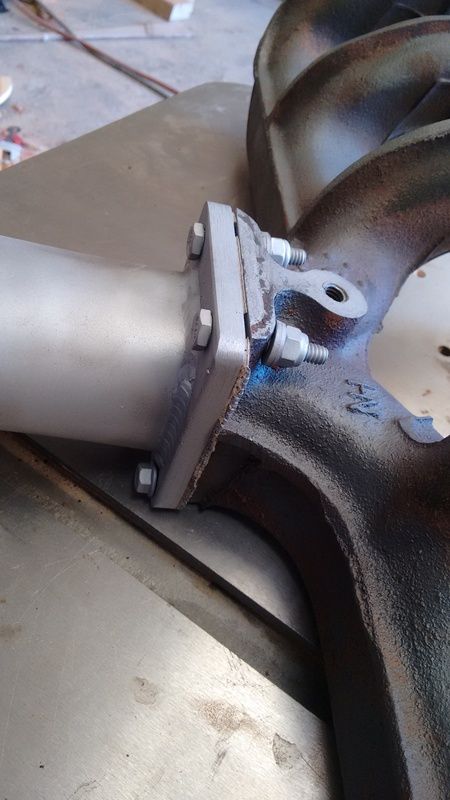
But for your question Dantra, I had seen a manifold cut similarly, but with a different adapter on the end that basically clamped on. I cut behind the riser pivot so it was gone, and cut to the back of the riser pocket so I'd have a flat surface. I used an angle grinder and cut off wheel, then put the part on a belt sander to flatten it. I recently sandblasted it before i repainted it so i have some better pictures of where it's cut.


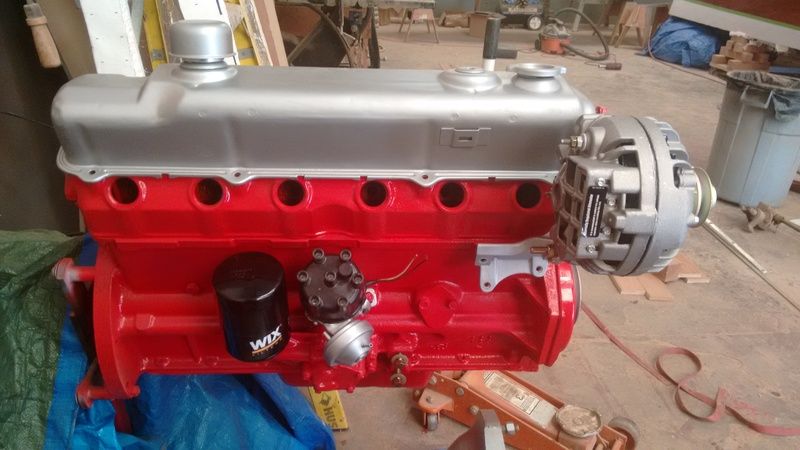
And as for the engine, I changed my mind on build appearance. I ordered paint for the rest of the car and it came two days ago. It's changing to Viper Blue Pearl and white roof with white painted tail stripe, and red hidem thinline tape between the colors. SO I figured a bright red with silver accent engine would look good amongst that field of blue.

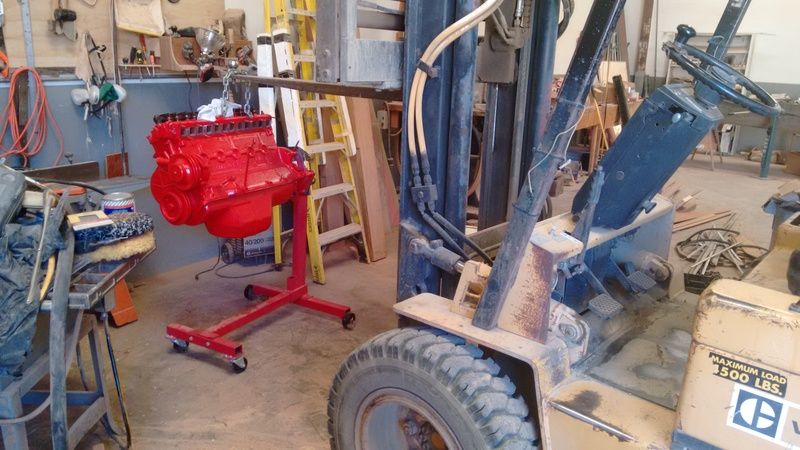
So it got stripped, and then painted Ford Red.
And then I moved it inside finally now that our large boat project has been delivered so I have half a shop to put the engine and car into next to it. Above that is the hoist on an i-beam so I can move it up and then sideways into the car and before that strip the old engine of its good stuff that's being re-used and then haul the rest of it out and onto an old tire or something.


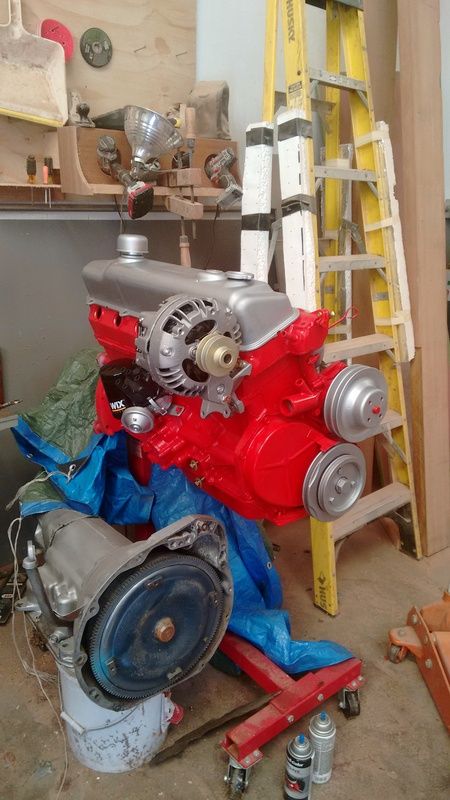
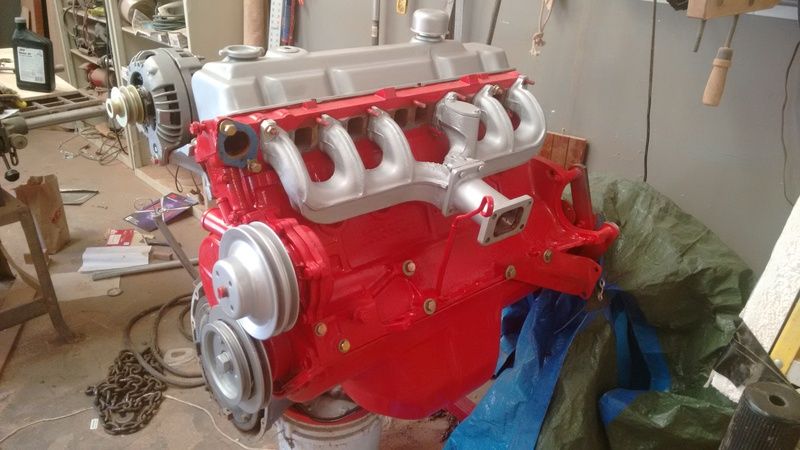
Then a lot of components I finished sand blasting and then painting. The silver accents look pretty cool I think. Then I'll have stainless steel hard line for boost referencing everything bolted down to clips that I'm going to make on various bolts on the engine.


It's starting to come together.


That's the exhaust just staged in place. Soon I need to park the car next to it to get the turbo out and transferred.
 
Thanks for the info man.. I had another manifold and just found that in the past few days that it's gone.. so now I'll need to pick up another. I like the cut/drill/tap method better than the weld. The weld wouldn't be much problem but the reliability of it is what I question. Still not sure on space tho... sheesh. I'll just have to get everything collected and see.

Btw.. this color combo lookes WAY better. It's a little more old school. Sometimes less is more.

Great Job :thumbsup:
 
Woah, 2 months, sorry. BUT I have been busy with the car and engine. I'd say I've accomplished quite a bit. I have the engine completely assembled, and the car is in the middle of getting ready. I still have to cut and polish it.
20160831_135313_zpsc1cf7muj.jpg

20160902_172025_zpsvbpvttk4.jpg

20160904_112043_zpszigya4ad.jpg

20160906_131335_zps2xu5dxnq.jpg

As for the engine, it's pretty much ready to drop when I get the body all set, take my tent down, and can pull a forklift up to it.
20160829_140420_zpswlztmhqm.jpg

20160818_155628_zpsyjknss00.jpg

20160815_163212_zpsscplxnns.jpg

20160808_163852_zps6d5lae2w.jpg
 
Sharp color dude! BC/CC or single stage? And give us some specs on that motor! Piston rod combo? Cam? Turbo? Is that your old super six/350 setup? I've been away for a while, glad to see someone is making some progress!

Oh, and on a side note (completely personal opinion btw) if you don't have many/major flaws is the paint (i.e., runs, sags, dust, insects) I personally think fresh paint doesn't need wet sanded/buffed/waxed. Unless it is something you enjoy doing of course. Again, everyone has their own opinion on this and it is perfectly ok if they don't correspond.
 
Last edited:
if that blue is a metallic single stage you might want to make a test panel for cutting and polishing before you start on your car.
 
It started out as a single stage, but then i talked to car painter and he said since i was new to it, and that the only paint i had, to take the last coat and mix it 50/50 with clear and then shoot a couple clears over it. It adhered just fine, but he suggested it so that if i mess up i can polish it without toasting the metallic. It is a metallic. Viper Blue "pearl." This is the second time i shot the car. The first time i got the entire left side as a run and sag, and the rest of the car was a super bad orange peel. I sanded it all down with 220 and then back to 600 to reshoot. It didnt take much to cover since the car was then blue already. The polishing is because i got some weird texture in some spots on the clear. I have no idea what happened and no amount of spray gun tonkering or spray gun cleaning changed it. The rest of the clear layed fine but in a couple spots theres a truck bed liner (not quite that bad) feel to it. Im hoping to knock that down and polish it to save it. Id rather not have to sand and shoot again. Im planning on going super dull with some 2000 on it.

As for the engine, i started running out of money and didnt want the car to sit at my shop forever. I need to drive it. So i decided the ultimate slant six build i would make out of my 68 block and head, and that this 74 block would be just a really nice rebuild. Its been bored .040 over, new pistons and rings, crankshaft ground and polished, new timing chain, made a whole bunch of actual bent oil lines instead of hoses draped everywhere, a LOT of custom made bracketry that i cut from 1/8" and 1/4" aluminum. A lot of it for making the lokar ayatem work. It is the same 350 supersix setup, just cleaned up a lot better, with a better cut for adaptong to the 350. Instead of two holes oncthe intake its a huge oval. The exhaust was modified to have an adapter which mounts the turbo right up next to the motor. Ive already decided if the turbo doesnt clear the stwering box, im shimming the engine mounts on steel risers, and if it doesnt clear the hood. Im cutting the hood. Thats just how itll be. Lol.

So nothing super exciting as far as internal mods for the engine besides having an engine that will not spit oil from every crevice because it has massive blowby, and im going to give it 14psi and see what happens, and be able to have a nice driver while i build another block. I also took every piece off the engine and whatever fit in thr blast cabinet got blasted and restored. Everything is as nice as i could possibly make it and im happy with it. If it makes 250rwhp then thats great.
 
Sounds good man!

"i started running out of money..."

Well maybe if you didn't spend it all on repainting the engine constantly...

Nah, I'm just ribbing ya. Most of your color combinations I like quite alright. I hope you get this thing together again! I know it sucks not being able to drive them. Hope it works out for ya!
 
So just to show everyone i'm still around and still working on this, the engine is in, i painted the car literally 3 times and still dont like it, but its getting closer to running. Im waiting on someone to ship me a direct drive starter for this weird torque converter.
9F1SCET.jpg

H62tusG.jpg

cn62kQC.jpg

And then had to replace the radiator with a champion unit. I filled it and coolant atarting leaking out through the cores.
2iuC6Kr.jpg

Right now im just modernizing more wire behind the dashboard and making everything all nice while waiting for this starter.
5iLqyPI.jpg
 
I LOVE yer build & looks top shelf! I too am under taking a boosted /6 in a 73 duster so your thread is great! I have one qustion for ya. What mods did you do to boost ref the power valve in the carb? Thats a 350 cfm correct? Thanks! Keep it up!
 
I LOVE yer build & looks top shelf! I too am under taking a boosted /6 in a 73 duster so your thread is great! I have one qustion for ya. What mods did you do to boost ref the power valve in the carb? Thats a 350 cfm correct? Thanks! Keep it up!
To boost reference the power valve you need to literally disassemble it and reassemble it backwards with the spring moving it on the other side. Its kind of weird sounding and i dont have a pic of what i did, and then you also block off the lower vacuum port in the powervalve cavity. Then i drilled a 1/4" hole through the side of the carb into the dame cavity and inserted a tube that goes to the caeb bonnet, so when boost pressure overcomes the spring, it opens the valve. Theres also someone who makes the valves for $35 on the turboforums but i forget who. Its not a bad deal though.
 
To boost reference the power valve you need to literally disassemble it and reassemble it backwards with the spring moving it on the other side. Its kind of weird sounding and i dont have a pic of what i did, and then you also block off the lower vacuum port in the powervalve cavity. Then i drilled a 1/4" hole through the side of the carb into the dame cavity and inserted a tube that goes to the caeb bonnet, so when boost pressure overcomes the spring, it opens the valve. Theres also someone who makes the valves for $35 on the turboforums but i forget who. Its not a bad deal though.

Does it look like this? Holley, Demon, QFT .boost referenced, Blow through Boost activated power valve. | eBay
 
I just wanted to say thank you for doing this thread. I'm currently on page 15. I intend to read the entire thread. I'm taking a lot of your lessons learned and some from others you referenced. My intention is to get my 63 Dart 3 on the tree turbo'd and fuel injected. I can't wait to get started. What you've done with minimal hand tools and in a driveway is amazing.
 
Wow, I finally finished the entire 35 pages. Hopefully you can provide more updates soon. I'm using this is a guide for my 63 170 dart build. I love everything you've done, and you've provided quite a bit of insight and ideas. Thank you to everyone who has contributed to this thread.
 
-
Back
Top