The Great Pumpkin - '71 Duster

-
quote=rmchrgr;1970852149]So I thought I had the crank all buttoned up but no dice. I went to check end play and it was .002". Not good!

I tried to re-seat the crank by smacking it back and forth with a dead blow hammer but it wouldn't budge. So, the caps came off and out came the crank.

I went around with this a few times, mostly because I didn't really know exactly what I was doing. I have learned that crank end play is similar to backlash on a diff. where you just want enough movement for a margin of safety. You can actually feel the crank move a little with the caps on. Factory spec for this is somewhere between .002"-.007". With a hi-po engine it's better to be on the looser side. Some say to start at .006" and up to .010" is acceptable.

So not knowing what I was doing was more related to how it feels. When I first checked it, it wouldn't move at all but I didn't realize it wasn't moving because of insufficient clearance. I was prying on the crank throw with a big screwdriver trying to get it move but it was getting hung up on something. Leaning in the screwdriver also gives false readings because it really only takes a little nudge to get the dial indicator to move.

After a few tries, I took the #3 thrust bearing out. I read in the Big Inch Mopar Small Blocks book that you can rub the #3 bearing thrust surface on some emery paper to get the clearance. So that's what I did. Took a while to get it to where I needed it and the thrust surface seemed like it may have had some definite high spots. After every round of sanding, I checked the width with a caliper to try and gauge how much I was taking off. It's wasn't easy to do it that way. What I failed to do was do both at the same time so as to not have any discrepancy between the top and bottom half. I believe any difference was minimal though.

SO I put the modified bearing and still no change. Out came the crank again, this time to check the caps. It was suggested to me over on Moparts that the caps may have not been cut perfectly square. I didn't think that was likely though - I reasoned that the oil clearances were dead nuts. But the clearances really have nothing to do with how square the cap surfaces are to the block.

So I looked and sure enough, there was a spot on the rear cap where the cutter did not make a perfect cut towards the outside front of the cap which may have been causing it to bind ever so slightly. I hit it with a stone to even it out but really, nothing significant, just a few light passes. I checked the rest for burrs and found one that I also hit with the stone.

So all of it goes back together again but this time must have been the charm. I finally stumbled on the movement I was looking for, just a little back and forth with a slight pry on the crank throw. Not sure why I didn't get it before, maybe the cap really was the culprit. Perhaps it wasn't seating right, I don't really know.

Regardless, my clearance without the caps was now .010". The caps all went back on while checking clearances at every step and it stayed good. After all the caps were installed, I still lost a few thousandths (to be expected) but it was right at .007. Perfect!

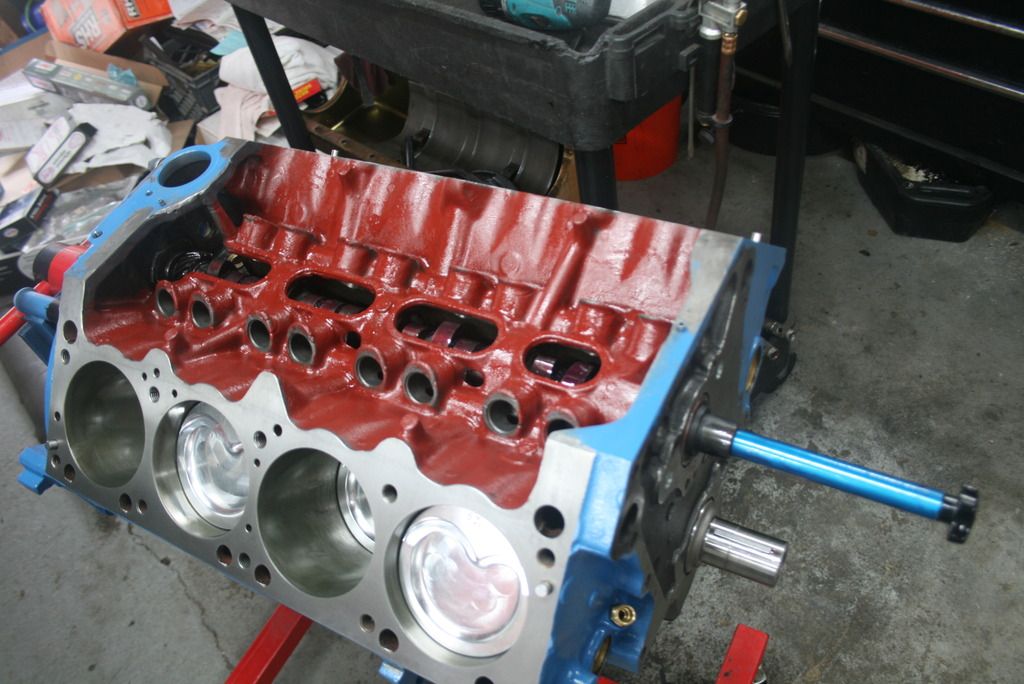
So now that the end play is good, on to the next step which is installing the rods and pistons on to the crank. I will need to check the oil clearances on the rods though and I'll probably use Plastigauge for that since A) the pistons are already on the rods and B) even if they were not, I'd still have no way to torque the rod bolts down and check to check with a dial gunge because I don't have a rod vise. (Hope that makes sense to you) Hope this goes a little smoother than the end play. I am feeling a little wary of doing the rods though since I will be using a rod bolt stretch gauge for the first time.

Here's the 4" BPE crank with the caps and bearings ready to go in the block. Note my attempt to be neat and organized
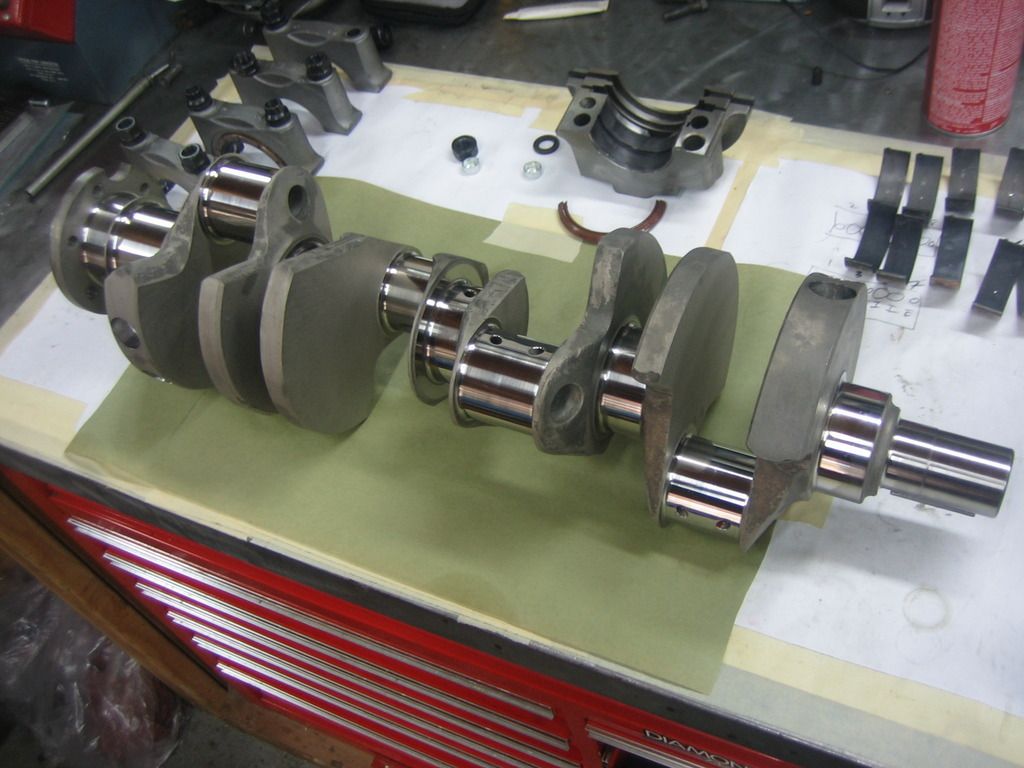
IMG_9831_zpsiaq7qj19.jpg


This is the engine assembly lube I used. It's sticky, kinda gets everywhere if you're not careful. I've had to wash it off several times. I changed to the Permatex brand which is basically the same but less expensive and easier to clean.
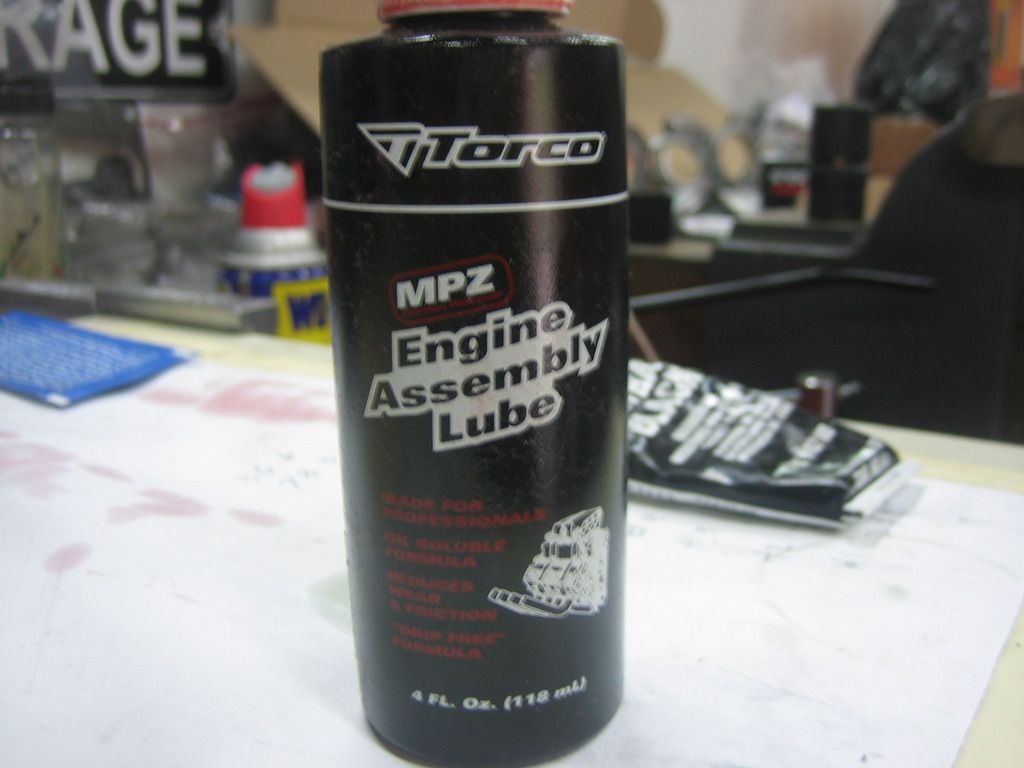
IMG_9830_zps94vconjz.jpg


This pic shows the method I used for torquing the main caps down. The ARP instructions say to get to your final torque in three equal steps. If I had one torque wrench, I'd be adjusting it 3 times for every stud. With the two, I only have to adjust one wrench one time. Lot easier! Incidentally, the stud kit I got from Hughes has one regular bolt in it which clears the oil pump. The bolt gets torqued to 85 ft lbs, unlike the studs which get 110 ft lbs. The #3 studs also have 12 pt nuts as opposed to hex so I had to switch out the socket when doing that cap.
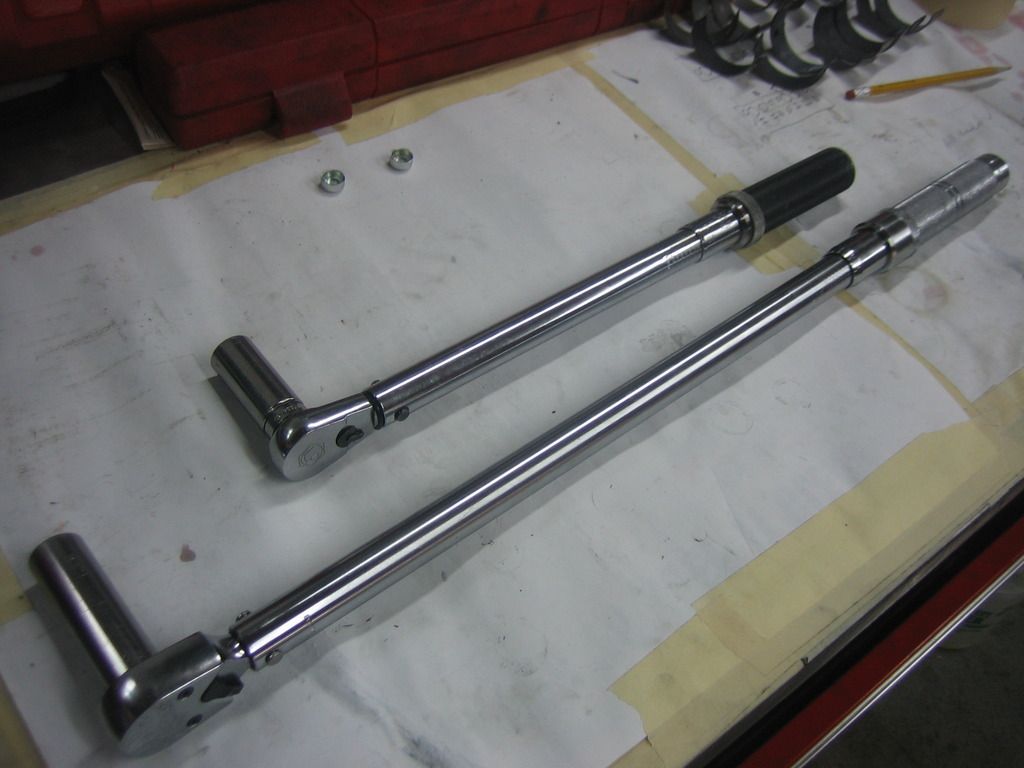
IMG_9834_zpsgzgd11yn.jpg


Checking end play. When I took this pic, I realized the little tip on the dial indicator plunger was missing. Doh! Found another one and stuck it on. The other dial indicator I have was taken apart, all the screws were off the back cover. I didn't remember doing that. I think I may have dropped it and was checking it out but stopped and got another one. Strange.
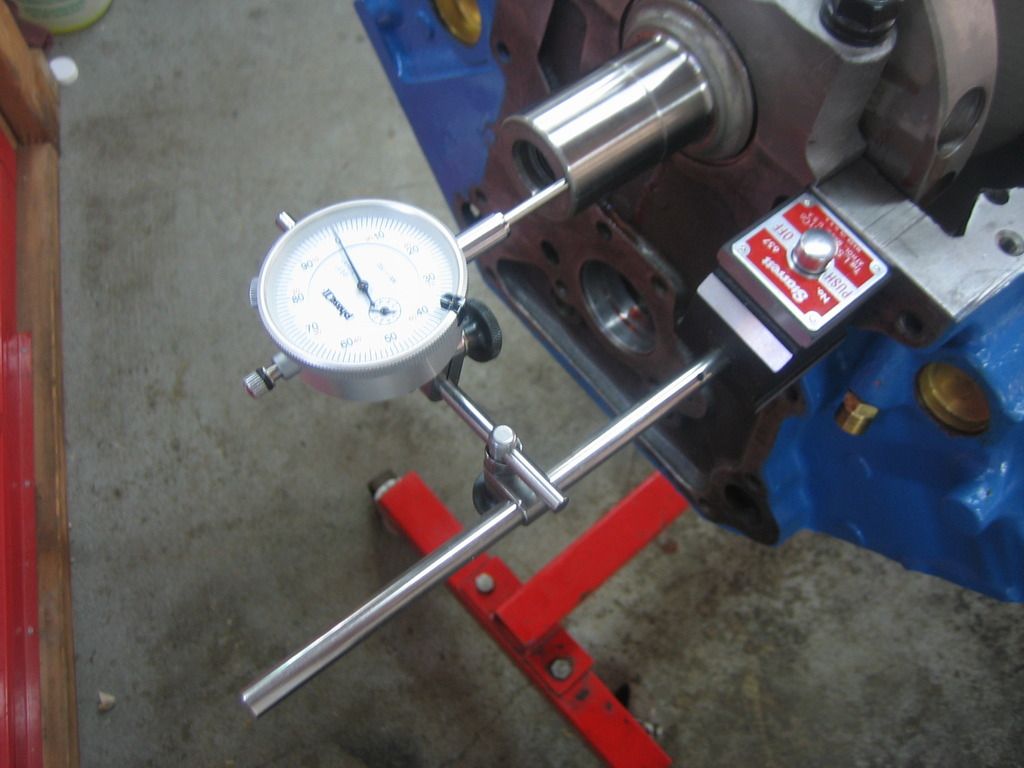
IMG_9840_zpsk6rngsge.jpg


Here's the crank in for good with the end play right.
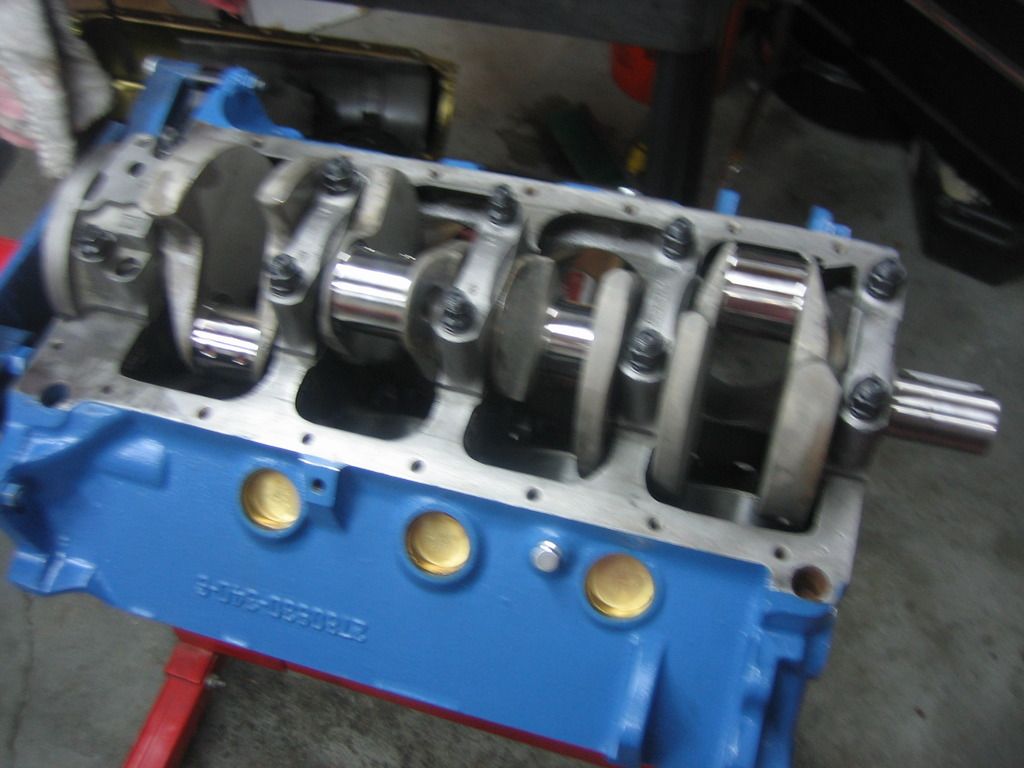
IMG_9841_zpsdyoxyqfl.jpg


Sorry for the blurry pics. More to come.[/quote]

If I had a dollar for every time ,I watched someone "assemble " a short block, without checking crank end play... Your Torco lube, sounds like good stuff. I have a bottle of Lucas engine assembly lube, that could almost replace model glue for stickiness.
 
If I had a dollar for every time ,I watched someone "assemble " a short block, without checking crank end play... .

Yeah, it's one of those little details that's often over looked. There are so many of these things to pay attention to and get right. I think about all the details and specs I have in my head that I can spout off at any time, makes you realize how involved you get into this stuff.

Your Torco lube, sounds like good stuff. I have a bottle of Lucas engine assembly lube, that could almost replace model glue for stickiness.

Yeah, the Torco lube is good but I think the Permatex stuff is basically the same and costs less.

In other news, I ordered the rod bolts last night. I had to close my eyes when I confirmed the payment, that was tough to swallow. Guarantee the bolts I have now are fine and I could have used them for years but better safe than sorry. The one little thread that gives way at the wrong time could be expensive. It will be peace of mind when I am going down the track at 6,500 rpm.

Anyone need some extra rod bolts? :D
 
In other news, I ordered the rod bolts last night. I had to close my eyes when I confirmed the payment, that was tough to swallow.

If you think $145 is bad for ARP 2K rod bolts, you ought to try dropping $320 for ARP main studs/side bolts for a 4.6...plus another $240 for head studs on top of the rod bolts. I was only momentarily disgusted since NO ONE else makes non-TTY bolts for a mod motor, totally worth the expenditure but it was still somewhat annoying dropping nearly $800 just for bolts/studs...

Bitchin' thread btw man, can't wait to read more!
 
If you think $145 is bad for ARP 2K rod bolts, you ought to try dropping $320 for ARP main studs/side bolts for a 4.6...plus another $240 for head studs on top of the rod bolts. I was only momentarily disgusted since NO ONE else makes non-TTY bolts for a mod motor, totally worth the expenditure but it was still somewhat annoying dropping nearly $800 just for bolts/studs...

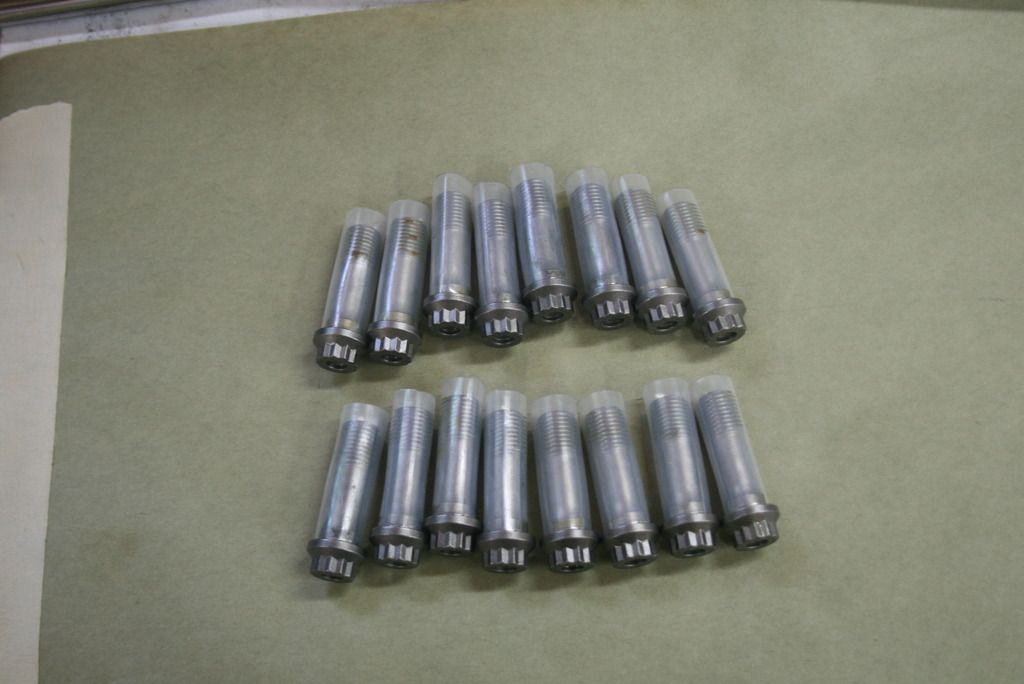
Yeah, it's eye opening when you realize what you are paying for - bolts! I suppose that's the price you pay if you wanna go fast and have your engine stay together. These are the 8740 C.M. 7/16" 12 pt cap screws.

And if you think about it, it's a small percentage of the overall engine building budget so that takes the pain away a little. Just seems like I could have avoided the extra cost if I had known what I was doing. Oh well.

ARP is nice stuff though and am happy to have their pieces.

Bitchin' thread btw man, can't wait to read more!

Thanks. Feels like I am stuck in second gear at the moment but hopefully after I get this last hiccup squared away things will go smoother.
 
Just seems like I could have avoided the extra cost if I had known what I was doing. Oh well.

See, now that would piss me off...at least a little. But, I guess we've all made some expensive mistakes here and there. I thought about buying the rod stretch gage more than once, but I balked and figured if the guys who make/market the pieces I'm buying say torque to this spec, they know what they're talking about...
 
Well, the silly Great Pumpkin rod bolt saga is over. Parts arrived on Saturday and installed within hours of receipt. Torqued to 64 ft lbs. in two steps, done. Not gonna think about it any more.

I measured the old ones, I believe they were stretched .002-.003". Maybe I was just seeing things but it sure appeared to be so. I don't know when the stretching happens but it can't be good to keep re-doing them over and over again using different methods for tightening. They bolts are supposed to be stretched to a degree but not in a relaxed state. I did the right thing by replacing them.

Not much to see, just new rod bolts.
IMG_1419_zps76u8206f.jpg


Talked to the guy at Precision oil pumps about my stupid cracked pump housing and he was not terribly helpful. Really though, what is he going to do for me, I cracked the pump housing so it's not a warranty issue. He said the best thing to do would be to buy a new pump and use his gears which have a special coating. Frustrating to say the least. More money out the window.

Haven't had time to do much at all lately though as I have been dealing with some family issues which unfortunately is eating up my garage time. Things have settled down now, hope to get back into it this week.

Next things on the list are getting the cam and timing gear in, then setting up the valve train.

More to come.
 
416 progress! Got the cam and timing chain in. Cam is degreed.

New parts! New Dynamic 9.5" converter showed up.

Of course, this wouldn't be a Great Pumpkin post if there were no screw-ups, second guesses or what have you. Here's how it all went down.

So as I mentioned in the last post, I finally got past the rod bolts and I'm all ready to start putting the cam in. But, one small thing left before I do that - install the two little front oil galley plugs. Easy enough, right? Wrong.

Without really thinking about what I was doing, I start knocking them in. I tapped them in with the face of a hammer and they go in easy enough but then I look at 'em and the edges are all mushroomed with metal hanging off. Doh! My wife loves to say haste makes waste and in this case, she was right. We'll keep that between us here but of course this turned into another clusterf*ck.

Getting the plugs out was a PITA. I ended up removing the rear galley plug and poking it out from behind with the tip of a long galley brush. First though I had to chisel it inwards with a screwdriver which of course made a mess. I had to drill the other one and grab it with a needle nose to yank it out. I am an idiot.

So now I have to find two more plugs. I had a freeze plug kit with plugs in it but they were a hair too small. So now I go driving around to every hole-in-the-wall parts store in town and dig through the Dorman boxes trying to find the right ones. More wasted time and effort.

I find a few that look close (555-009, same as what usually come in the MP kits) so I take a shot and bring 'em home. Too big! I am beyond pissed now but no way I am going back out to dig through another dusty old Dorman box. I fire up the grinder and whittle down the edges a smidge then hit 'em with the wire brush to smooth 'em out. Perfect fit now, just snug enough. This time I wise up though and use a socket inside the cup so I don't smush the edges. After a lot of careful tapping, they are in. Frankly, this is the kind of stuff that used to kill me when I was turning wrenches and it still does. Thankfully my paycheck is not affected any more so it's all good, just chalk it up to another lesson learned.

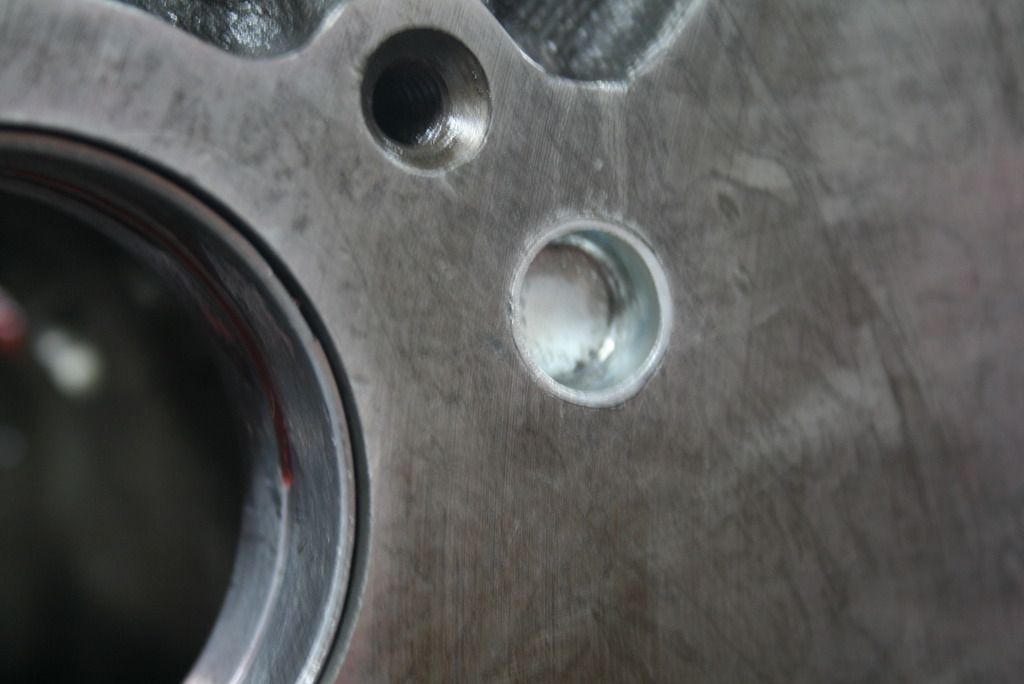
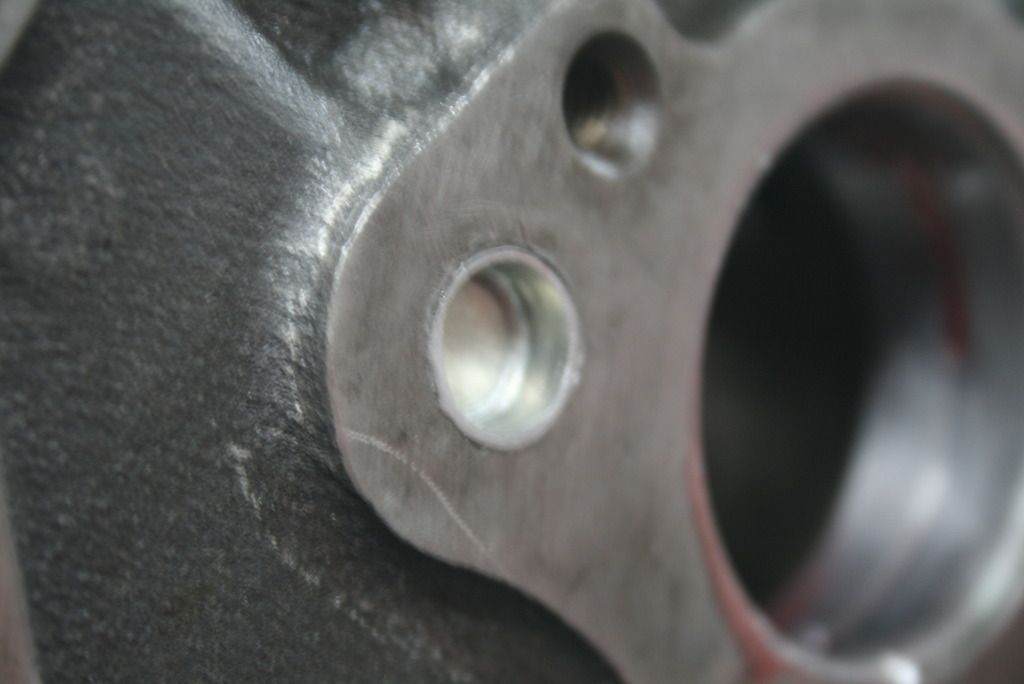
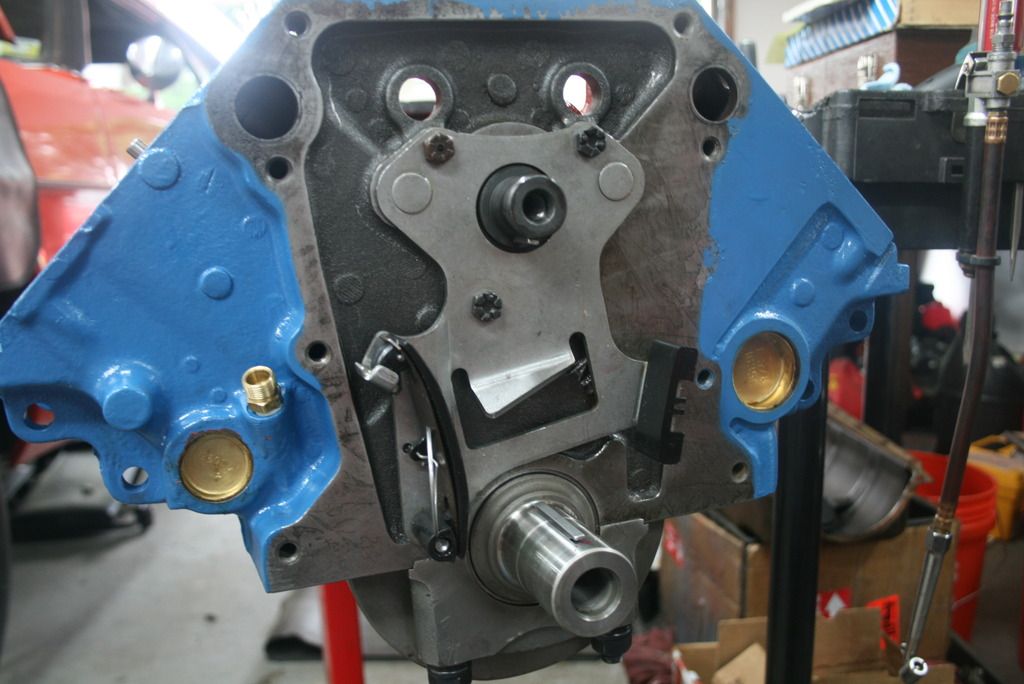
Plug one and two. Some say to drill a 1/64 hole in the left side plug so the chain sees pressurized oil but I personally don't think it's needed. You also need tro drill an extra hole in the tenioner plate fro the oil to come though. I have the older style drip bolt with the hole in it and the tensioner has a built-in drip tab. Plus the slinger splashes oil up from the pan. One of my blocks has the plug drilled but it had a thrust plat and no tensioner. Odd.
IMG_1494_zpsdy2dqygi.jpg


IMG_1493_zps9chjadsm.jpg


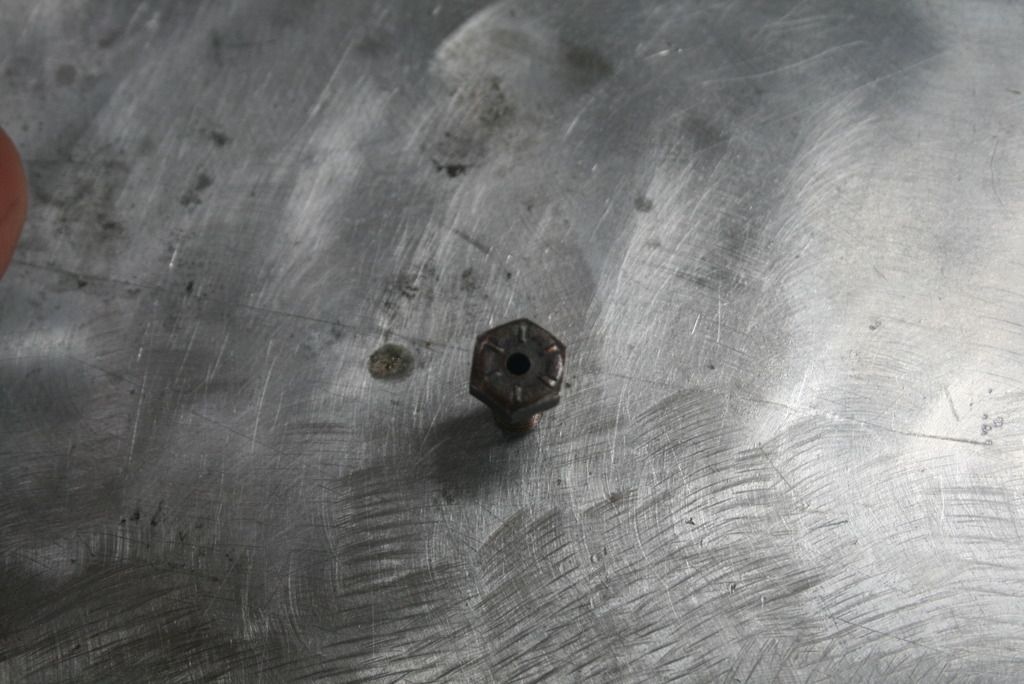
Bolt with oil hole fed by the galley behind it. Goes in the upper right side.
IMG_1498_zpswqapajij.jpg


So after the galley plug debacle it's time to get the cam in. That actually goes OK. It's a Comp solid FT spec'd by Brian at IMM. (251/259 @ .050. .593/.585 lift with 1.6 rocker arms) Its all slathered up with assembly lube and it goes in OK. I have a Comp degree kit which comes with a handle to guide the cam in. It takes a little finesse to get the shaft in without any drama, (ba dum bum, tshhh) especially when you have lubricant on your fingers. (ba dum bum, tshhh) Sexual innuendos aside, it was time to start the degree process.

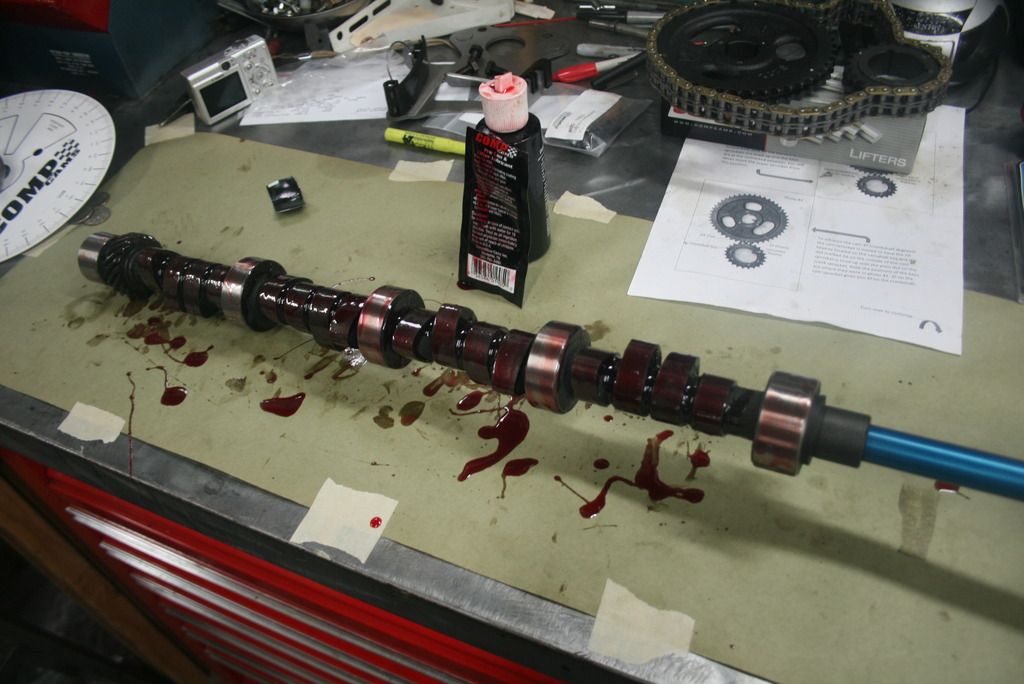
Lube my shaft. Looks like a bloody mess.
IMG_1495_zpstaofpu3s.jpg


Going in. Note handle on cam end to guide it in.
IMG_1497_zpsgnpainkv.jpg


For a timing chain, I got a beautiful Pro Gear timing set from Hughes and a Cloyes tensioner. Now, tensioners are a much-debated item. No small block had one until the 3.9 V6s started having chain problems which the tensioner was apparently designed to help with by reducing chain slack. You can make the argument that they are not necessary if you have a new chain. But, all chains have some slack which is why you need to degree your cam, the timing sets are just not that accurate. And, once a chain runs for a little bit it acquires more slack in it. Now the cam you put in 4 degrees advanced is now only 2 or something. I don't have any direct experience like that but it makes sense so I used a tensioner.

Here is the tensioner installed. Bolts go to 210 inch lbs. or 17.5 ft. lbs.
IMG_1500_zpsxlro2svg.jpg


I will be honest, getting a brand-new, tight, high quality double roller chain onto a tensioner is a *****. You either need three hands or a helper. There needs to be enough slack in the chain to be able to install it with both sprockets. But with the tensioner arm pushing inward and effectively shortening the chain, you can't get the sprocket onto the cam. You need to push the arm out of the way as you work the chain into position and wiggle the sprocket onto the cam snout. Plus, the the cam keeps sliding backwards when you try to slip the sprocket on. Impossible!

Somehow, I got it to work without help. I have a long ratchet extension which I used to push the tensioner arm away from the chain while using the cam snout as a fulcrum. I was able to hold the cam from moving backward with the cam handle and got the sprocket on just enough to get it to stay in place. I tapped the sprockets home with a dead blow mallet.

If anyone else deals with this, you should know that the flimsy grenade pin that keeps the tensioner arm in place while you work the chain into position comes out very easily. It's almost useless. The pin goes through a very small hole in a bracket on the back of the arm which nothing of any significant strength could possibly fit through. There's another hole in the tensioner bracket - the pin goes through both and holds the arm until you pull it. If you look at it wrong it pops out, especially after the first time since it is weakened.

I gave up trying to hold the pin in place while installing the timing set. I am hoping the spring steel on the back of the arm did not lose it's ability to keep tension on the chain since I sort of had to force the chain over it but it seems OK, the chain rolls tightly but smoothly which I believe is what you probably want.

So no pin in the tensioner arm means the cam is degreed with tension on the chain. I have read that tensioners can cause a difference of a degree or two. Not sure how much truth there is to that but again, it makes sense since you are effectively shortening the timing chain.

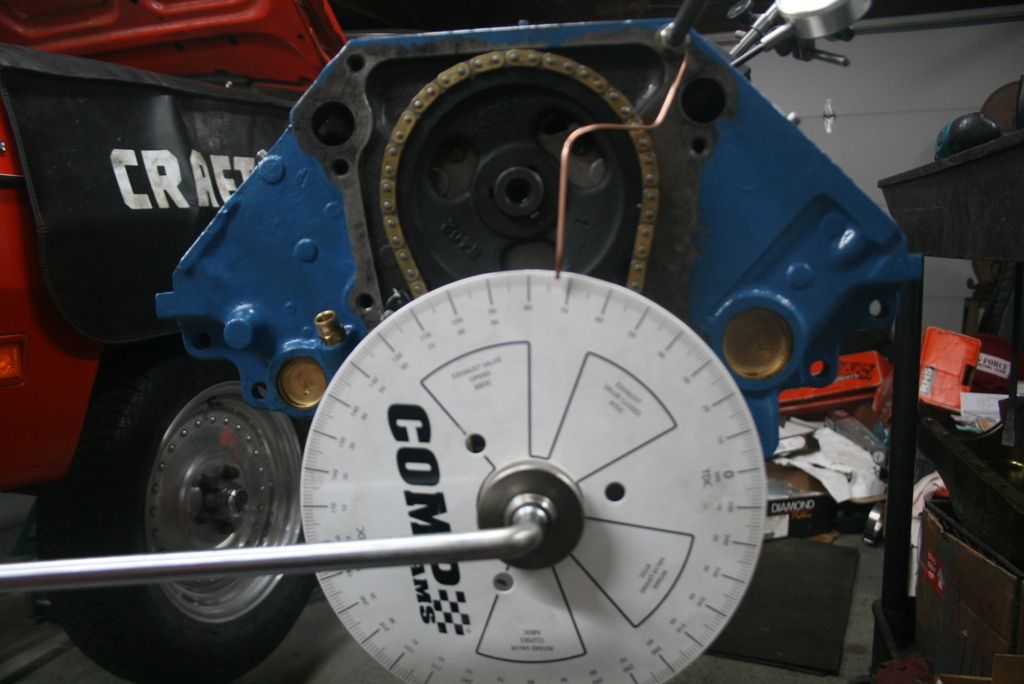
In any event, I put the cam in straight up and 'degreed' it - DEAD NUTS! Wound up at 106.***, cam card said install at 106. (cam is ground on 108 CL with 2 degrees built in) It was only off around a half a degree which is good. Most cam companies say 1 degree either way is OK to run. I called Comp just to make sure I was not totally wrong and told the guy about the tensioner pin- he said run it. I am relieved I don't have to dick around with that timing chain again. There's a part of me that is reasoning the cam was accurate because of the tensioner. Who knows, maybe I just got lucky.

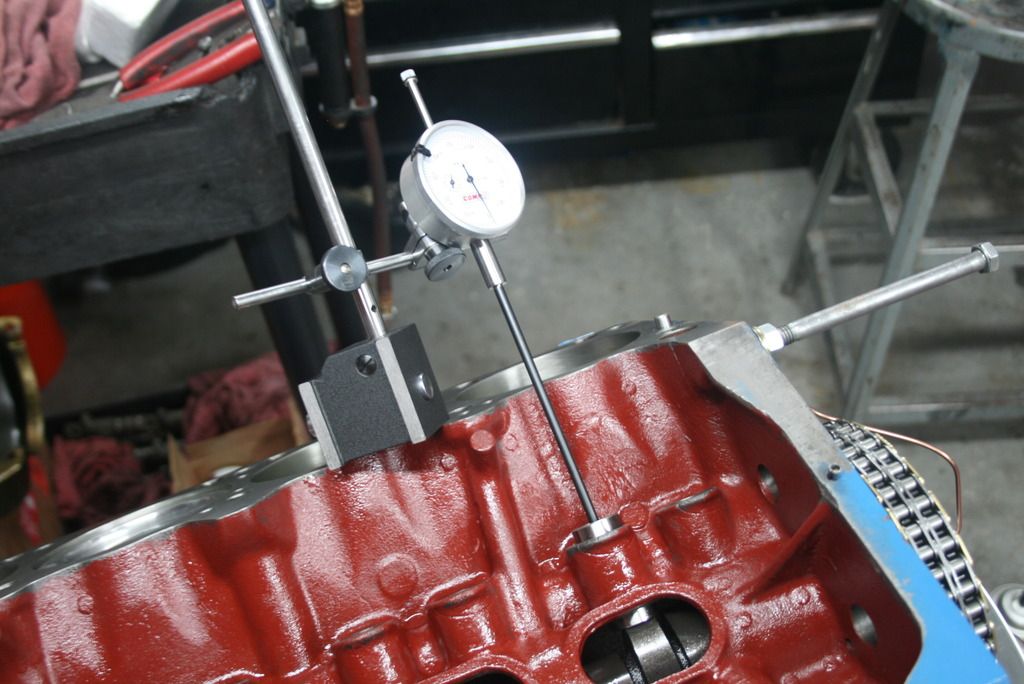
Degreeing the cam. Comp degree kit comes with all sorts of cool stuff beyond a degree wheel; crank holder socket, pushrod attachment for the dial indicator, decent dial indicator and a few more attachments. I chose the kit that does the job with the heads off, seemed easier.

Wheel of fortune.
IMG_1501_zpsusxwbbww.jpg


Checking max lift of the intake lifter.
IMG_1504_zpsutrh3u8z.jpg


So the next step is to finish this damn motor. Heads are next, then measure pushrods and check the rocker arms for "proper geometry" as they say.

As mentioned earlier, my new converter showed up. If its anything like what was told to me on the phone, my car will take off like a rocket and drive like a dream. Anything will be an upgrade over the last one I had.

Have not touched anything else on the car for a while. There is some stuff floating around the recesses of my mind that I know I need to take care of but I'm all in on the engine build right now.

More to come.
 
If you think that's bad, you ought to try degreeing 4 cams with two separate tensioners using slivers of feeler gages and grinding on the cam keyway...good it wound up as advertised though.
 
416 progress! Got the cam and timing chain in. Cam is degreed.

New parts! New Dynamic 9.5" converter showed up.

Of course, this wouldn't be a Great Pumpkin post if there were no screw-ups, second guesses or what have you. Here's how it all went down.

So as I mentioned in the last post, I finally got past the rod bolts and I'm all ready to start putting the cam in. But, one small thing left before I do that - install the two little front oil galley plugs. Easy enough, right? Wrong.

Without really thinking about what I was doing, I start knocking them in. I tapped them in with the face of a hammer and they go in easy enough but then I look at 'em and the edges are all mushroomed with metal hanging off. Doh! My wife loves to say haste makes waste and in this case, she was right. We'll keep that between us here but of course this turned into another clusterf*ck.

Getting the plugs out was a PITA. I ended up removing the rear galley plug and poking it out from behind with the tip of a long galley brush. First though I had to chisel it inwards with a screwdriver which of course made a mess. I had to drill the other one and grab it with a needle nose to yank it out. I am an idiot.

So now I have to find two more plugs. I had a freeze plug kit with plugs in it but they were a hair too small. So now I go driving around to every hole-in-the-wall parts store in town and dig through the Dorman boxes trying to find the right ones. More wasted time and effort.

I find a few that look close (555-009, same as what usually come in the MP kits) so I take a shot and bring 'em home. Too big! I am beyond pissed now but no way I am going back out to dig through another dusty old Dorman box. I fire up the grinder and whittle down the edges a smidge then hit 'em with the wire brush to smooth 'em out. Perfect fit now, just snug enough. This time I wise up though and use a socket inside the cup so I don't smush the edges. After a lot of careful tapping, they are in. Frankly, this is the kind of stuff that used to kill me when I was turning wrenches and it still does. Thankfully my paycheck is not affected any more so it's all good, just chalk it up to another lesson learned.

Plug one and two. Some say to drill a 1/64 hole in the left side plug so the chain sees pressurized oil but I personally don't think it's needed. You also need tro drill an extra hole in the tenioner plate fro the oil to come though. I have the older style drip bolt with the hole in it and the tensioner has a built-in drip tab. Plus the slinger splashes oil up from the pan. One of my blocks has the plug drilled but it had a thrust plat and no tensioner. Odd.
IMG_1494_zpsdy2dqygi.jpg


IMG_1493_zps9chjadsm.jpg


Bolt with oil hole fed by the galley behind it. Goes in the upper right side.
IMG_1498_zpswqapajij.jpg


So after the galley plug debacle it's time to get the cam in. That actually goes OK. It's a Comp solid FT spec'd by Brian at IMM. (251/259 @ .050. .593/.585 lift with 1.6 rocker arms) Its all slathered up with assembly lube and it goes in OK. I have a Comp degree kit which comes with a handle to guide the cam in. It takes a little finesse to get the shaft in without any drama, (ba dum bum, tshhh) especially when you have lubricant on your fingers. (ba dum bum, tshhh) Sexual innuendos aside, it was time to start the degree process.

Lube my shaft. Looks like a bloody mess.
IMG_1495_zpstaofpu3s.jpg


Going in. Note handle on cam end to guide it in.
IMG_1497_zpsgnpainkv.jpg


For a timing chain, I got a beautiful Pro Gear timing set from Hughes and a Cloyes tensioner. Now, tensioners are a much-debated item. No small block had one until the 3.9 V6s started having chain problems which the tensioner was apparently designed to help with by reducing chain slack. You can make the argument that they are not necessary if you have a new chain. But, all chains have some slack which is why you need to degree your cam, the timing sets are just not that accurate. And, once a chain runs for a little bit it acquires more slack in it. Now the cam you put in 4 degrees advanced is now only 2 or something. I don't have any direct experience like that but it makes sense so I used a tensioner.

Here is the tensioner installed. Bolts go to 210 inch lbs. or 17.5 ft. lbs.
IMG_1500_zpsxlro2svg.jpg


I will be honest, getting a brand-new, tight, high quality double roller chain onto a tensioner is a *****. You either need three hands or a helper. There needs to be enough slack in the chain to be able to install it with both sprockets. But with the tensioner arm pushing inward and effectively shortening the chain, you can't get the sprocket onto the cam. You need to push the arm out of the way as you work the chain into position and wiggle the sprocket onto the cam snout. Plus, the the cam keeps sliding backwards when you try to slip the sprocket on. Impossible!

Somehow, I got it to work without help. I have a long ratchet extension which I used to push the tensioner arm away from the chain while using the cam snout as a fulcrum. I was able to hold the cam from moving backward with the cam handle and got the sprocket on just enough to get it to stay in place. I tapped the sprockets home with a dead blow mallet.

If anyone else deals with this, you should know that the flimsy grenade pin that keeps the tensioner arm in place while you work the chain into position comes out very easily. It's almost useless. The pin goes through a very small hole in a bracket on the back of the arm which nothing of any significant strength could possibly fit through. There's another hole in the tensioner bracket - the pin goes through both and holds the arm until you pull it. If you look at it wrong it pops out, especially after the first time since it is weakened.

I gave up trying to hold the pin in place while installing the timing set. I am hoping the spring steel on the back of the arm did not lose it's ability to keep tension on the chain since I sort of had to force the chain over it but it seems OK, the chain rolls tightly but smoothly which I believe is what you probably want.

So no pin in the tensioner arm means the cam is degreed with tension on the chain. I have read that tensioners can cause a difference of a degree or two. Not sure how much truth there is to that but again, it makes sense since you are effectively shortening the timing chain.

In any event, I put the cam in straight up and 'degreed' it - DEAD NUTS! Wound up at 106.***, cam card said install at 106. (cam is ground on 108 CL with 2 degrees built in) It was only off around a half a degree which is good. Most cam companies say 1 degree either way is OK to run. I called Comp just to make sure I was not totally wrong and told the guy about the tensioner pin- he said run it. I am relieved I don't have to dick around with that timing chain again. There's a part of me that is reasoning the cam was accurate because of the tensioner. Who knows, maybe I just got lucky.

Degreeing the cam. Comp degree kit comes with all sorts of cool stuff beyond a degree wheel; crank holder socket, pushrod attachment for the dial indicator, decent dial indicator and a few more attachments. I chose the kit that does the job with the heads off, seemed easier.

Wheel of fortune.
IMG_1501_zpsusxwbbww.jpg


Checking max lift of the intake lifter.
IMG_1504_zpsutrh3u8z.jpg


So the next step is to finish this damn motor. Heads are next, then measure pushrods and check the rocker arms for "proper geometry" as they say.

As mentioned earlier, my new converter showed up. If its anything like what was told to me on the phone, my car will take off like a rocket and drive like a dream. Anything will be an upgrade over the last one I had.

Have not touched anything else on the car for a while. There is some stuff floating around the recesses of my mind that I know I need to take care of but I'm all in on the engine build right now.

More to come.

Nice to see progress. I thought I was the only one,who had fits with tight timing chains. Used the t.c. tensioner myself,considered a must have anymore.
 
If you think that's bad, you ought to try degreeing 4 cams with two separate tensioners using slivers of feeler gages and grinding on the cam keyway...good it wound up as advertised though.

I might have drawn the line at grinding on the keyway...
 
Nice to see progress. I thought I was the only one,who had fits with tight timing chains. Used the t.c. tensioner myself,considered a must have anymore.

Everyone fights with the tensioner, seems pretty common.

Not sure why you would argue against them but again, there are those out there who say you don't need one. Guess they are just used to doing things a certain way and don't want to bother with a better mouse trap. Steady timing can't be a bad thing.
 
I might have drawn the line at grinding on the keyway...


Accepted practice on mod motors...some engines come from the factory with as much as 16* difference from one bank to the other. Your other options are adjustable gears, but they're a couple hundred bones. The gears are torqued on with 95 lb/ft torque (or more), so when torqued, they don't go anywhere.
 
Accepted practice on mod motors...some engines come from the factory with as much as 16* difference from one bank to the other.

Ahhh... txstang ... got it now...

When I was a Chrysler tech we (I worked with the powertrain guy) 'rebuilt' a 4.6 Mustang engine for a used car the dealership was selling. We definitely did not degree anything.

All those multi-chain engines can be complicated. It usually takes two sets of hands to hold one part and get the other pieces into position.

Sprinter engines were the worst. They have these plastic guides that were hard to get to behind the cover, then like all the other OHC engines you feed the chains through these openings while holding the crank sprocket and getting them around the cams... lot's of manly cursing and such... ahhh the good old days of 2012.
 
That the block i sold ya'...get er' done i'll be down e-town Aug 21-23..
 
That the block i sold ya'...get er' done i'll be down e-town Aug 21-23..

Yep, that's the one.

If I am not at that race with my car I will be seriously bummed.

But hey, if it does not happen, the hope is that it's not because I haven't finished but rather that I ran it beforehand and know it will need a roll bar. Kind of anticipating that a little? Trying not to get my hopes up too much here since it's still in pieces but the light at the end of the tunnel is getting brighter.

Once the engine is done, I plan to break it in on a dyno and get it to where I can drop it in and go. I gotta build the trans as well but that should not be a long, drawn-out affair like the engine. At least I hope not...

:burnout:
 
It's allways a long haul, even at the finish line, just before you insure it, tag it getting ready to drive it.
 
It's allways a long haul, even at the finish line, just before you insure it, tag it getting ready to drive it.

Long haul Rob? Feels more like a slow boat to China. I had another small setback on the 416 buildup today, need to vent this right now.

Had some time this morning so I put the heads on the block to make sure everything looked as it should - no dice. Head studs are too short! Aaaarrrggghhhh!

Put the studs in and slid the heads down and found there were only two threads sticking up over the bosses, not enough to even fully thread a nut on. Turns out the RHS heads require Magnum style studs, not LA. Honestly, it didn't even occur to me that there would be a difference but now I know. Super frustrating. Hopefully I can exchange them.

To compound things even further, it seems like one of the dowels may be causing a misalignment on the left side. Even though the studs were too short, I still should have been able to slide the head down on the block but there was some interference and it would not sit flat. Not sure how to deal with this one yet. Perhaps if I get the correct studs it might allow more room to wiggle the head. I am hoping that is the case but the right side went all the way down no problem.

One good thing out of all this was to see the heads on the block for the first time. Made me realize I am probably closer to finishing than it actually feels like right now. As always though, one step forward, two steps back. Such is life with a project like this. :banghead:

Not much to take pics of this time. Hopefully next update will be more positive.

More to come.
 
It's nowhere a stock 18 year olds 318 ring & bearing job. Everything is different,from different era engines & multiple era parts. Part of the learning curve, with aftermarket parts. I feel your pain,man.
 
Ahhh... txstang ... got it now...

When I was a Chrysler tech we (I worked with the powertrain guy) 'rebuilt' a 4.6 Mustang engine for a used car the dealership was selling. We definitely did not degree anything.

All those multi-chain engines can be complicated. It usually takes two sets of hands to hold one part and get the other pieces into position.

Sprinter engines were the worst. They have these plastic guides that were hard to get to behind the cover, then like all the other OHC engines you feed the chains through these openings while holding the crank sprocket and getting them around the cams... lot's of manly cursing and such... ahhh the good old days of 2012.


Yeah, if you just toss them together dot to dot, it's no big deal...just a couple more steps and a significantly increased torque spec. I was able to get the 95 lbs/ft by myself, but not without being a little creative with the engine still on the stand.

Regardless, you're making progress...at least you have something to wrench on right now...I'll have to wait till I get out of here.
 
Alright, I seemed to have resolved the dowel pin alignment problem. Turns out this has happened to someone else I know and after talking to him, he said it happened the same way on another set of heads he helped a friend with - driver's side only!

Not sure how or why this could happen. Maybe the RHS machining jig is off just enough to cause the issue? Does not make sense though since the passenger side goes down normally. So if two heads are the same how does one fit properly on one side and not the other? Makes no sense but the issue exists and apparently has happened on more than one occasion.

At first, I thought the pins just need to be tapped down into the block a little more but that was not the case. Tapping them with a metal hammer deforms/mushrooms the tops which obviously compounds the fitment issues. So I got out the files and whizz wheel and went to work. Two hours later I was able to get the one side down close enough to the block to tap it the rest of the way down with a plastic mallet. The pins look like little nubs now and I ended up putting a few superficial scratches into my nice straight deck from wayward file strokes. Grrrrrr....

Reaming out the dowel locator holes in the heads with emery paper seemed to help some as well. I also slightly enlarged the chamfer of the hole with a counter sink which allowed a little more room to be able to tap it down. This head has to stay on the driver's side now though since it wiggles a little when put on the passenger side. Crazy stuff that I am not happy about in any way. Shouldn't be that hard.

The cherry on top of this wonderful afternoon was that I dropped a head gasket on a corner while checking fitment to make sure I had enough pin left after all the whittling. I did not separate but it got dented a little. It'll probably be OK once I crank it down but I might get another to be safe. Maybe I can pick one up at Carlisle next week.

Just an aside - the guy I was talking to last night has a similar combination to mine - 416 in a Duster with OOTB RHS heads and a similar solid cam from Hughes. He went 10.82 at Maple Grove last year.

More to come.
 
Took a break from the engine build today to start looking into the transmission. I have two units; one I took apart earlier this year and the one that was in the car. Both are 904s and both are 999 versions but the one that came out of the car was a regular 904 built as a 999 with a 5 clutch front drum. I did not take apart the guts from that unit yet but I can tell whats inside because of the wide bands around the drums. They are exactly the same as the ones I got out of my real 999 so I am confident that what's inside is the same.

So the plan for the trans is just a rebuild since the hard parts are already heavy duty. No need to go bananas here with all kinds of trick parts, it's a tough piece already and should hold up to the new combo fine.

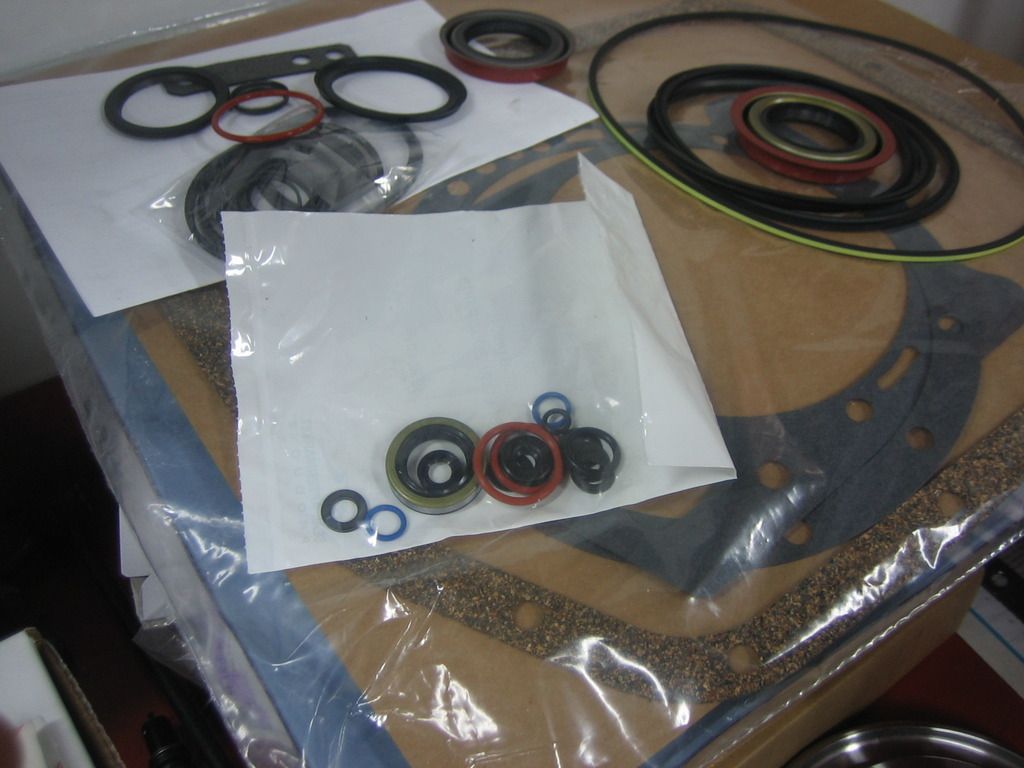
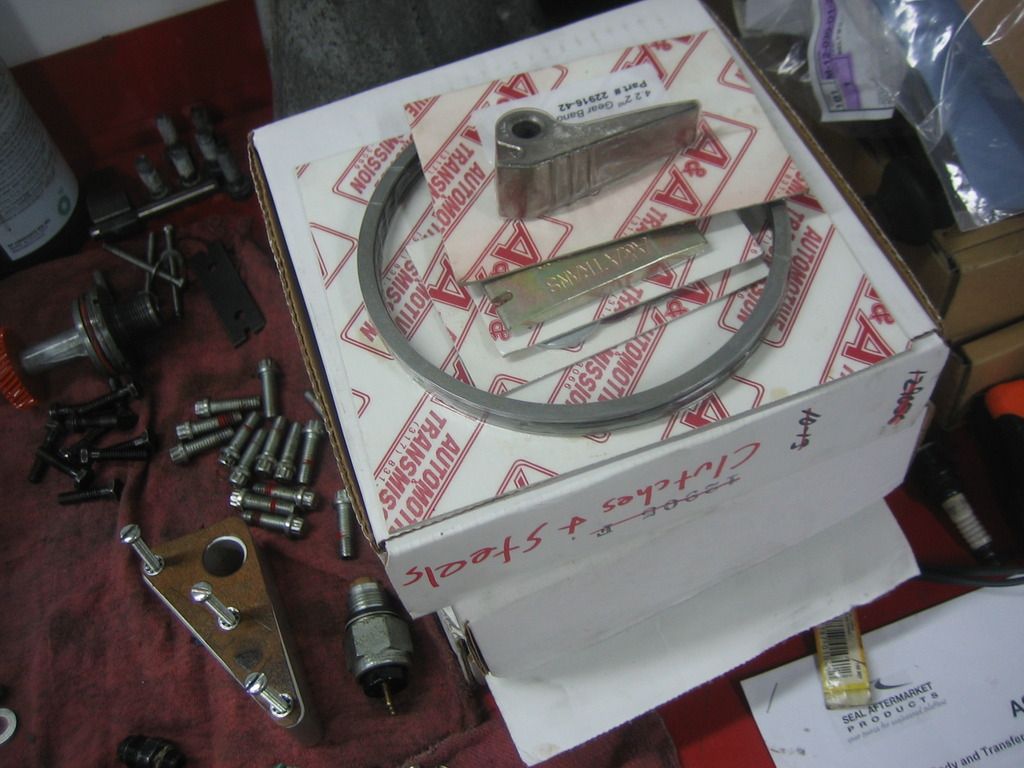
I got a rebuild kit from A&A along with a selective snap ring kit, 4.2 lever and reinforced band strut, new bands, clutches, steels and a 'race prepped' case.

Rebuild parts, plus lever, band strut, selective snap ring kit, bands, clutches etc.
IMG_9871_zpsbtkv6zcc.jpg

IMG_9872_zpsq8zkpsgp.jpg


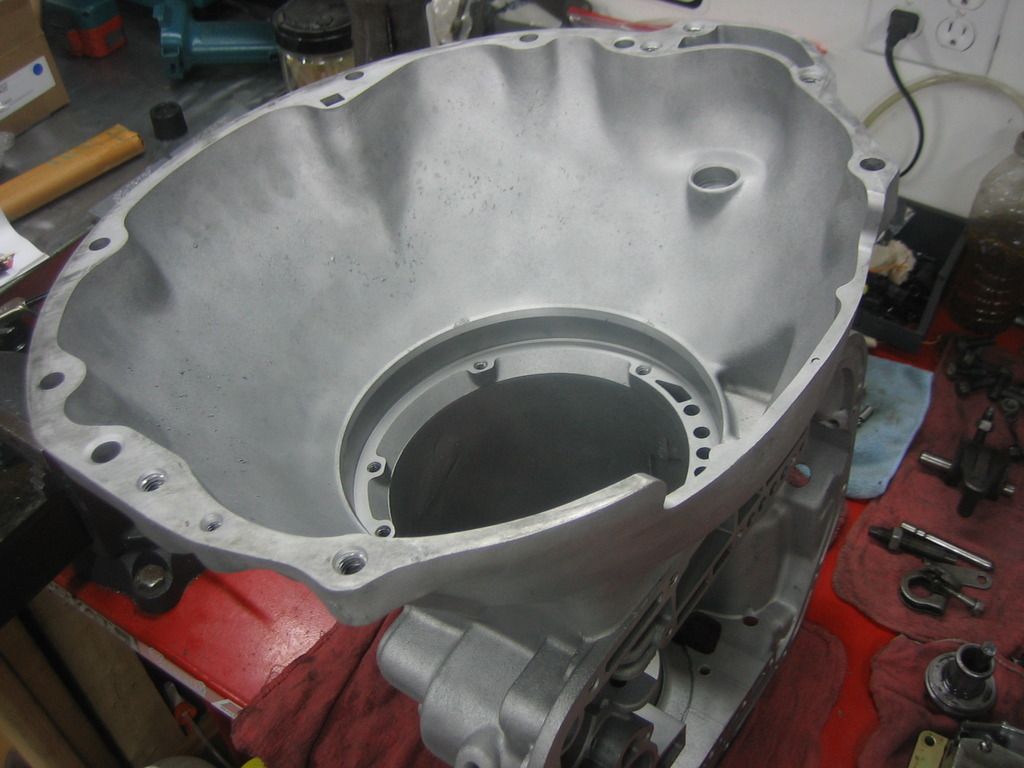
For the race-prep case, they take a garden variety 904 case and clean it up to like-new. There's a cut-out at the bottom of the bell for converter bolt access. It also has improved venting so hopefully this unit stays clean. The unit that was taken out of the car was really dirty, like annoyingly so. Seemed like if I got within a few inches of it, I would be covered in grime. I hate working with stuff like that so the case was a no-brainer for me.

Case in point.
IMG_9873_zpsrbpukr5x.jpg


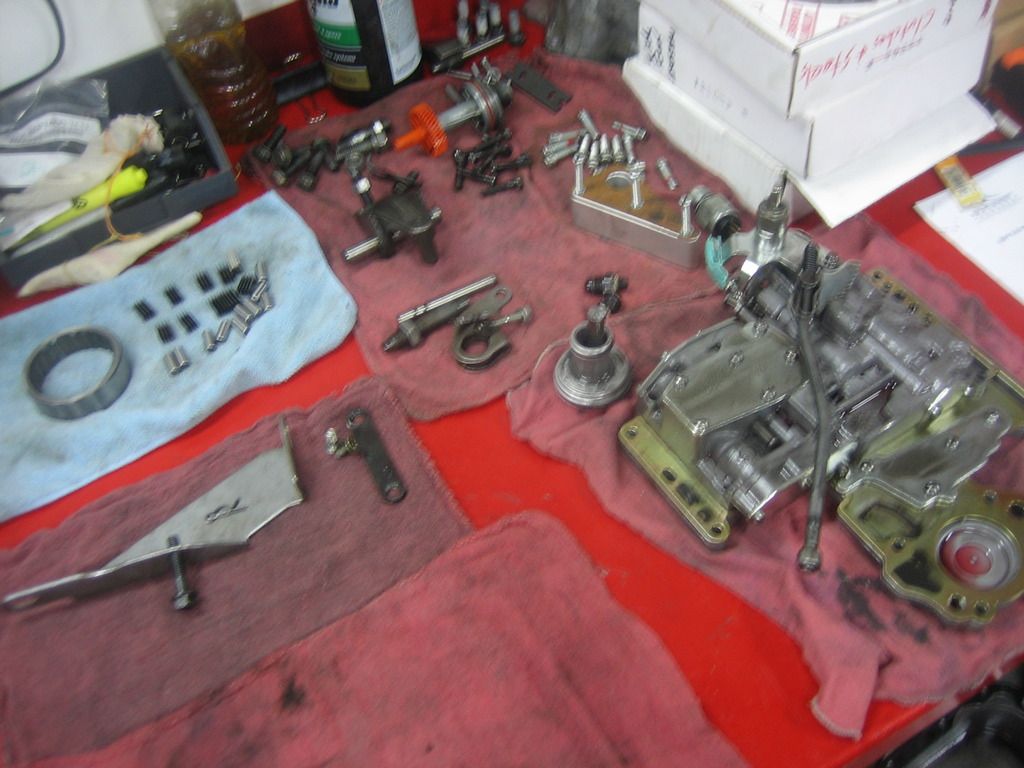
I have to transfer things from the unit that was in the car - valve body, cooler tap fittings, pan and gasket (I have a reusable one), various fasteners for the bands, tail shaft housing, servos, lever and pivot rods, shifter bracket, speedo gear and a few more items I can't remember right now. Need to get the servos out too. May look into some fancy billet ones once my money tree starts blooming again.

Here are the parts getting transferred from the old unit on the bench. These things need to be cleaned up before going in the new case.
IMG_9864_zpsjjjj50xj.jpg


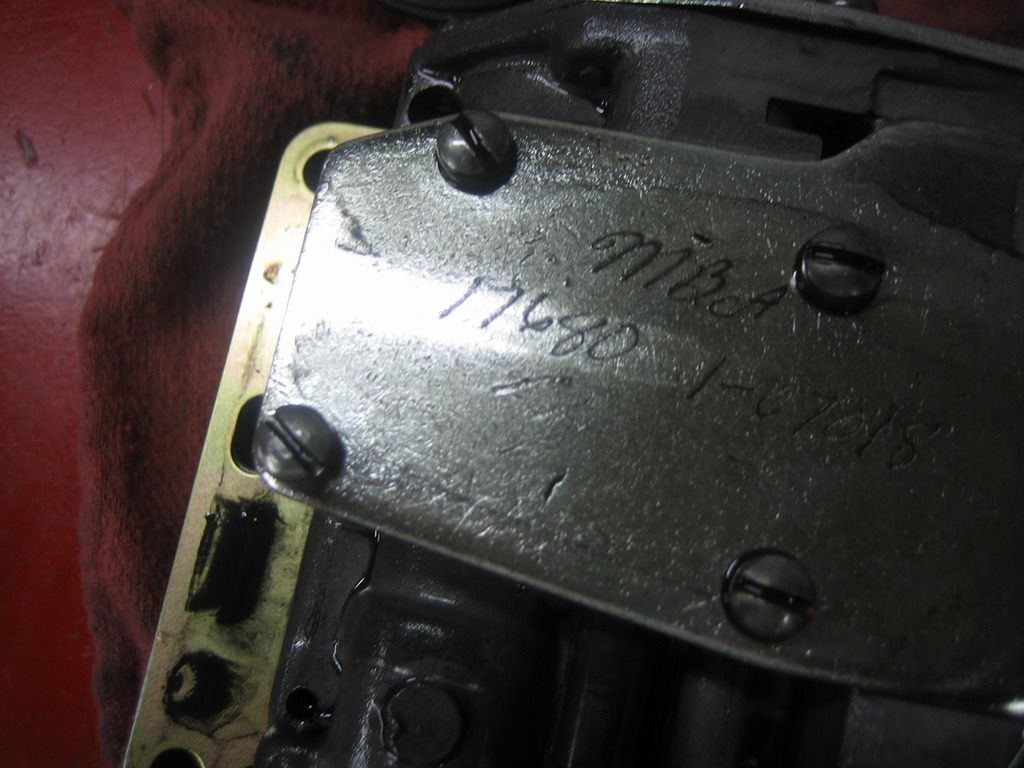
The valve body is a Turbo Action, #17680 which they no longer make. It's a forward manual valve body, no engine braking in first, passing gear linkage eliminated. Only difference between their regular reverse pattern part is obviously the shift pattern. It's gnarly.

Need to clean this thing.
IMG_9865_zpsiglk4uwx.jpg


So again, unlike the engine, this is more of a basic rebuild replacing mostly factory or factory-style parts. Plus, I already have everything on hand so not much to buy going forward. Only thing I am unsure of right now is whether to use the giant, heavy, cast aluminum deep pan I have. There's a lot of fluid in the trans with the extra capacity in the pan and the large cooler so I may take hard look at it and see if it's worth using again. It looks cool though!

The other thing I am contemplating is whether to replace the front pump bushing since I have a new converter. I may call Dynamic and see what they say about it. I know that some companies used to send a new bushing with their converter depending on what material the snout is made from. They did not send one or mention it on the phone so I imagine it's OK but it's probably worth a call. I got the thing apart so now would be the time to do it. I guess that's where all the leaky front pump stories may originate from, the bushing chews up the new converter snout and causes the leak. I don't really have the right tools for the job but there are several trans. shops within a few minutes of my house so I could take the pump to one of those places to have it done.

So things are looking OK for the trans at the moment. I don't foresee too many issues that could arise but being this is my car, I'm sure I will run into a snag.

Carlisle is this week so I'll be on the lookout for some things while I'm there - possibly an 850 carb and maybe a fiberglass hood but I don't really have a way to get one back easily so that might not be in the cards. Unless I have updates during the week, stay right here for a full, detailed report when I get back next Sunday.

More to come.
 
Oh man do I hate automatic transmissions.
I can take'em apart just fine.
Putting them back together ..... Not so much.
 
Oh man do I hate automatic transmissions.
I can take'em apart just fine.
Putting them back together ..... Not so much.

Come on, Rob, don't make me second guess myself here!

It's not that hard really and the 904 has to be one of the simpler automatics you will ever run across. There are only a few parts to deal with, it's really straightforward. Only a few special tools required if any.

I guess things like getting the servos out and back in, dealing with snap rings and checking clutch pack clearances are a little involved but no more so than building a performance engine. Doing it all while the thing is out of the car makes it much easier as well.
 
-
Back
Top