Biohazard

-
Finally getting around to dealing with this ole girl's inability to hold her liquid.

Ordered up a new tank grommet (Dale's Cuda shop) and have the floor pan gasket coming from DMT. I've been dying to see the actual state of the fuel filler tube-to-fuel tank union.

First order of business - get the flip cap off and remove the screws holding the upper part of the fill tube to the quarter panel. As stated earlier, this was easy as the anti-tamper screws had already been replaced with regular phillips heads.

Next, clear out the cargo area and remove the stamped steel cargo floor. This permits access to the floor gasket (5 screws). My floor seal was doing a poor job of keeping the outside outside.

Now its time to increase the working room between the fill port and the fuel tank. This means undoing the fuel tank straps and lowering the tank.

Floor jack in place for fuel tank management....


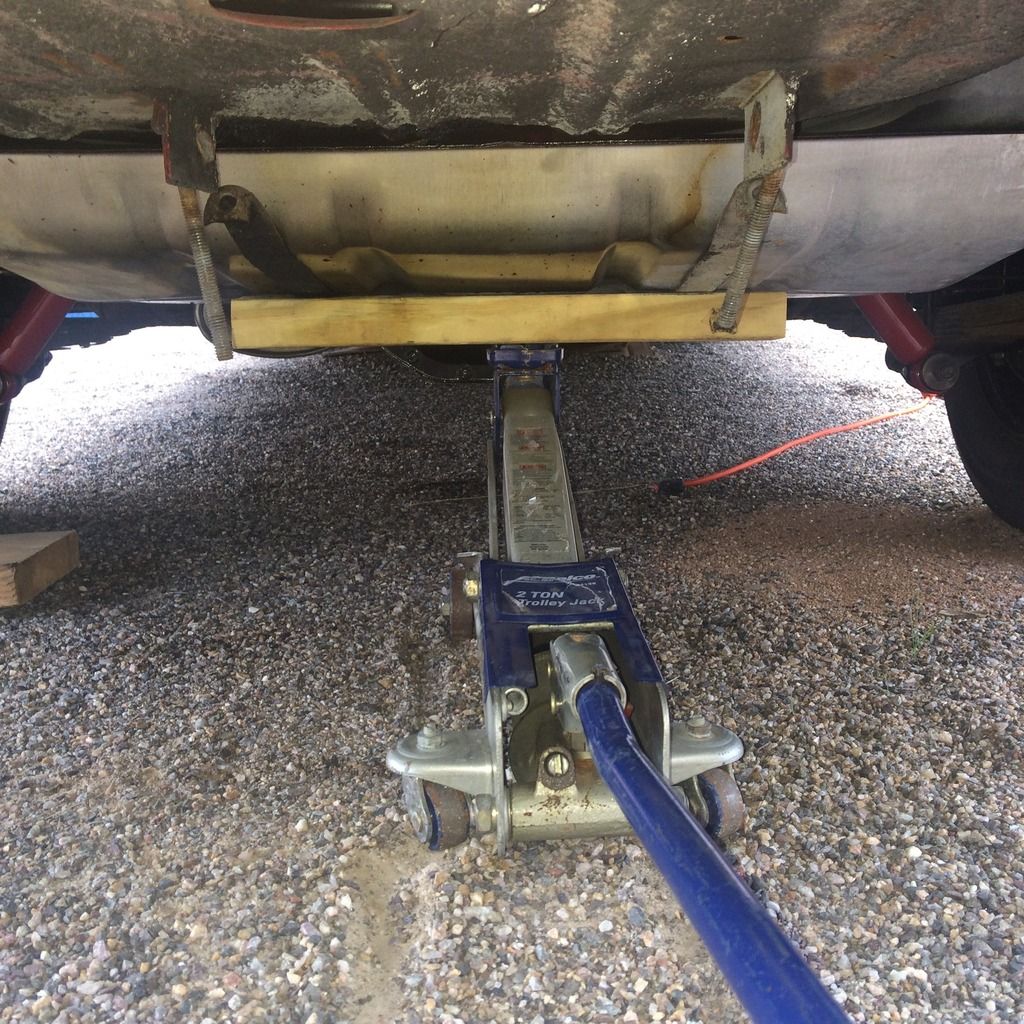
With the tank down about 5 inches or so, wiggling the fill tube out was fairly painless.

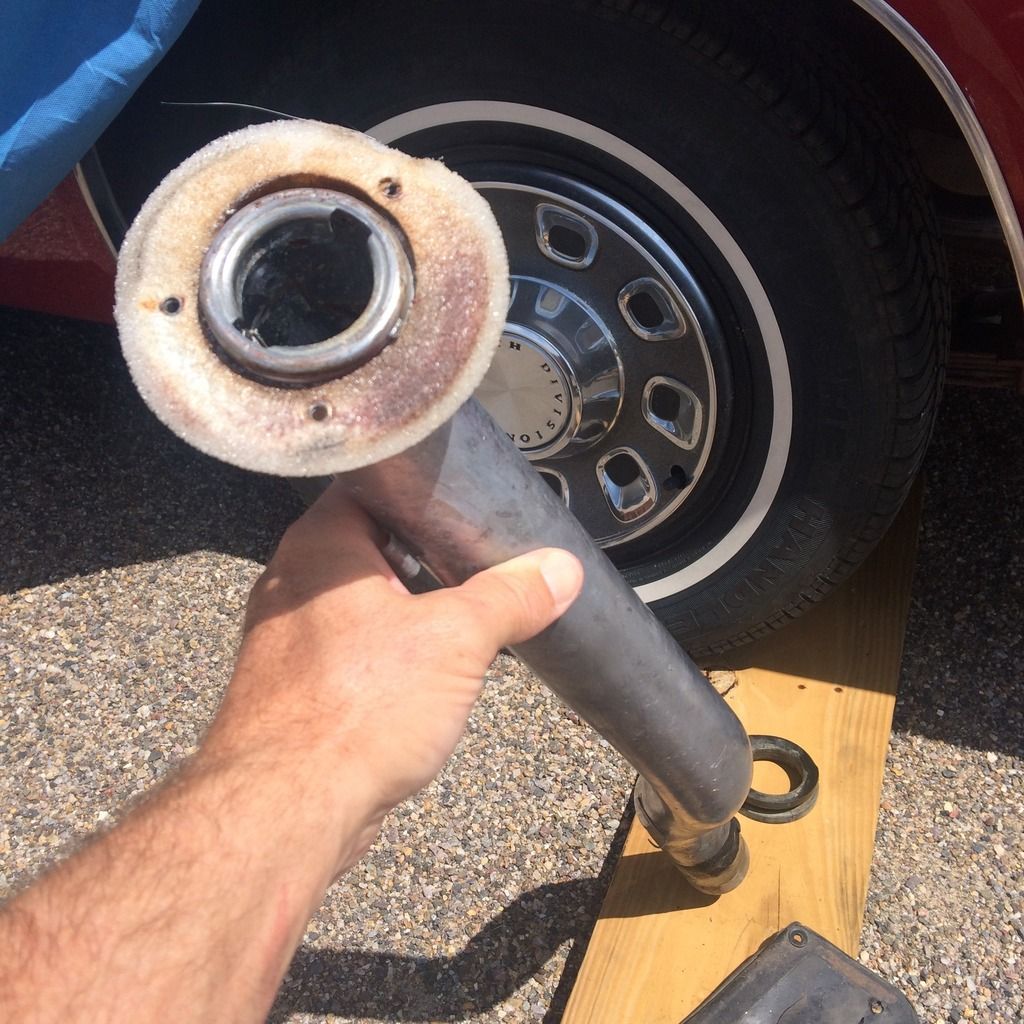
Here's a shot of the old floor seal, tank grommet, and the gunky fill tube...


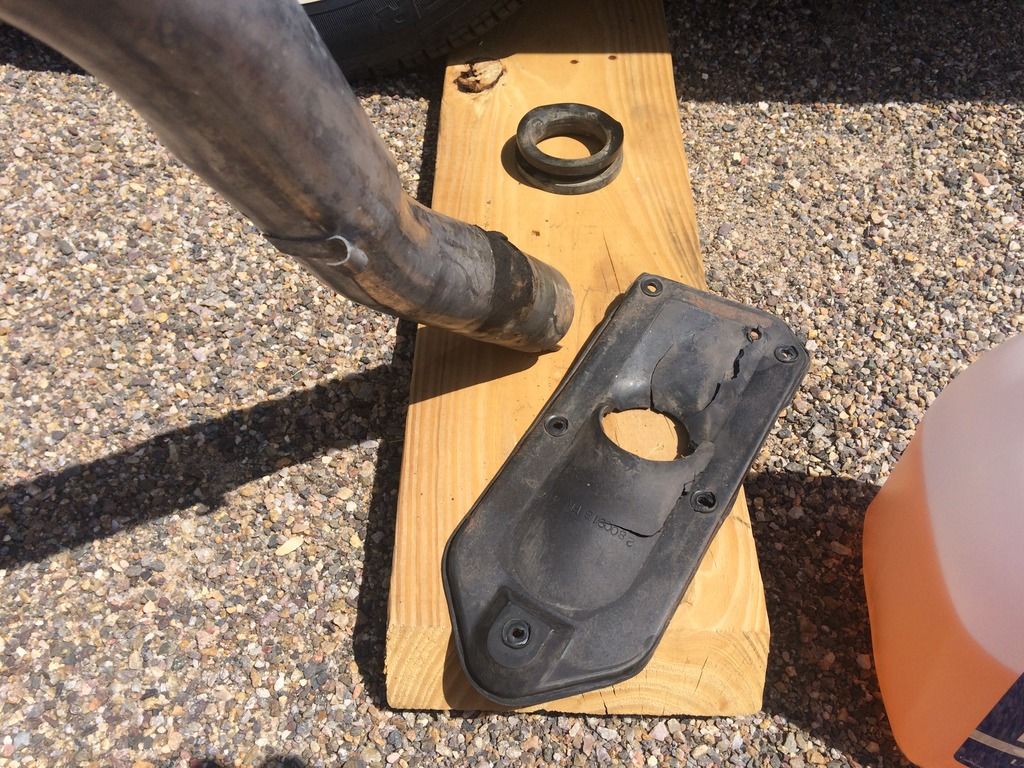
And at the other end of the tube, the body seal...

 
The exact nature of the fuel leakage was easy to see once I got the old tank grommet and the new one side-by-side.

First of all, the diameters are visibly off from each other...


I expected to see this but I also expected the old grommet would be hard and dried out but it was quite soft and pliable. Hmmmm.....


Yeah, not even kinda the same. Not sure where that old grommet came from but it looks nothing like the repro part. The old grommet slides up and down the fill tube with ease as it doesn't even come close to hugging the metal. You can easily see light between the tube and the o-ring whereas the new seal has to be pulled firmly into place on the fill tube. Pretty sure this is the weak link in the quest to keep my gasoline where it belongs.
 
I decided that keeping a good tight seal could be better facilitated by having a smoother fill tube surface for the grommet to wrap around. I gently wire-brushed the crud off the tank end of the tube and followed up with some metal polish.


Unfortunately, this meant doing the whole thing. Particularly, the part that would be visible inside the trunk...


...and, of course, the fill port itself....


Its true...there is no shine like Mother's...


For those who didn't know...this tube is thick gage aluminum and polishes rather easily.

Looking forward to my floor pan seal coming in so I can put it all back together. You see, a fair amount of gasoline spilled out onto the gravel driveway and, as you would guess, it really smells foul out there. Once the tank work is done, I can push the Biohazard out of the way and throw a match on the wet spot and all should be well.
 
Nice work Dan!

I hate paint covered tubes! It does not take a lot of work to clean them up like they were originally!
 
No, it really doesn't. Once you have it out of the car, that is ;)

Kinda held up right now waiting on the floor pan gasket. I had kinda gotten to the point, when I pushed her out of the garage last time, that I'd had enough and she was just gonna have to stay out there. Like a dog who'd pissed on the rug one too many times. But I really hate the idea of having to work in 100 degree heat when I'm mere feet away from a perfectly good garage. This is why doing the tank got moved to the front of the line.
 
Well, I couldn't wait. I installed the new grommet, smeared some Marvel on the end of the fill tube and pushed it in. Then I stuck a rag in the end of the fill port and this successfully corked up the tank. I actually rocked it pretty good trying to get fuel to come out at the inlet but it all stayed put. Then I rolled her back into the garage. We be expectin' storms all night tonight.
 
My remote starter trigger came in so I had to go test it out. With a full charge on the battery, I got the car fired up relatively easily. She then ran long enough for me to adjust the idle mixture screws and figure out why she had wanted to stall after warming up. Turns out the linkage from the choke pull-off is too short and opening the choke too much at idle, leaning it out, stalling it.

I let it run for about 10 minutes... just because .... and because I thought it would be helpful to run the fuel level in the tank down a bit. My filler neck seal came in today as well so I will probably be putting that in tomorrow.

On the down side...the exhaust fumes from running a too-rich mixture, in the garage with insufficient breeze, left me with a monster headache. Apparently, I've got a bit o' what the missus has. Yay.
 
Good day today. First thing I did was adjust that choke pull-off rod hoping it would relieve my warm engine stall condition - which it did. Fired the car up on the first pull and it ran, without intervention, for 20 minutes. During this time, I made more adjustments to the idle mix and moved the distributor around a bit, going off sound pretty much.

Then I pushed the *** of the car outta the garage to lower the tank, remove the fill neck, install the floor seal (thanks DMT!) reinstall the fill tube and wash the area around the tank to deal with any spilled fuel lingering wherever. Pushed her back in the bay, of course.

Still to be done - need to raise the tank back into place, screw down the floor seal, and reinstall the flip-cap.
 
So...Got none of that done. 96F in the garage with everything opened up.

Fugetaboutit
 
Got the tank back into place after a good cleaning under the spare tire well. Screwed down the floor seal and reinstalled the flip cap with a home made gasket fashioned out of the same material I used to make the brake backing plate seals.

Here's the filler neck with the el cheapo gasket..


Pic from outside the car showing the gasket..


Flip cap cleaned up but not polished or anything. I did take a wire wheel to the screw heads ;) *the upper and lower screws are basically a before-n-after with the wire wheel

 
For my next eco-friendly enhancement, I'm going to route that fuel vapor discharge fitting at the top of the fill neck to a canister full of activated charcoal rather than just venting it to the environment.
 
Ta-daaa...

the fuel vapor collection cannister...


fancy.

installed in it's temporary location..

 
For the limited amount of time the car was running...it seems to like to make the battery fizz, which it did, and now I have discoloration spots all throughout the area around the battery tray. PITA!
 
If the battery got warmer than you would expect being under the hood with the engine running, it's definitely overcharging. Put a volt meter on it with the engine idling and see what the voltage is. If it's more than about 14.5 or 14.6, it's overcharging and will kill the battery by overheating and boiling away the electrolyte (acid), all over that shiny underhood paint...
 
Hadn't noticed the battery heating up (but I didn't check). I was running a wire straight from the positive post to the + terminal of the coil...bypassing the ballast resistor and the ignition switch to do test runs from under the hood. Possible culprit?
 
Headliner must go in before windshield can go in - which help make the car more rain "resistant". (I would never say rain "proof")

Headliner install:


Letting the material sit for a while before installing the clips down the sides.
 
So since this page started off with the fuel vapor issue...and it's been 2 months now...I am pleased to report that there is no gas vapor smell in the garage. Hasn't been. Win.
 
Anything I can do to keep it from getting evicted from the garage is worth doing.
 
-
Back
Top