'69 Barracuda T56 swap, floor, cross member

-
everybody seems to be forgetting we're talking 1/2", not 3" or more. really, it's 1/2". can we please have some perspective, it won't make the car a dangerous death trap will it. once the alignment is reset the difference will probably be un noticeable. remember...... 1/2".
neil.

I think you’re completely underestimating the difference that can be made by moving a major suspension point by a 1/2”. Moving the LCA pivot down with respect to the UCA mounts will change the camber curves, bump steer profile, and roll center.

Now, I couldn’t tell you off the top of my head if that will be detrimental, or how big an effect it will be, but it’s something that should be considered. Look at the Hotchkis UCA’s for E bodies for example- they move a single suspension point, more than a 1/2” but not 3”, and in doing so completely change the anti-dive and camber curves. Or consider that some of the handling set up Mopars doing competitive events are now running 1/2” taller upper bump stops to improve some of those suspension geometry characteristics- it’s not a negligible amount. And the K-frame spacer would change the control arm angles in the opposite direction from a taller upper ball joint.

A 1/2” drop in ground clearance isn’t negligible either. On my car for example I don’t have a 1/2” to give up and remain easily street-able since my header flanges are already sub 4” to the ground. Which would mean I’d have to raise the body, which would again change the roll center and decidedly for the worse, raise the CG, etc.

The Hemi cars that did this weren’t built for handling, certainly not the level that can be achieved today. Maybe they weren’t death traps, but they weren’t AutoX competitors either.

I’d rework the HVAC ducts given the choice, unless I was going to plot out the entire suspension geometry to determine exactly what I’d be changing and by how much.
The suspension geometry does change: upper and lower control arm angles are different, distance between upper and lower control arm is increased, exhaust hangs lower etc. I spent hours reading about k frame spacers and most say its viable and can work but stuff changes like you said.

Right now I have around 15,000 or so miles on a fully rebuilt Formula S factory steering and suspension. I live in country high speed curvy roads. I can drive the car with one hand on the steering wheel and it was a fairly competent handling car before being taken apart. Thats why I plan to raise trans tunnel and mod heat duct. I know I can get those two things done and then my engine, suspension, exhaust is exactly how it was when I had the 727 in there cause it was a nice driving car before I took it apart.
 
I think you’re completely underestimating the difference that can be made by moving a major suspension point by a 1/2”. Moving the LCA pivot down with respect to the UCA mounts will change the camber curves, bump steer profile, and roll center.

Now, I couldn’t tell you off the top of my head if that will be detrimental, or how big an effect it will be, but it’s something that should be considered. Look at the Hotchkis UCA’s for E bodies for example- they move a single suspension point, more than a 1/2” but not 3”, and in doing so completely change the anti-dive and camber curves. Or consider that some of the handling set up Mopars doing competitive events are now running 1/2” taller upper bump stops to improve some of those suspension geometry characteristics- it’s not a negligible amount. And the K-frame spacer would change the control arm angles in the opposite direction from a taller upper ball joint.

A 1/2” drop in ground clearance isn’t negligible either. On my car for example I don’t have a 1/2” to give up and remain easily street-able since my header flanges are already sub 4” to the ground. Which would mean I’d have to raise the body, which would again change the roll center and decidedly for the worse, raise the CG, etc.

The Hemi cars that did this weren’t built for handling, certainly not the level that can be achieved today. Maybe they weren’t death traps, but they weren’t AutoX competitors either.

I’d rework the HVAC ducts given the choice, unless I was going to plot out the entire suspension geometry to determine exactly what I’d be changing and by how much.
no underestimating here mate, i've been building hotrods, customs etc for 40 years now. i've scratch built ifs more than once. it all comes down to what the car's intended use will be. if it was my car i'd alter the heater/ac box too to allow the tunnel to be raised, but that wasn't my point, if altering the heater wasn't an option spacers would work. with taller top ball joints geometry wouldn't change (assuming the joint was a similar 1/2" taller). the op has now decided that's the best route for him too so we're all on the same page anyway.
neil.
 
hvac removed. Now I will be able to get the firewall raised to clear the trans bellhousing and get the rest of the tunnel sheet metal work done.

Plan is to finish the 6 spd swap and get the car running again. Then circle back to modding floor heat duct, rebuild the hvac box, and get the heat and AC working again.

hvac removed 1.jpg


hvac removed 2.jpg


hvac removed 3.jpg
 
Sometimes it's good to just make a decision. The state of indecision stifles any progress. Good to see something good happening again.
 
Moved engine as far forward as possible. Verified motor mount studs were all the way forward in the k-frame. Driver's side header tube may need a flat spot not sure yet but if it does it will be very minor. No clearance issues with torsion bars.

Was able to get 1/4" clearance between firewall and bellhousing. Will need to remove trans bellhousing, hammer dolly, and butt weld pie shaped pieces in there. Also going to remove the bent over pinch weld and butt weld lower sections of floor to firewall. So no bent over pinch weld will exist. Will stay on this firewall clearance task till I get it right.

1/4" vacuum tube can be slid up forward between bellhousing and firewall tunnel easily so its got clearance on the areas that are heard to see.

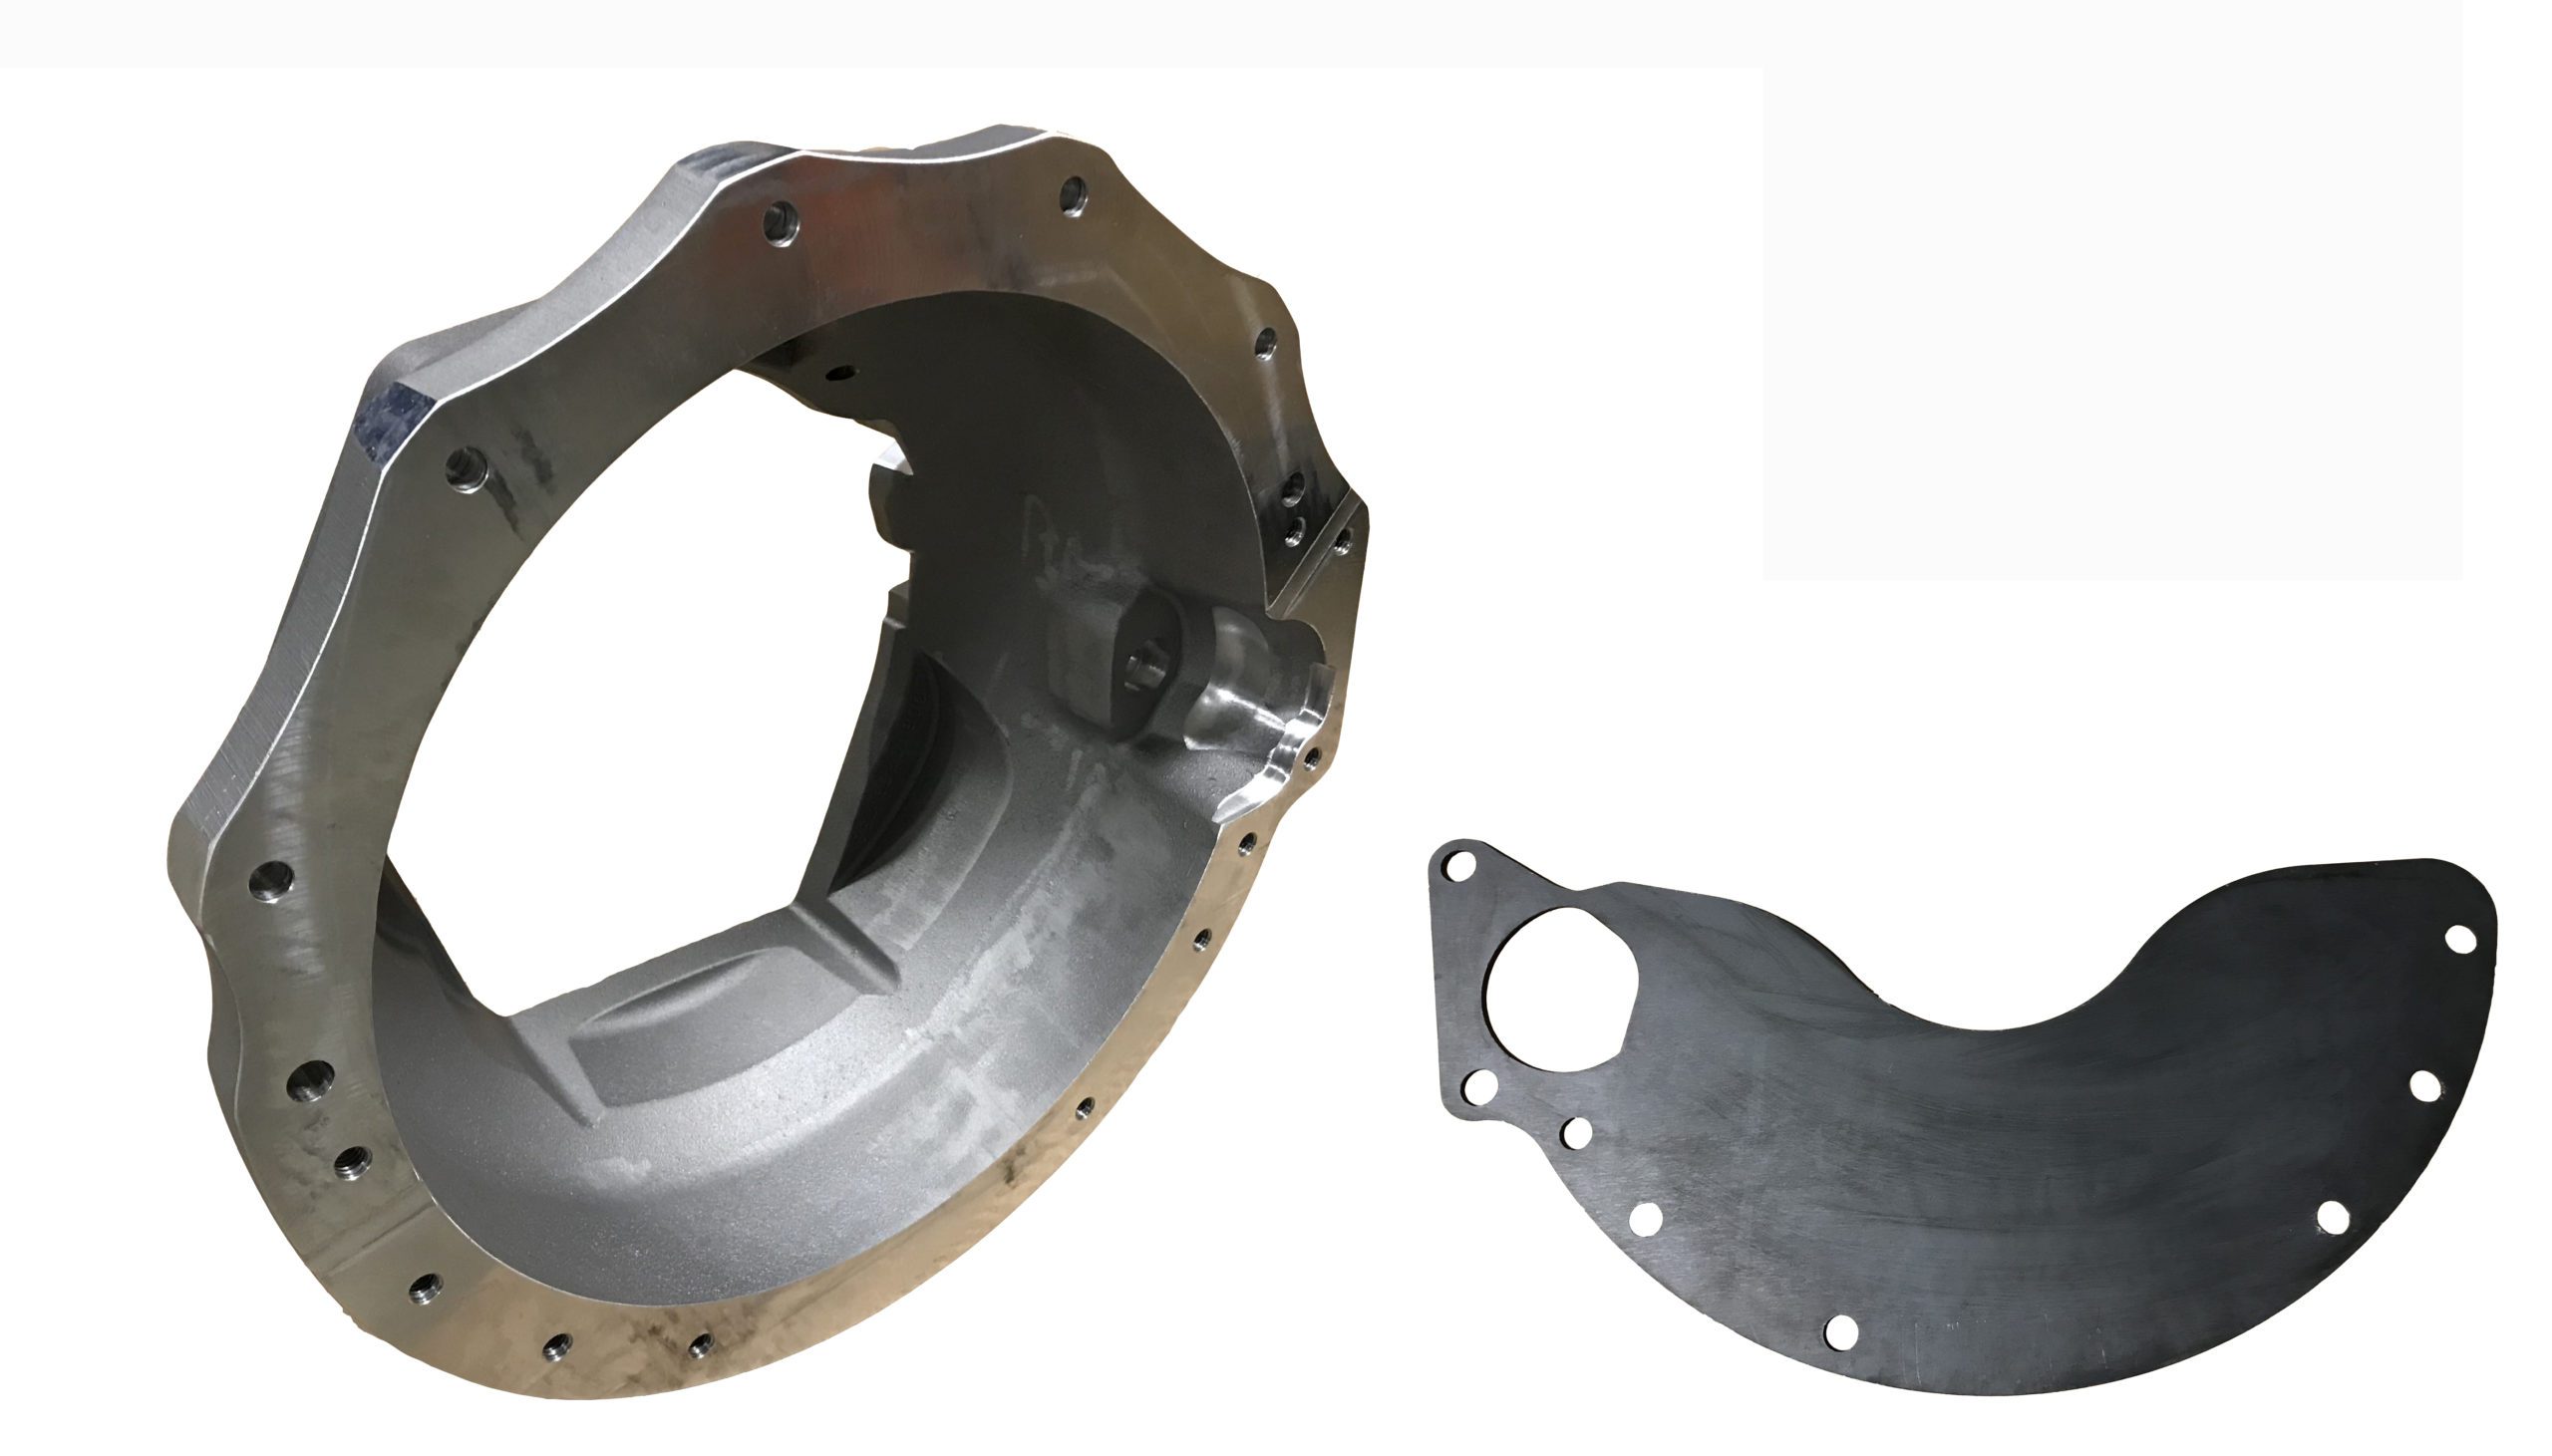
NOTE: this cast bellhousing is around 1/2" taller then the trans. Others that used the Quick Time steel bellhousing those do not stick up past the trans. So a lot less clearancing would have been required had I gone with a Quick Time.

Firewall clearance 1.jpg


header clearance 1.jpg


header clearance 2.jpg


Trans mount 3.jpg
 
Nice work!

Yeah I think a lot of your headache is from the differences between that aluminum bell housing and the QuickTime bell that I used. Probably did their test fitting on an B or E-body.
 
Could you have a machine shop run a mill across the top of the BH to remove that extra 1/2"?
 
Spent a bunch of time cleaning garage organizing before I start cutting/shaping/welding tunnel. So decided to put front bumper back on car rather then having it sitting around taking up space.

front bumber installed.jpg
 
Yeah I think a lot of your headache is from the differences between that aluminum bell housing and the QuickTime bell that I used. Probably did their test fitting on an B or E-body.
I welded pie cut on one side of tunnel now 1/4" hose hangs up in one spot. So the decision has been made to go with the smaller lower profile Quick Time steel bellhousing. Placed Quick Time order today Holley says its in stock. I hate to be defeated but its a lot easier to throw money at the problem then continuing to fight this bellhousing tunnel fitment issue.

The founder of Quick Time has a video on yourtube. He states their bellhousings are low profile and designed for tight trans tunnel situations.

Will have to re-index the new bellhousing etc etc etc etc....

And scratched up aluminum bellhousing will be up for sale for cheap....
 
Ugh, that sucks!

Looking at that bellhousing though I think going to the QuickTime will solve some of your issues with the tunnel. The QT itself needs a couple of small modifications depending on the T56 used and throw out bearing used. I know on mine with the T56 magnum snd C5 corvette throw out I had to do a little grinding to clear the clutch lines and things. Of course I bought my QT bell quite awhile ago so they may have updated it, not sure.

IMG_5463.jpeg


Your bellhousing is small block to T56 right? Does it fit a GenIII hemi? I might be interested, I’m still looking at options for my Challenger and it would have a larger tunnel…
 
Your bellhousing is small block to T56 right? Does it fit a GenIII hemi? I might be interested, I’m still looking at options for my Challenger and it would have a larger tunnel…

I know I am jumping in before the OP, but just in case...

Assuming he got the kit from American Powertrain (don't remember for sure), looks like it is G3 and SB.


Here's the one that came in my SST kit:


I would bet there is only one manufacturer for the cast aluminum T56 bellhousing and all the kits come with the same one I have.
 
I know I am jumping in before the OP, but just in case...

Assuming he got the kit from American Powertrain (don't remember for sure), looks like it is G3 and SB.

[/URL]

Here's the one that came in my SST kit:

[/URL]

I would bet there is only one manufacturer for the cast aluminum T56 bellhousing and all the kits come with the same one I have.
Yes its the Quick Draw like in your link above and apparently Gen III hemi and mopar small block same bolt pattern. Also for the GM style T56 Magnum trans.
 
Your bellhousing is small block to T56 right? Does it fit a GenIII hemi? I might be interested, I’m still looking at options for my Challenger and it would have a larger tunnel…
My bellhousing is for T56 Magnum GM style same trans you used in your Duster. GenIII hemi and small block mopar are same bell housing from what I read. I have those steel heat ducts above the floor so trying to minimize the amount of cutting I have to do to those heat ducts. I scratched the top of the bell housing prying floor up so I will have to sell bellhousing at a discount now.
 
Notice how the Quick Time is the same height as the T56 trans where as the cast bellhousing is 3/8" or so higher then the transmission. And the Quick Time just behind the flange is dramatically lower then the cast bell housing.

Quick Time 2.jpg


Firewall clearance 1.jpg
 
Quick Time got delivered today. Notice how it is same height as trans mating surface where as aluminum sticks up 3/8 - 1/2" higher then the trans.

Bell to trans 2.jpg


Bell to trans 4.jpg
 
From this angle you can really see how much smaller the Quick Time is compared to the aluminum bell housing.

Bell to trans 1.jpg


Bell to trans 3.jpg
 
that's a big difference :thumbsup: it may even fit now without any more tunnel/ac duct cutting, fingers crossed.
neil.
The bolt in center of the trans will end up being the high point which will require floor to be raised and require heat duct to be cut. Carpet and padding must fit between floor and heat duct so there needs to be a gap there. But Quick Time will reduce the amount of floor raising heat duct cutting required. So yes it makes things way way easier.

Transs floor interference 2.jpg
 
Welded up the cuts that were made in firewall tunnel in order to enlarge it. Then did a test fit with the Quick Time bellhousing. The tightest spot is that bolt in center of trans but a 1/4 inch hose slides between bolt and floor without any drag. Clearance looks good everywhere else. So I think I finally have sufficient clearance now.

Firewall clearance 2.jpg


Firewall clearance 3.jpg


Quick Time 3.jpg
 
Done got sick lost a couple weeks but fully recovered now feeling great and back on the project again.

Formed up patch for front half of tunnel. It has around 1/8 - 1/4 inch overlap with floor in its current state. Could just overlap weld in seal it and be done with it. Gonna sleep on it and probably go butt weld though.

Note no more bent over pinch weld between floor and firewall. Floor is butt welded to firewall where bent over pinch weld used to be.

Front tunnel fitted 1.jpg


Front tunnel fitted 2.jpg


Front tunnel fitted 3.jpg


Front tunnel fitted 4.jpg
 
Last edited:
Got front section butt welded in and tacked in rear section cause ran out of welding gas over holiday weekend. I straighten floor edges out to fit the patch shape which had straight edges which resulted in the tunnel getting widened. Also gives it a better look. Needed relieve cuts in floor in two places to get the floor to bend straight. Floor cleared trans before so now it will have extra clearance.

Also note bent over pinch weld is cut off and floor to firewall is butt welded now.

Tunnel welded 1.jpg


Tunnel welded 2.jpg


Tunnel welded 3.jpg
 
-
Back
Top