DIY Classic Looking Roof Rack

-

Serj22

Well-Known Member
Joined
Feb 14, 2013
Messages
1,231
Reaction score
59
Location
Benicia, CA East Bay
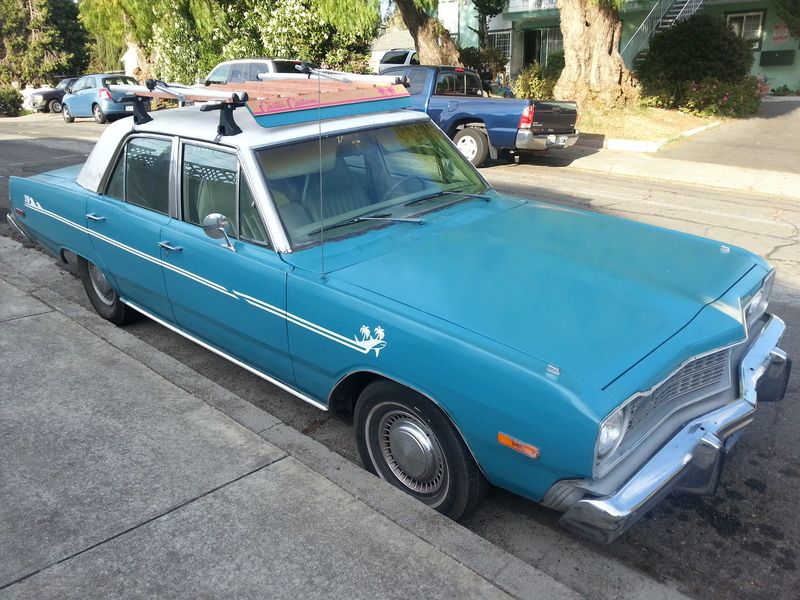
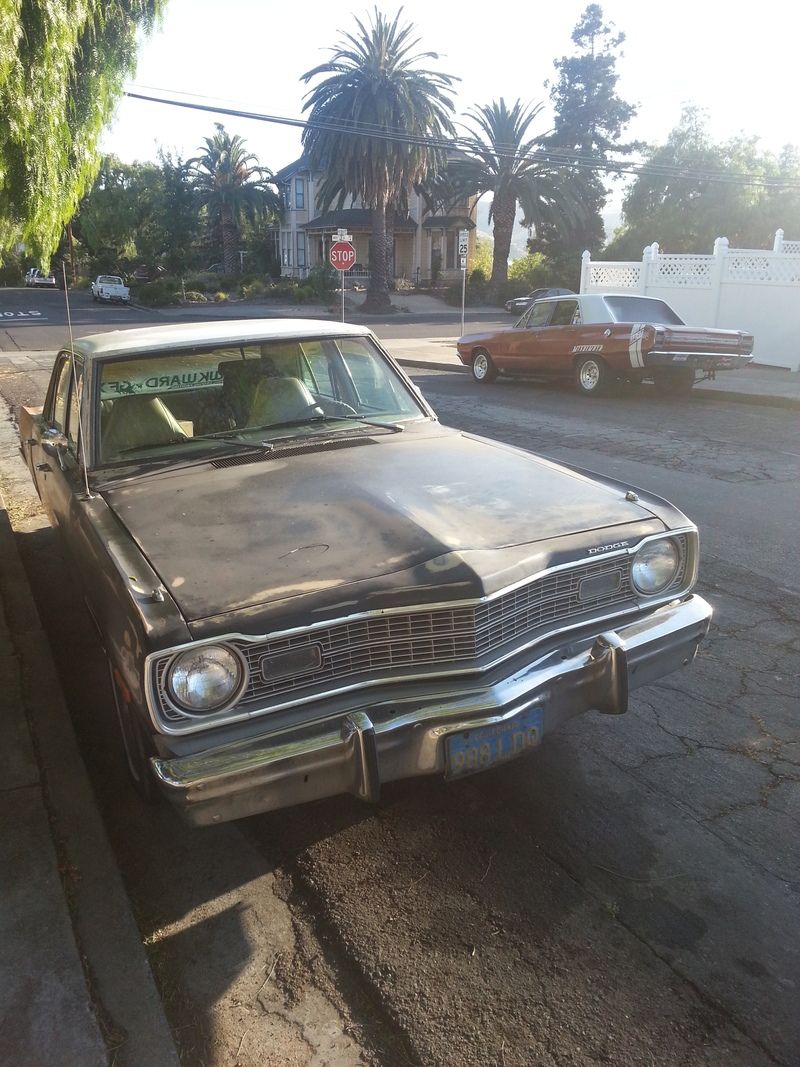
Well, since we finally made a decision as to where the 1974 4-door dart was going - one of the ideas that kept coming up was to make it kind of a beach-cruiser car, and keep some of the old styling of the 70s with it. I opted to give it a cheap $62.00 rustoleum roller paint job, and it took several hours AFTER painting it just to knock the paint down, smooth it out, and buff it.

Since this is my fiancee's car, everything gets run by her, and she hasn't really liked any of the ideas I've had, didn't want a stripe on it, etc... till I came up with this style for the overall look. So for those who like watching me build stuff, like the center console I made a while back, this is the thread for you - to see some more of my strange ideas, and a really really simple project...

I am building a roof rack - with a wood main body, and it will have bike mounts on it, for full functionality.

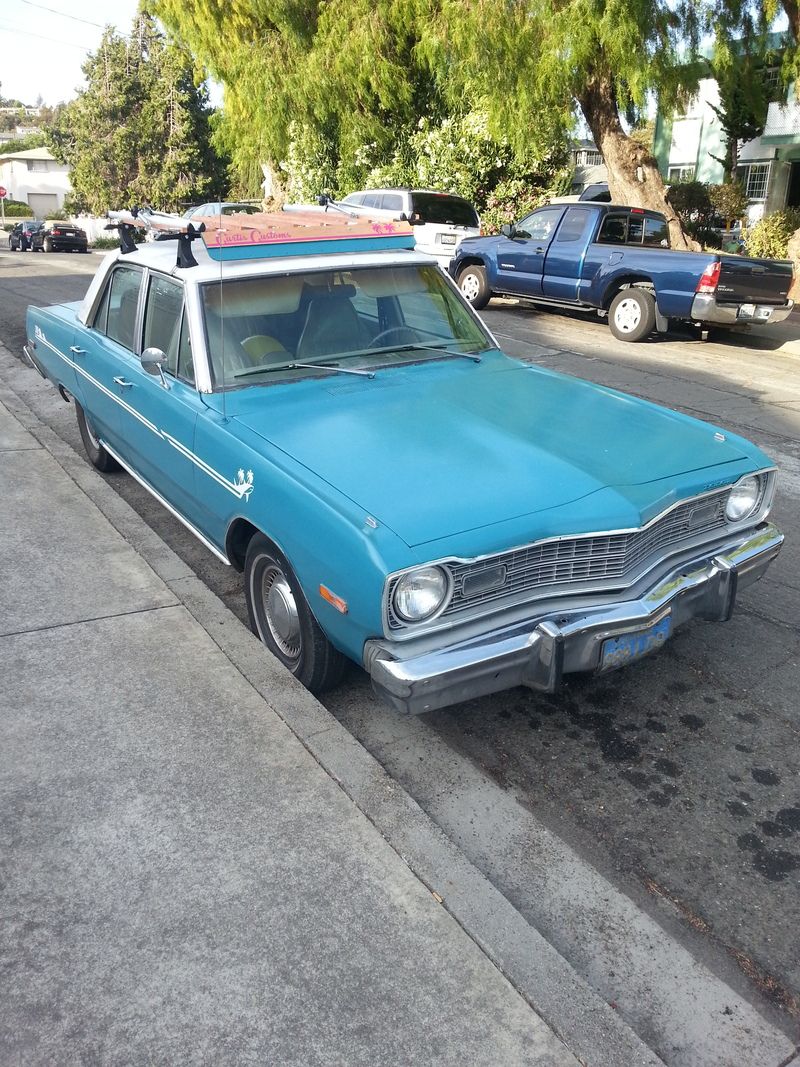
So, let's start with the style of this car - to make this work - It looked like this not just a couple weeks ago.

20150624_190256_zps6rxp3mir.jpg


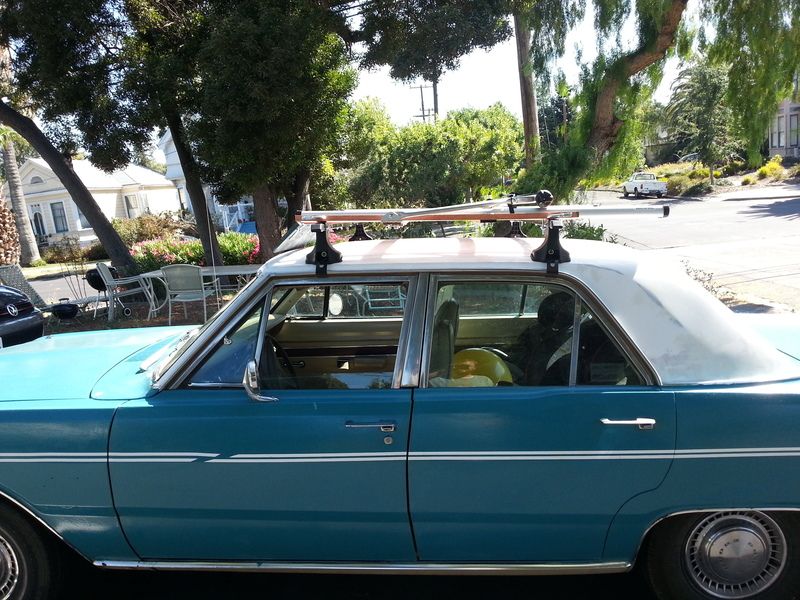
Then paint happened.

20150627_141352_zpsqkajlz8p.jpg


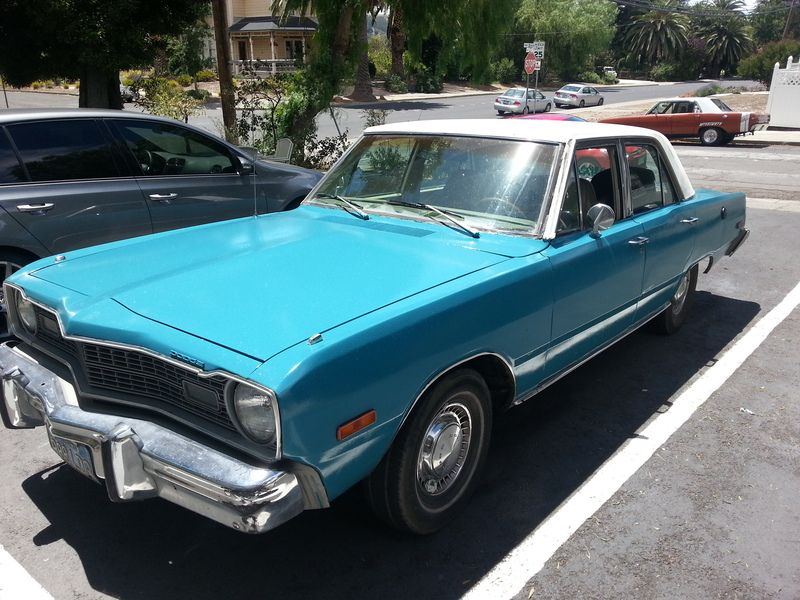
Just a roller, some custom mixed paint, a lot of wet sanding, a lot of polishing, sanding, polishing, and just time and work in general.

The roof is still yet to be painted - it will still be white, just fresher paint.

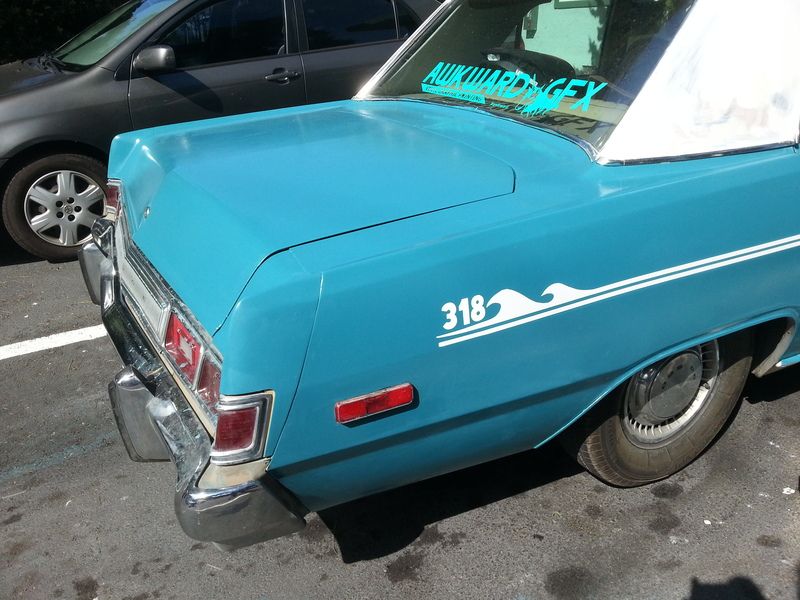
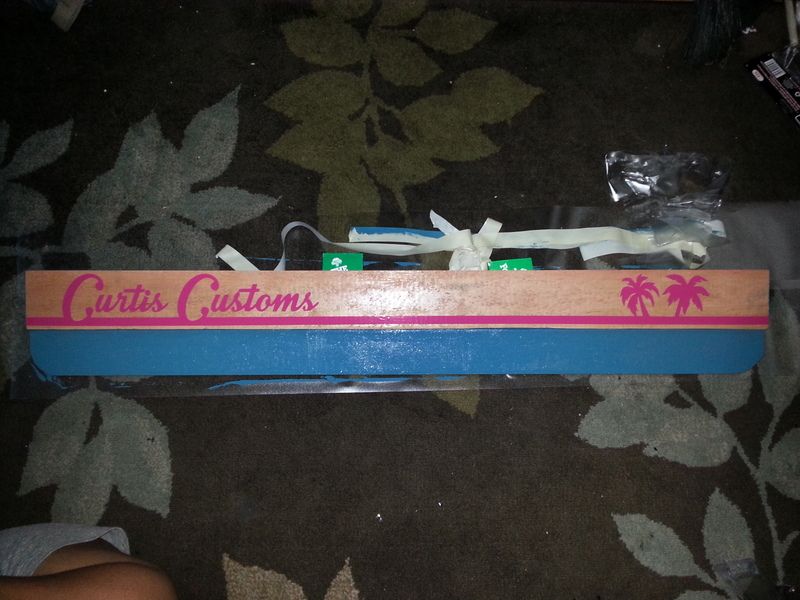
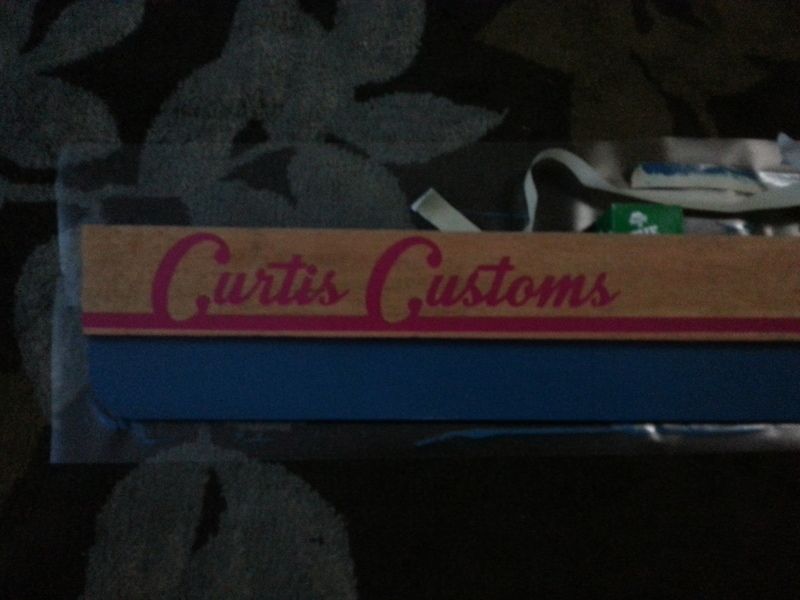
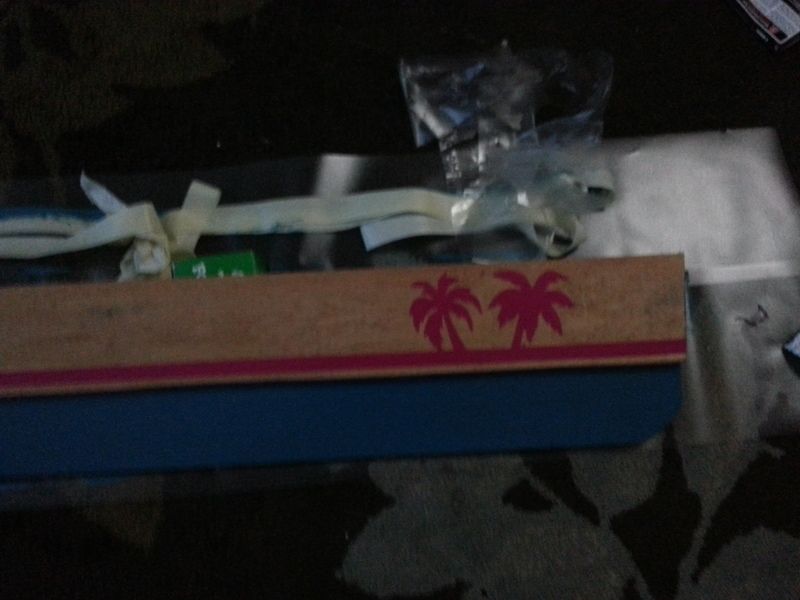
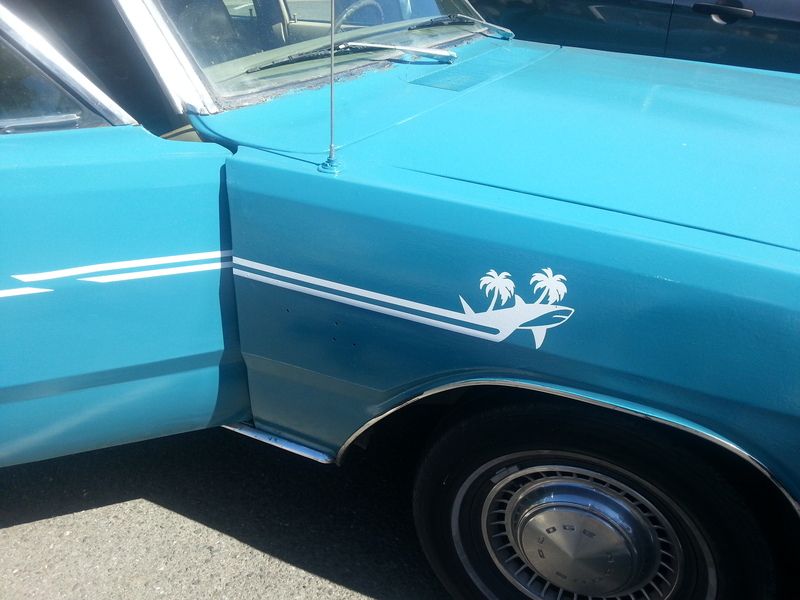
Me and my fiancee' do vinyl printing out of the house, so I drew up a custom stripe for the side of the car - based on the Dart "Hang 10" styling. I still have to draw the front of the stripe, but this is what we have so far.

20150630_165617_zps4oxxusyk.jpg


Soooooo....

The project.

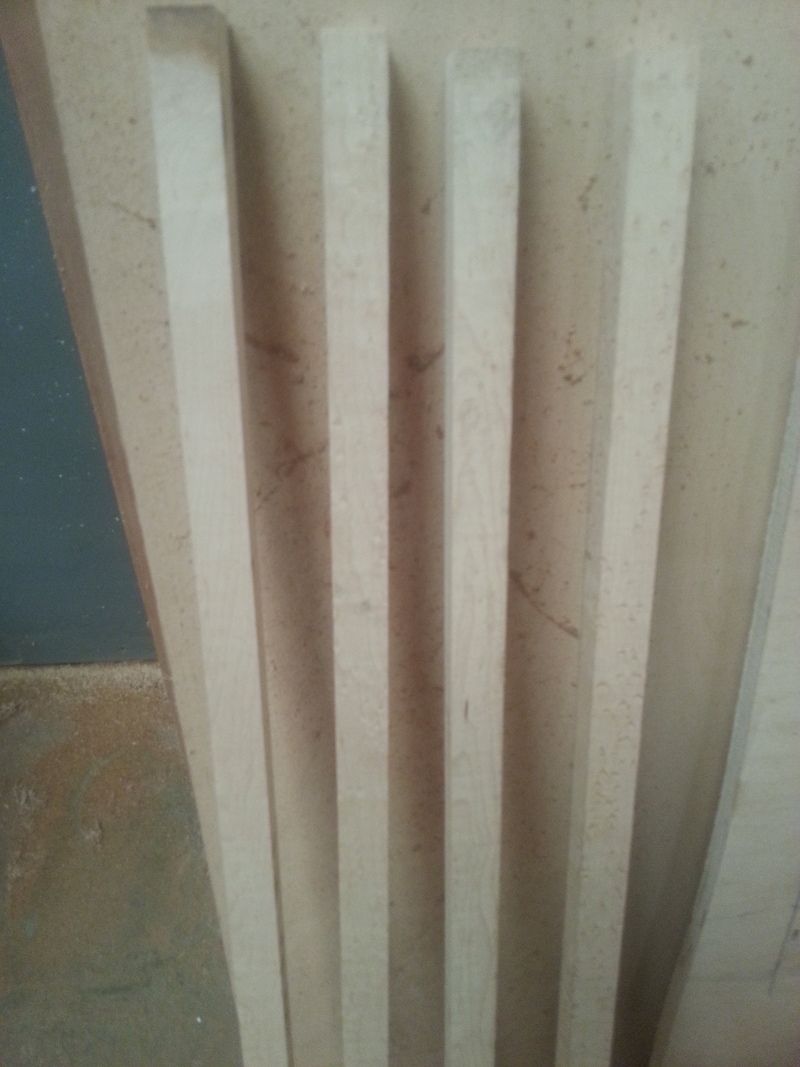
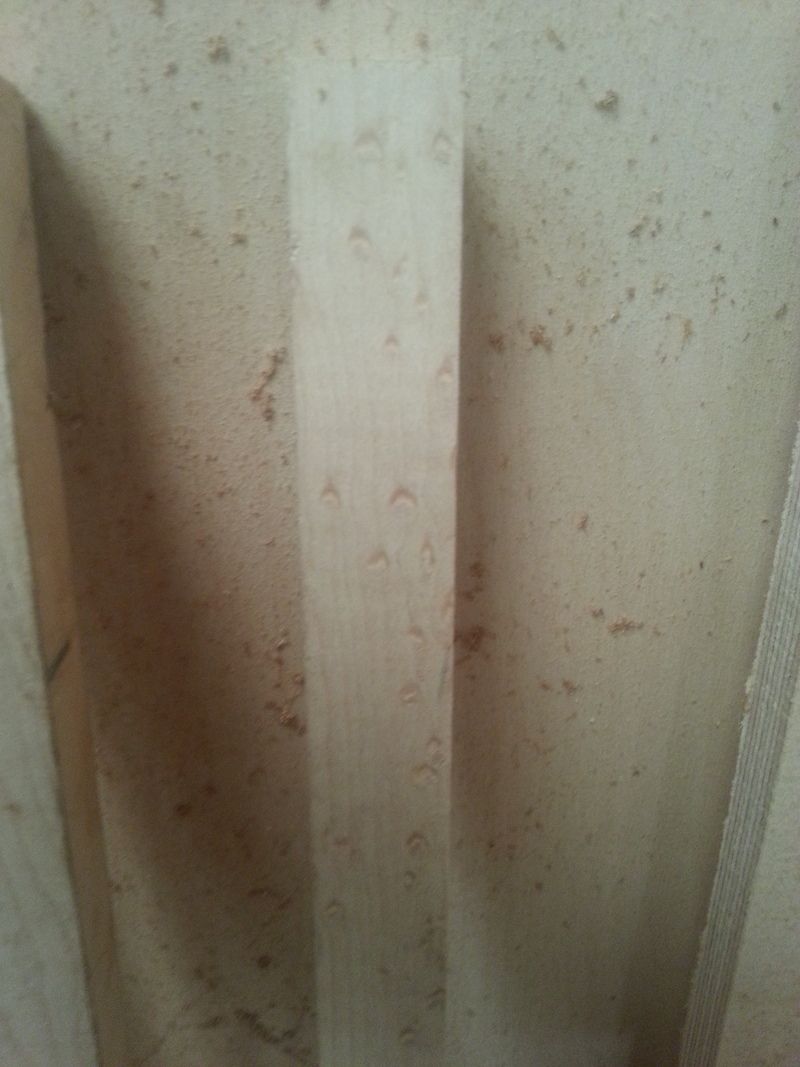
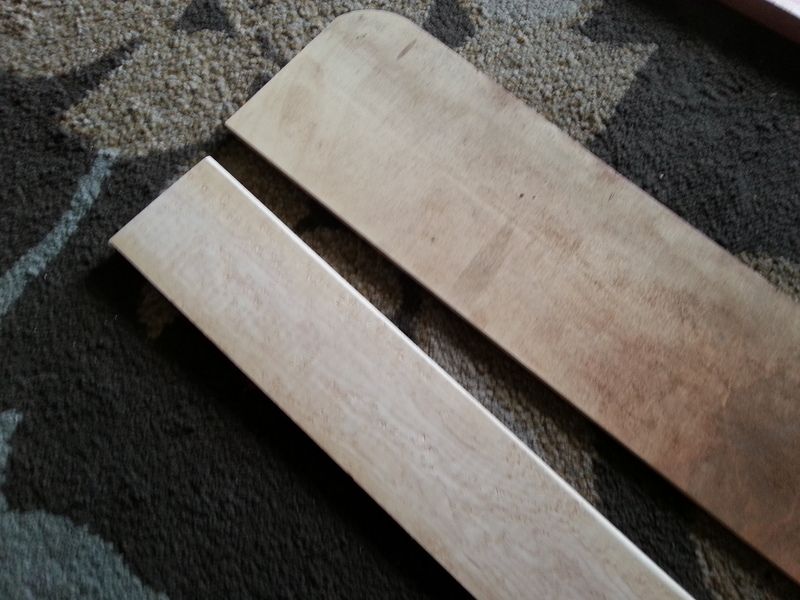
I hunted through a bunch of wood at the shop and found a few pieces of what I thought would make an interesting roof rack - Bird's Eye Maple. It's tough, kind of hard, and definitely interesting. I feel like it would look pretty neat. I'm not sure what it's left over from, but it's not a material we use in boats ever - maybe a cabinet we built in the past - oh well - it's here, and so it shall be used.

20150703_083838_zpsjic1w0hy.jpg


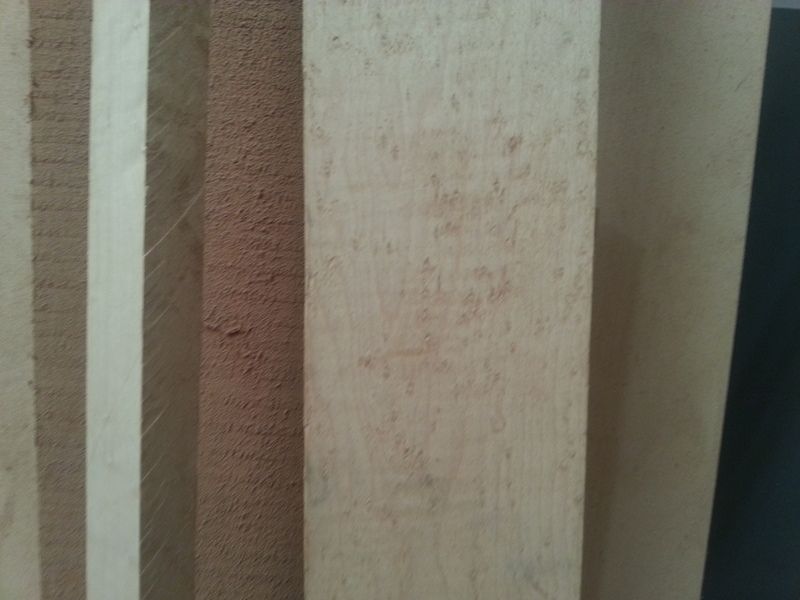
I planed the couple planks we had to 3/4" thick.

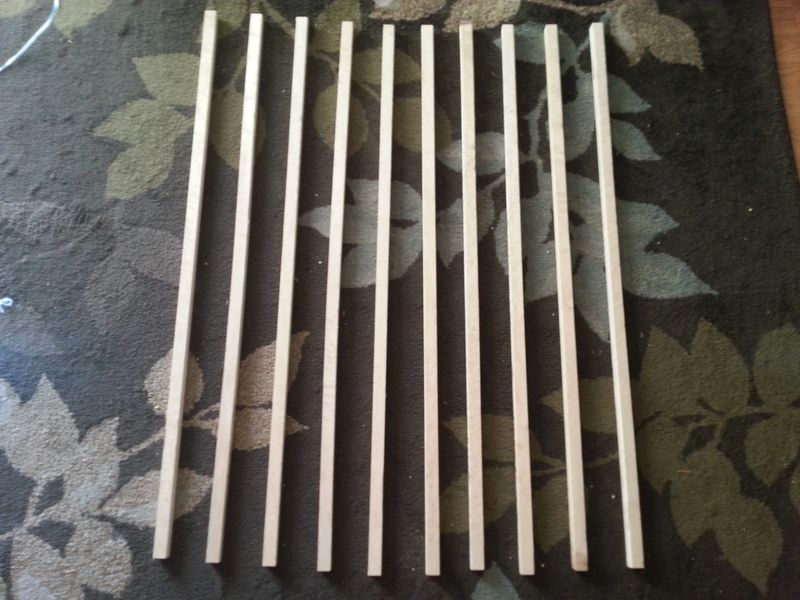
Then I ripped them on the table saw to about 7/8" and then planed them down to 3/4" on that dimension as well. Then I cut all those sticks to 40" long each. I made 10 sticks total. That's all the maple I had.

So 10 sticks, 3/4" x 3/4" x 40"

20150706_082141_zps0k6bqz7r.jpg


20150706_082150_zpscqxg8yy5.jpg


20150706_185603_zpsmumpt7vi.jpg


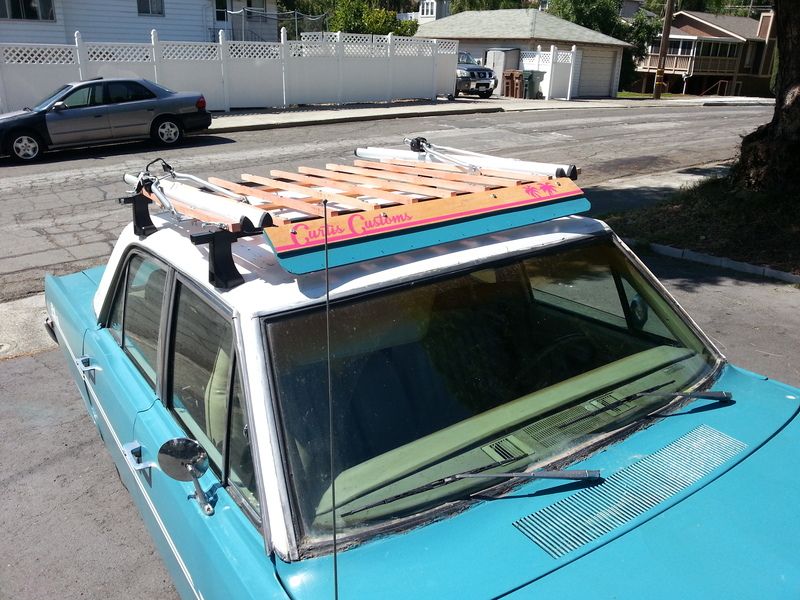
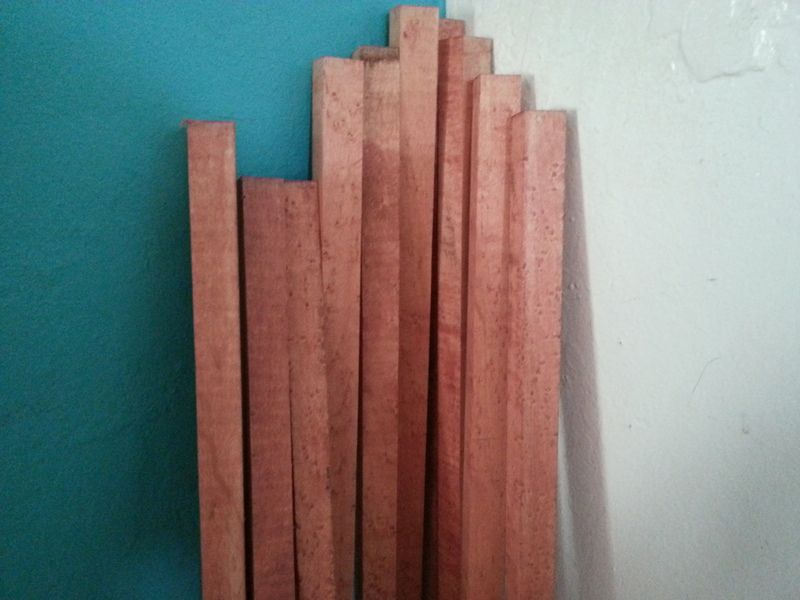
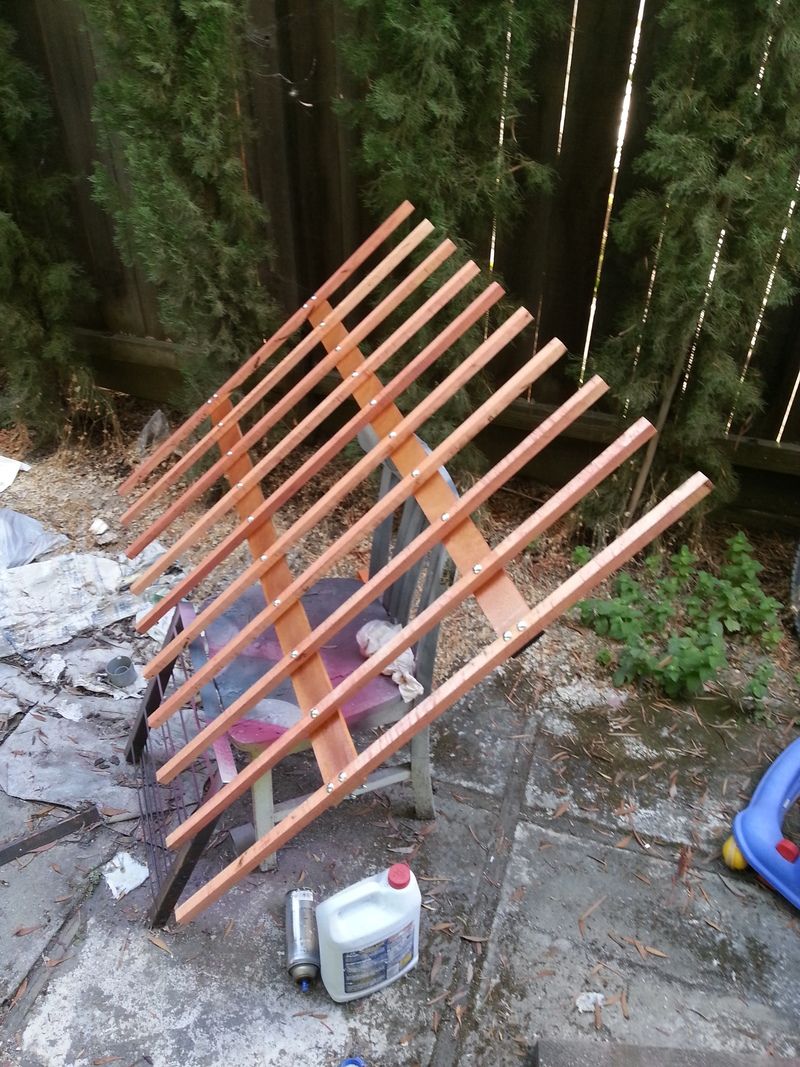
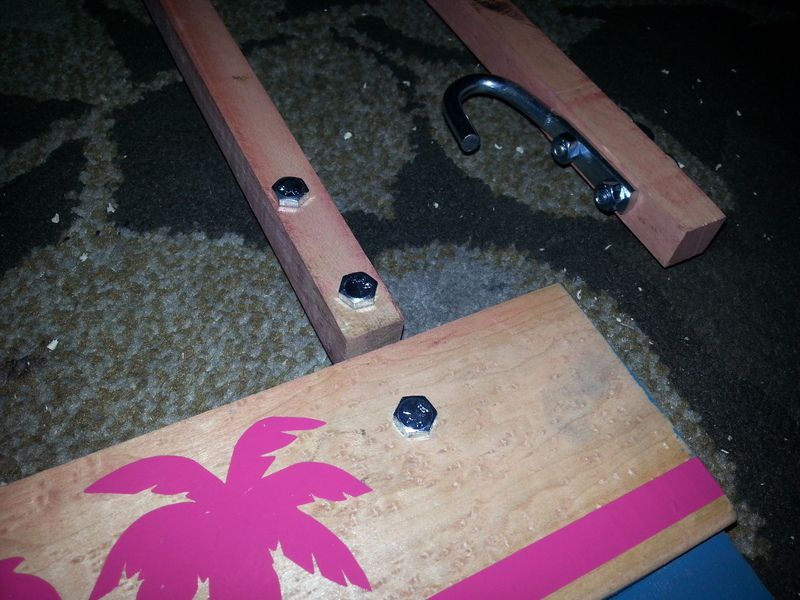
I took them home to see what natural maple looked like against the roof of the car... and it wasn't that good. So, since maple is - well maple, it'll take a variety of colors pretty well. I mixed up some orange 1shot, with some pink, and thinned it out a lot, and came up with a peach-orange stain, and put it on all the sticks. It came out similar to a really really light gunstock color if anyone is familiar with stain.

20150706_192644_zpsicqkarth.jpg


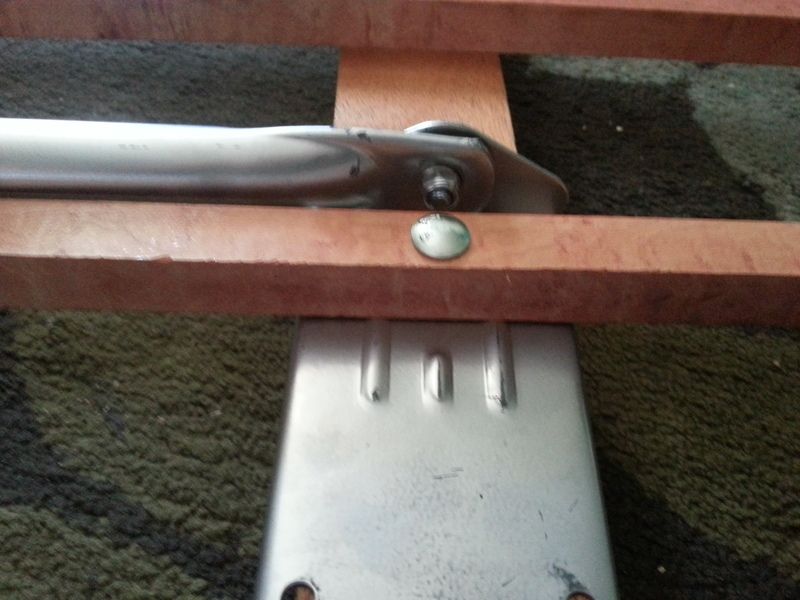
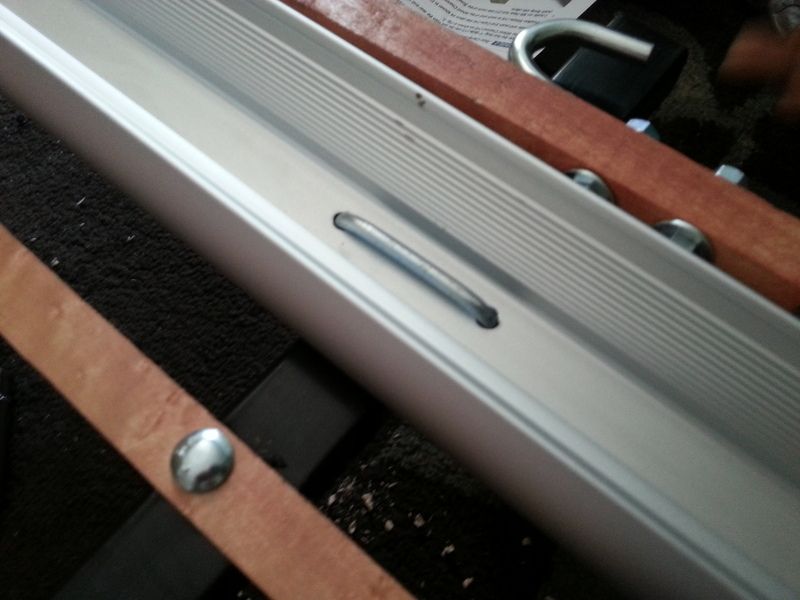
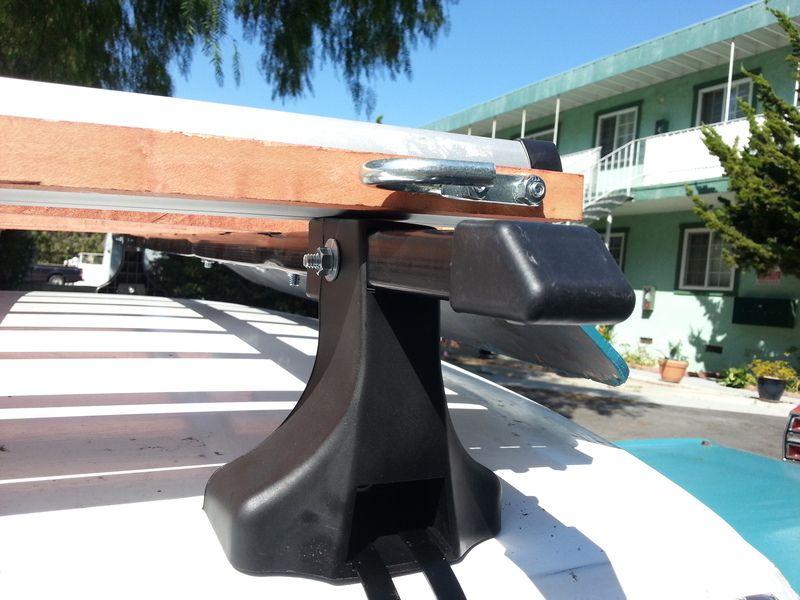
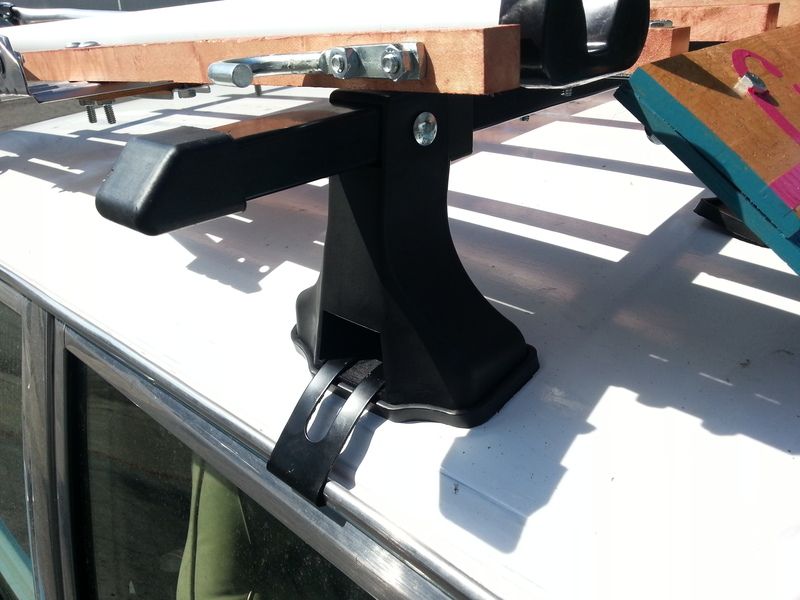
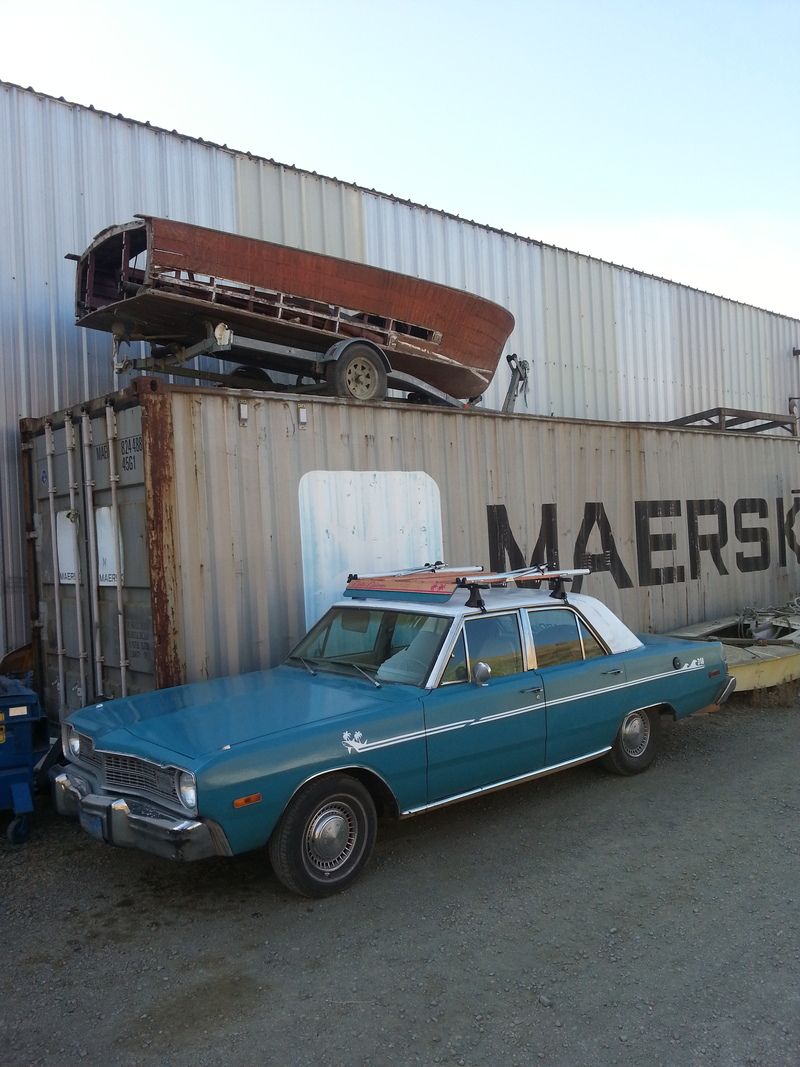
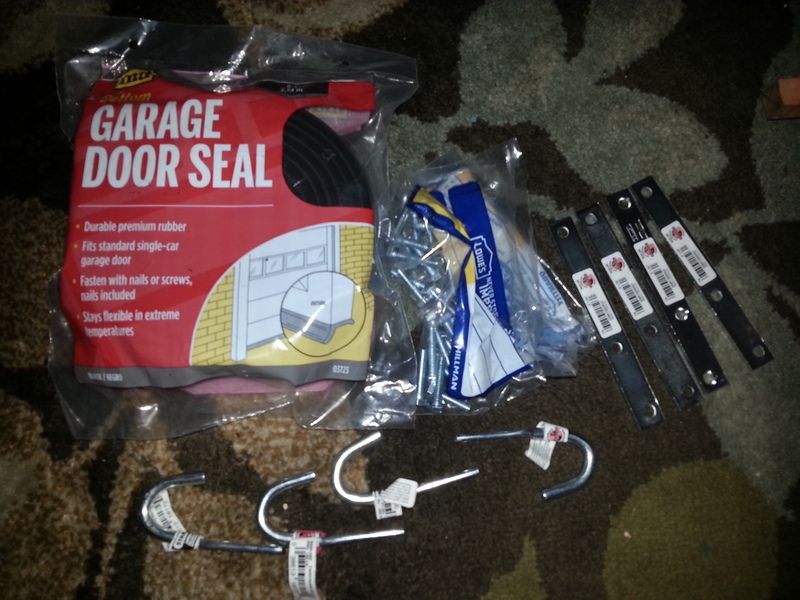
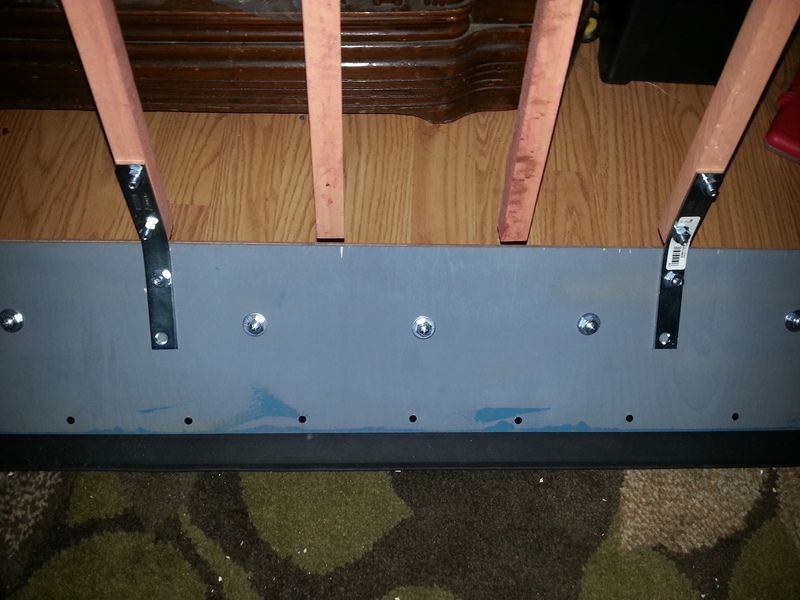
Then I sorted through a few ideas I had to actually get the sticks on a rack, and mount it to the car - my first idea was 1/2" water pipe, and then pull the galvinization off of them and polish it, then bolt them to 90* elbows and bolt it to the roof of the car. My next and more favorable idea was to get two pre-made cross-bars with feet already attached, long enough to reach the rain gutters on the roof. And I found just that on Ebay for $50. So I went for it. I've had the same rack before, but just used it to bolt a bike holder to. This one should be significantly stronger, since the wood center section will be bolted to it as well.

$(KGrHqZ,!k4E8m2ye7FYBPTUDEv,B!~~60_12.JPG


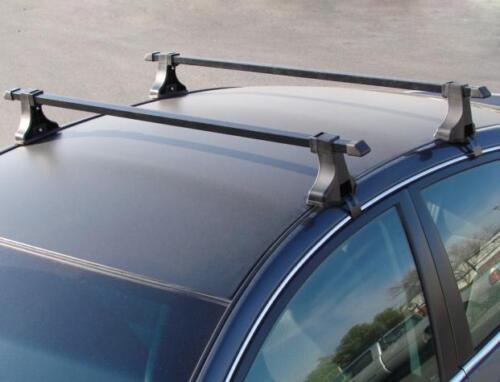
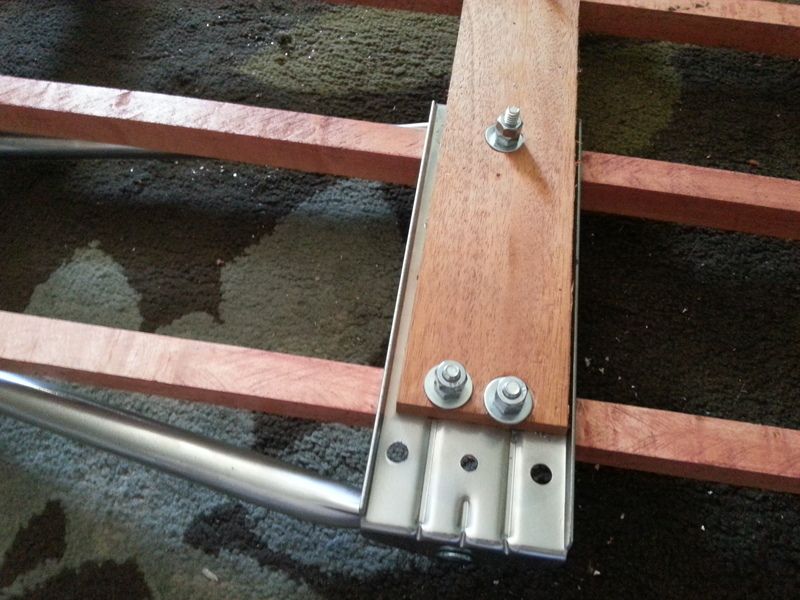
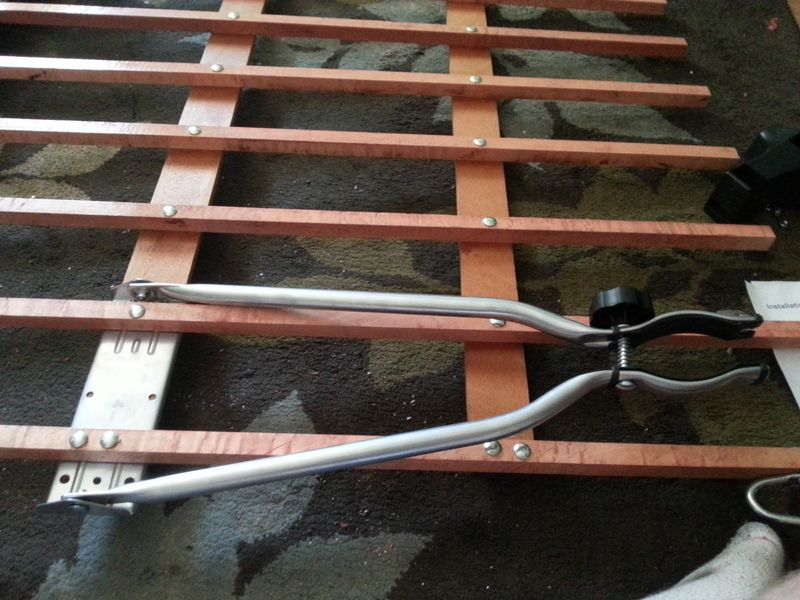
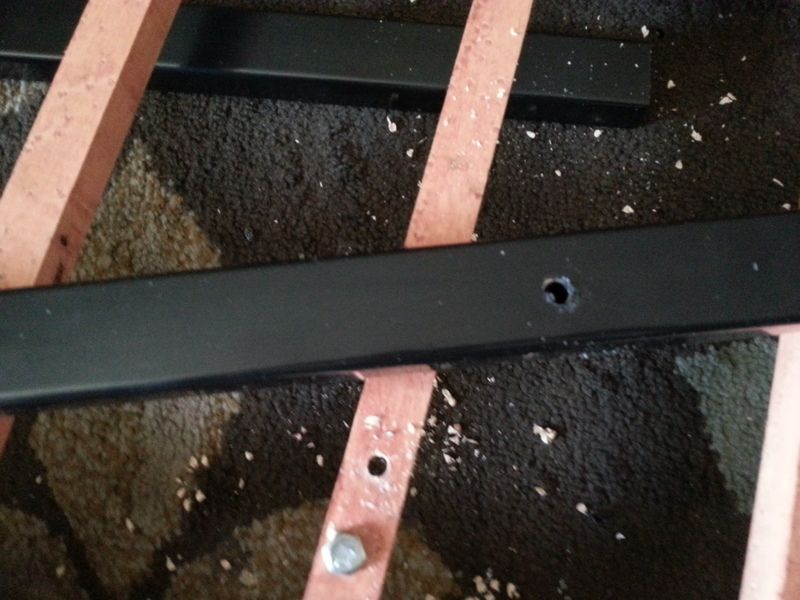
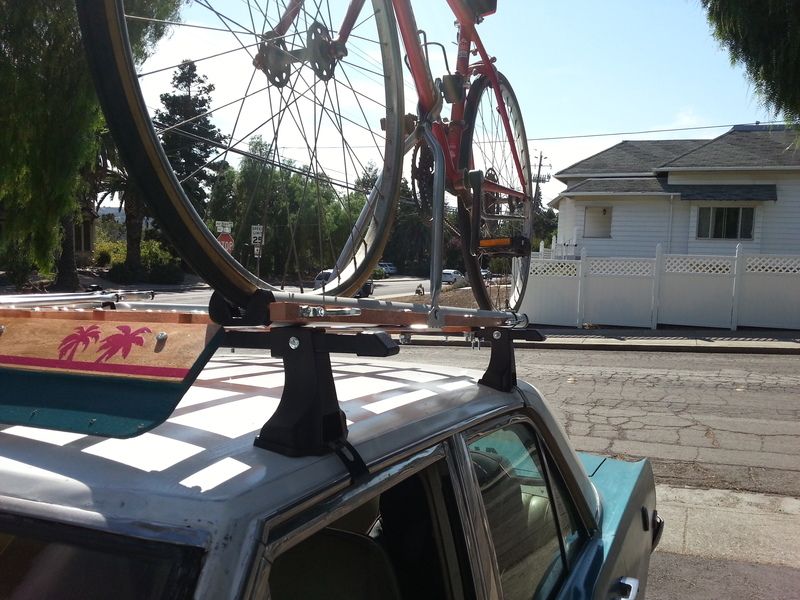
The cross-bars are rectangular so they will be way easier to drill holes into to bolt the rack. Then on either side of the wood rack will be one of these:

$_12.JPG


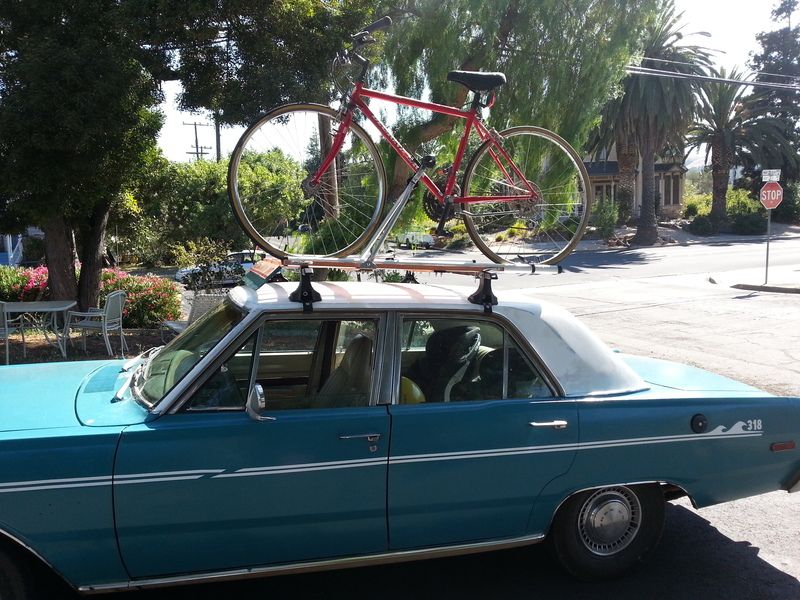
This will allow us to ship all the bikes to the state park for our ride instead of just being able to carry one.

So back to the rack...

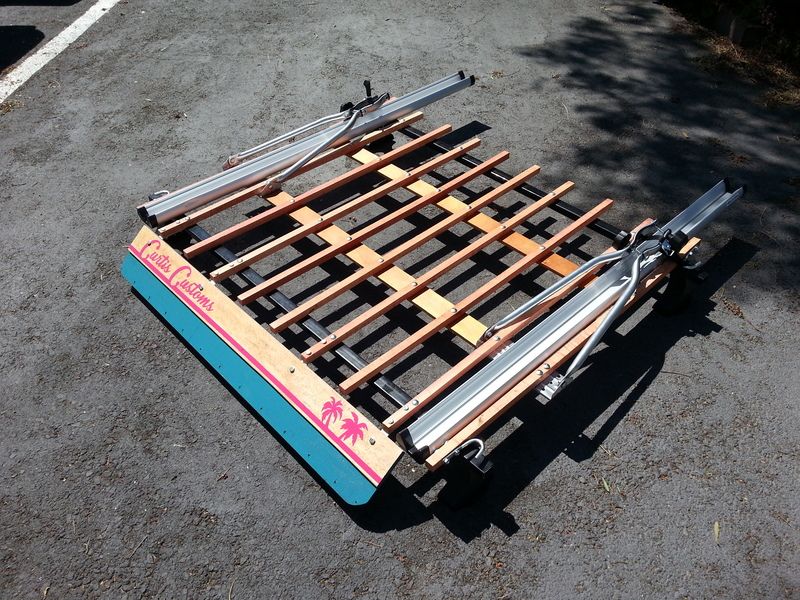
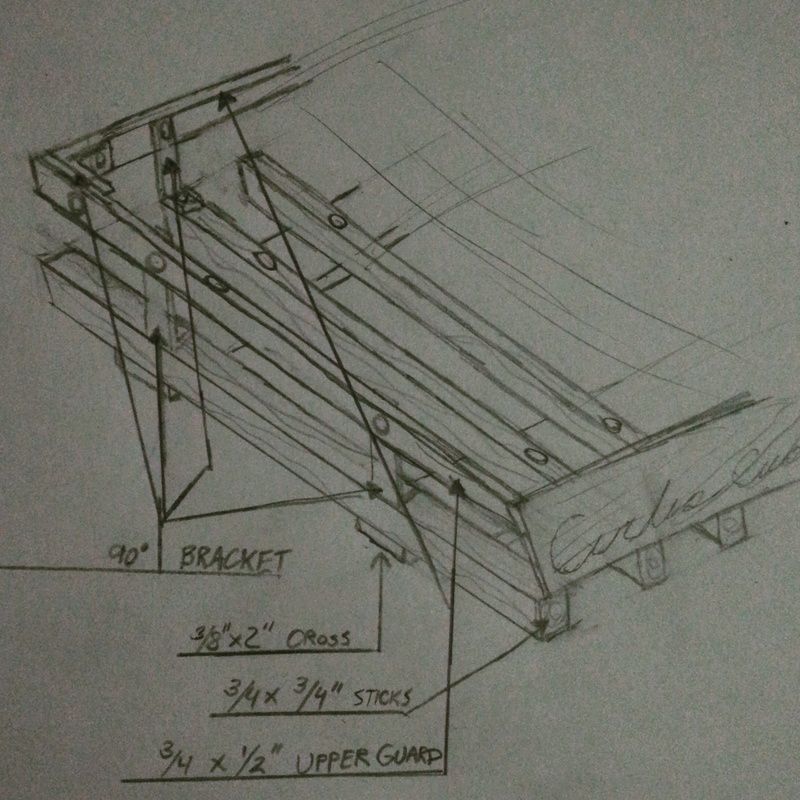
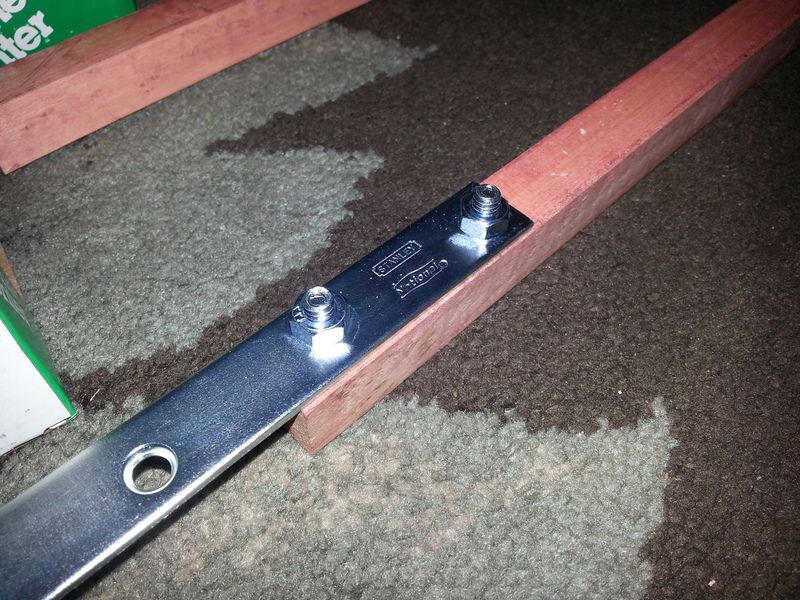
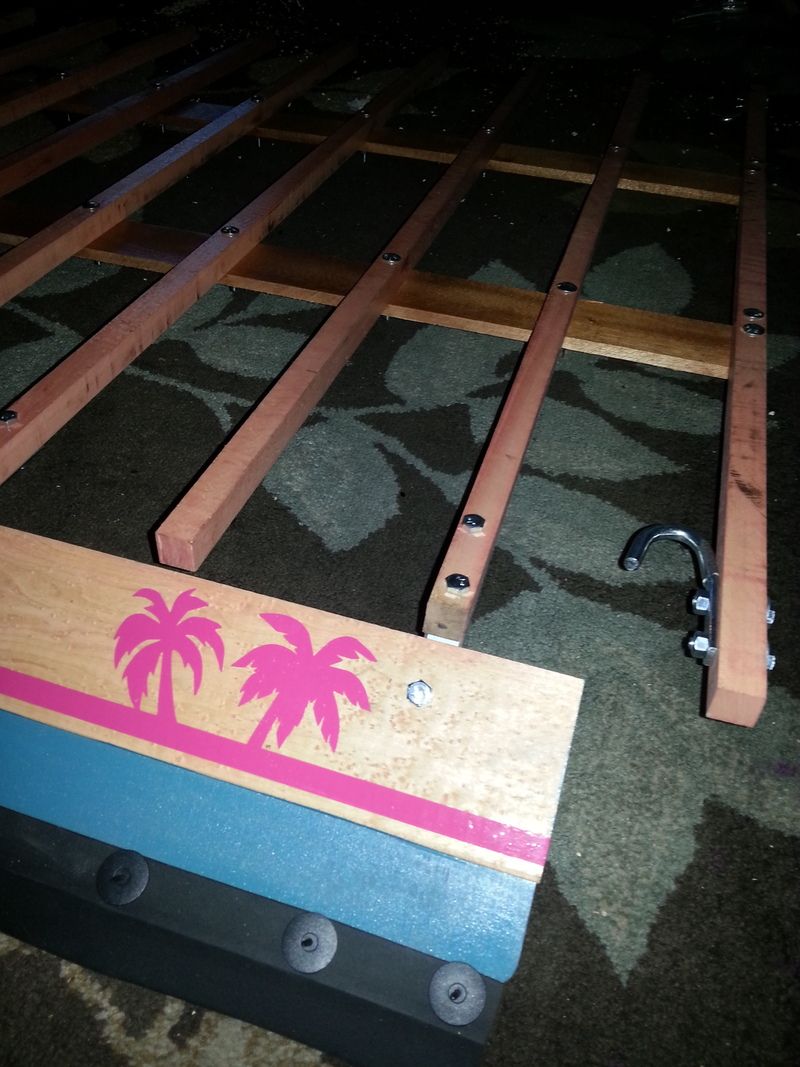
Now that i had my idea of what is going to happen, I went ahead with assembling the sticks, but wanted a center section to bolt them together, and add a little stability. The roof rails will be 36" apart to the maximum ends. So the sticks will overhang 2" on both sides. The bike holders will extend further.

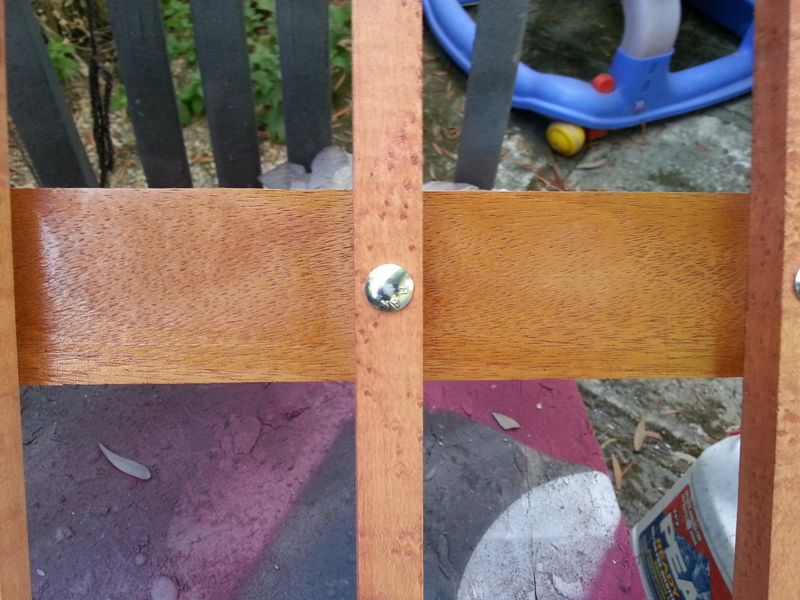
For the center bars, I made two pieces of African Mahogany, which was also laying around in the shop, these were leftovers from an old boat project, and I planed and cut them to 3/8" thick, 2 1/2" wide, and 48" long.

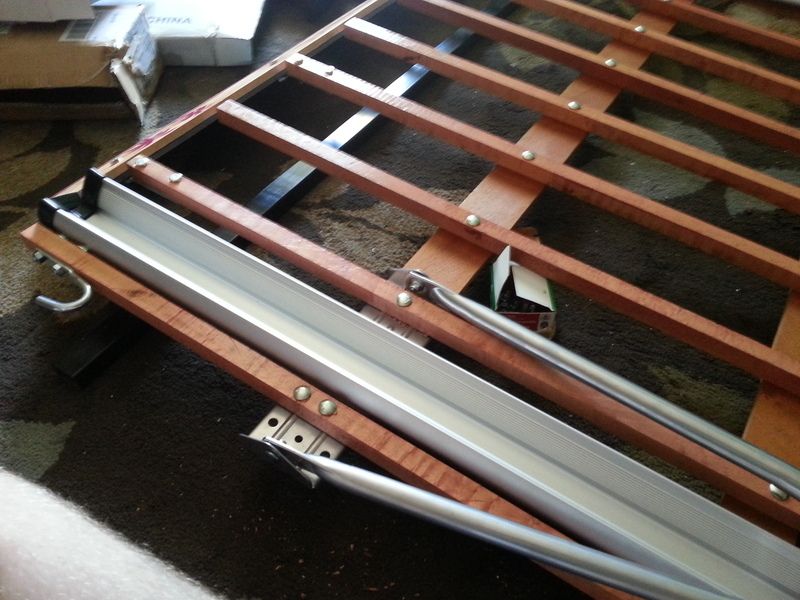
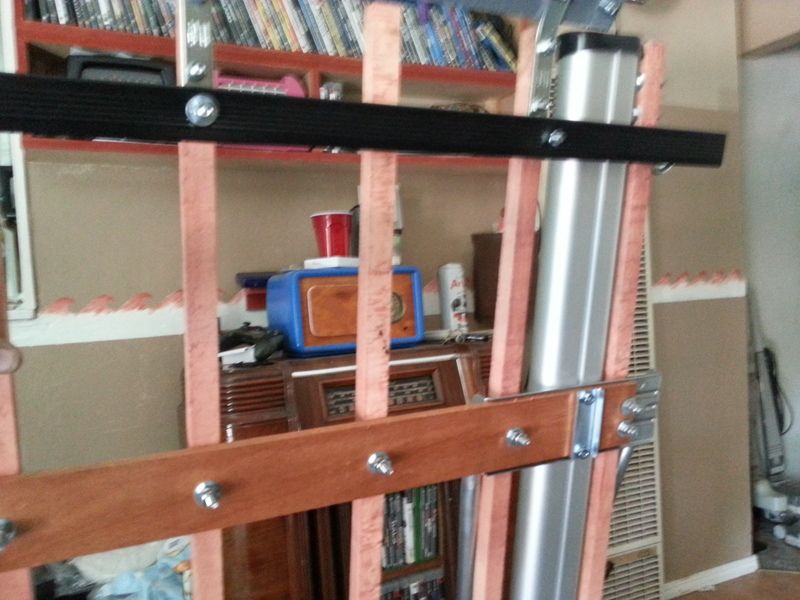
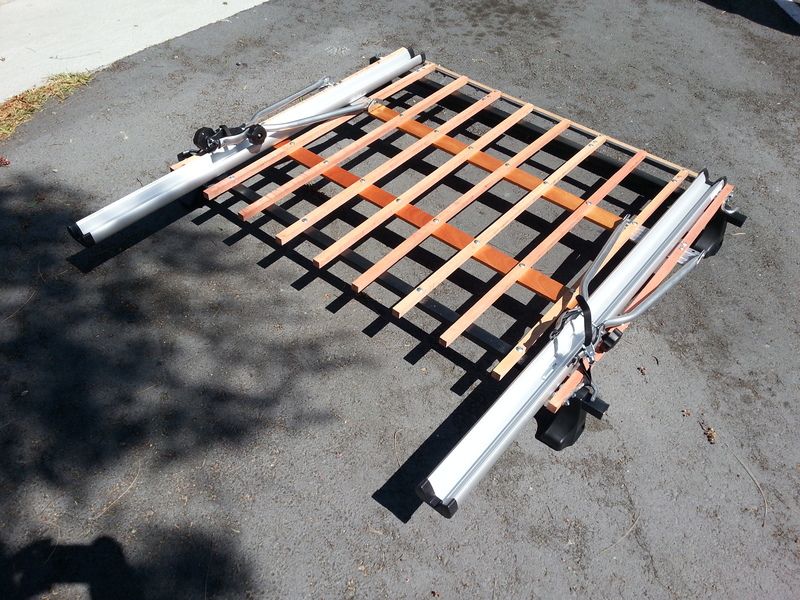
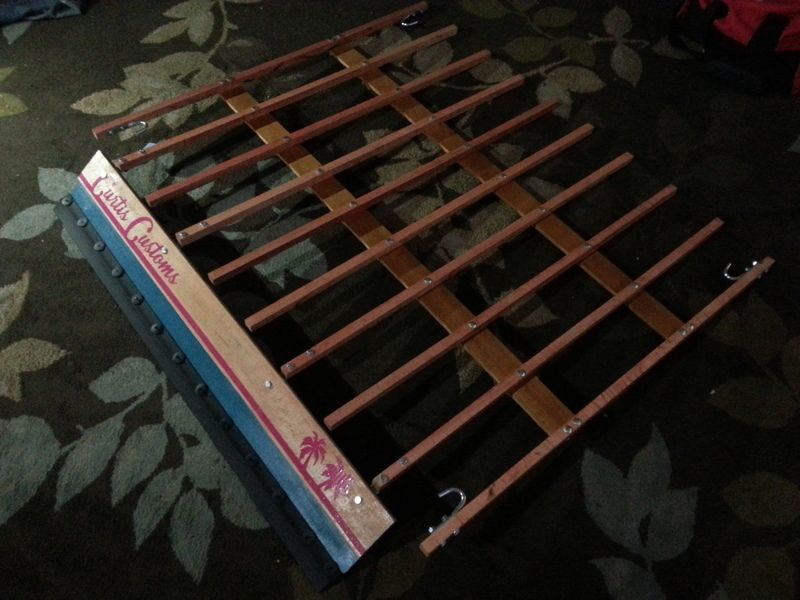
I laid out the whole assembly and glued and carriage bolted it together. The glue is to mostly keep moisture out from between the pieces so I didn't have to stain them at that junction.

20150707_160515_zpskyhwsxfb.jpg


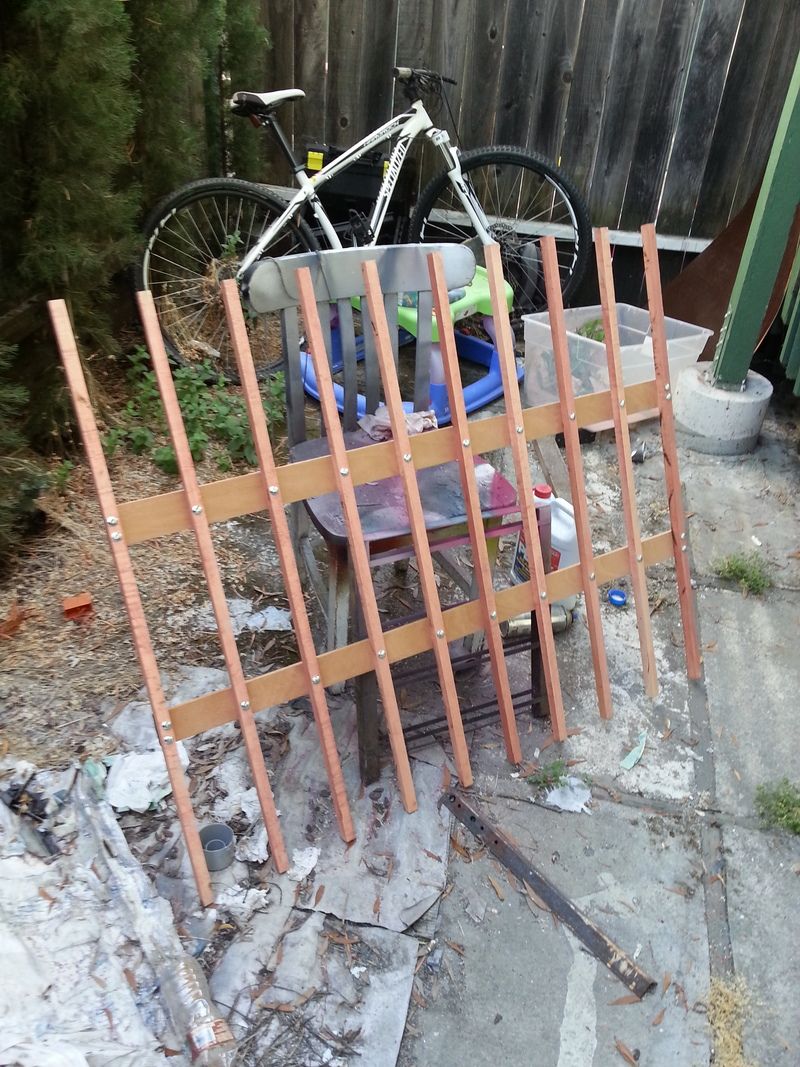
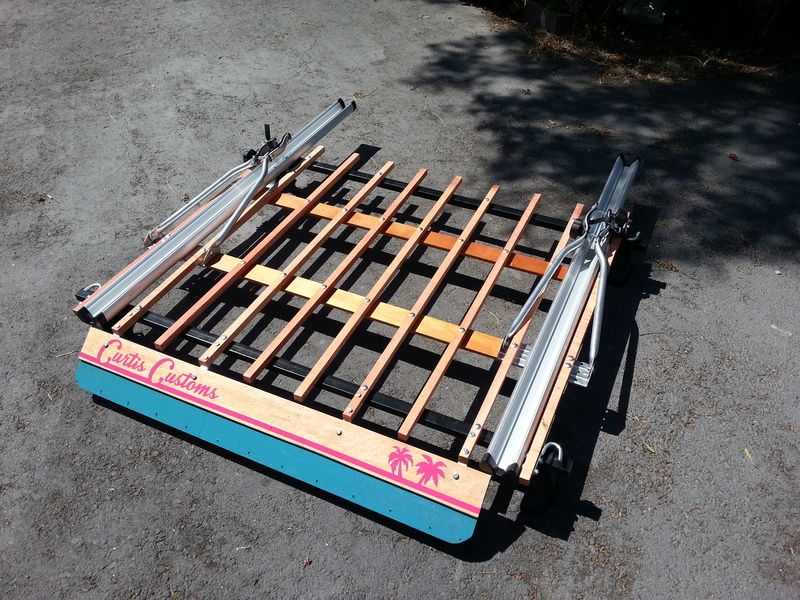
Then I used spar urethane over the whole assembly, and put on about 2 total coats of it, and it's good there I think. I'll recoat it tomorrow and call it a good seal.

And that's where I'm at so far...

20150707_161135_zpsss4t5gmc.jpg


20150707_161150_zpsclgvphru.jpg
 
Well, maybe this project is not everyone's cup of tea, but to those who are reading, it continues.

I created a custom fairing using 1/4" birch aircraft plywood, and a 1/4" piece of bird's eye maple that I planed.

20150707_143040_zpsysetxdaj.jpg


I primed and then painted the plywood the same color as the car, and then sectioned off where the maple sat so I could glue it on. I glued and screwed the maple on from the back with some stainless screws.

The maple was stained similarly to the sticks, and then spar urethane coated before it was glued on.

I also did some work and drew up a vinyl stripe, printed out on our vinyl plotter, and I wanted it reminiscent of old surfboard decals. I think it came out just like it should, and the pink vinyl against the maple looks super retro.

20150707_205626_zpslmf0kvha.jpg


My phone camera does no justice for this piece. It looks great.

20150707_205639_zpsqksvpjnl.jpg


20150707_205642_zps4ueqlnih.jpg


Update:
Well, got the front of the stripe done and it looks great.

20150708_160154_zpsny7arols.jpg


Then back on the roof rack...

I took a trip to Lowe's for the remaining hardware to mount the fairing to the front of the rack. I was thinking of just some fence post supports, and just my luck they had some that were about 6" long and only 3/4" wide so they would tuck under 4 of the sticks.

I also got an "EZ-Lip" which is commonly sold on Ebay as such, and costs $30.00 to add a front spoiler to any car, or as I like to call it - garage door seal... availabe for $8.00 and comes with the same material. So weird... In fact if you look at the picture on the packaging you can see that someone installed a front spoiler on the garage door for some reason.
This will allow the fairing to sit close to the roof, but not quite touch. The molding will take up the additional space.

Then I got 4 bolt on hooks, I figure for convenience, and they were only $0.79 a piece, then got the rest of my nuts, bolts, hardware etc...

20150708_183831_zpsiozolzgx.jpg


I bolted the straps to the 2nd to last outrigging sticks, and the 4th to last.

20150708_190103_zpsainy9ir9.jpg


I then bolted the fairing to all of them, and bolted my hooks on to the outlying sticks, one at each corner. This will be a good cargo net or bungee cord location if the need ever arises. The fairing doesn't quite go to the end because the bike carriers will be taking up the remaining space and stick forward of it a little bit. It's not going to be a super functional fairing as much as it is just to finish off the look.

20150708_194935_zps5wf5ivus.jpg


20150708_203054_zpsfh6fgj00.jpg


I also put on the garage seal, but the included spike fasteners are not working for this application, so I'll be swapping those out with stainless screws.

Once it was bolted down, I flipped the whole rack upside down and put gradual pressure on each side of the fairing to bend it a little. I'm not sure how much it needs to be bent yet, as I am still waiting on the cross bars to get here, but this is a start and I wanted to see that I could actually bend it to fit, and the answer is - it's not going to be a problem.

20150708_203951_zpsuwhpzmi3.jpg


As of right now, I see no real need to put bolts in the 2nd holes of the brackets, as the 4 in it currently are way more than tough enough, and there's no flex of the board away from the bracket.

20150708_204632_zpsgsyqdwrp.jpg


Getting there.
 
Dude.....you and your skills just suck dried up camel balls. Cause I caint do it too. You SUCK.

That looks awesome.

But you SUCK. lol
 
Dude.....you and your skills just suck dried up camel balls. Cause I caint do it too. You SUCK.

That looks awesome.

But you SUCK. lol

lol. Thanks. I appreciate it. I almost scrapped this project because in my head it looked stupid at one point, then I kind of altered it, and then steamed on ahead because it looked balls-to-the-wall awesome (in my head). Hopefully once it's mounted on the car it will look sweet. Either way it's still fun to make, and always nice to hear people like your work.
 
I think you could make a pile of dawg crap look good. Some folks just bees like that.
 
wow ...I am totally watching this thread.

That looks amazing and its not even done!!!

This creativity is amazing
 
Triple tough, Roll on paint job turned out sweet, decal is supper cool, and rack is killer. Wish I had the time and skills you do, along with a better half that is into MOPARS, good times.
 
Cool concept. Most of us could do the same thing and it would come off like a Red-Green job ( just need some duct tape on it somewhere). Your graphics and attention to detail really take it to custom car status.
 
Nice rack!

What are those funny looking trees in the first picture???
 
Nice work, cant wait to see it on the car.

You certainly have your own style when making stuff for your mopars.
 
Nice rack!

What are those funny looking trees in the first picture???

They're supposed to be palm trees behind a shark. It was kind of a silly - but awesome idea.

Also Red-Green job? I've never heard of that. This is like a 20/20 (looks good 20 feet away going 20mph) but, more like a 5/0. As long as you don't get your face in it, it looks like a sprayed paint job. You get close, you get kind of an orange peel look. I also spent way more time sanding and polishing than you would have spent to tape off the car, but I don't have a paint booth. Did it in the driveway for $62.00. The price was right.

Also thanks guys. I had to bounce so many ideas off my fiancee' before I had one I was "allowed" to do, and that was the beach-y theme. Before that I thought of a super-rust patina look, with a flawlessly painted roof and a tail stripe that was also high gloss, then just flat black, then I was showing her all kinds of stripes and graphics on mopars, and then thought of the "Hang 10" dart, and showed her that stripe, and she approved. So I drew up a cool stripe based on that. Except instead of a surfer, there's a "318" and then of course a shark. I was thinking of ways to end the stripe up front and someone was helping me brainstorm and said "how bout a shark, or an outline of some palm trees" and I said - why not both?

The roof rack idea I had because I always thought of those wood racks you see on beetles and stuff, and some other old cars, and I looked through ones for sale - none looked right. It needed one that fit the car.

I'm still thinking of other stuff the car needs to be a total beach theme car - probably all red wheels with no hubcaps, and some rear window blinds.
 
They're supposed to be palm trees behind a shark. It was kind of a silly - but awesome idea.


I was just poking at you because we don't have palm trees here.... (I was referring to post 1 picture 1 with the trees in the background) :poke:

They're like trees with testicles.... LOL! :happy3:

The logo is cool. :D
 
They're supposed to be palm trees behind a shark. It was kind of a silly - but awesome idea.

Also Red-Green job? I've never heard of that. This is like a 20/20 (looks good 20 feet away going 20mph) but, more like a 5/0. As long as you don't get your face in it, it looks like a sprayed paint job. You get close, you get kind of an orange peel look. I also spent way more time sanding and polishing than you would have spent to tape off the car, but I don't have a paint booth. Did it in the driveway for $62.00. The price was right.

Also thanks guys. I had to bounce so many ideas off my fiancee' before I had one I was "allowed" to do, and that was the beach-y theme. Before that I thought of a super-rust patina look, with a flawlessly painted roof and a tail stripe that was also high gloss, then just flat black, then I was showing her all kinds of stripes and graphics on mopars, and then thought of the "Hang 10" dart, and showed her that stripe, and she approved. So I drew up a cool stripe based on that. Except instead of a surfer, there's a "318" and then of course a shark. I was thinking of ways to end the stripe up front and someone was helping me brainstorm and said "how bout a shark, or an outline of some palm trees" and I said - why not both?

The roof rack idea I had because I always thought of those wood racks you see on beetles and stuff, and some other old cars, and I looked through ones for sale - none looked right. It needed one that fit the car.

I'm still thinking of other stuff the car needs to be a total beach theme car - probably all red wheels with no hubcaps, and some rear window blinds.

Yeah, David, what the Rusty Rat Rod said: Insanely jealous of your fertile mind and endlesly abundant talent for getting things done.... You suck...:blob:
 
Well, continuing the habit of sucking a lot, here's more.

:D

I was excited when I was done doing charity work helping the city restore a boat today, then came home and discovered three long boxes on the porch! YES! I went right to work.

20150711_133433_zpsqe1o0ml7.jpg


I got the bike carriers and trays out and assembled them. They recommended attaching the carrier part to the cross-members, but that would force me to attach the cross member in a position i did not want it, so i unbolted and freed the lightly glued surface of 2 of the sticks on either side of the rack, drilled new holes in the carriers, and mounted them down to the wood cross members, then reset the sticks on top of them. It bends up slightly to curve over but it's a 1/32" at most. You'd never notice it.

20150711_140343_zps8ycnume1.jpg


20150711_144537_zps8cvx0244.jpg


The mount by itself is not structurally that stable, but my goal in the project is to bolt as many things together as possible. I bought a box of 100 carriage bolts and I intended to use them.

The tray that goes across it would make up the rest of the structure.

20150711_144625_zpshw5158u4.jpg


I bolted the tray down to the bracket using the supplied "T" bolts that go through the bottom of the tray into the carrier bracket, and are relatively hidden. I did not like how that was the only thing really holding it, so I had another idea for that later.

20150711_145504_zpsfcyhi19o.jpg


I marked and drilled holes to mount the two cross- bars for the roof rack, which are a steel square tube, with a plastic cover over it.

20150711_150715_zpspww3wtl9.jpg


I through bolted those onto the rack and all the flex that the rack originally had - disappeared.

20150711_151949_zpsdmwel5i8.jpg


Sorry it's a blurry picture but that's apparently the only one I took.

Once both cross-bars were on, I finished my idea for mounting the other parts of the bike trays. I decided to drill straight through them and use a U-bolt instead of a clamp with T-bolts like they included. This is way sturdier.

20150711_154348_zpsje0mg4os.jpg


It makes it so that it is hard mounted all the time. They intend for the bike carriers to be removable, but I don't need that. They are also made in China, and are of exceptionally high quality compared to bike trays I've bought in the past, but the hardware supplied to attach them is severely lacking, but that's ok, because I have a lot of bolts remember?

Once both trays and carriers were on, I set the feet on it, but not bolt them down yet, and set it outside for a photo op before going on the car. Wow - that looks cool.

20150711_154846_zpsaeua1bbn.jpg

20150711_154849_zpsvk08rqrx.jpg

20150711_154857_zpsrhprxsji.jpg


Then just sitting on the roof - no mounting yet.

20150711_155104_zpsb5mjg9z8.jpg


For the feet, I liked the hardware they supplied to attach it to the "Window" of the car, but in my case they go on the gutters and it works nice. But the hardware to secure them to the cross-bars was no more than a clamp with a bolt in it you tighten against the foot base. That is also holding the tension to keep it on the car - no. That is a bad system, so I spent a lot of time getting it aligned, and made it tight without the rubber feet on, then drilled a hole through the foot and the rail and through bolted it together. Clamps would have been no good - it would fall apart.

20150711_162155_zpszn0p0rih.jpg


You can see the bolt going through it, I did that for all 4 corners, then loosened the clamps that hold the foot to the gutter, and placed the rubber included pads under them, and retightened. So the whole thing was about 1/4" undersized at that point so everything is super tight. You move the rack - you move the car. It is one unit if that makes sense.

20150711_163114_zpstegygaif.jpg


20150711_163722_zps7rxld7gd.jpg


Bike test. Everything fits nice and the carrier was in the perfect spot. It works very nicely. But i would not have trusted the included hardware. The kit itself and the main components are super nice, but the stuff to attach it - was crap. I made a good decision not to use it.

20150711_164613_zpsnornplnj.jpg

20150711_164627_zpsh3d14slc.jpg


20150711_190016_zpsmwbpz1n2.jpg


And it looks cool too.

20150711_190027_zpsmon6g5ri.jpg


Now someone else request one and pay me some money so I can build it again. That was a lot of fun.
 
Yeah, David, what the Rusty Rat Rod said: Insanely jealous of your fertile mind and endlesly abundant talent for getting things done.... You suck...:blob:

You shut up you old geezer. You suck too with your mad turbo skills. Always sayin you don't know anything about them. My big old butt.
 
I had this idea to make a old-school style rack for a long time, and driving around with it I have received a lot of positive response, and people who actually want me to make copies of it. I don't know about making exact copies, I'd make it a bit narrower to fit on any car, and figure out a way to make the feet adjustable to mount to any vehicle, and a less harsh bracket system.

I thought the idea was cool, but not revolutionary, but people want them for some reason. As such I am constructing a kickstarter. If people want them made, I'll make them. It's fun. I also have some plans I've drawn up for wood trailers, stakesides for modern trucks, etc... basically bringing back a dead style - with modern reliability; trunk luggage racks, wood deck trunk floor covers, wood cayak and small craft trailers, etc. I have a lot of ideas and drawings/ plans around for ideas I didn't think anyone would like but me. But I guess there are people out there.

20150713_083055_zps72lsqeji.jpg
 
Well, like i mentioned before, there's a lot of positive response for this rack, and I drew up plans for a few other racks. One person requested a rack for advertising purposes, and they have an 4 Door Valiant. They specifically wanted something they could "toss their skateboard and backpack up there without it falling off"

Well, message received - I drew one out and started building. Weather they buy or not, I am still making the rack. It is basically a short spare tire carrier style rack.

It's a narrower version of what I made previous, and putting the wind fairing on top of the cross-sticks, with a side rail on each side, and a back rail. The side rails will be mahogany and the cross-sticks will be maple like before, and then a 1/4" aircraft ply fairing up front.

Here's the quick sketch I did - hopefully this makes it easier to understand where I'm going with projects since i suck.

IMG_20150719_181246_zpsjaerq8ps.jpg


I made just a few pieces today, as I was really gearing towards finishing the "Joltin Joe" which was a Chris Craft gifted to Joe Dimaggio by the New York Yankees while he was married to Marilyn Monroe. So that's a big to-do as the boat show is friday and everyone wants to see it. There's still about 4 people cranking away on it late into tonight.

Anyway, back to the rack...


I picked out and planed one piece of Phillipine Mahogany that was reclaimed from an old boat restoration and made that 3/4"x3/4" and then cut it into three pieces at 32" long.

Then i cut out my 3/4" birds' eye maple cross-sticks, but made them 1" wide this time, so they're 3/4" thick, and 1" wide which makes the washers on the nuts look better. It's more centered.


I also got a piece of African Mahogany, to do the side rails, but only cut the rear one today. It's 32" wide, 1/2" thick, and 1 1/2" tall, which will make a good side rail size.

I think I may still stain the maple in this build, but i have three colors going here - maple is fairly white, phillipine mahogany is dark red/brown and african mahogany is kind of orange.

I went for a semi gloss polyurethane this time.


I then laid out a new pattern so i could drill all the holes in every single lower piece without having to stack the sticks to get them all the same. It works good. The spacing is all the same, and it leaves about 5" of the stick hanging out on each end of the cross beams, and a much smaller gap between the sticks. This time they're about 3" and will have 8 sticks total. Right now i only have 4 cut though, the rest I will possibly get tomorrow.


You shut up you old geezer. You suck too with your mad turbo skills. Always sayin you don't know anything about them. My big old butt.

Rob,

Thanks for your all-too-kind comments, but I am not kidding; what little I know about turbocharging I learned from you guys on FABO, and the braintrust over at the Slantsix.org site. I did read a few books in the six years I have been interested in forced induction, but at my (advanced) age, you don't retain much of the printed word, unfortunately.

The "they" I refer to in this article, are the two guys who thought-up this combination I am using, and whose cars I basically, "cloned." Their help was critically-important to the completion of this exercise... More about them, later...

FORTUNATELY, a good friend has been helping me over some (mechanical) rough spots, and the car is race-ready, as we speak. We just finished installing some Yukon axles, and a spool in a 2.76:1 third member that I had lying around the garage. He has experience with CalTracs (I DO NOT,) so he adjusted them for me, and machined some wedges to go on my axle pads to reposition the rear end for a more correct pinion angle. That 2.76 is the gear ratio utilized by both their similar, 500 horsepower slant sixes (the ones that I know about,) and the owners both contend that, after experimentation, they both found that their cars run quicker and faster with that ratio than any other rear end gearset. Go figure... I always liked 4.56's/4.88's...

Proof that I apparently have NO UNDERSTANDING of how this all works...

So far, I have made a bald-faced effort to copy, closely, EVERYTHING they have done, because I just am not smart enough to figure all this stuff out on my own... so, I copy the ones who have gotten it done, already. Nothing succeeds like success!!!:cheers:

See, Rob, I didn't come up with ANY of this on my own; it's ALL "copycat" mechanics.

Sorry to disappoint anyone, but the fact is, I was a babe in the woods... FABO member Tom Wolfe took me by the hand and showed me all the details of building a successsful turbo slant motor, with some very important additional help from FABO's Ryan Peterson (10.74 @ 127 mph.)

Shame on ME, if my car doesn't run at least, within a second of them.... They told me how to do it...


Dick Curtis, I apologize for hijacking your impressive thread... I am sorry.
 

Attachments

  • 100_4007.jpg
    23.3 KB · Views: 173
-
Back
Top