The Brick, 1972 Dodge Dart Custom

-
20131215_163300.jpg


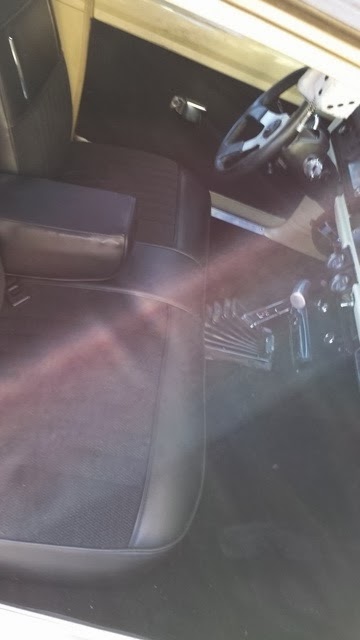
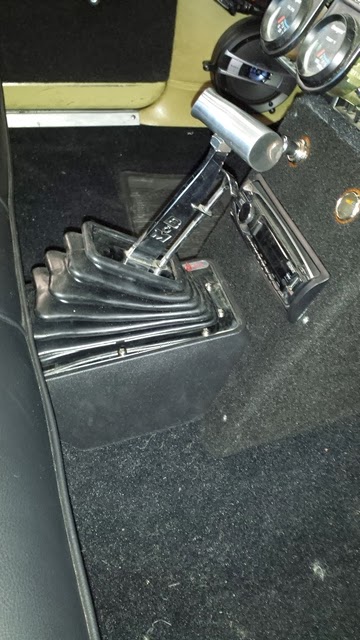
Oops, forgot one. Now, waiting on my Dremel that I am getting for Christmas so I can cut the shifter console. That thing sits right against the front of my seat, so I have to trim the back of the console off.
 
Well, Merry Christmas to me. Got a 20gallon upright compressor, 1/2 impact wrench, and a DA sander for Christmas. And I picked up an Addco 675 Rear swaybar for myself so I could finish off the suspension and handling rebuild, and get ready for dual exhaust.

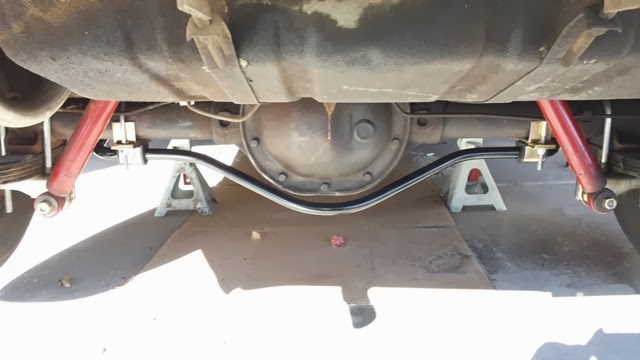
Installed the sway bar today. All in all, it took me about 2 hours. Had a bit of an issue on the passenger side - the end link to fram mount wanted to go right where my fuel lines are. After some gentle persuasion on the fuel lines, I managed to move them just far enough out of the way. The instructions on the Addco bars are a bit lacking, but it's easy enough to figure out.

Going to hit the showers and then take the wife and kids to Dave and Busters. I will be back on the shifter housing trimming tonight. Need to grab up some of that black roll carpetting that I used on the door panels to cover the housing. Still thinking of building a side slung mount to put some cup holders in......but just thinking for the time being.

swaybar.jpg
 
@03jeepjeep - haven't taken it out on the road after adding that rear bar, but the front one I added really made a difference. I can only imagine that the back one will to :)

I might take it out for a drive here in the next few days, as I am off early today, and don't return to work until Jan 6th (yeehaw). Have to rewire one of my brake lights first - Phoenix cops aren't too forgiving when it comes to brakes lights not working.....lol. I am also going to be finishing off the shifter housing - got a few more trim cuts to make and then cover it with carpet......

Thanks for the info. Ive been looking at getting them but didn't know how well they would work. Great build!
 
I love being able to work from home......gratefully, my employer doesn't need me in the cube farm....at least for right now.

I snuck out to the garage, taking my brandy new dremel with me, and trimmed the shifter housing to fit back into the car.

20131231_103400.jpg


Nice and snug again. Just need to vacuum the carpets after the install, and pretty much the interior is buttoned up, except for the headliner. I am taking that to Phoenix Finest and my boy Anthony can do that for me. I am not wanting to mess with it. LOL

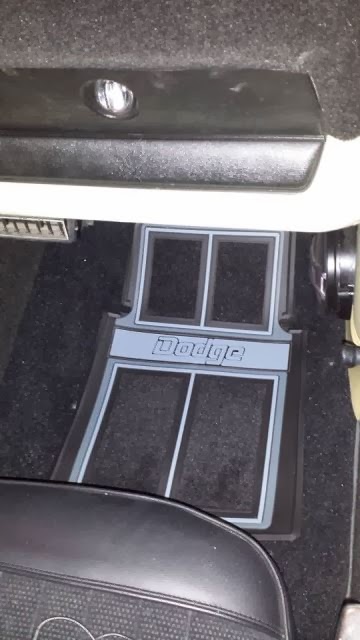
Found some pretty nice floor mats on Classic Industries that I just ordered, to protect the carpet.....So glad the interior is coming together.
 
Thanks for the info. Ive been looking at getting them but didn't know how well they would work. Great build!

I think I have the Addco 150 up front, and I know the 675 out back. The front really stiffened the ride up, but I might have a slanted view because I installed it right after rebuilding the front suspension and disk brake swap. I used Mopar Performance SS springs out back so the ride in the back is already stiff. I never really noticed any heavy roll, just wanted to shore it up a bit. Honestly, even before the rear bar, this thing rode nicer than the wife's Yukon....lol
 
Took the Brick out for a spin tonight. Had to go put gas in it anyways.....let me tell you, adding that rear swaybar made a HUGE difference. No body roll at all, and it rides really smooth. Now to run down that passenger rear brake/turn signal light issue....didn't get the time to check the power in from of the rear seat this weekend.......I will get to it next weekend.
 
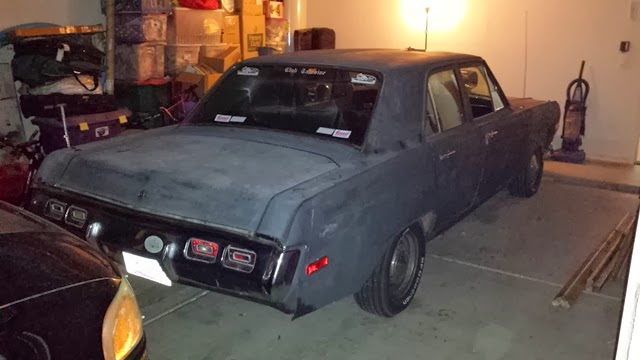
She's a bit rough on the outside. Just your basic 4 door in faded primer black. Hoping to polish off the body work this spring and have her painted. Have to finalize the interior and get the door handles shaved first......:)

Oh, and Christmas after Christmas......my spiffy new floor mats came in from Classic Industries.

floormats.jpg


Will have my shaved door handle and power window kits, hopefully, here in the next month.....
 
Figured I'd post a new picture of the outside of the car. Have only done some real minor body work, and more is yet to come.

Brick.jpg
 
Welp, finished finding where my brake light issue is - power getting to the column, but nothing coming out....so ordered a new MOPAR repro column turn signal assembly, and figured since I was going to have to tear that down, I would do what I wanted to do with the dash cluster in the first place - white gauge faces, replace all the lighting the cluster with green leds, replace the cluster voltage regulator, and then replace the ignition lock.

One of my buddies who is the electrical guru is going to come over so we can hammer out the power window and shaved door handle kit I am going to need, and then we are going to rebuild my door hinges for the front doors.

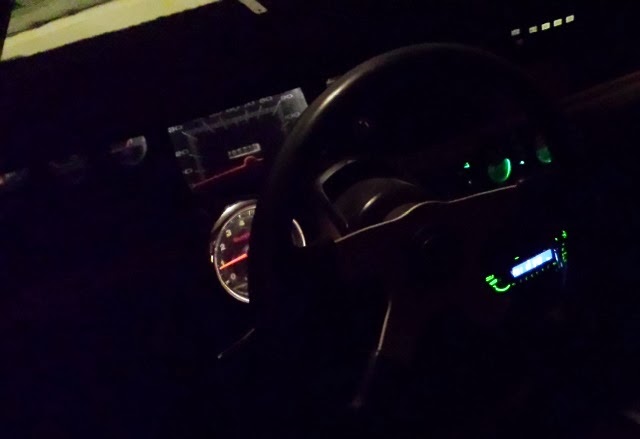
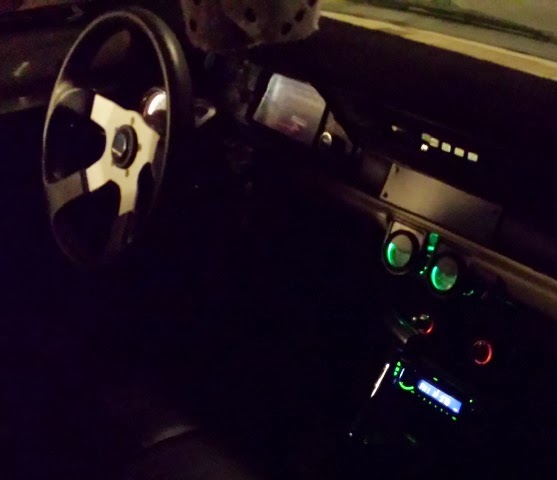
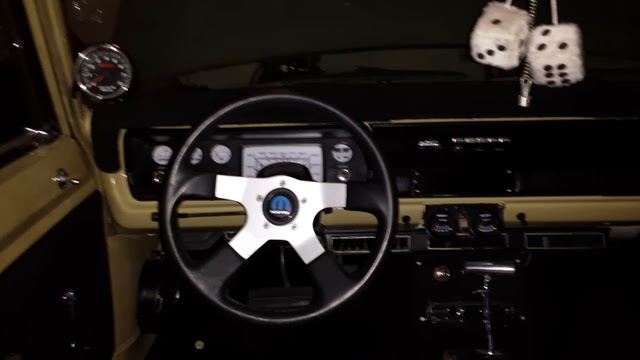
Snapped a couple of night time pics of the dash area of the Brick, while I was futzing around and letting the car run for a bit.

Still think I want to relocate the tach back up on the A piller.....it just seems out of place where I have it.

The little radio "delete" plate I made will be home to the power window switches, and I am going to run down an under hood fuse and relay block to mount all the electricals on it.

I think next weekend there is a plan to hit the local junkyards, so maybe I will find one of those diplomat trunk releases.

Dashlights2.jpg


Dashlights.jpg

 
Really like what you've done to the ride. Looks great!

Congrats on the new spot and time to work on it, too.

I do have to agree with a previous poster (147?). You have your proportioning valve on the line of the master cylinder (big reservoir) which should be going to the front disc brakes. The small reservoir is for the rear drum brakes and is the system that should have the adjustable prop valve on it. I read where you said it works good, so probably no worries, but you definitely need to make sure that line coming out of the larger reservoir (closest to the firewall/driver) is going to the disc brakes for fluid provision/supply as those pads wear, or you may end up sucking air instead of fluid as time goes on.

Looking forward to seeing the rest of your build!
 
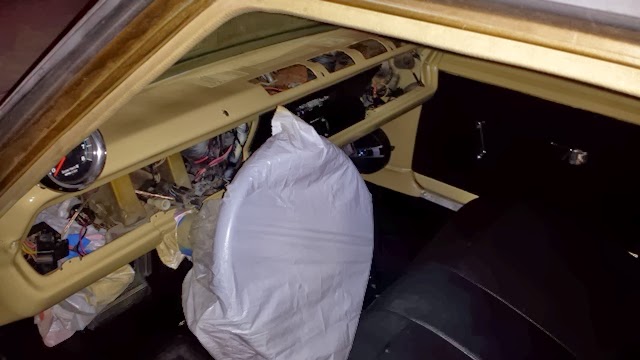
Okay, I did the dash in 2012, in the summer. I grabbed whatever color spraypaint was closest to the interior color, 1972 Y4 Light Gold, (it was not even close). Seeing as I was working on the low dollar, I went head and did it up, repainting the dash with the tan color I got, and then redoing all the plastice trim, etc. Well the dash cluster got all beat up going back in and I wasn't happy with the color of the metal part of the dash.

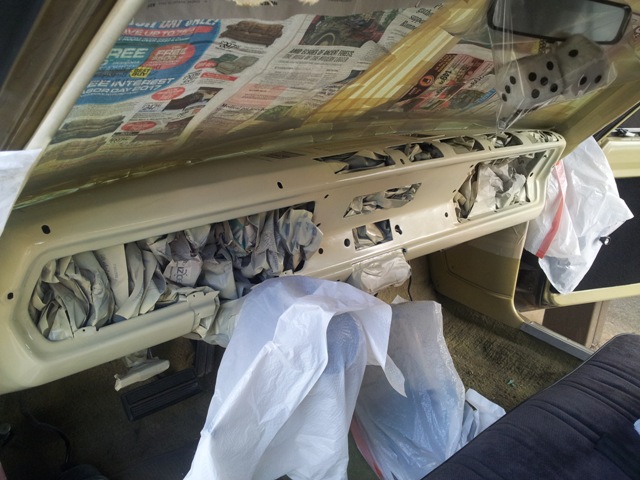
I decided that I needed to redo the dash, and this weekend was it. I wanted to replace the voltage regulator, install white gauge faces (makes them easier to see) and install LED lighting to the dash. Ran to Arizona Paint Supply, and they took a pint of actual Y4 Light Gold and pushed it into spray paint cans for me. I went home and proceeded to take the dash apart.

After I got it all apart, I went over the tan paint with a green scrubby pad (scotchbrite or the knock off) and then masked and taped everything off.

I also didn't like the column placement of the tach - so I put it back on the pillar.

I shot it in the Y4 and oh boy did it make a difference.

20140125_184037.jpg


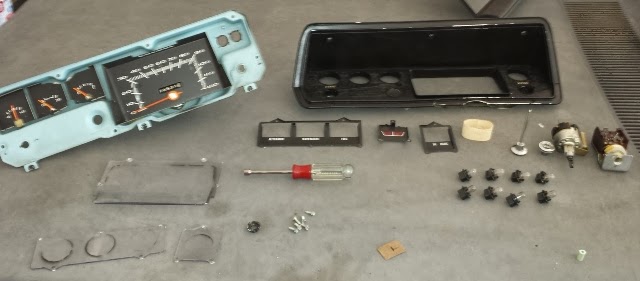
I then let it sit for several hours as I went ahead and touched up the ac/radio trim, and took apart the instrument cluster.

20140125_132110.jpg


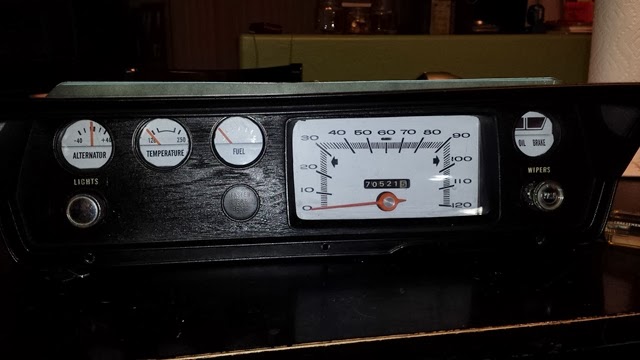
Using alcohol and tons of elbow grease, I got the paint overspray off the lenses. I then mounted the white gauge faces, that I sourced off of Ebag.

As I was assembling the dash cluster, the plastic welds, which I had to cut to take it apart, were repaired with plastic welder (a high tech model glue that basically melts the plastic together).

20140125_233044.jpg


At about 10 pm tonight, I went ahead and reinstalled everything. Here is the result:

20140126_011144.jpg


Here's the color from the last repaint

dashtan.jpg


As you can see, a real big difference. Best part is that it is all back together now, looks good, and looks right.

Now to just get it to the upholstery shop and get the headliner installed. Emissions and plates first though.

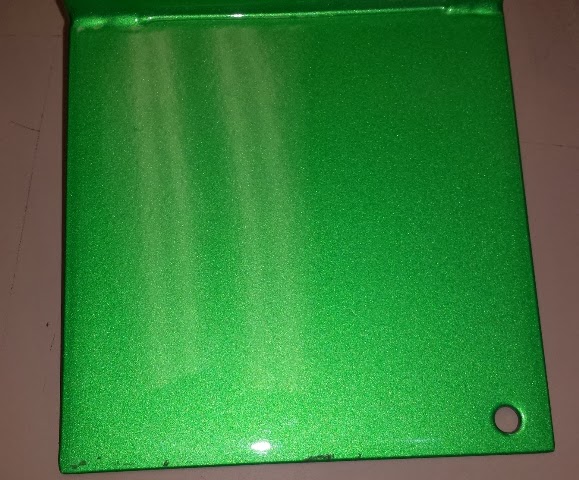
Oh, and a side note. Went to the Moparty in the Desert the weekend before. Wife say sublime green Dusters and has declared a color change on the exterior. I like sublime, but I like metallic flake paint, so we decided on sour apple metallic.

Color sample from the paint shop
20140125_095009.jpg


Well, that's it for the weekend. Still no passenger side brake or turn signal. I reversed the polarity of the electronic flashers and have turn signals now, except that one rear light. I just don't think it is getting enough or any voltage. With the turn signal on, it gets a light flicker - has to be a short to ground somewhere.....Oh well, that is for another weekend.
 
Really like what you've done to the ride. Looks great!

Congrats on the new spot and time to work on it, too.

I do have to agree with a previous poster (147?). You have your proportioning valve on the line of the master cylinder (big reservoir) which should be going to the front disc brakes. The small reservoir is for the rear drum brakes and is the system that should have the adjustable prop valve on it. I read where you said it works good, so probably no worries, but you definitely need to make sure that line coming out of the larger reservoir (closest to the firewall/driver) is going to the disc brakes for fluid provision/supply as those pads wear, or you may end up sucking air instead of fluid as time goes on.

Looking forward to seeing the rest of your build!
See, now you guys got me worried about it - The brake setup is off an Aspen, both front and rear, and the prop valve was not available when i got the front and rear setup. I have the prop valve on the front brakes......hrm. I had the brake system checked for balance at a shop and they said it was fine. I will revisit this, for sure. Should be a simple swap between the 2 brake lines, with some new bends.

Thanks for pointing that out!
 
I didn't notice you had a build thread when you were posting on mine. This is definitly a sick 4-door. I like what you're doing so far.
 
Thanks man - I keep plugging along. A couple of friends and I are in the process of shaving the door handles and installing aftermarket power windows......way too much wiring for my blood. :)

doorpanel.jpg


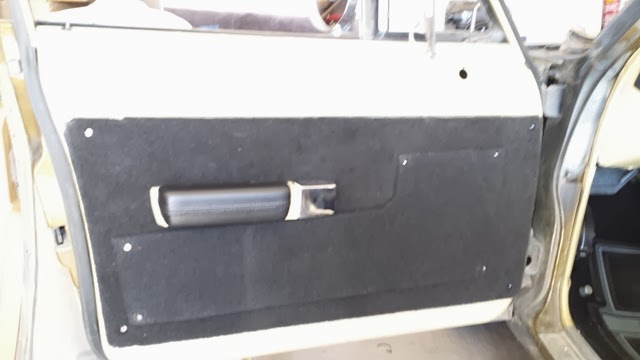
Interior Door panel redo - I recut the actual panels in 1/4 inch MDF. I had to create some spacing for the power window motors. The switches are going into the center of the dash, in my radio "delete" plate. The 68-72 4 door use the same armrests front and rear and since I could not locate my original bases, I picked up a full set from Mr Moparts. I shot the bases in the same GY4 golden tan that I have on the rest of the interior. I also picked up new defroster vents that are going in as I finish up the dash wiring for the remote setup for the shaved door handles.

kickpanel.jpg


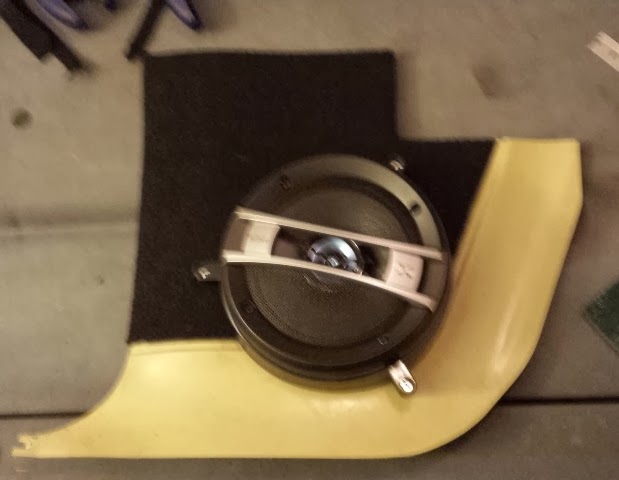
I carpeted the kick panels to match the new colors of the interior. Nice touch and super easy to do. The speaker mounts actually aim the speakers toward the passenger compartment and up towards the passenger. Nifty ABS kit I picked up from an online source. Made mounting the speakers a lot easier than having to cut the panels.

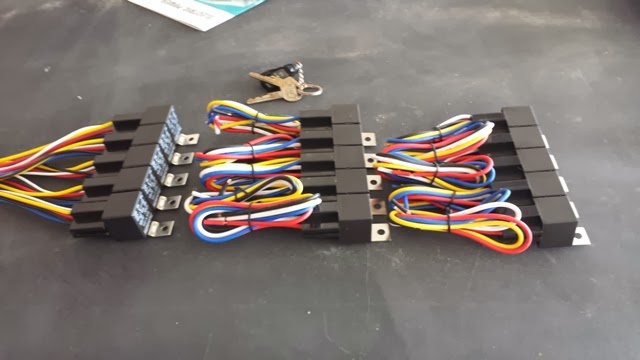
pileorelays.jpg


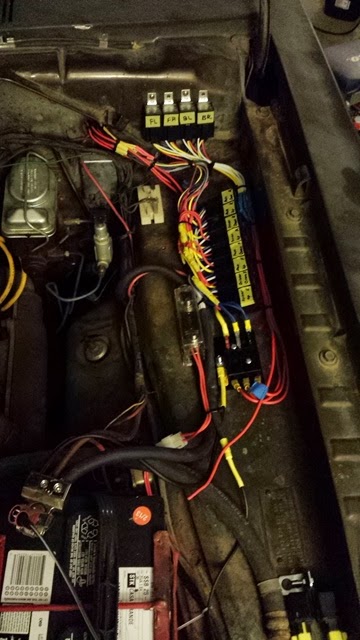
Here is the mess of relays I am using for the power windows and door solenoids for the shaved door handles. 2 for each window (8 total), 4 for the solenoids, and 1 for the trunk release I have yet to pick up.

relaymounting.jpg


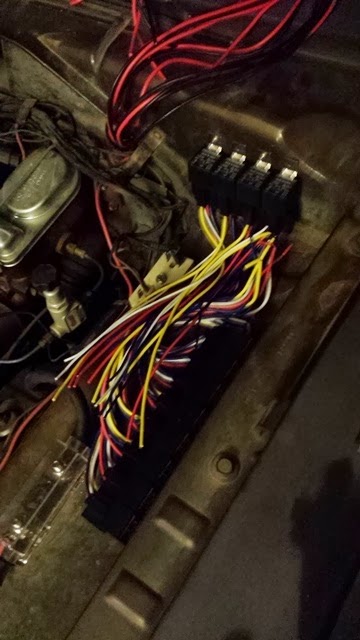
Relocated the ballast resistor to the fender well, and mounted the relays to the firewall and the fender. I am putting in a fused distribution point so that I have a centralized point to fuse and distro power to all of these accessories.

Been plinking away at this for the past few Sundays. Tomorrow, I hope to have the final wiring done in the doors, and then mount the window motors before finishing the door panels.
 
I was looking into those flexible window crank motors, but it always seemed like they were intended for modern door panels that had depth to them. Did the 1/4" of space with the mdf give you enough clearance for the wormgear?

Also, I painted my B pillars in the middle of the car white on the bottom to continue the door panel look between the two panels. It looks like you could put carpet there to match the theming on the kick panels. I need to find a way to get the gauge cluster out so I can repaint my dash too.
 
Yeah, the extra 1/4 inch clearance was all I needed for the colibri style. I intend on posting some pics on what I ended up doing to give enough space for them. The dash cluster isn't too hard to get out on mine, but its the short box one.

Posted via Topify on Android
 
Okay, here is the weekend update:

door+solenoids.jpg


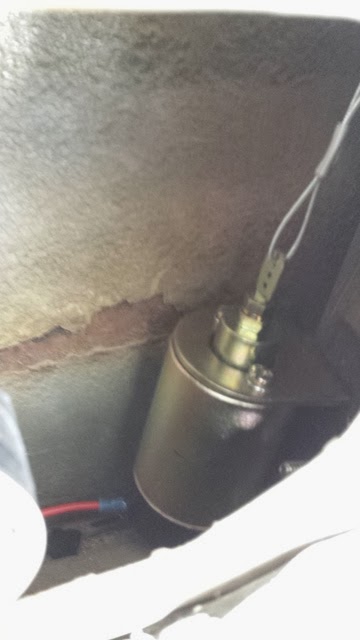
Shaved door solenoids installed and tested (still have to hook up the controller and the microswitches). Wired through 4 relays with a manual safety release.

frontpwindow.jpg


rearpwindow.jpg


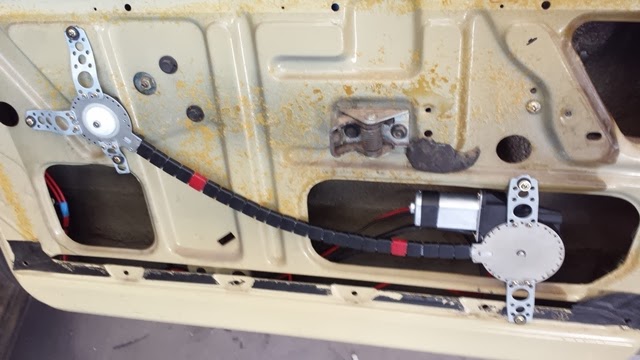
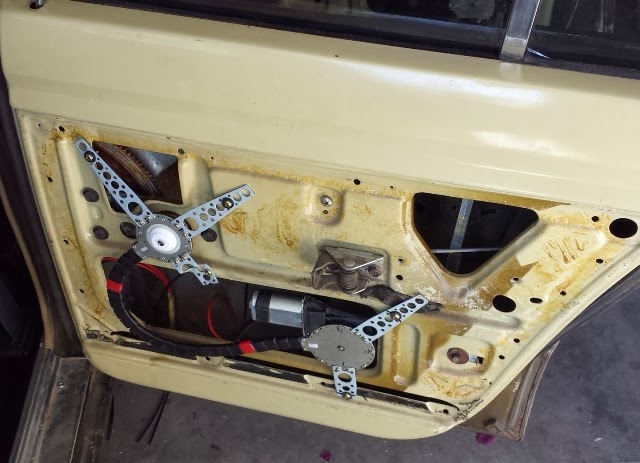
Front and rear power window motors mounted, wired, and tested. Wired to dual relays per window, and wired to the dash mounted switches.

And the wonderous joy of the underhood wiring. I had thought about hiding all of the relays in the center console, but that would have been a total PITA, so went with underhood mounting instead. I will be using some large black loom to clean it all up.

relaysunderhood.jpg
 
-
Back
Top