Great work as always Don!The OEM seal had 3 holes for the machine screw to pass through to the frame
View attachment 1715990743
I used my gasket maker kit (various size punches) and punched the access holes in the rubber seal.
View attachment 1715990742
The old hardware
View attachment 1715990744
The new stainless steel fender washer and pan head 1/4 inch machine screw. They’re nowhere identical to the origibal hardware but will do the trick!
View attachment 1715990745
The OEM rubber bushing fit in the hole in the glass, probably to make sure the machine screw doesn’t touch the glass. The white plastic spacer should do the same job. It is longer than the rubber spacer so I cut all three down
View attachment 1715990746
And after fighting with the glass, new seal and frame. It is all assembled ready to install into the tailgate
View attachment 1715990747
You are using an out of date browser. It may not display this or other websites correctly.
You should upgrade or use an alternative browser.
You should upgrade or use an alternative browser.
65 Dart Wagon Conversion to a Sedan Delivery
- Thread starter 65 Dartman
- Start date
-
I suck SO bad at fabrication, but you make it look so easy. lol
Thanks but it was all trial and error. I did end up messing a few up but in the end, it all worked outI suck SO bad at fabrication, but you make it look so easy. lol
A Mopar buddy and I had mated the 42RH with the empty 273 to the K Frame and installed it to the body several months ago. i then had installed the radiator, power steering cooler and auxiliary transmission cooler for mock up of wiring and cooler lines
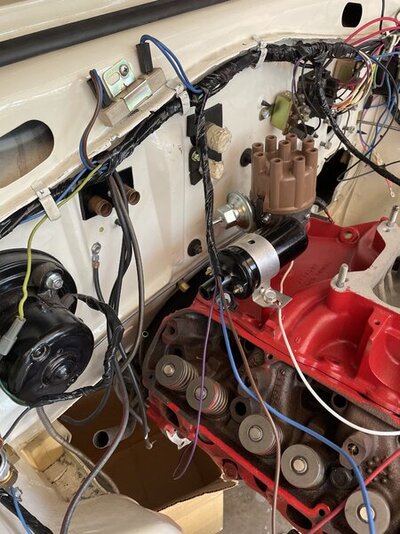
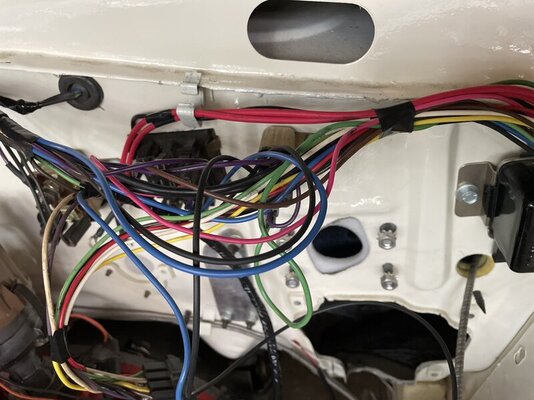
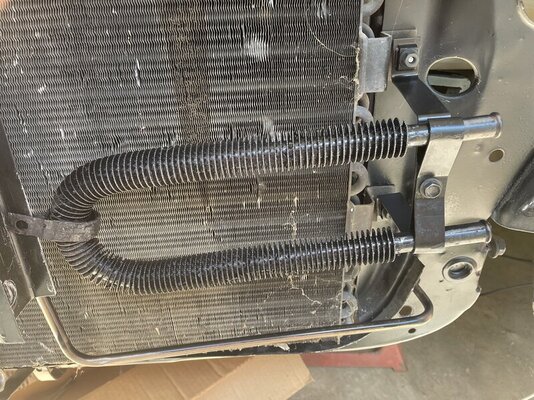
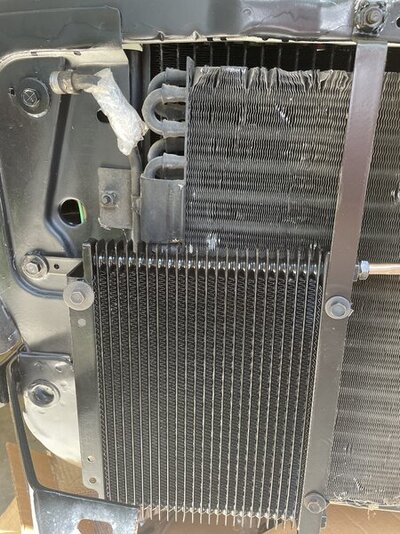
I have finally finished all the mock-up so he stopped by to help with dropping the motor, transmission and K frame out the bottom the same way we installed it a few months ago - they say practice makes perfect so that old saying is so true!
Now I have an empty engine compartment again.
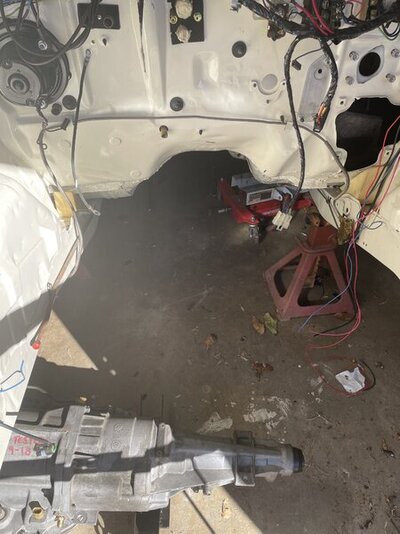
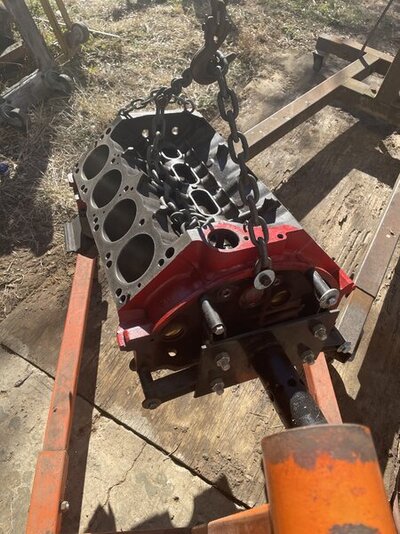
And the empty engine waiting for a thorough cleaning and installation of all the internals that will make it a complete engine


I have finally finished all the mock-up so he stopped by to help with dropping the motor, transmission and K frame out the bottom the same way we installed it a few months ago - they say practice makes perfect so that old saying is so true!
Now I have an empty engine compartment again.

And the empty engine waiting for a thorough cleaning and installation of all the internals that will make it a complete engine

Last edited:
Well, time for a long overdue update as i decided to take some time off from doing anything on the car!
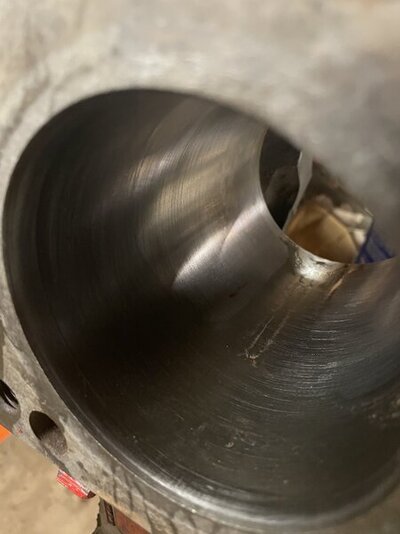
I took a long hard look at the bores in the block and just didn’t like it the crosshatch pattern (or lack there of!).
Unfortunately I forgot to take any before pics. With some cutting oil my son left for me, i got to work yesterday. After all said and done, I’m satisfied with the results, although I don’t think the picture shows it too well. After a thorough cleaning the lint-free white rags were nice and clean after going through the bores.
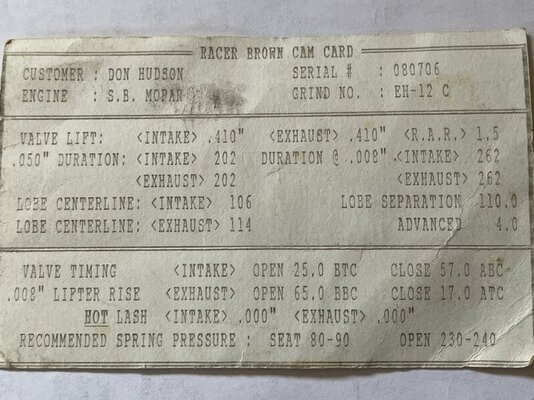
I cleaned the new cam i had ordered some time ago from Jim at Racer Brown. Spec sheet:
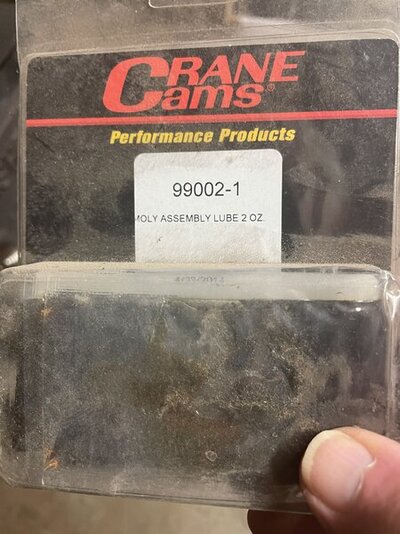
And will use the Comp Cams moly lube to coat the cam lobes when I go to install the cam later today
I still have a lot more cleaning to do - so more to follow!
I took a long hard look at the bores in the block and just didn’t like it the crosshatch pattern (or lack there of!).
Unfortunately I forgot to take any before pics. With some cutting oil my son left for me, i got to work yesterday. After all said and done, I’m satisfied with the results, although I don’t think the picture shows it too well. After a thorough cleaning the lint-free white rags were nice and clean after going through the bores.

I cleaned the new cam i had ordered some time ago from Jim at Racer Brown. Spec sheet:

And will use the Comp Cams moly lube to coat the cam lobes when I go to install the cam later today

I still have a lot more cleaning to do - so more to follow!
Last edited:
Looks great Don. How much oversize?Well, time for a long overdue update as i decided to take some time off from doing anything on the car!
I took a long hard look at the bores in the block and just didn’t like it the crosshatch pattern (or lack there of!).
Unfortunately I forgot to take any before pics. With some cutting oil my son left for me, i got to work yesterday. After all said and done, I’m satisfied with the results, although I don’t think the picture shows it too well. After a thorough cleaning the lint-free white rags were nice and clean after going through the bores.
View attachment 1716036345
I cleaned the new cam i had ordered some time ago from Jim at Racer Brown. Spec sheet:
View attachment 1716036347
And will use the Comp Cams moly lube to coat the cam lobes when I go to install the cam kater today
View attachment 1716036348
I still have a lot more cleaning to do - so more to follow!
It is still standard size bore so the OEM HiPo pistons will be fine. This is a 66 engine I bought off eBay a number of years ago. Even the crank is Std/Std!Looks great Don. How much oversize?
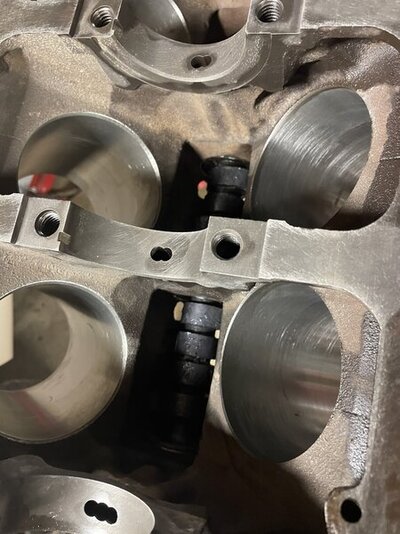
Not that it matters much but with the help of my wife, I got the cam lobes lubed with the moly assembly lube and then set in the empty block while I had the room
Next up is to thoroughly clean the Std/Std forged crank. I had the torque converter pocket on the crank opened up for the converter for the 42RH

Next up is to thoroughly clean the Std/Std forged crank. I had the torque converter pocket on the crank opened up for the converter for the 42RH
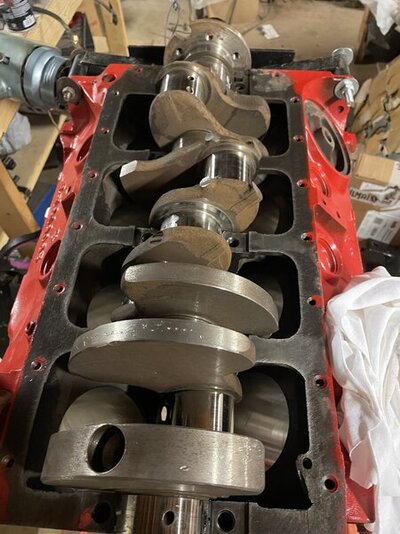
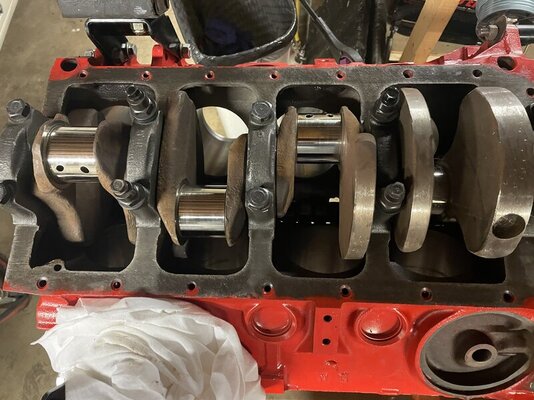
Another minor update - Got the crank thoroughly clean. The polished main and rod bearing surfaces look great so it’s ready to install. Installed and applied break in lube to the upper main bearing shells. Got the crank set in place - not as young as I used to be at 77! Got the lower bearing shells installed to the main bearing caps and after lubing them, installed and torqued them per specs from the 65 TSM. I need to pick up some appropriate size hose to protect the rod journals when I go to install the rod/piston assemblies
Yes, Nr 2 and 4 main caps do have the windage tray provisions that I will use on this motor. Overkill, maybe, but i have everything so I’ll use it
Yes, Nr 2 and 4 main caps do have the windage tray provisions that I will use on this motor. Overkill, maybe, but i have everything so I’ll use it


Last edited:
Wow amazing what your doing at 77! So an E body wagon creation in your 80s and Hemi grin!Another minor update - Got the crank thoroughly clean. The polished main and rod bearing surfaces look great so it’s ready to install. Installed and applied break in lube to the upper main bearing shells. Got the crank set in place - not as young as I used to be at 77! Got the lower bearing shells installed to the main bearing caps and after lubing them, installed and torqued them per specs from the 65 TSM. I need to pick up some appropriate size hose to protect the rod journals when I go to install the rod/piston assemblies
Yes, Nr 2 and 4 main caps do have the windage tray provisions that I will use on this motor. Overkill, maybe, but i have everything so I’ll use it
View attachment 1716038357
View attachment 1716038359
I'm going to pick your brain on the ignition as I'm doing an HEi and it's a WR 95 Ron Francis harness. No ECU no ballast resistor Mopar ignition switch. I know or think blue ign1 is run yellow is start black assessory and red power brown is ign2. I got factory diagram and service manual as but I'm second guessing with this GM style harness. Your wiring skills are real mine are not automotive trained for sure.


Nope! Neither of them! If I live that long and ever finish the 65, next and last on the agenda is my 47 Dodge 4 door sedan! Yes I do have a restoration thread started somewhere here. Nothing exotic - stock body, mildly customized dash with a built slant with triple Webers for motivation!Wow amazing what your doing at 77! So an E body wagon creation in your 80s and Hemi grin!
EDIT: no more triple Webers - they are gone!
Last edited:
I’m not familiar with Ron Francis wiring but i will take a look and see if I can figure it outI'm going to pick your brain on the ignition as I'm doing an HEi and it's a WR 95 Ron Francis harness. No ECU no ballast resistor Mopar ignition switch. I know or think blue ign1 is run yellow is start black assessory and red power brown is ign2. I got factory diagram and service manual as but I'm second guessing with this GM style harness. Your wiring skills are real mine are not automotive trained for sure.
View attachment 1716047325
View attachment 1716047326
View attachment 1716047327
View attachment 1716047328
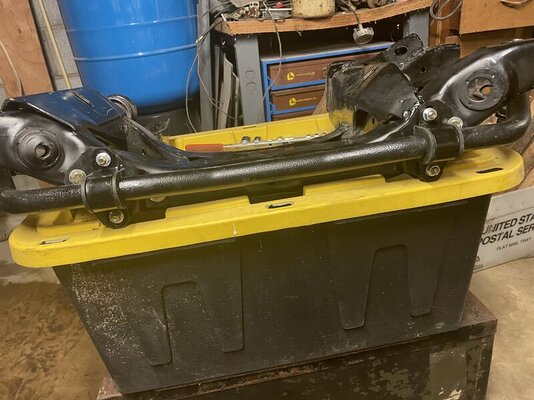
Although I have started the engine assembly i got sidetracked into doing my Hellwig early A sway bar install after commenting on @Mopar Tim thread on early A sway bar bushing. In that thread there were some concerns that Hellwig’s early A bar had morphed into the 67-72 bar.
So I pulled out my Hellwig 55914 1 & 1/4 in hollow sway bar. The Hellwig website says it’s specifically for the 63-66 Early A Bodies. Their website says the 5906 is for 67-72 A bodies. I bought this kit in 2013 and has been stored since then. The instructions for mine:
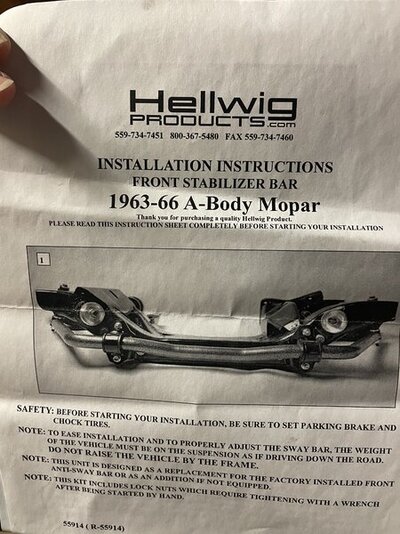
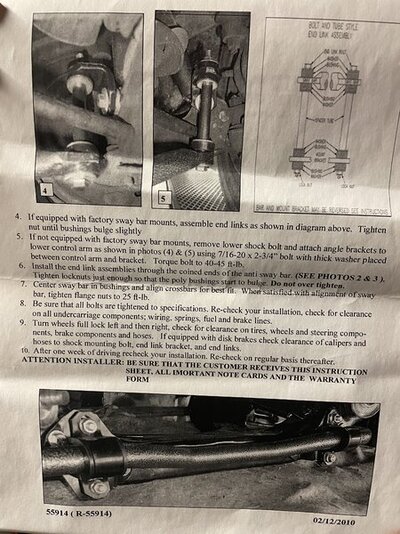
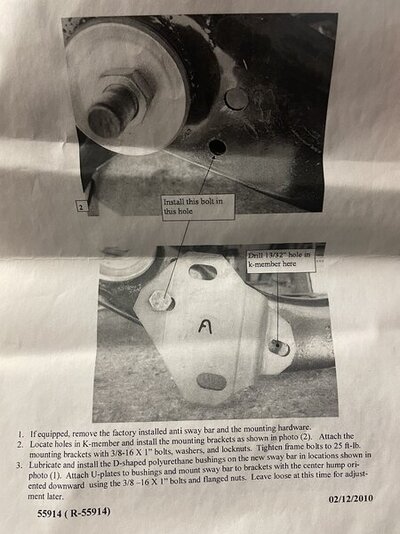
The mounting brackets use one of the factory sway bar mounting holes with the user drilling the other. So i mounted the basic brackets and found it was a close fit but did need some adjustment. I did the “Adjustment” with my torch and BFH to make the brackets mount where they were supposed to. The instructions said securely mount the brackets with the Grade 8 hardware and leave the sway bar U bracket loose until the car was on the ground. I installed both LCA in order to center the sway bar. I left everything a little loose until the bar was adjusted side to side, then torqued the main brackets to their specs. I might tack weld the brackets to the K Frame for good measure.
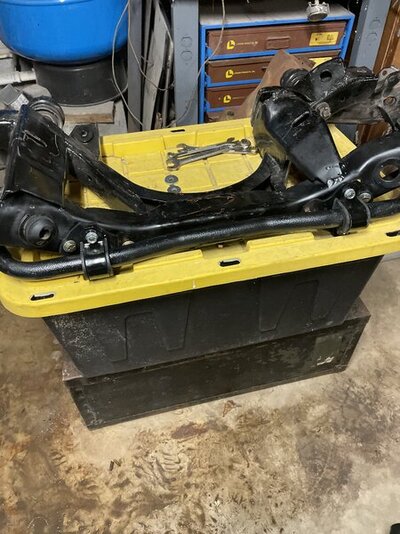
The Hellwig 55914 fits the early A kFrame and LCAs pretty decent. I am happy with the fit side to side to the LCA’s sway bar factory brackets I will be installing my QA1 strut rods but leaving them loose until the car is sitting on the ground

So I pulled out my Hellwig 55914 1 & 1/4 in hollow sway bar. The Hellwig website says it’s specifically for the 63-66 Early A Bodies. Their website says the 5906 is for 67-72 A bodies. I bought this kit in 2013 and has been stored since then. The instructions for mine:


The mounting brackets use one of the factory sway bar mounting holes with the user drilling the other. So i mounted the basic brackets and found it was a close fit but did need some adjustment. I did the “Adjustment” with my torch and BFH to make the brackets mount where they were supposed to. The instructions said securely mount the brackets with the Grade 8 hardware and leave the sway bar U bracket loose until the car was on the ground. I installed both LCA in order to center the sway bar. I left everything a little loose until the bar was adjusted side to side, then torqued the main brackets to their specs. I might tack weld the brackets to the K Frame for good measure.
The Hellwig 55914 fits the early A kFrame and LCAs pretty decent. I am happy with the fit side to side to the LCA’s sway bar factory brackets I will be installing my QA1 strut rods but leaving them loose until the car is sitting on the ground


Yo see in that last picture where the var is right yonder the main attaching bolt? IMO it is to close to the tires. Mine rubbed and prevented lock yo lock steering. Factory just clears and is considerably further inboardAlthough I have started the engine assembly i got sidetracked into doing my Hellwig early A sway bar install after commenting on @Mopar Tim thread on early A sway bar bushing. In that thread there were some concerns that Hellwig’s early A bar had morphed into the 67-72 bar.
So I pulled out my Hellwig 55914 1 & 1/4 in hollow sway bar. The Hellwig website says it’s specifically for the 63-66 Early A Bodies. Their website says the 5906 is for 67-72 A bodies. I bought this kit in 2013 and has been stored since then. The instructions for mine:
View attachment 1716047853
View attachment 1716047854
View attachment 1716047855
The mounting brackets use one of the factory sway bar mounting holes with the user drilling the other. So i mounted the basic brackets and found it was a close fit but did need some adjustment. I did the “Adjustment” with my torch and BFH to make the brackets mount where they were supposed to. The instructions said securely mount the brackets with the Grade 8 hardware and leave the sway bar U bracket loose until the car was on the ground. I installed both LCA in order to center the sway bar. I left everything a little loose until the bar was adjusted side to side, then torqued the main brackets to their specs. I might tack weld the brackets to the K Frame for good measure.
The Hellwig 55914 fits the early A kFrame and LCAs pretty decent. I am happy with the fit side to side to the LCA’s sway bar factory brackets I will be installing my QA1 strut rods but leaving them loose until the car is sitting on the ground
View attachment 1716047877
View attachment 1716047875
View attachment 1716047876
Thanks for your post and picture! I will know much more about how mine is going to fit once everything is installed and all torqued to specs.
I had Steer and Gear rebuild both my OEM box snd pump to their Stage 3 configuration (feels like a modern car’s steering). I will also be using Firm Feel 1.03 torsion bars, their solid 9/16 tie rod sleeves and a set of Bilstein RCD front and rear shocks. Finishing up the rear is an Addco 3/4 inch rear sway bar. I’m hoping the wagon will handle OK!You won't regret that all stiffened up. Did you also do the updated steering box. I was thinking about eventually getting a new one and power steering pump.
EDIT: almost forgot about the QA1 adjustable strut rods
Last edited:
mygasser
Well-Known Member
your pic shows the link going up from your swaybar whereas the pic above shows his going down from the swaybar. could that be why you have interference?Yo see in that last picture where the var is right yonder the main attaching bolt? IMO it is to close to the tires. Mine rubbed and prevented lock yo lock steering. Factory just clears and is considerably further inboard
View attachment 1716047910
neil.
Thanks for all of the updates. I can't wait to see the finished project!
Don my friend, if someone is going to figure it out it's gonna be you!I’m not familiar with Ron Francis wiring but i will take a look and see if I can figure it out
The factory way is my install....I tried to make that exact bar setup work. I was not successful. Or not happy with the install...your pic shows the link going up from your swaybar whereas the pic above shows his going down from the swaybar. could that be why you have interference?
neil.
Rounding out the front suspension build (till it gets installed to the chassis) is the QA1 adjustable strut rods. Then everything will be torqued to dpecs
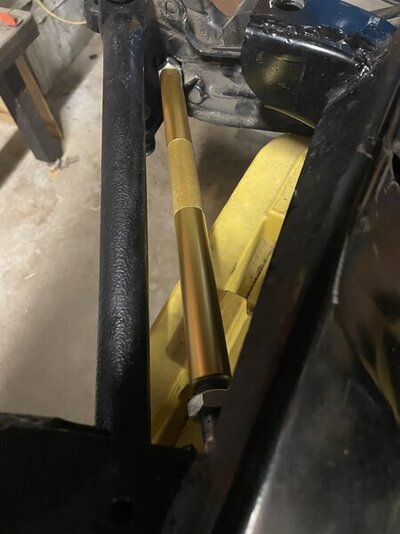
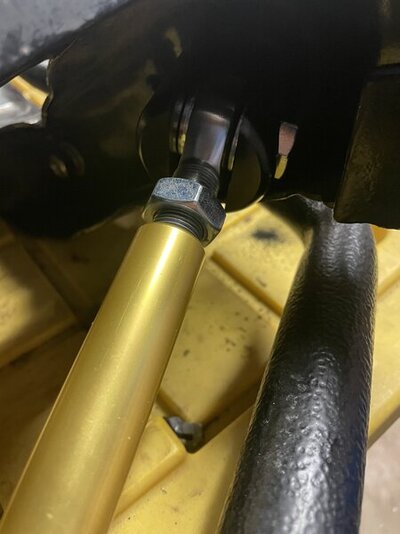
The instructions:
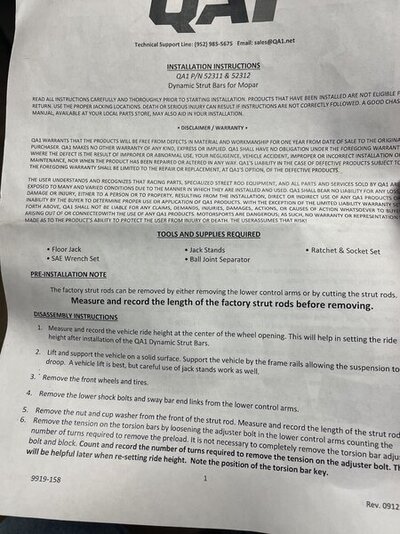
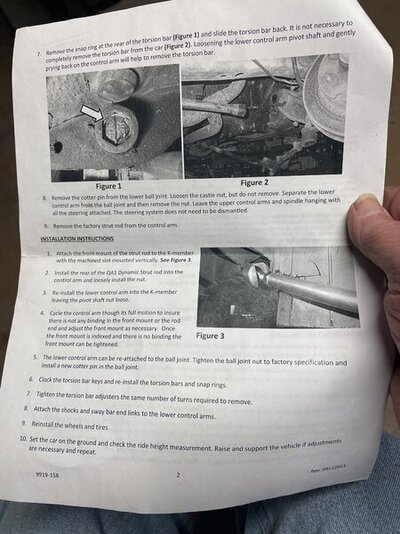
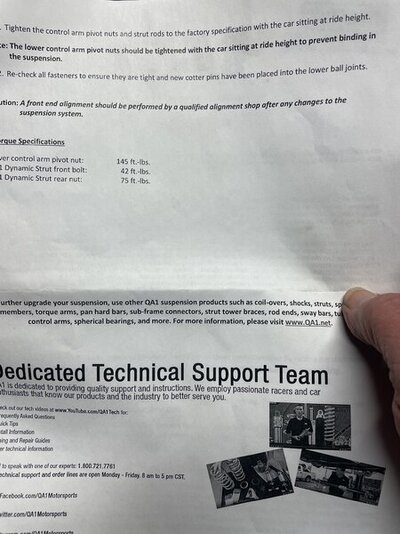
The instructions assume you are installing their strut rods to a fully assembled suspension while on the car so they’ve provided the disassembly procedures for the torsion bars and LCAs as well.


The instructions:


The instructions assume you are installing their strut rods to a fully assembled suspension while on the car so they’ve provided the disassembly procedures for the torsion bars and LCAs as well.
Looks great. Keep up the good work.Rounding out the front suspension build (till it gets installed to the chassis) is the QA1 adjustable strut rods. Then everything will be torqued to dpecs
View attachment 1716048864
View attachment 1716048863
The instructions:
View attachment 1716048860
View attachment 1716048861
View attachment 1716048862
The instructions assume you are installing their strut rods to a fully assembled suspension while on the car so they’ve provided the disassembly procedures for the torsion bars and LCAs as well.
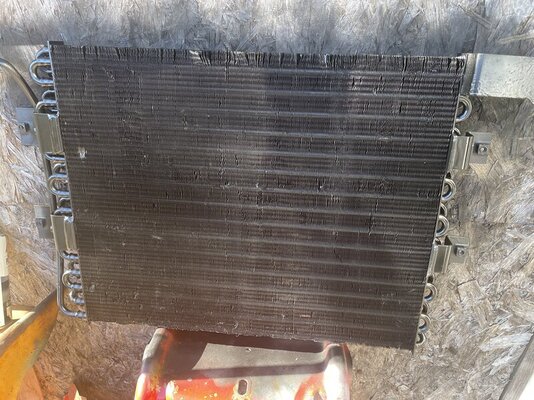
While doing some research on the engine assembly (on temporary hold), i need to keep moving. I decided to prep my 65 AC condenser - well 2 of them and use the best of the 2 in the car - to straighten and comb the fins using a readily available radiator comb. It has 6 different size combs for most any application. The smallest comb worked the best on these condensers
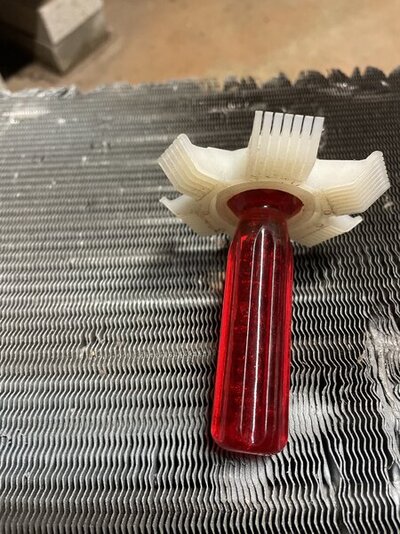
Here’s a sampling of bent and mashed in fins on both condensers on both sides.
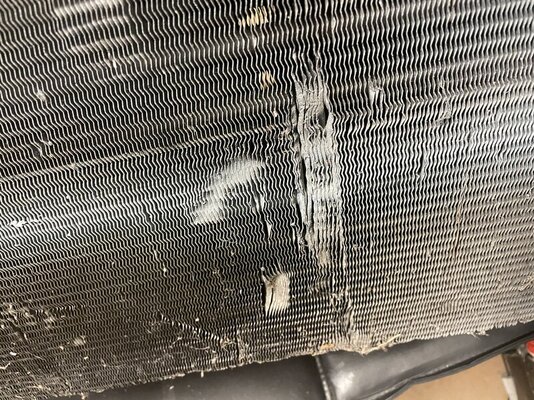
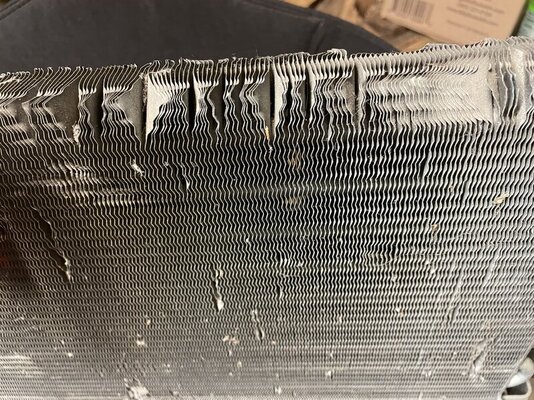
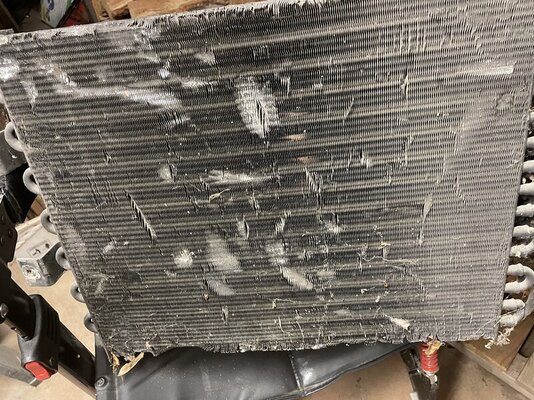
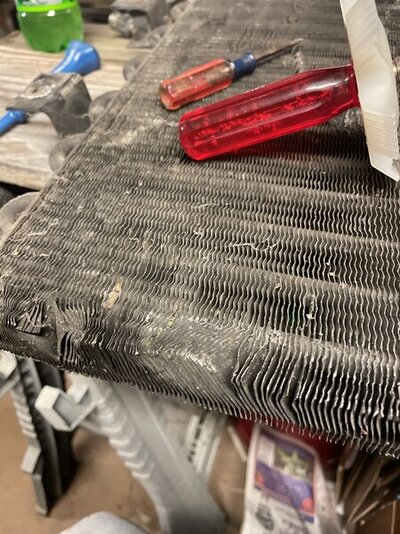
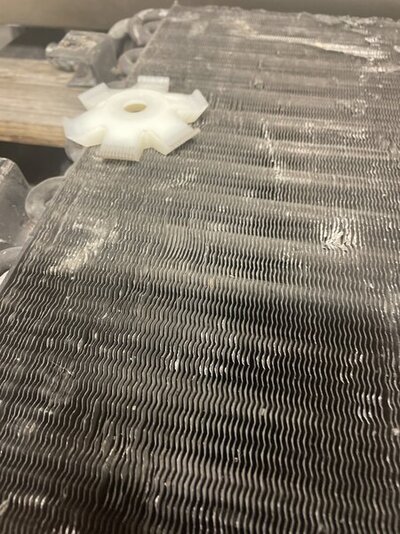
After working a couple of hours a day for 2 days, both were about as good as I could get them.
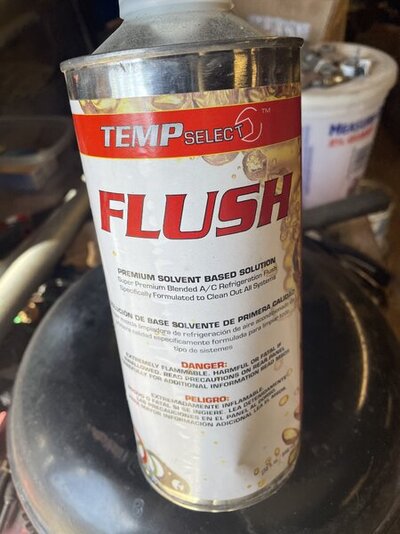
After a thirough internal cleaning with this stuff:
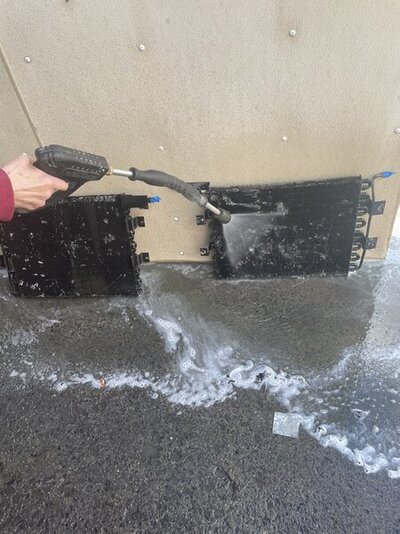
I taped up the intake/exit tubes and with the help my trusty assistant (the wife), took them to the car wash and thoroughly cleaned the exterior with the wand on low pressure
After painting them both with satin black paint, i picked the better of the two as seen from the grille area and fitted it the car
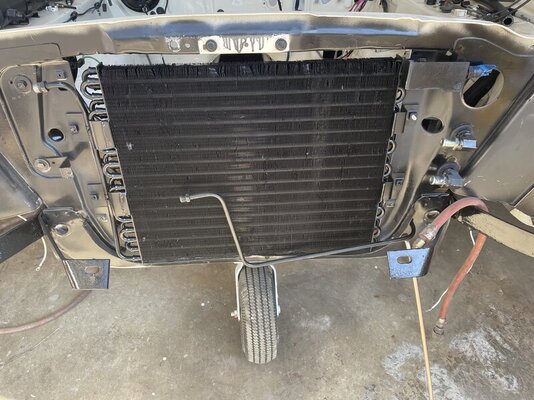
Now I can permanently install the transmission and power steering coolers

Here’s a sampling of bent and mashed in fins on both condensers on both sides.


After working a couple of hours a day for 2 days, both were about as good as I could get them.

After a thirough internal cleaning with this stuff:

I taped up the intake/exit tubes and with the help my trusty assistant (the wife), took them to the car wash and thoroughly cleaned the exterior with the wand on low pressure

After painting them both with satin black paint, i picked the better of the two as seen from the grille area and fitted it the car

Now I can permanently install the transmission and power steering coolers
Last edited:
-


