turbo 6 bangers post here

-
Hey Bill and Srixon I finally have most of my parts to start fabrication, my question to you guys is why you have your BOV on the exhaust manifolds as apposed to the turbo tubing. I was under the impression that it needed to be in between the carb and the turbo, but I could definitely be wrong.
 
Hey Bill and Srixon I finally have most of my parts to start fabrication, my question to you guys is why you have your BOV on the exhaust manifolds as apposed to the turbo tubing. I was under the impression that it needed to be in between the carb and the turbo, but I could definitely be wrong.

What your seeing is the wastegate and its best placed in the merge of the exhaust manifold after all the legs of the exhaust come together pre turbo some turbos come with built in WG in the exhaust housing of the turbo it self
The BOV is in between the turbo and the carb or throttle body
Post some pics of your project and tell us about your setup
 
Hey Bill and Srixon I finally have most of my parts to start fabrication, my question to you guys is why you have your BOV on the exhaust manifolds as apposed to the turbo tubing. I was under the impression that it needed to be in between the carb and the turbo, but I could definitely be wrong.

They do loook a lot alike; easy to confuse them if you're not real familiar, but Aaron is right... He usually is... :violent1:
 
Not too much to post yet, but will get some pics very soon. The plan is a pretty simple setup that I'm taking most of the ideas from Pishta. I have a Ct-26 Turbo off of a 89 Supra. I am going back and forth on a 4 or 2 barrel but I think I am going to end up with a 2 barrel 350 holley, since a four barrel will require mechanical secondaries and to do so I will have to overcarb too much in my opinion as well as ease of tuning. 4 Barrel intake manifold, modified stock exhaust manifold. Also plan on making the car a driver that is as light as possible so my weight to HP should be pretty good. Right now I am just getting the head cleaned up to get the valve seats hardened and am mocking up a setup to get started on bending pipe.
Ill keep you guys updated.

By the way Bill where did you get the decal made and would it offend you if I got one for myself, I love it.

They say that imitation is the sincerest form of flattery, so how could I be offended by anyone who wants to copy my deal?

No, I am not offended; quite the opposite; I appreciate A LOT, that you like the decal and want one like it. I'd like to see it on ALL turbocharged slant six cars so those V8 guys would know what just blew by them...:cheers:

!'ll have to look up the guy's name who made them for me; he's a FABO member, or was... I haven't heard anything from him in a long time, but he knew what he was doiing and had fair prices! Nice guy, too...

But, it was a computer-generated image and he saved it, so duplicating it should be easy. He has all the equipment and knows how to use it.

He also made me a "lookalike" hood callout decal in the same syle and size (and, color) as the "340 WEDGE" decal that was featured on the hood of the 340 Dusters in 1971 and '72. It goes on a flat black hood and at about a 30-degree angle (maybe 45; I don't know.) Except, it says, "234 turbo" instead of 340 WEDGE."

I'll send you his name in a P-M when I find it.... I was hoping somebody else might want some of those.

I think PISHTA is a really sharp individual and I like his turbo setup a lot!
I do think a Super Six intake (2bbl) would work well for you, along with a 350 or 500cfm Holley 2bbl.

PISHTA fabricated a really neato turbo mount out of a U-Bend and two flanges. If you can duplicate what he did, I think you'll be in good shape! I'd like to put together one like he did, myself! Cheap and effective!:cheers:

I'll get back to you on the decal!

Thanks for you interest.
 
Let me no if you guys can watch this video Bill can't but let me no one way or anoth [ame]http://static.photobucket.com/player.swf?file=http://vid1109.photobucket.com/albums/h431/srixon4406/VID_20120805_115449.mp4[/ame]

I can watch it but sometimes it will buffer and the video will stop but if you start it over most times it will play straight through
 
New question. Oil return lines. Should they be above or below the oil line? My thought is that below the oil line reduces foam or aeration. Also are there any specifications I should know? Where are you guys putting them dimensionally on your pans? Thanks
Also is anyone running power steering? Is it an issue with placing the turbo exhaust?

I would recommend a 10 an return line that's about a 5/8 of a inch I tired a 1/2 line or 8 an and had problems as for where to install your return line I did mine about 2 inches below the pan rail above the oil level you want zero restrictions or you could damage the turbo
As for power steering anything is possible I started with PS but converted to manual just for the extra clearance
 
Doc, thanks for the sugestions. Here are some answers:

The shipping weight of a Valiant two-door sedan in 1964 is just 35 pounds less than a 4-door, Not a whole lot...
The '64 Valiant 4-door is 165 pounds lighter than a '64 1/2 Barracuda...

Yes, the back doors are whole. Their proximity to the rear wheels is thought to make getting weight out of them counter-productive. This car is going to be hard enough to hook up with the kind of torque it SHOULD have, and removing weight from the area around the rear wheels probably isn't going to help traction.

An aluminum trunk pan would also make the front/rear weight distribution worse. More traction woes, I'm afraid...

Eventually, I imagine the side glass (which is stock) will be replaced with lexan, and at that time, the regulators will have to go... good idea! :D

Thanks for your interest!


Well, we finally got the car to an accurate truck scale:

2,680 pounds with no driver.

I figured 2,850.... glad I was wrong.

Still want to replace the side window glass with Lexan or plexiglass... but that's down the road.

Just an update, here for anyone who's interested.:happy1:
 
Bill thats awesome 2680 pounds thats 500 pounds lighter then Toms car i cant await to see that thing run

I got some work done today i took off the test turbo and i installed the new turbo today and needless to say the swap was easy as pie:cheers:
I also took the carb off the car to go through it and clean it up im hoping my fuel system is fully cleaned out now because the carb was rough inside i also changed the primary Metering block and the power valve over so i can hook up my CRUTCH With the BRPV
Im going to take the advice of another member and ditch the fuel log before it becomes a problem with heat soak from the header

Heres a couple things im planning on working this weekend while i wait on the fuel fittings
1. Get the front trim and bumper installed
2. Install a new fuel pressure gauge
3. Install temp gauge
4. I have to run one line to connect the water cooled intake
5. Wire up my 12 volt air pump for the CRUTCH SYSTEM

This is just a small check list of things that still need to be done

Next week I'm hoping to get the TOAD down to the alignment shop and get the front end all straight and true then i can start testing and tuning and I'll also work on getting some more video up

Stay tuned were getting closer by the day:burnout:

Aaron

That's great that you're making such meaningful progress; at that rate, it won't be long at all.... :cheers:

Can you tell me again, how that 'crutch system' works, please? I can't seem to remember anything about what's involved except that I remember that I thought it was expensive...

Can you help me out a little here, Aaron? I'm lost...

Thanks loads!!!
 
The main idea for the crutch system is so that you can use small jets to have a cleaner cruise and lean on the T-brake or stall but once the RPM activation to the pump or whatever you choose to send signal to the BRPV's, they will act as a secondary set of jets to allow extra fuel into the engine that the small jets cannot do alone. Once a run is complete, the air system will shut off and the carb will run off the normal smaller jets again. You can activate the PV's several diffferent ways like using a mini air pump with some type of controller such as the MSD8969 RPM controller or even thru your MSD7531 unit im useing a pressure switch kind of like a Hobbs switch and using hat psi to activate the air pump. Doing this type of set up gives you PV's opening control from the cockpit instead of taking the carb apart to adjust or replace springs.
 
The main idea for the crutch system is so that you can use small jets to have a cleaner cruise and lean on the T-brake or stall but once the RPM activation to the pump or whatever you choose to send signal to the BRPV's, they will act as a secondary set of jets to allow extra fuel into the engine that the small jets cannot do alone. Once a run is complete, the air system will shut off and the carb will run off the normal smaller jets again. You can activate the PV's several diffferent ways like using a mini air pump with some type of controller such as the MSD8969 RPM controller or even thru your MSD7531 unit im useing a pressure switch kind of like a Hobbs switch and using hat psi to activate the air pump. Doing this type of set up gives you PV's opening control from the cockpit instead of taking the carb apart to adjust or replace springs.


Thanks, Aaron, for the great explanation!

Our car will see minimal street time.. just a drag strip toy, mainly.

Tom did build a bracket in the primary foat bowl and made mods for a boost-referenced power valve.


I don't understand that rationale. I'd better ask him. Power valves are activated by a lack of vacuum, sa far as I know. When boost occurs, vacuum disappears, so I don't (in my ignorance) understand the reasoning behind a power valve that uses boost to activate it. It's GOING to open when the vacuum goes away, anyway, isn't it????

I'll bet I learn, though.... :violent1:

Today we completely changed our fuel return system from a -6 to a -8 size and installed the new Aeromotive regulator. We had to order a weirdo fitting (-8 to -6, both male, one end O-ring, the other end flare) from Summit, to finish it. so we didn't get to test drive it with the new system.

Monday or Tuesday, I guess...

Tomorrow (Sat.) I'm going to try to get the new distributor (locked plate) and MSD 6-AL digital system installed.

Wish me luck...:prayer:
 
Bill thats awesome 2680 pounds thats 500 pounds lighter then Toms car i cant await to see that thing run

I got some work done today i took off the test turbo and i installed the new turbo today and needless to say the swap was easy as pie:cheers:
I also took the carb off the car to go through it and clean it up im hoping my fuel system is fully cleaned out now because the carb was rough inside i also changed the primary Metering block and the power valve over so i can hook up my CRUTCH With the BRPV
Im going to take the advice of another member and ditch the fuel log before it becomes a problem with heat soak from the header

Heres a couple things im planning on working this weekend while i wait on the fuel fittings
1. Get the front trim and bumper installed
2. Install a new fuel pressure gauge
3. Install temp gauge
4. I have to run one line to connect the water cooled intake
5. Wire up my 12 volt air pump for the CRUTCH SYSTEM

This is just a small check list of things that still need to be done

Next week I'm hoping to get the TOAD down to the alignment shop and get the front end all straight and true then i can start testing and tuning and I'll also work on getting some more video up

Stay tuned were getting closer by the day:burnout:

Aaron


You're about to have MORE FUN, than the law allows... LOL!!!!

You go, guy!!!!:cheers:
 
Bill the bracket that Tom made for you I'm sure looks like this this is his design
5119411932_3e5a0290d5_m.jpg


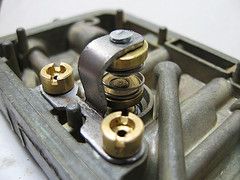
And this is what I refer to as a brpv or boost referenced power valve and now vacuum does absolutely nothing for you anymore so the old thinking about how a power valve works is different now with the modification that Tom made to the PV it stays closed until the boost pressure over comes the spring pressure delivered via the boost ref port in the carb
This is what the crutch system is all about alot of the guys say that boost pressure a loan isn't normally enough to over come the spring pressure so that's why they interduce the air supply
I hope this explains it abit better to you I'm sure tom can explain it better so they only difference from what tom did for you and what I'm doing is not relaying on boost pressure to open the brpv but for it to turn on my air pump so i no it opens up and dumps fuel
Hope this helps
Aaron

Aaron,

Yes, it looks exactly like that.

Sounds like I need a crutch... seriously.

On a race car, could you just use a compressed-air source (bottle) and a relay-controlled valve to activate (open) the power-valve?

You could have a compressed air bottle plumbed into the carb PV in such a way that a hobbs switch would activate a relay to open the valve immediately, when the slightest amount of boost occurred...

I guess it wouldn't be a very good system for the street, but might work okay on a race car??? what do you think (it would need a pressure regulator, of course, for the (actuating) signal going to the power valve...)

Thanks again for the excellent tutorial...:violent1: :cheers:
 
Yes bill there's alot of guys running co2 because they don't want to have a mechanical failure like burning a air pump up.
And yes you would need some sort of a regulator and a activation switch and then you would introduce the supplied air into the PV cavity
Damn bill your a quick study I had to search the turbo forums for this info but nobody wants to give out to much info they act like this stuff is rocket science or something
But I hope this helps
Aaron:prayer:

Thanks Aaron; I'm a "quick study" of necessity; I don't have another 20 years to get this right... :violent1:

I am wondering why anyone would BUY co-2 when they could just fill a bottle with compressed air from a service station air hose or their own compressor... Just put a Schrader valve on the bottle, and voila...

Is compressed air from a sevice station THAT contaminated with water???

What's the deal?:-|
 
Hey guys, here is my next question. While I was at the nationals last week I talked to a holley rep about his thoughts on my carb choice of a 350 2 barrel. He agreed that with a fairly stock motor and a turbo that is the correct choice, but he also told me I needed to have the carb modified. I knew I needed to change the float, but figured since I was running only 10lbs tops I wouldn't need to worry about having any other changes made. Thoughts?
 
Do the hanger 18 mods but you will only have to do one half the carb its not hard to do I printed all the pics and txt and put it in a binder for future reference
 
Hey guys, here is my next question. While I was at the nationals last week I talked to a holley rep about his thoughts on my carb choice of a 350 2 barrel. He agreed that with a fairly stock motor and a turbo that is the correct choice, but he also told me I needed to have the carb modified. I knew I needed to change the float, but figured since I was running only 10lbs tops I wouldn't need to worry about having any other changes made. Thoughts?

Aaron is giving you good advice. The reason for this carb business is that the metering circuits on any carb, 2 or 4 bbl are originally designed to deal with atmospheric pressure pushing its way through the venturis into the engine.

When you start shoving a lot more air though there, the metering goes all haywire, and usually, the result is more air, yes, but not a commensurately larger amount of gas...

That equals a lean mixture.

A lean mixture is a sure-fire recipe for detonation...

Detonation under boost is a recipe for catastrorophic engine failure.

BOOM!!!

There go the pistons.... and maybe the rods...

All unnecessarily, with the right carb mods.​

Even ten pounds of boost is playing with fire, especially, when running stock pistons.​

The mods to a two-barrel are probably not that complicated, and are absolutely necessary with forced induction.​

Good insurance!​

I don't have the URL for the hangar 18 mods page but it's probably easily available on Google... or, maybe Aaron has it...​

Good luck!!!:cheers:​
 
-
Back
Top