No Ulf, I can’t think of anythingAnything I can send you?
You are using an out of date browser. It may not display this or other websites correctly.
You should upgrade or use an alternative browser.
You should upgrade or use an alternative browser.
65 Dart Wagon Conversion to a Sedan Delivery
- Thread starter 65 Dartman
- Start date
-
Awhile ago I applied window tint to 2 loose vent windows, both loose door glass and the tailgate glass. After going through both sides of my vent window frames, I selected the ones in the best condition as far as the pot metal glass retainer, stainless exterior and vent rubber weatherstrip. I have removed the old glass and installed the glass with the tint. So I’m ready to install the vent window and door glass EXCEPT the window channel for both doors is in sad shape - frayed and ripped in places. I called several Mopar parts suppliers to find new window channel without any luck. Quiery Quality Design suggested calling Restoration Specialties - BINGO! They have both the window channel in 72 and 96 inch lengths (cut to fit) and divider channel (installs on the vent window frame where the door glass rides against the vent frame). These are specifically for 63-66 A Bodies. I’ve got both on order so should be able to get the doors buttoned up in the next week or so.
And it’s a mini Christmas for me in September- I received my window channel and divider bar channel - both carefully cut to length
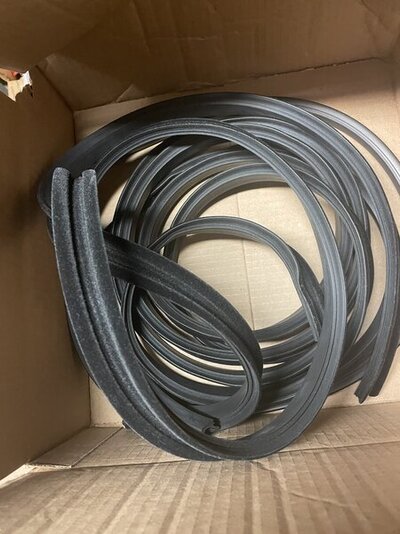
Now it’s time to measure a few times and cut once and get the doors done.
Plus my new sunvisors which will compliment my new arms I bought from Layson’s a few weeks ago arrived tiday as well.
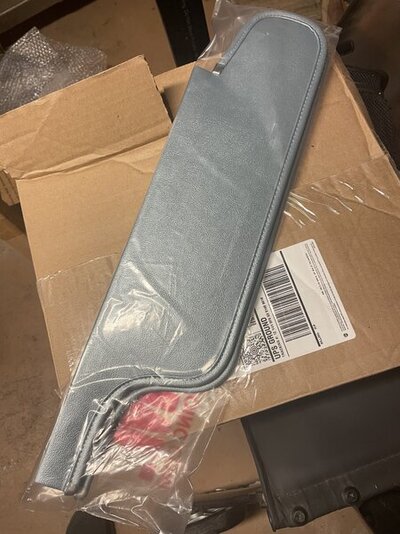
Yes, they are early A convertible sunvisors. Why convertible sunvisors you ask? Because they are so much wider than the regular sunvisors and when secured into the convertible rear view mirror bracket, will cover virtually all the way across the top of the windshield. I wish they were taller when blocking the sun but us beggars can’t be choosey. They are manufactured by REM and must be ordered through one of their sales reps. Here’s an interesting tidbit of info - i ordered them from Deutchman Automotive who is my Mopar Nationals neighbor every year. He said I was the 3rd person to order convertible sunvisore in the last month! The thing was None were for a convertible! All were for a hardtop or in my case a sedan

Now it’s time to measure a few times and cut once and get the doors done.
Plus my new sunvisors which will compliment my new arms I bought from Layson’s a few weeks ago arrived tiday as well.

Yes, they are early A convertible sunvisors. Why convertible sunvisors you ask? Because they are so much wider than the regular sunvisors and when secured into the convertible rear view mirror bracket, will cover virtually all the way across the top of the windshield. I wish they were taller when blocking the sun but us beggars can’t be choosey. They are manufactured by REM and must be ordered through one of their sales reps. Here’s an interesting tidbit of info - i ordered them from Deutchman Automotive who is my Mopar Nationals neighbor every year. He said I was the 3rd person to order convertible sunvisore in the last month! The thing was None were for a convertible! All were for a hardtop or in my case a sedan
mygasser
Well-Known Member
have you got any floor bungs out that could let the bolt drop into a chassis section/crossmember?
neil.
neil.
Nope. In fact I’ve eliminated all but the one in the left rear floorpan. It was the only floorpan that didn’t get replaced. I did install the plug though. I can’t move the carpet enough since the gas pedal is installedhave you got any floor bungs out that could let the bolt drop into a chassis section/crossmember?
neil.
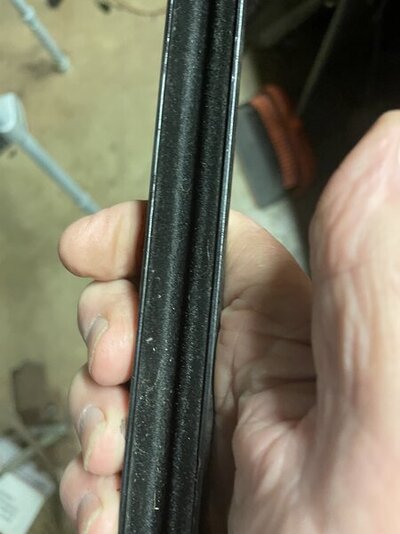
i decided to start on the 2 little left and right tailgate window channels to see how things were going to go before starting on the doors. I couldn’t even budge the old channel out of the retainers. I ended up using a flat tip screwdriver snd my little ballpeen to remove the channel, which is actually made of rubber with a flocked area where the glass rides. It’s amazing that the rusty channel retainer will hold the channel so securely! After thinking about it, I guess the glass seal at the top didn’t keep a lot of water out and got between the channel and retainer. This one was the best of the 4 that I have:
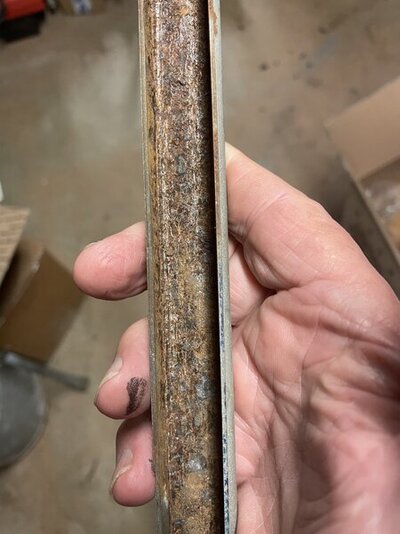
I cleaned it with a wire brush in a drill which cleaned it up somewhat. A cutoff wheel in my air tool did a much better job! I then painted the inside of the 2 that turned out the best
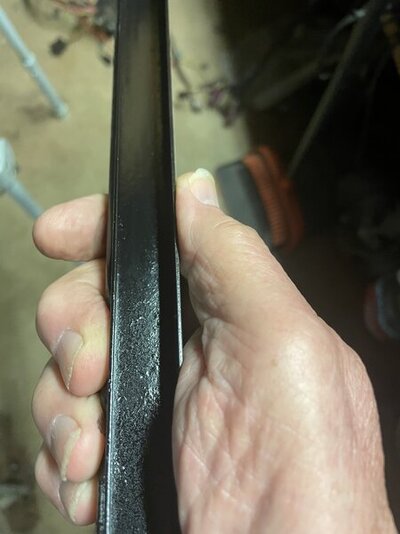
then it was cut the channel to length and install them in the retainers. They are definitely not as eady as they look to install. They are now ready to install in the tailgate

I cleaned it with a wire brush in a drill which cleaned it up somewhat. A cutoff wheel in my air tool did a much better job! I then painted the inside of the 2 that turned out the best

then it was cut the channel to length and install them in the retainers. They are definitely not as eady as they look to install. They are now ready to install in the tailgate

Last edited:
I started on the passenger door window channel. There is a lower channel retainer similar to the ones for the tailgate for each door. The are secured to the lower door side jamb after the window gets installed and final adjustment. The new channel gets installed to it first then one works it way up the rear door frame. There is a small access hole in the inner panel and I found you must be a contortionist to even reach the channel to get it started in the actual door frame. With the help of a large padded screwdriver and a glass stick, i was able to finally get it started. Once started, installing it to the back and top frame went fairly smooth.
I had tested the window motors outside the car, but not installed in the doors. So that was next on the agenda. I have not installed the switch power wire to the vehicle electrical system so it was easy to temporarily install the switch hot and ground wires straight to a battery. First problem: I had the up and down connectors reversed. That was easy to fix. Then i found I had never finished installing the terminals to the connectors on the passenger side. Once I took care of that, i got lucky that I connected the wires so that Up was up and Down was down. So I’m just about ready to install both the glass and vent window assembly
I had tested the window motors outside the car, but not installed in the doors. So that was next on the agenda. I have not installed the switch power wire to the vehicle electrical system so it was easy to temporarily install the switch hot and ground wires straight to a battery. First problem: I had the up and down connectors reversed. That was easy to fix. Then i found I had never finished installing the terminals to the connectors on the passenger side. Once I took care of that, i got lucky that I connected the wires so that Up was up and Down was down. So I’m just about ready to install both the glass and vent window assembly
I tackled the driver’s door window channel today, which went better than the passenger door. I ordered the vent window division bar channel when I ordered the rest of the channel. That went fairly easy for both vent windows. Like the main window channel, I’d recommend having a couple of glass sticks on hand to seat both style channels in their appropriate frames. Next is install the door glass. I seem to recall it needed to come out at the same time as the vent window assrmbly. Time to research the shop manual.
The passenger door vent window assembly and glass is installed. It was nowhere as easy as the shop manual indicated it would be! Anyway the window goes up about halfway and down all the way. The vent assembly now needs adjustment so the glass goes up all the way. BTW the power window motor works like a dream moving the glass. The manual regulator had a stop on it which is now missing so i will need to fabricate a lower stop; none needed for an upper since the glass stops quite nicely in the upper door frame. Many thsnks to @66Dvert for paving the way on adding power windows to his early A
66Dvert
Working on my custom car parts again!
Good Deal getting it together and working. just be thankful you don't have the rear quarter windows to do. they are Bassackwards mounting and a total pain in the behind to align, Now I know why early A's didn't get power windows (but I still am doing it on the other convertible anywaysThe passenger door vent window assembly and glass is installed. It was nowhere as easy as the shop manual indicated it would be! Anyway the window goes up about halfway and down all the way. The vent assembly now needs adjustment so the glass goes up all the way. BTW the power window motor works like a dream moving the glass. The manual regulator had a stop on it which is now missing so i will need to fabricate a lower stop; none needed for an upper since the glass stops quite nicely in the upper door frame. Many thsnks to @66Dvert for paving the way on adding power windows to his early A
I am taking a break on the 65 as it’s in the unheated pert of the basement and as in years past, the heat from the wood stove doesn’t get too far out there. We had a nice warm day the other week so I was out there looking things over. I kept looking at the console with the cupholder I previously installed. The more I looked at it, the less I liked it!
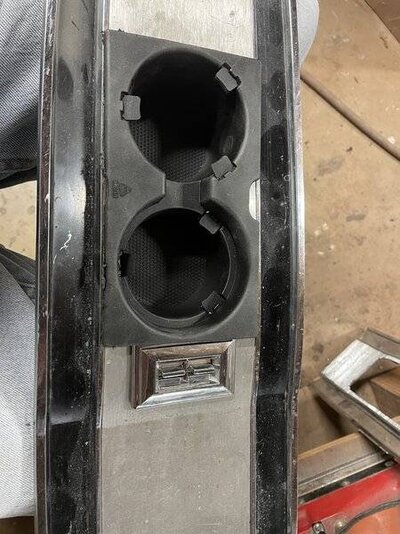
I found a pullout cupholder in an old Ram center armrest I had. The more I thought about it, the more thought I could probably fabricate some kind of bracket to mount it to the console top plate. Because i had hacked a big hole in the top for that other cupholder, to repair it I found a suitable size sheet of aluminum at Tractor Supply. After cutting it to size I bolted it in place and started on fabricaing a bracket for the pullout cupholder. It took several attempts before I was satisfied with how it all looked. I also had to move the power window switch as well.
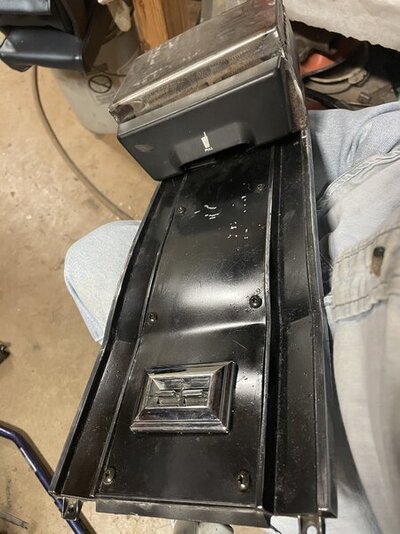
Once it’s finished (prime and paint the top), i think it’ll be much better looking (and when closed) out of the way than the old cupholder that was flat on the console top.
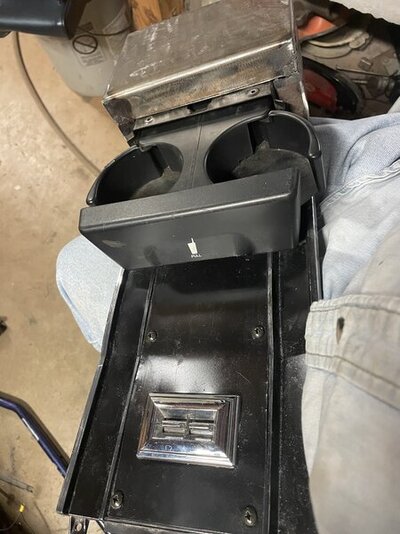
The cover on top hides the hardware used to mount the cupholder (it’s top mounted) and has enough room for a toggle swith or two or a warning light if needed.

I found a pullout cupholder in an old Ram center armrest I had. The more I thought about it, the more thought I could probably fabricate some kind of bracket to mount it to the console top plate. Because i had hacked a big hole in the top for that other cupholder, to repair it I found a suitable size sheet of aluminum at Tractor Supply. After cutting it to size I bolted it in place and started on fabricaing a bracket for the pullout cupholder. It took several attempts before I was satisfied with how it all looked. I also had to move the power window switch as well.

Once it’s finished (prime and paint the top), i think it’ll be much better looking (and when closed) out of the way than the old cupholder that was flat on the console top.

The cover on top hides the hardware used to mount the cupholder (it’s top mounted) and has enough room for a toggle swith or two or a warning light if needed.
Although I’m not doing anything out where the car is due to the unheated garage, I thought why not work upstairs on a major component - the front bucket seats! I had saved a set of 66 Dart buckets and since the 66-67 seat frames are the same for A and B Bodies, these would be just fine for my 66 Barracuda upholstery.
After stripping the old nasty upholstery and foam from the driver’s seat, I cleaned the frame. It was in great condition.
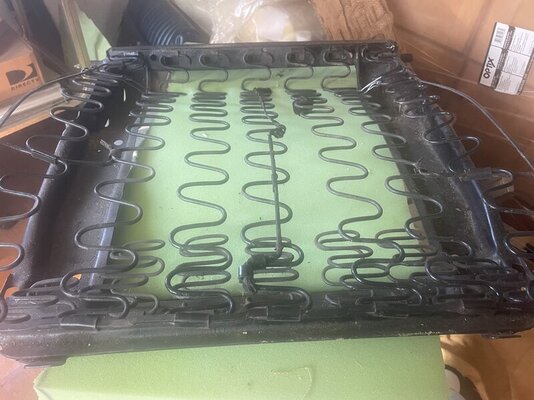
Then cut new burlap to size and hog ringed it in place every 3 inches or so to the springs
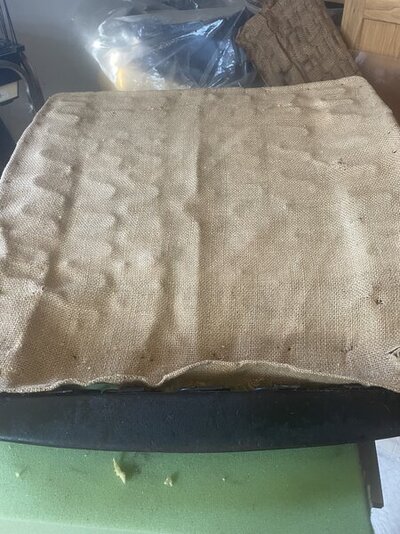
Next measure the location on the upholstery for the listings - if any (the 66 Barracuda’s seat cushion has 3 listings - 2 sides and one in the front) and mark the burlap for the listing wires. I had to order a roll of felt that’s to be hog ringed around the spring perimeter over where the burlap was hog ringed. This is to protect the upholstery.
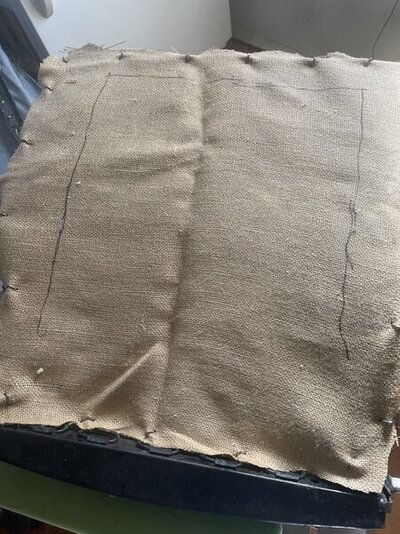
I also marked the foam and cut slits in the foam for access to the listing wires that will be hog ringed to the burlap.
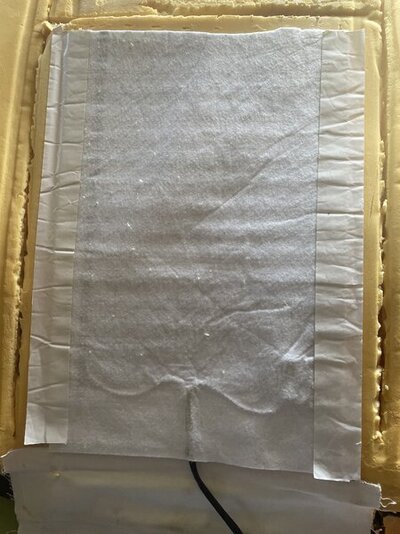
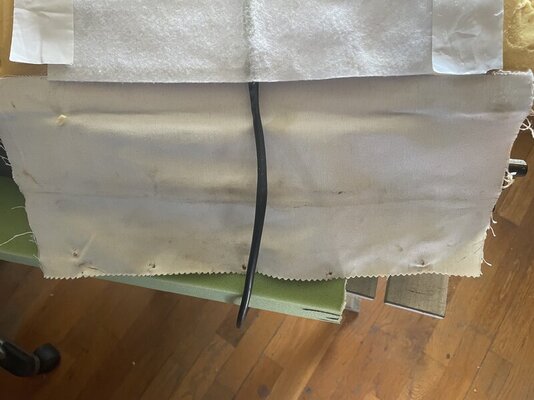
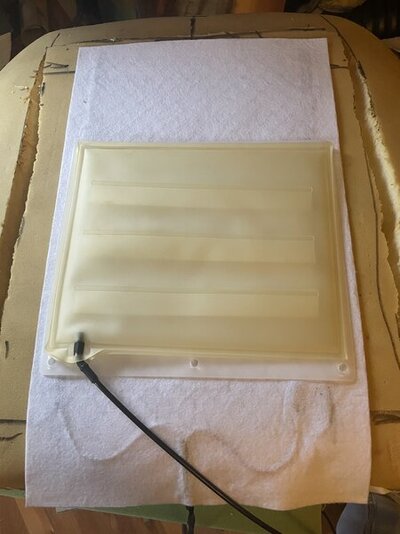
That white sheet with the black pigtail is for a heated seat. Yes, gonna have heated seats should I drive my baby on a cold morning. I also cut to size and glued the muslin to all 4 sides of the foam. These will securely hold the foam is place when it’s installed
TO BE CONTINUED
After stripping the old nasty upholstery and foam from the driver’s seat, I cleaned the frame. It was in great condition.

Then cut new burlap to size and hog ringed it in place every 3 inches or so to the springs

Next measure the location on the upholstery for the listings - if any (the 66 Barracuda’s seat cushion has 3 listings - 2 sides and one in the front) and mark the burlap for the listing wires. I had to order a roll of felt that’s to be hog ringed around the spring perimeter over where the burlap was hog ringed. This is to protect the upholstery.

I also marked the foam and cut slits in the foam for access to the listing wires that will be hog ringed to the burlap.

That white sheet with the black pigtail is for a heated seat. Yes, gonna have heated seats should I drive my baby on a cold morning. I also cut to size and glued the muslin to all 4 sides of the foam. These will securely hold the foam is place when it’s installed

TO BE CONTINUED
Last edited:
Hi Don. Brings back a few memories for certain. When I pulled the Legendary covers over the prepped seat springs, foam, and burlap, I sprinkled some baby powder on the back-side of the covers. This was my wife's idea where it was a bit easier to "Stretch" the covers tightly. That method assisted in a tight wrinkle-free finished product. Thanks for posting!! Sgrip65Although I’m not doing anything out where the car is due to the unheated garage, I thought why not work upstairs on a major component - the front bucket seats! I had saved a set of 66 Dart buckets and since the 66-67 seat frames are the same for A and B Bodies, these would be just fine for my 66 Barracuda upholstery.
After stripping the old nasty upholstery and foam from the driver’s seat, I cleaned the frame. It was in great condition.
View attachment 1716202620
Then cut new burlap to size and hog ring it in place every 3 inches or so to the springs
View attachment 1716202621
Next measure the location on the upholstery for the listings - if any (the 66 Barracuda’s seat cushion has 3 listings - 2 sides and on in the front) and mark the burlap for the listing wires. I had to order a roll of felt that’s to be hog ringed around the spring perimeter over where the burlap was hog ringed. This is to protect the upholstery.
View attachment 1716202622
I also marked the foam and cut slits in the foam for access to the listing wires that will be hog ringed to the burlap.
View attachment 1716202623
That white sheet with the black pigtail is for a heated seat. Yes, gonna have heated seats should I drive my baby on a cold morning. I also cut to size and glued the muslin to all 4 sides of the foam. These will securely hold the foam is place when it’s installed
View attachment 1716202624
TO BE CONTINUED
View attachment 1716202625
Thanks Jerry - I’ll have to try that
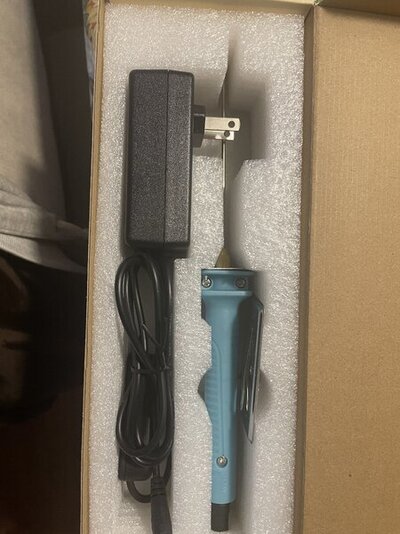
I used a razor knife to make the slits in the foam - not ideal compared to the demonstration done in the Legendary video. So I ordered and received this afternoon an inexpensive foam knife. I will put it to good use on the passenger seat rebuild and driver’s seatback as all 3 foams will need to be slitted for the listings

CONTINUED From Post #1012
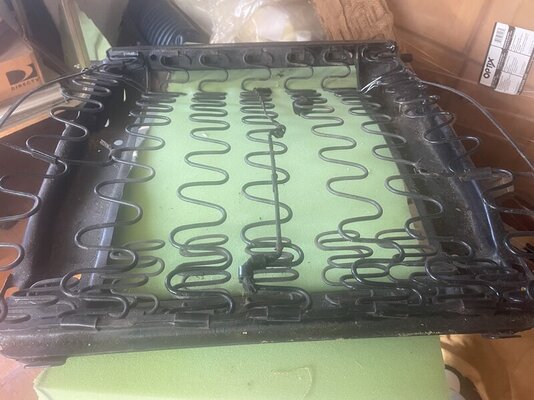
Installed the felt I received around the spring frame perimeter.
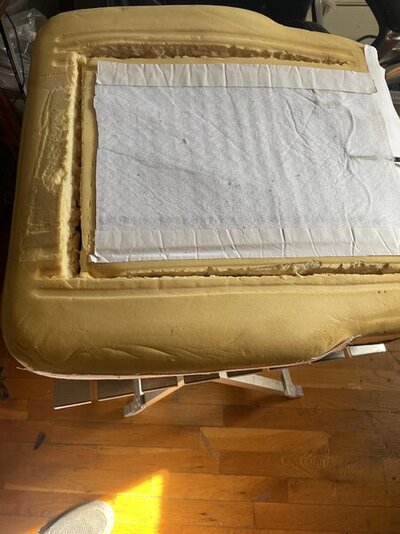
Next was to install the foam and hog ring the muslin sheets I previously glued to the foam to the appropriate areas on the frame
Next was to hog ring the 2 side and front listing wire in the upholstery to the wires previously hog ringed to the springs and through the burlap. Then with a lot of grunting, pushing on the foam to get the upholstery over the foam in the corners and down the sides, tugging and pushing at the same time and with some help from my trusty helper (the wife), i was able to get the upholstery on and hog ringed to the frame. I ended up with some wrinkles on the side bolsters. I’ll let it sit in the afternoon sun for a few days and if needed, redo the hog rings on the sides one at a time
Before and After
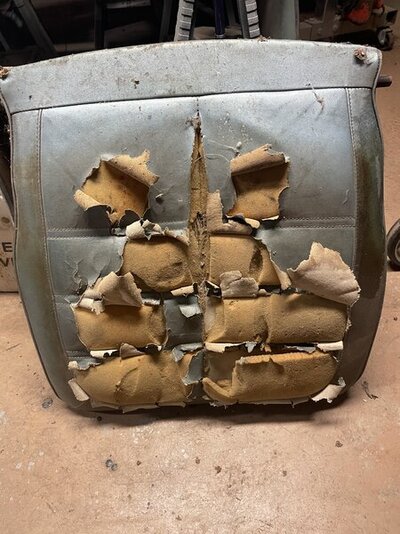
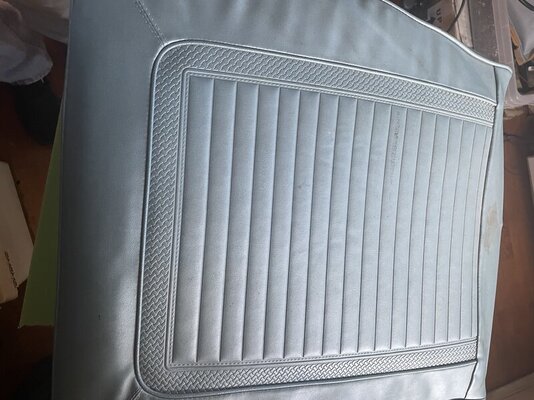
TO BE CONTINUED
Installed the felt I received around the spring frame perimeter.

Next was to install the foam and hog ring the muslin sheets I previously glued to the foam to the appropriate areas on the frame

Next was to hog ring the 2 side and front listing wire in the upholstery to the wires previously hog ringed to the springs and through the burlap. Then with a lot of grunting, pushing on the foam to get the upholstery over the foam in the corners and down the sides, tugging and pushing at the same time and with some help from my trusty helper (the wife), i was able to get the upholstery on and hog ringed to the frame. I ended up with some wrinkles on the side bolsters. I’ll let it sit in the afternoon sun for a few days and if needed, redo the hog rings on the sides one at a time
Before and After


TO BE CONTINUED
Last edited:
Very Nice Don!!CONTINUED From Post #1012
Installed the felt I received around the spring frame perimeter.
View attachment 1716203882
Next was to install the foam and hog ring the muslin sheets I previously glued to the foam to the appropriate areas on the frame
View attachment 1716203892
Next was to hog ring the 2 side and front listing wire in the upholstery to the wires previously hog ringed to the springs and through the burlap. Then with a lot of grunting, pushing on the foam to get the upholstery over the foam in the corners and down the sides, tugging and pushing at the same time and with some help from my trusty helper (the wife), i was able to get the upholstery on and hog ringed to the frame. I ended up with some wrinkles on the side bolsters. I’ll let it sit in the afternoon sun for a few days and if needed, redo the hog rings on the sides one at a time
Before and After
View attachment 1716203883
View attachment 1716203884
TO BE CONTINUED
CONTINUED FROM THE PREVIOUS POST:
In addition to adding heated seats, for my driving comfort I am adding an aftermarket power lumbar setup to the driver's seat. I installed the pump to the under side of the seat springs
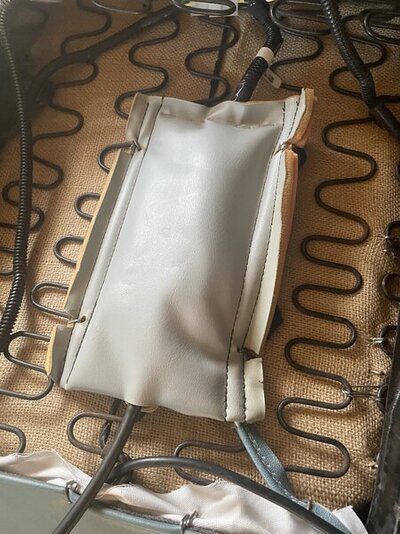
The pump feed at the bottom on the protective bag will be routed to the bladder on the seat back. The wiring harness is pretty simple - a red power wire to the dash harness and a black ground wire. The harness branches off to a momentary switch - one way pumps up the bladder; the other allows it to deflate.
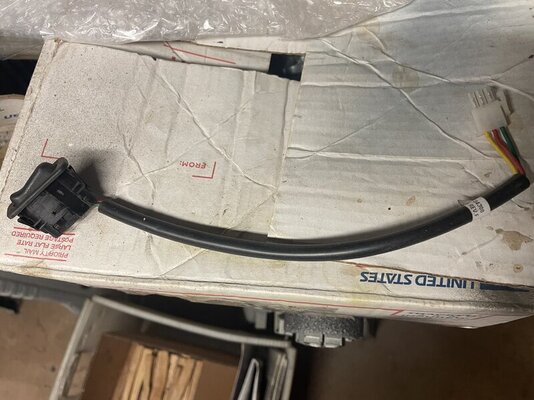
I will mount it on the driver’s side where the for and aft lever and button normally goes. It’s not needed since the seat frame will be installed to a power rack. When it gets warmer all the seat’s tin will get painted to match the seat upholstery - light metallic blue
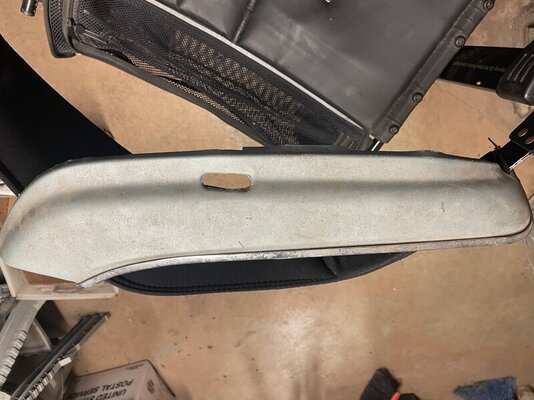
In addition to adding heated seats, for my driving comfort I am adding an aftermarket power lumbar setup to the driver's seat. I installed the pump to the under side of the seat springs

The pump feed at the bottom on the protective bag will be routed to the bladder on the seat back. The wiring harness is pretty simple - a red power wire to the dash harness and a black ground wire. The harness branches off to a momentary switch - one way pumps up the bladder; the other allows it to deflate.

I will mount it on the driver’s side where the for and aft lever and button normally goes. It’s not needed since the seat frame will be installed to a power rack. When it gets warmer all the seat’s tin will get painted to match the seat upholstery - light metallic blue

Last edited:
I did manage to strip the upholstery, foam and burlap from the seat back today. Other than the pivot arms that bolts to the seat base, the frame was in great shape. Once I sand and paint the pivot arms, it’ll be ready to start the rebuild.
NOTE; I found that the foam was in great shape. I’m going to reuse it on a 67 Charger seat I’ll be rebuilding
NOTE; I found that the foam was in great shape. I’m going to reuse it on a 67 Charger seat I’ll be rebuilding
Last edited:
I used a razor knife to make the slits in the foam - not ideal compared to the demonstration done in the Legendary video. So I ordered and received this afternoon an inexpensive foam knife. I will put it to good use on the passenger seat rebuild and driver’s seatback as all 3 foams will need to be slitted for the listings
View attachment 1716202788
I am not too impressed with this upholstery foam knife. Once the blade is heated, it does go right through the foam. By using a sawing mothion, it does cut the foam, jthis meyhod doesn’t leave a nice smoith cut unlike the knife Legendary uses. I suppose if I were doing upholstery full time, it would be worth buying one if those expensive knives. For my two seats, i’ll just deal with it
Continued from post # 1019 - So onto the seat back. Prior to starting, i cleaned and painted to pivot arms black. As with the seat base, i started with new burlap hog ringed to the frame
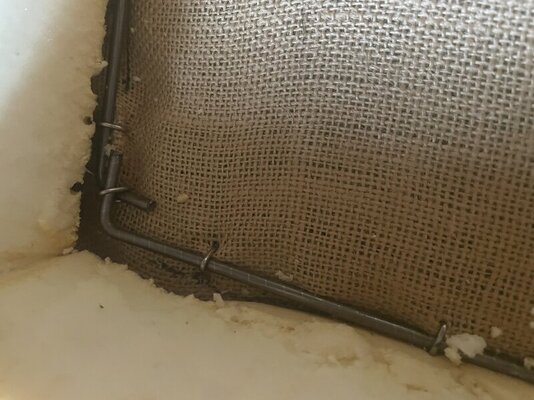
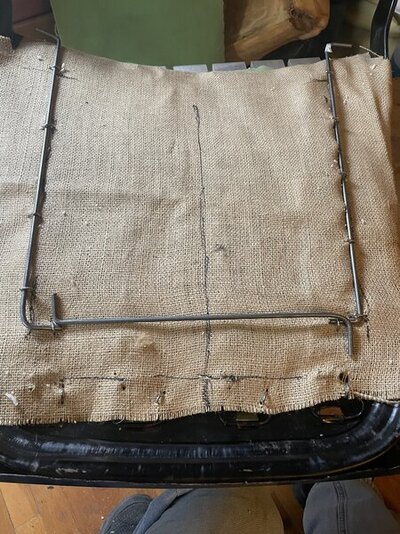
Then the rods weee added
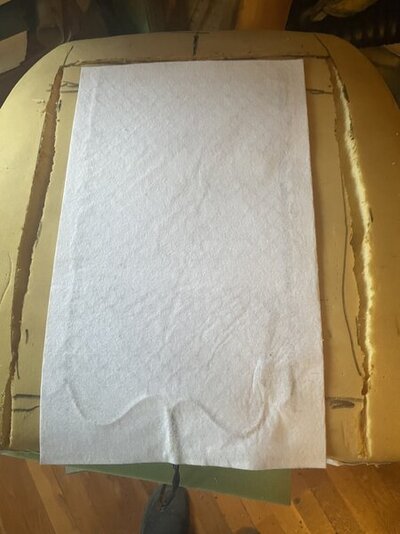
The heating element for the heated seat attached to the foam
The bladder for the power lumbar was next
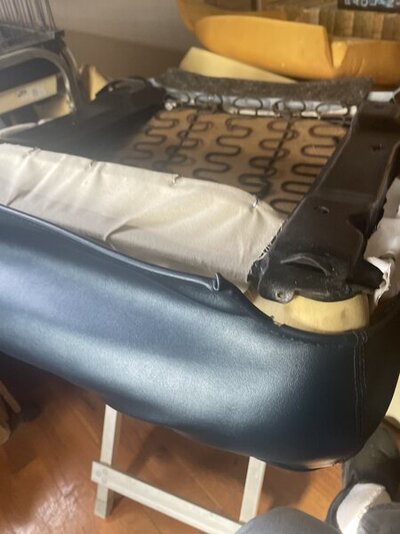
Then pull and tug while uttering some choice words during the installation
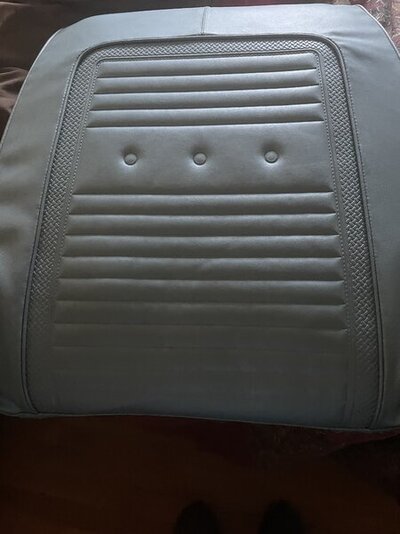
And finally the seat back ready to install to the seat base. I will comment (again) it’s definitely not as easy as shown in the Legendary video
Next will be the passenger seat after I take a break from upholstery

Then the rods weee added

The heating element for the heated seat attached to the foam

The bladder for the power lumbar was next

Then pull and tug while uttering some choice words during the installation

And finally the seat back ready to install to the seat base. I will comment (again) it’s definitely not as easy as shown in the Legendary video

Next will be the passenger seat after I take a break from upholstery
Hi Don, While stretching the seat covers on our 65 and and 66 Darts using Legendary Covers, my wife suggested sprinkling baby powder on the back side of the covers. The baby powder provided a bit of "ease" with the covers being pulled over the foam. At least I thought so. A bit easier on the fingers and hands while stretching and pulling. I did have a wrinkle or two on the first cover , but then, I used my wife's baby powder suggestion where the pulling and stretching became a bit less effort. As far as the wrinkles on the first one, they worked themselves out. Thanks for the postContinued from post # 1019 - So onto the seat back. Prior to starting, i cleaned and painted to pivot arms black. As with the seat base, i started with new burlap hog ringed to the frame
View attachment 1716210715
Then the rods weee added
View attachment 1716210717
The heating element for the heated seat attached to the foam
View attachment 1716210716
The bladder for the power lumbar was next
View attachment 1716210718
Then pull and tug while uttering some choice words during the installation
View attachment 1716210719
And finally the seat back ready to install to the seat base. I will comment (again) it’s definitely not as easy as shown in the Legendary video
View attachment 1716210720
Next will be the passenger seat after I take a break from upholstery
which reminded me of the fun in upholstery. Sgrip65
Jerry - We tried the baby powder this morning and it helps a bit. I have just the front to do on a 67 Charger bucket seat base. The seat back I already did.
You’re probably wondering how I latched onto a 66/67 Charger interior. I bought a 67 Charger from an acquaintance and ordered the complete interior for it - front buckets, buddy seat snd rear buckets. Later I found a set of core front and rear seats and buddy seat from another Charger. He got seller’s remorse and bought the car back from me. I kept the core seats and brand new Legendary upholstery and here I am alternating between the wagon’s seats snd these Charger seats. I’ll take them to the Mopar Nationals and try to liquidate them
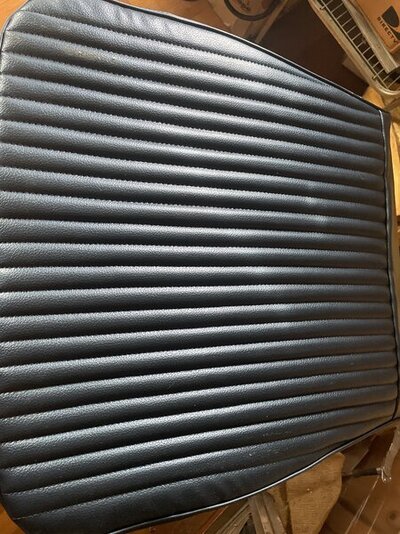
You’re probably wondering how I latched onto a 66/67 Charger interior. I bought a 67 Charger from an acquaintance and ordered the complete interior for it - front buckets, buddy seat snd rear buckets. Later I found a set of core front and rear seats and buddy seat from another Charger. He got seller’s remorse and bought the car back from me. I kept the core seats and brand new Legendary upholstery and here I am alternating between the wagon’s seats snd these Charger seats. I’ll take them to the Mopar Nationals and try to liquidate them

Chuter
Active Member
It never is. I just drywalled a bathroom in my basement and found the same thing. But your seats came out a lot better than my walls! Had to keep reminding myself it's the basement dog wash....I will comment (again) it’s definitely not as easy as shown in the Legendary video
Nice progress, Don! But chop, chop Hop Sing. I wanna ride. lol
-


