Breathing new life into the 318 in the Scamp!

-
I wouldn't rule that out. All of the hardware was reused on the rods they came from, to keep balance. I didn't think that it would make a difference, but I'm wondering if the high ring lands and high compression/ heat said otherwise.

The way it started making a sound immediately got me thinking rod bolt/ nut issue.

I'll know a lot more when I take it apart, but yeah, it could easily still be a hardware issue. I'm going loc-tite next time with new nuts, even if it's not the issue.
 
Crap I think it got too hot on you on break in.

FYI I started both my fresh engines on my test stand this spring.
Complete full gauges on everything tach, oil, water, volts, vacuum.

After break in the following is what I noticed.

The 360 with aluminum heads and 11.37 static and 10.71 dynamic would idle until it ran out of gas with no heat issues 190 max.

The 340 with iron factory X heads 8.98 static and 8.06 dynamic did not like to idle more than 5 minuates and the gauge was at 210.

My test stand has aluminum radiator and electric fan I know the mechanical fan will pull more air if shrouded but it is a safety issue on the test stand.
 
I wouldn't rule that out. All of the hardware was reused on the rods they came from, to keep balance. I didn't think that it would make a difference, but I'm wondering if the high ring lands and high compression/ heat said otherwise.

The way it started making a sound immediately got me thinking rod bolt/ nut issue.

I'll know a lot more when I take it apart, but yeah, it could easily still be a hardware issue. I'm going loc-tite next time with new nuts, even if it's not the issue.

Which way are the hash marks on the end of the rod bolt nuts?
They go to the outside where you can see them.
 
I think I set them up that way, but there's no way of telling until I get it apart for sure.

I'm betting that the combination of high heat, coupled with these bearings is what did it in.

It didn't knock while I was driving it, but I'm thinking that after I stopped driving, cutting oil pressure back to idle and having the higher temp on the engine from the driving load, it likely did the picky rod bearing in.
 
Dave,
I am assuming you did not have an oil gauge on it? Just the light.
**** what you built is just a sweet blue-printed stock motor using mostly stock parts that should run for years.
Did the same guy that did the rods do the crank also...most machinist are proud of there work or did you swap parts from one engine to another, this can throw balance off?
 
I used another crank that was freshly turned .010"

The only thing that was done to the rods were on the small end, with wrist pins/ piston assemblies pressed on.

It didn't have any awkward vibration. The stock cranks used a set bob weight as did the rods. They weren't paired at the factory, but rather all built to the same tolerances.

The original crank that goes to these rods is out of the car. I still have it and I plan on having it cut .010"/.010" so I can use the clevite mains if they inspect ok and don't have embedding issues when i pull the parts from the bottom end.

I have another set of stock rods from a 360. I'm debating on robbing one of them and balancing the big and little ends against the damaged rod and make it the same.

The more I think about this, the more research I do on bimetal aluminum bearings and talk to engine builders I know, the more it sounds like a hardware issue to me.

There are things that I don't like about the aluminum bearings. They don't last as long, but are more tolerant of shape shift from RPM and heat, less tolerant to embedding, making them less desirable for flat tappet and carbureted engines that need oldschool oil and more frequent changes than today's engines. But better for race applications.

I didn't have a gauge on it, but I think if it were an oil issue, it would have shown up on break in. The light never came on, but those are worthless, anyway.

I think I'm going to run an oil pressure gauge from a block feed, when it goes back in. I have a factory unit that is accurate, that will look spot on in the dash, but I may just put an auxilary aftermarket one in for now, until I know everything is money and jack with the dash later.

I'm going to inspect the chamfer on the bearings, compared to some originals that I have that were in the car. One thing that a friend brought up was that they may have been cut for a different fillet, but nothing felt goofy going together. I could spin it by hand on assembly with the pistons in and no breaker bar.

Another thing that was brought to my attention, from a friend who built a 440, was that he had a knocking issue with the engine that was being caused by the floating pin locking up from heat, on a tight wrist bore on the piston. I know these are press fit with no retainers, but the same thing could have happened on the little end, where the piston rocks on the pin, from heat.

Forensics.
 
#5 got loose.

Looks like the cap came off about 1/16". The nuts were still on.

I'm glad that I shut it down immediately and that it wasn't run on it.

Now, this is a first for me, but completely understandable, considering I heard it start while it was idling parked in front of the garage and shut it off, then pushed it into the garage where it sat and the engine pulled...

The journal has no visible or measurable damage. The finish looks fine. I looked at the bearings, they are still seated in the rod and cap. They have slightly brighter spots on them, where the journal was coming off of the bearing and going back on.

I checked the journal at the high points of where I thought it would have slapped, with a caliper at each end of the journal and the middle, through 90° of the rotation and I'm seeing less than .0005" in difference.

I'm going to plastigage all of the journals and plastigage the #5 journal in three places on the tdc side of the journal, 45° from each other in the opposite direction of crank rotation to check for possible damage wear from the rod side bearing slapping down. I've looked at it with a flashlight and I can't see any visible differences in the journal. I think the knock sound I was hearing was actually the piston slapping the cylinder head.

I think the soft metal of the bearings took any light blow that it may have been put through. The bearing almost looks like it could even be reused, but I'm not going to risk that.

I'm going to replace all of the bearings with some Clevite 77s and plastigage all of the rod bearings. If everything checks out ok, the pan is going back on and it's going in. I want to tune this thing!

Not being satisfied with only finding what was wrong, I checked my friends micro-torque wrench that was used to do everything. I went and bought a Craftsman beam torque wrench and all of the rest of the rod cap nuts were at 32 ft lbs. I checked the wrench with a double ended 3/8 socket and it clicks at 13-14lbs shy of actual torque at 45lbs showing on the wrench.

I'll never trust a micro-torque on another engine or transmission build, ever again. I'm also going to retorque everything else on the engine.

This will give me the opportunity to put some o2 sensor nuts on the exhaust, so I can check AFR and get the carb dialed in. I think the secondaries are lean. I wanna get this thing tuned.

Page 6 and this thread has 6,666 views. At least I don't need to buy the head gaskets for the 3rd time. I want this "carb swap" over with.
 
Sounds like minimal damage, you got lucky.
I red locktight everything in the bottom end when I assemble.
 
Is the engine still in the car?

A rotating assembly came loose, check the run out conecentricity (sp?) on the rod, I bet the cap is streached and the big end is not round. or not round to begin with.
Did you have the big end re-sized when the machine work was done?

Please check this before putting it back together.
 
Using a clicker-type torque wrench is kind of a crapshoot unless it's really good quality, they tend to have a lot more variation in readings and internal spring pressures and such. Whenever I use my clicker wrench I push it just a little past the click to be sure as they do often read higher than they are.

Beam torque wrenches FTW, might take a little longer but it's by far the most accurate unless you spend hundreds on a fancy digital quality calibrated one.
 
Is the engine still in the car?

A rotating assembly came loose, check the run out conecentricity (sp?) on the rod, I bet the cap is streached and the big end is not round. or not round to begin with.
Did you have the big end re-sized when the machine work was done?

Please check this before putting it back together.

Definitely.

I'm going to. You can see the bright/ wipe pattern on the rod bearing. I'm going to plastigage it across that entire area, within 15° of each one to make sure that the potential low spot on the journal and potential low spots on the rod and cap are correct, with the replacement bearing.

I'm going to remove the old bearing and mic the rod/cap torqued against the angle just past TDC where I saw the bright mark on the rod side bearing, against the cap, when it's down near BDC, like you usually do, only at the slight crank angle past BDC so the cap and journal's potential out of round spots are on each other.

If it specs out tighter in any other direction, I'll check it with another cap and see if it changes. If it does, I'll pull the rod out and have it resized with another cap and balance the assembly to match the old one.

Using a clicker-type torque wrench is kind of a crapshoot unless it's really good quality, they tend to have a lot more variation in readings and internal spring pressures and such. Whenever I use my clicker wrench I push it just a little past the click to be sure as they do often read higher than they are.

Beam torque wrenches FTW, might take a little longer but it's by far the most accurate unless you spend hundreds on a fancy digital quality calibrated one.

Even the high end micro-torque/ click wrenches and digital wrenches that you get from tool trucks are due for tuning every now and then. Tool truck drivers have a micro-torque calibrator that they use to remove the spring and check it.

I vote to keep it simple. Just got a new 1/2" for the rest of the engine, to check it all out, too.
 
So, I'm scraping gaskets, while building the low end of this thing and I go to clean the oil pan out and found something.

Nothing catastrophic, but I wanted to see if anyone else has experienced this issue, before and give everyone a heads-up;

oilpancrack_zpscc6ec294.jpeg


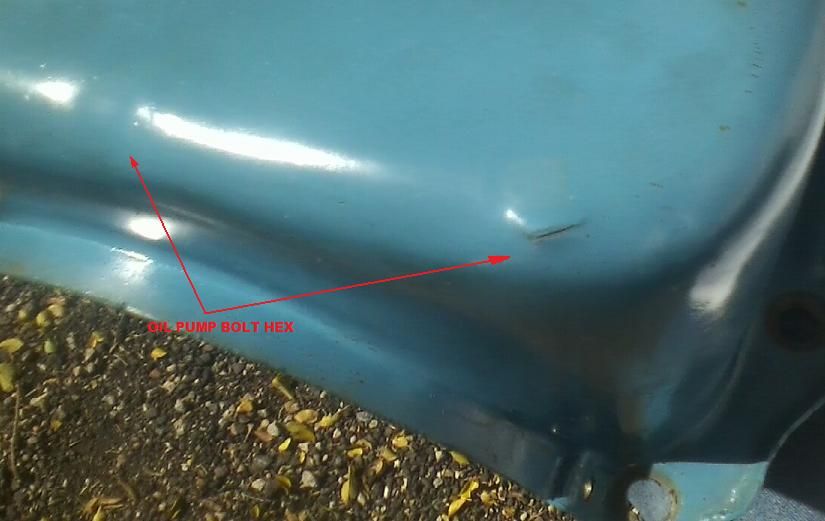
The small, 1/4" fracture was made by the hex bolt head of the new pump, as well as the other dimple that can be seen, just left on the reflection of the pan's curve.

I'm not sure why this happened. I looked at the pump and it is completely flush with the main cap. The bolts for the main cap are not interfering with the pump.

I don't have the old pump, so I can't measure it's depth, but I'm wondering if the new pump or it's cap are slightly taller/ deeper?

The pump is just a stock replacement Federal Mogul/ Sealed Power from Summit

http://www.summitracing.com/parts/slp-224-4166/overview/

I'm guessing that the magnum pans are deeper at the rear of the engine, than these older pans are.

I had a bit of a struggle, getting the pan on, but eventually, after aligning the holes, I sucked everything down and didn't notice anything going on.

I did see a trace of oil on the bottom of the pan, with a trail running from the back of the pan, but I thought it could have been residual from the main seal assembly. When I took the pan off, the seals looked sound, including the upper seals. No oil on the wrong sides.

That's when I noticed the crack at the rear corner.

I'm just going to massage the back of the pan with my metal working bit on my air hammer and some wood to make more clearance and then I'm gonna blanket the back and weld it from the inside with a brass paddle on the outside.

It's not an area that sees a lot of oil, except when it sloshes. I have a feeling that I would have seen a bit more than trace amounts on the pan (not even enough to drip on the garage floor) if I hadn't baffled the pan.

As of right now, when I set the pan down on the upside down engine without a gasket, it shifts rearward, just before it touches the block, as the pump rubs against the corner of the pan.

I think I'm going to take the pump off to check and make sure that everything is ok, but I was wondering if anyone else has run into this problem?

Check your pans when you assemble them. If the pan won't go straight on, don't force it and check the pump clearance with some visible grease on the bolt heads to see if it's contacting the pan!
 
Thanks for the info here, Dave. Things like this can really help people.
 
I'll get some height measurements on this pump and get another from the 360 that I have, if it's still in place. If not, I'll check the T/A 340 at work for an original to check against.

I think the cap or the pump itself is manufactured too tall.
 
Dave,
I had a heigth issue one time using a MP high volume pump, the body is taller.
Maybe you recieved a HV pump that was packaged wrong.

The stock Mellings standard pump clears every stock oil pan that I have ever seen.

MY stock 340 pan has a slightly raised area to clear the pump body, so checking the 340 pan will not do you much good.

If the pump checks out ok, I would just modify the pan to fit, or try the Mellings pump.

http://www.summitracing.com/parts/mel-m72/overview/make/dodge
 
I agree. Modding the pan is where I am at with this. I'm just gonna roll an edge with the plenishing hammer head that I made for my air hammer and set it up on a block of wood. It will move enough to clear. I think most of my problem is just in the curvature of the pan's corner.

I'll check pressure when I put it back together. You may be on to something with a mislabeled part.

If the 340 has a taller pump, I'll just skip on that.
 
Smart move,Dave. Never have seen ,that problem before. Best of luck
 
Pulled the caps, All of the bearings have a very slight brighter area with the one that came loose, showing the brightest.

Plasti-gaged fine. None of the journals are damaged.

Just for fun, I took them apart with the beam wrench. Every one of them came loose at 29-31lbs.

So, I think all of these started to come loose, according to the bearings and the torque on the cap nuts.

They all went back together fine @ 45lbs with the 77s.

Moral of the story:

Throw your click wrench in the @#*&^% trash or just use it for suspension.

The pan gasket set is wrong. Need another one. Test fitted the pan with no gasket. Still needs some more metal work on the outer corner. Once it gets finished and fit, I need a warm day to give it another paint job.

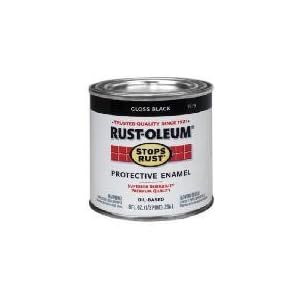
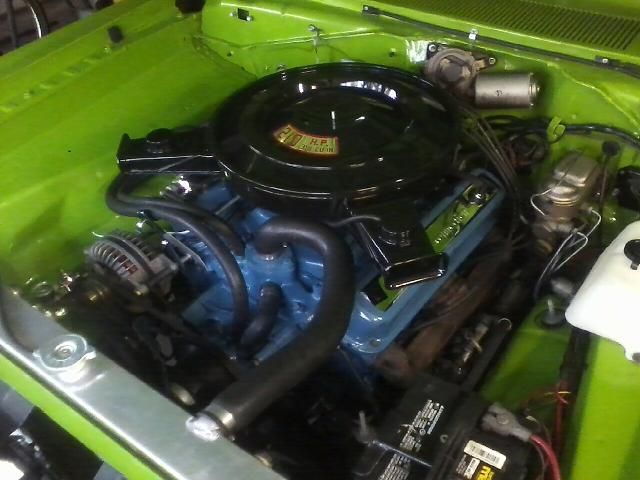
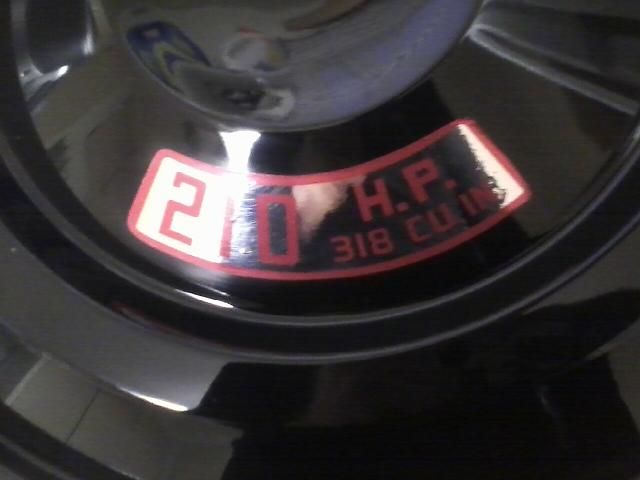
Gonna use Rustoleum gloss enamel primary colors with black and white to match Chrysler blue. I used the gloss black out of the can, thinned with lacquer thinner, out of a gun, on the air cleaner and it stayed significantly higher gloss than the rest of the engine, from the spray can. I'm convinced that the Dupli-Color stuff just goes on too thin. It doesn't have much solids to build ennough mil thickness to hold gloss. Looks great, until the engine warms up and all of the solvents go away.

21OZk2Q8LyL._SL500_AA300_.jpg


ScampEnginebeforeteardown_zps6a7aa2e5.jpeg


318AirCleanerDecal_zpse55c49a6.jpg


The can says not to use lacquer thinner. It takes about 2 minutes, stirring with a stick for the paint to start sticking to the sides of the cup, instead of washing away with just the thinner. They say to use acetone up to 15%. I used 25% lacquer thinner. 15% sprayed like undercoat and laid out like a pancake on a test card.

The reason I used lacquer thinner is because it dries slow. The slower you can get an ambient temp dry paint to cure, the higher gloss it will keep. Hit it once with a tac coat, like all enamels should. Let it sit up 30 minutes. Came back in and did a full 2nd coat. Laid out like glass and took 2 days to dry completely.

Crossing my fingers for anything above freezing. 2nd bathroom may become a 2nd paint cure room. Hope not.
 
Good looking package there Dave. I'm hoping the one that came loose doesn't give you any grief. I had something very similar happen the first engine I actually put together-I had to swap out one connecting rod because it actually damaged the cap-splayed it out ever so slightly.
 
This one should be ok. It didn't actually come off. Just loose and it wasn't driven on it. I shut it off right away. It went back together flush, by hand. Torqued good, plasti-gaged good. We'll see. If it starts sounding ugly, I'll just pull it again and replace the rod. I think it's ok.

If I suspected the cap was out of square, I'd probably just find another cap, weight correct it, check it with a plasti-gage and if I couldn't get it to do what I needed it to do , just have it resized or replace the rod assembly with another one.
 
Well, you said you inspected them, and it went on well, so I hope you're good to go...mine didn't actually come off either, maybe back about 6 threads, but it definitely hurt the rod. Best wishes man...
 
Best of luck.Been there, on the torque wrench situation..... Cool tip,on the lacquer thinner.
 
If you are shooting oil based paint, in cold weather just use acetone, it will flash quick enough, if the opposite extreme, if it is real hot out use mineral spiriits, it dries even slower than laquer thinner.
There are actually two different types of rustolum, the one you shown, and they also make one that says "industrial".
The "industrial" stuff I have found to be much more durable but it is a couple more dollars for a quart.
 
-
Back
Top